Table of Contents >> Show >> Hide
- Before You Start: Three Non-Negotiable Safety Rules
- Fast Triage: What’s Actually Happening?
- Thermostat and Control Fixes (Because the Thermostat Is the Boss)
- Airflow Fixes (The “Your System Can’t Breathe” Department)
- Fix #5: Change the Air Filter (The Most Boring Fix That Works the Most Often)
- Fix #6: Open Every Supply Register You Closed “To Save Money”
- Fix #7: Make Sure Return Air Isn’t Blocked (Your HVAC Needs a Way Back Home)
- Fix #8: Clean Dusty Registers and Return Grilles
- Fix #9: Replace or Reposition a Crushed/Kinked Flex Duct (Only If Easily Accessible)
- Outdoor Unit Fixes (The Part of Your HVAC That Lives Outside Like a Brave Little Toaster)
- Indoor Unit and Condensate Fixes (Where Water and Gravity Team Up)
- Fix #14: If Your AC Is Leaking Water, Check the Drain Line First
- Fix #15: Reset a Tripped Float Switch (After You Fix the Drain Issue)
- Fix #16: If the Coil Is Frozen, Thaw It the Right Way
- Fix #17: Clean a Dirty Blower Compartment Area (Light Cleaning Only)
- Fix #18: Make Sure the Furnace/Air Handler Door Is Fully Seated
- Heating-Specific Fixes (Warmth Edition)
- Efficiency and Comfort Fixes (Make It Work Better, Not Harder)
- When to Stop DIY (A Short List That Can Save You a Very Long Day)
- Real-World Experiences: What These Fixes Look Like in Actual Homes (Extra Notes from the “Oops” Files)
- Conclusion: Comfort, Restored (and Fewer HVAC Jump Scares)
Your HVAC system has exactly two moods: quietly saving the day or choosing violenceusually on the first hot day of the year or right before guests arrive for the holidays. The good news? A surprising number of heating and air conditioning problems are caused by small, fixable issues: a clogged filter, a thermostat set “almost right,” a tripped switch, or an outdoor unit buried under last fall’s leaves.
This guide walks you through 22 easy, homeowner-friendly fixes (no refrigerant handling, no “let me just rewire this real quick” heroics). You’ll get symptoms to look for, why the problem happens, what to do step-by-step, and a clear “stop here and call a pro” linebecause comfort is great, but safety is greater.
Before You Start: Three Non-Negotiable Safety Rules
- Kill power first. For anything beyond thermostat checks, turn the system off at the thermostat and the breaker/disconnect if you’re opening panels.
- If you smell gas or burning electrical odors, stop. Leave the area and contact your gas utility or an HVAC professional.
- Don’t mess with refrigerant. If you suspect a refrigerant leak, that’s certified-tech territory (and in many places, legally required).
Fast Triage: What’s Actually Happening?
Start by naming the symptom. The right fix depends on whether your system is:
- Not turning on (no fan, no heat, no cool)
- Running but not heating/cooling (air blows, but it’s the wrong temperature)
- Short-cycling (turns on and off rapidly)
- Leaking water (puddles, dripping, damp ceiling)
- Making new noises (rattling, buzzing, banging, squealing)
Now let’s fix the common stuff firstthe “I can’t believe that worked” category.
Thermostat and Control Fixes (Because the Thermostat Is the Boss)
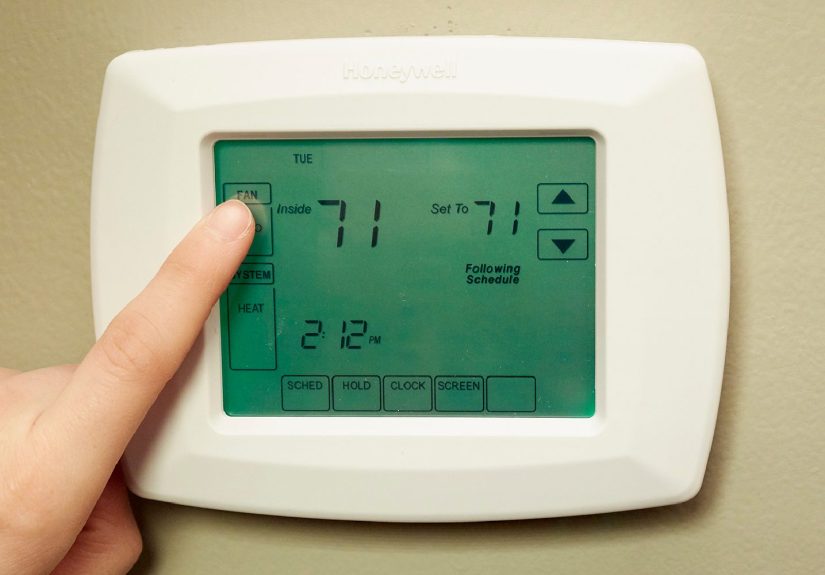
Fix #1: Set the Thermostat Mode Correctly (Yes, Really)
Symptoms: System won’t heat/cool, or does the opposite of what you want.
Why it happens: Someone bumped it during cleaning, kids were “helping,” or it got left on Auto with a confusing setpoint.
- Set it to Heat for heating, Cool for AC (avoid Auto while troubleshooting).
- Set the temperature at least 3–5°F beyond room temp to force a call for heating/cooling.
- Wait 3–5 minutes. Some systems have built-in delays.
Call a pro if: The display is blank or the thermostat is unresponsive after batteries/power checks.
Fix #2: Replace Thermostat Batteries (If It Has Them)
Symptoms: Blank display, weak display, Wi-Fi thermostat acting haunted, or system ignores commands.
Why it happens: Low batteries cause flaky signals, incorrect readings, and “I swear I set it to 72” confusion.
- Pop the thermostat faceplate off (most pull straight out).
- Replace batteries with fresh ones (match polarity).
- Reattach and re-test heating/cooling call.
Pro tip: If you’re using a smart thermostat, confirm it’s still connected and not stuck in a failed update loop.
Fix #3: Cancel a Weird Schedule or “Eco” Setting That’s Fighting You
Symptoms: Temperature keeps changing back; comfort lasts 20 minutes, then disappears.
Why it happens: Programmable schedules, geofencing, utility demand-response modes, or “learning” features can override you.
- Set the thermostat to Hold or Temporary Hold.
- Turn off schedule/eco/away modes while diagnosing.
- If it’s a smart thermostat, check the app for automations and utility settings.
Call a pro if: The thermostat wiring is loose, corroded, or you see error codes related to equipment control.
Fix #4: Check the Breaker, Furnace Switch, and the “Secret Switch” Near the Unit
Symptoms: Nothing runsno fan, no humming, no attempts.
Why it happens: Breakers trip, service switches get turned off, or a condensate safety switch shuts the system down.
- Check your electrical panel for a tripped HVAC/furnace/air handler breaker. Reset it by flipping fully off, then on.
- Look for a wall switch near the furnace/air handler (it often looks like a light switch). Confirm it’s on.
- If you have an outdoor unit, check for a nearby disconnect boxdon’t open it unless you know what you’re doing, but confirm it hasn’t been switched off.
Stop and call a pro if: The breaker trips again immediatelyrepeated trips can indicate an electrical fault.
Airflow Fixes (The “Your System Can’t Breathe” Department)
Fix #5: Change the Air Filter (The Most Boring Fix That Works the Most Often)
Symptoms: Weak airflow, rooms not reaching set temperature, system runs forever, rising energy bills, or frozen coils.
Why it happens: A clogged filter chokes airflow. Less airflow means poor heat transfer and more strain.
- Turn the system off.
- Remove the filter and note the size (printed on the frame).
- Install the new filter with the airflow arrow pointing toward the blower (usually toward the unit).
- Turn the system back on and monitor airflow.
Smart move: Write the install date on the filter frame. Future You will be grateful.
Fix #6: Open Every Supply Register You Closed “To Save Money”
Symptoms: Certain rooms are miserable; system sounds louder; airflow feels uneven; comfort is unpredictable.
Why it happens: Closing too many vents can increase static pressure and reduce system performance.
- Open all supply registers fully for troubleshooting.
- Make sure rugs, curtains, or furniture aren’t blocking vents.
- After performance is normal, you can fine-tune room balancegently.
Fix #7: Make Sure Return Air Isn’t Blocked (Your HVAC Needs a Way Back Home)
Symptoms: Bedrooms too hot/cold with doors shut; whistling doors; airflow drops when doors close.
Why it happens: Supply air pushes into a room, but without return airflow, pressure builds and circulation stalls.
- Check return grilles for blockage (furniture, baskets, pet bedsyes, really).
- Vacuum return grilles and ensure airflow is unobstructed.
- If a room struggles with doors closed, test comfort with the door open as a quick diagnostic.
Long-term fix: A pro can add return paths (transfer grilles/jump ducts), but the “easy fix” is removing obstructions.
Fix #8: Clean Dusty Registers and Return Grilles
Symptoms: Musty smell when system runs, dust blowing, visible lint buildup.
Why it happens: Dust collects and can restrict airflow; it also makes your house look like it’s auditioning for a ghost show.
- Turn the system off.
- Remove vent covers and vacuum inside the opening as far as you can reach safely.
- Wash covers with mild soap and water; dry fully before reinstalling.
Fix #9: Replace or Reposition a Crushed/Kinked Flex Duct (Only If Easily Accessible)
Symptoms: One room gets little airflow; you find a duct that looks like it lost a wrestling match.
Why it happens: Storage boxes in attics/crawlspaces, rodents, or sloppy installation can pinch flex duct.
- If you can safely access it, gently reposition the duct to remove the kink.
- Ensure it’s supported (flex duct should not sag like a hammock).
- If it’s torn or collapsed, note the location and consider a pro replacement for best sealing and insulation.
Safety note: Attics and crawlspaces can be hazardousheat, nails, insulation, and cramped access. Don’t risk injury.
Outdoor Unit Fixes (The Part of Your HVAC That Lives Outside Like a Brave Little Toaster)
Fix #10: Clear Debris Around the Condenser/Heat Pump
Symptoms: Poor cooling, system runs hot, loud fan noise, or the outdoor unit looks like a compost pile.
Why it happens: Outdoor coils need airflow. Leaves, grass clippings, and weeds block heat release.
- Turn off the system.
- Clear a 2-foot perimeter around the unit: weeds, leaves, stored items, and anything leaning on it.
- Remove loose debris from the top grille (by handdon’t poke fins).
Fix #11: Gently Rinse the Outdoor Coils (Garden Hose, Not Pressure Washer)
Symptoms: Cooling seems weaker each season; outdoor unit is visibly dirty.
Why it happens: Dirt on coils acts like a blanket, making it harder to dump heat outdoors.
- Turn off power at the thermostat and, if you’re comfortable, at the outdoor disconnect/breaker.
- Use a gentle hose spray from the outside of the coil toward the fins to wash off dirt.
- Let it dry, restore power, and test performance.
Avoid: Pressure washers. They can flatten fins and reduce airflow, which is the HVAC equivalent of putting tape over your mouth.
Fix #12: Straighten Bent Fins (If They’re Badly Crushed)
Symptoms: Noticeably bent fins, restricted airflow, or hot-running unit.
Why it happens: Lawn tools, hail, curious kids, and unfortunate encounters with bicycles.
- With power off, use a fin comb (cheap at hardware stores) and gently straighten fins.
- Work slowlyfins bend easily and tear if you rush.
Call a pro if: The fins are severely damaged across large sections or the coil is leaking.
Fix #13: In Winter, Clear Snow/Ice Around a Heat Pump
Symptoms: Heat pump struggles to heat; outdoor unit is encased in snow; airflow is blocked.
Why it happens: Heat pumps need air. Snow drifts and ice buildup reduce performance and can trigger defrost cycles more often.
- Clear snow away from the unit, especially the sides and coil area.
- Don’t chip ice with sharp tools. Use warm (not boiling) water if needed or let defrost handle light frost.
- Keep gutters and roof drip lines from dumping water directly onto the unit.
Indoor Unit and Condensate Fixes (Where Water and Gravity Team Up)
Fix #14: If Your AC Is Leaking Water, Check the Drain Line First
Symptoms: Puddle near the indoor unit, water stains, dripping from a ceiling vent, musty smell.
Why it happens: Condensate lines can clog with algae/dust, causing overflow.
- Turn the system off to prevent further overflow.
- Find the condensate drain line (often a PVC pipe near the air handler).
- If you have access to the outside drain termination, try clearing it with a wet/dry vacuum for 1–2 minutes.
- Once flowing, flush with distilled vinegar (avoid mixing chemicals).
Call a pro if: Water damage is ongoing, the pan is cracked, or the drain repeatedly clogs.
Fix #15: Reset a Tripped Float Switch (After You Fix the Drain Issue)
Symptoms: AC suddenly stops, but thermostat seems fine; you recently saw water or a full drain pan.
Why it happens: Many systems shut down to prevent water damage when the drain pan fills.
- Fix the clog/overflow first (see Fix #14).
- Locate the float switch near the drain pan (varies by system).
- Once the pan is drained and dry, restore power and test the system.
Important: Don’t bypass safety switches. They exist because ceilings are expensive.
Fix #16: If the Coil Is Frozen, Thaw It the Right Way
Symptoms: Little airflow, AC running but not cooling, ice on refrigerant lines or the indoor coil, water leaking as ice melts.
Why it happens: Usually airflow problems (dirty filter, blocked return) or sometimes low refrigerant.
- Turn Cool off. Set the thermostat to Off.
- Set the fan to On to circulate warm air and speed thawing.
- Replace the filter and open vents/returns (Fixes #5–#7).
- Wait several hours for full thaw before restarting cooling.
Call a pro if: The coil refreezes, you hear hissing, or cooling is still weakcould indicate a refrigerant issue.
Fix #17: Clean a Dirty Blower Compartment Area (Light Cleaning Only)
Symptoms: Dusty smell, reduced airflow, visible lint around the blower intake.
Why it happens: Dust bypasses filters when they’re missing, installed backward, or overdue.
- Turn off power at the breaker.
- If you can access a simple filter slot area or blower door safely, vacuum loose dust without touching wiring.
- Install a properly sized filter correctly (Fix #5).
Call a pro if: You see heavy buildup on the blower wheel or electrical components.
Fix #18: Make Sure the Furnace/Air Handler Door Is Fully Seated
Symptoms: System won’t start after you changed a filter; it ran yesterday, now it’s dead.
Why it happens: Many units have a door safety interlock switch. If the panel isn’t snug, the system won’t run.
- Turn power off.
- Reinstall the access panel carefully; ensure it’s aligned and latched.
- Restore power and test.
This fix is underrated. It’s the HVAC equivalent of “is it plugged in?”and it works more than anyone likes to admit.
Heating-Specific Fixes (Warmth Edition)
Fix #19: Check the Furnace Flame View Window for Obvious Clues
Symptoms: Furnace runs but you’re getting cool air; repeated attempts to ignite; short cycling.
Why it happens: Many furnaces have diagnostic blink codes on a control board visible through a small window.
- Look for a blinking LED code inside the viewing window (don’t open panels if you’re unsure).
- Write down the pattern and look it up on the inside panel label or manual.
- Use the code to decide whether it’s a DIY-able issue (like a dirty filter) or a technician issue (pressure switch/ignition).
Call a pro if: Codes reference ignition, flame rollout, pressure switches, or repeated lockouts.
Fix #20: Relight a Pilot Light (Only on Older Furnacesand Only If You Have Instructions)
Symptoms: No heat on an older gas furnace with a standing pilot.
Why it happens: Drafts, dust, or a failing thermocouple can extinguish the pilot.
- Follow the lighting instructions printed on the furnace (or in the manual) exactly.
- Wait the recommended time after turning gas off before relighting.
- If the pilot won’t stay lit, stop and call a pro.
Stop immediately if: You smell gas. Don’t try to “power through” with bravery.
Fix #21: Clear a Blocked Intake/Exhaust Vent (High-Efficiency Furnaces)
Symptoms: Furnace runs briefly then shuts off; error codes for pressure/venting; happens during snow or heavy wind.
Why it happens: High-efficiency furnaces vent through PVC pipes to the outside. Snow, leaves, or critters can block them.
- Locate the vent terminations outside (usually two PVC pipes).
- Clear away snow, leaves, and obvious obstructions.
- Restart the system and monitor.
Call a pro if: You see sagging vent pipes, loose joints, or recurring blockages.
Efficiency and Comfort Fixes (Make It Work Better, Not Harder)
Fix #22: Seal Easy-to-Reach Duct Leaks with Proper HVAC Tape (Not “Whatever Was in the Junk Drawer”)
Symptoms: Rooms far from the unit never feel right; dusty air; high bills; noticeable air leakage at joints.
Why it happens: Leaky ducts dump conditioned air into attics/crawlspaces, forcing longer run times.
- Find accessible duct joints near the air handler, basement, or utility space.
- Use UL 181 foil HVAC tape (or mastic) to seal seams and joints.
- Avoid standard cloth “duct tape.” It fails with heat over time (ironic name, right?).
Bonus comfort win: Seal gaps around the return grille frame and register boots if air is leaking around edges.
When to Stop DIY (A Short List That Can Save You a Very Long Day)
- You smell gas, see soot, or notice scorching near the furnace.
- The breaker trips repeatedly or you hear electrical buzzing/arcing.
- The system has refrigerant symptoms (hissing, oily residue, repeat freeze-ups after airflow fixes).
- You see error codes for ignition, pressure switches, flame rollout, or motor failure.
- Anything requires opening sealed combustion components or handling refrigerant.
Real-World Experiences: What These Fixes Look Like in Actual Homes (Extra Notes from the “Oops” Files)
Here’s what happens in the wildwhere HVAC problems rarely arrive with a neat label like “Hello, I am a Clogged Filter.” Most issues show up as a collection of small annoyances that slowly become big ones, usually at the worst possible time.
1) The Thermostat “Prank.” One of the most common “repairs” is simply discovering the thermostat was set to the wrong mode. A homeowner swore their furnace died overnight. The culprit? The thermostat was on Coolin Januarybecause someone bumped the mode switch while dusting. It’s hilarious in hindsight and deeply unfun at 6 a.m. with cold floors. The lesson: always do Fix #1 before you do anything else.
2) The Filter That Became a Blanket. Another classic: a filter so clogged it could qualify as a felt craft project. The symptoms are predictableweak airflow, rooms that never hit temperature, and a system that runs longer and louder. After replacing the filter, airflow often improves immediately. If it doesn’t, that’s useful information: it suggests you may also have a blocked return, crushed ductwork, or a blower that needs professional attention.
3) The Frozen Coil “Surprise Water Feature.” Frozen coils don’t just reduce coolingthey often create a delayed indoor puddle when the ice melts. People clean up the water and assume the leak is the problem. But the leak is usually the result of the freeze, not the cause. The winning sequence is: thaw properly (Fix #16), fix airflow (Fixes #5–#7), and only then test cooling again. When homeowners skip the thaw and keep “trying it again,” they often end up with repeat icing and bigger messes.
4) The Outdoor Unit That Couldn’t Breathe. In many yards, the condenser becomes a leaf magnet. A unit surrounded by tall grass and piled mulch has to work harder to dump heat outside. Homeowners notice the AC “kind of works” but takes forever. Clearing the area (Fix #10) and gently rinsing the coil (Fix #11) can make the system noticeably calmerless runtime, less noise, and better indoor comfort. It’s one of the few fixes where you can actually see the problem and the improvement.
5) The Furnace Door That Was “Mostly On.” This one is sneaky. You change the filter, put the panel back, and the furnace refuses to run. It’s easy to spiral into panicuntil you realize the access door wasn’t fully seated, so the safety switch prevented operation (Fix #18). It’s a great example of why troubleshooting should start with the simplest checks. HVAC systems are built with interlocks and safeties; if one is triggered, the unit may act totally dead even though nothing is “broken.”
6) The Bedroom That Hated Closed Doors. People often complain that the master bedroom is always hotter or colder, especially at night. The system “works,” but comfort in that room is stubborn. The common culprit is return air restriction (Fix #7)the supply pushes air in, but with the door closed and no return path, airflow stalls. The quick diagnostic is leaving the door open and seeing if the room improves. If it does, you’ve identified a circulation problem, not a capacity problem.
7) The Vent Termination Blocked by Snow (or a Very Determined Squirrel). High-efficiency furnaces often vent through PVC outside. In cold snaps, snow drifts can block those terminations and cause shutdowns (Fix #21). In warmer months, insects and small animals sometimes try to move in. Clearing the obstruction can restore heat quicklybut repeated blockages mean you should have a technician check placement, slope, and screening options that won’t restrict airflow.
The pattern across these stories is consistent: airflow, controls, and drainage cause a huge chunk of everyday HVAC drama. If you keep filters fresh, vents open, returns clear, outdoor units clean, and condensate draining freely, you’ll prevent many “emergency” calls from ever becoming emergencies. And when a bigger issue does pop up, these basic checks help you explain symptoms clearly to a technician, which usually leads to faster, cheaper diagnostics.
Conclusion: Comfort, Restored (and Fewer HVAC Jump Scares)
HVAC troubleshooting doesn’t have to feel like defusing a bomb with oven mitts. Start with the easy, high-impact fixes: thermostat settings, power checks, filters, airflow, and condensate drainage. These steps solve a large share of common “no heat” and “AC not cooling” complaintsand even when they don’t fully solve the problem, they narrow the cause so you’re not paying a professional to discover a backward filter.
Keep this list handy, move from simplest to more involved, and remember the golden rule: if you smell gas, see smoke, or face repeated breaker trips, you’re done troubleshootingcall in the experts and keep your home safe.