Table of Contents >> Show >> Hide
- Why a 4-Sided Embroidery Hoop Mobile Is So Charming
- Supplies You’ll Need
- Step-by-Step: How to Make a 4-Sided Embroidery Hoop Mobile
- Design Ideas for Your Scrapbook Paper Mobile
- Safety and Placement Tips
- Sustainability: Turn Scraps into Statement Decor
- Troubleshooting Common Mobile Problems
- Real-Life Experiences and Creative Twists with 4-Sided Hoop Mobiles
- Conclusion
If your stash of scrapbook paper is starting to look like a small mountain and you’ve got an embroidery hoop
(or three) rolling around your craft drawer, this project is about to make you very happy. A
4 sided embroidery hoop mobile turns those pretty papers into a sculptural hanging piece that feels
custom, whimsical, and way more expensive than it actually is. Inspired by popular DIY tutorials that use embroidery
hoops and paper to create lightweight mobiles for nurseries and craft rooms, this version adds a fun twist: four
bold, vertical faces that show off your favorite patterns from every angle.
Whether you’re decorating a baby’s nursery, giving your home office a creative focal point, or simply looking for a
project that uses up scraps in a stylish way, this scrapbook paper mobile is an easy, low-cost win. You only need a
wooden embroidery hoop, a few sheets of patterned paper, some glue, and a bit of patience (plus, perhaps, the
acceptance that you might get more glue on your hands than on the project).
Why a 4-Sided Embroidery Hoop Mobile Is So Charming
Mobiles made from embroidery hoops show up everywherefrom modern nurseries to boho living roomsbecause they’re
incredibly adaptable. Crafters use hoops wrapped in twine, fabric scraps, paper flowers, felt balls, or even
macramé to create lightweight hanging art that works in almost any style of home.
Specifically, a four-sided scrapbook paper mobile offers some unique perks:
- 360° pattern power: Four tall faces mean you see gorgeous designs from any direction, not just a
single “front.” - Budget-friendly decor: One embroidery hoop and a handful of scrapbook sheets cost far less than a
store-bought mobile or wall hanging. - Ultra lightweight: Paper and wood keep this decor safe and easy to hang, especially above a desk
or in a reading corner. - Endlessly customizable: Match any color palette or theme: woodland, modern geometric, floral,
holiday, or minimalist black-and-white. - Scrap-busting project: Ideal for using leftover paper pieces that are too pretty to toss but too
small for big layouts.
Supplies You’ll Need
Most DIY embroidery hoop mobiles use basic craft materialsnothing exotic or hard to find. Here’s a solid supply list
for a four-sided scrapbook paper version, based on common recommendations from embroidery hoop mobile and paper mobile
tutorials.
- 1 wooden embroidery hoop (10–12 inch diameter works well for most spaces)
- 4 sheets of 12" x 12" scrapbook paper (coordinating patterns or colors)
- Extra scraps of paper for smaller hanging shapes (optional)
- Paper trimmer or scissors and a ruler
- Bone folder or blunt butter knife for scoring folds (optional but helpful)
- Strong craft glue or double-sided tape
- Hole punch or paper awl
- Clear thread, fishing line, or strong sewing thread
- Ribbon, twine, or cord for hanging the mobile
- Clips or clothespins (to hold pieces in place while glue dries)
- Paint or stain for the hoop (optional, if you want a custom frame color)
Step-by-Step: How to Make a 4-Sided Embroidery Hoop Mobile
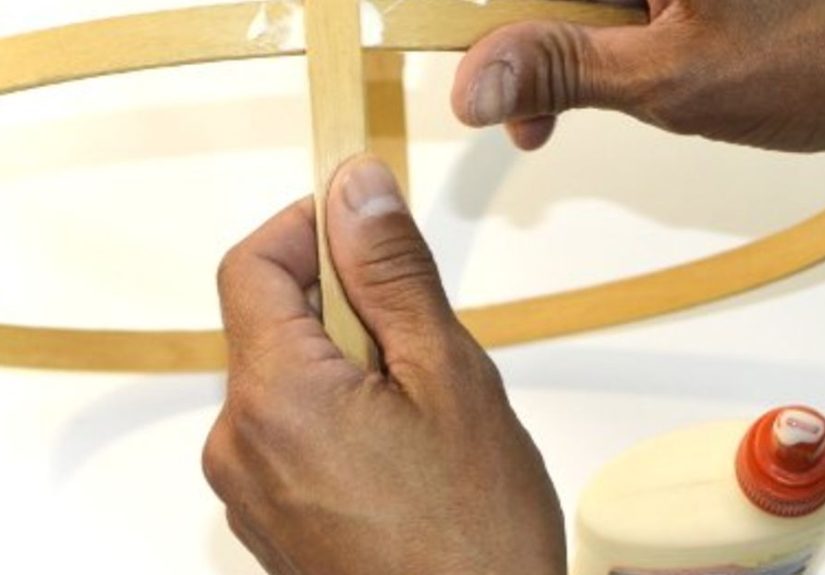
1. Prep and Style the Embroidery Hoop
Start by separating the inner and outer rings of your embroidery hoop. If you want a more polished look, give the
wood a quick sand and then paint or stain it to match your room’s decor. Many nursery mobile tutorials recommend
neutral or soft tones that won’t distract from the hanging shapes themselvesthink white, cream, soft gray, or a tone
pulled from your favorite scrapbook paper.
Once the paint is dry, put the hoop back together and tighten the screw. This will be the frame that holds your
four-sided paper structure and your hanging elements.
2. Cut the Scrapbook Paper Panels
To create the four “walls” of your mobile, cut your scrapbook paper into long rectangles. A simple starting size is
4" wide by 12" tall, one panel from each sheet. That gives you four tall, slim faces that look graceful without
overwhelming the hoop.
If you want a chunkier, bolder look, you can go wider (up to 5" or 6"), but keep in mind that the wider the panel,
the more it will fill the interior of the hoop and block the view of smaller hanging pieces.
For extra stiffness, you can glue two panels back-to-back so the design shows on both sides and the paper feels
thickersimilar to how some paper flower and paper mobile makers double up their cardstock for durability.
3. Assemble the Four-Sided Column
Lay your four panels side-by-side, pattern side down, in the order you’d like them to appear. Leave a tiny gap
(about 1/16") between each panel to allow the folds to flex easily.
- Run a strip of strong double-sided tape or a thin line of glue along the edge of one panel and attach it to the
next, working your way across. - When the four panels are joined, gently fold them into a square column so that the first and last panel meet.
- Glue or tape the final seam closed, forming a four-sided tube.
Use clips to hold the seams in place while the glue dries. This is where you might get a little glue on your fingers,
the table, and possibly your pet, so keep a damp cloth handy.
4. Attach the Column to the Hoop
To suspend the four-sided column inside your hoop, you’ll want it centered and balanced so it can spin gently in the
air without tilting like a confused satellite.
- Use a pencil to lightly mark four equidistant spots on the top edge of your paper column (one on each corner).
- Punch small holes at each mark with a hole punch or paper awl.
- Cut four pieces of clear thread or thin string, each slightly longer than the distance from the hoop to where you
want the top of the column to sit. - Thread each string through a hole in the column and knot it securely from the inside.
- Tie the other ends to the inner embroidery hoop, spacing them evenly around the circle.
When you lift the hoop, the column should hang straight. Adjust your knots until it sits level all the way around.
5. Add Hanging Shapes and Details
Now for the fun partthe “mobile” in mobile. Using coordinating scrapbook paper, punch or cut out small shapes:
circles, stars, hearts, clouds, leaves, geometric diamonds, or anything that matches your theme.
- Cut several lengths of clear thread or thin string.
- Tape or glue shapes along each string, spacing them a couple of inches apart. If you want them to look pretty from
both sides, sandwich the thread between two identical shapes. - Tie or glue the top of each string to the inside of the hoop or to the inner corners of your four-sided column.
Baby mobile tutorials often recommend varying the lengths of the strings so the shapes form a soft cascade. This
gives your mobile dimension and makes it truly interesting to look at from below or across the room.
6. Add the Top Hanging Cord and Balance
To hang your mobile, cut three or four equal lengths of ribbon, twine, or strong thread. Tie them to the hoop, spaced
evenly around the circle, and then bring them together at the top in one knot or loop.
Lift the mobile by that loop and check the balance. If one side dips, adjust the lengths or knots until the hoop sits
flat and the four-sided column hangs straight down. This is a small step, but it’s the secret to a professional-looking
mobile that turns smoothly and doesn’t constantly lean toward that one corner like it’s trying to sneak off the ceiling.
Design Ideas for Your Scrapbook Paper Mobile
Choose a Theme
The best part about using scrapbook paper is the endless design variety. You can align your mobile with the rest of
your decor or treat it as a bold focal piece. A few theme ideas:
- Woodland nursery: Think soft greens, browns, and neutrals with tiny forest animals and leaf shapes.
- Modern geometric: Use high-contrast black, white, and metallics with triangles, diamonds, and clean
lines for a gallery-ready look. - Floral and romantic: Mix vintage rose patterns with lace-like cutouts for a dreamy bedroom mobile.
- Seasonal and holiday: Swap panels and shapes for snowflakes in winter, leaves in fall, or pastel
eggs and flowers in spring. - Kids’ color explosion: Bright primary colors and fun shapesstars, balloons, or whimsical
charactershelp define a playful corner in a playroom.
Pattern and Color Tips
If you’re nervous about mixing patterns, try this simple formula:
- One bold pattern (large florals or strong geometric shapes)
- One medium-scale pattern (dots, small florals, simple motifs)
- Two subtle patterns or solids that support the main colors
This balance keeps your mobile interesting without letting any one pattern dominate. Many paper mobile tutorials follow
a similar rhythmusing a “hero” pattern supported by quieter designs so everything feels intentional, not chaotic.
Safety and Placement Tips
If you’re planning to use your embroidery hoop mobile in a nursery, safety matters just as much as style. Kids are
curious, grabby, and surprisingly strong for people who can’t yet open a juice box.
- Hang well out of reach: Follow general nursery guidelines and keep the mobile safely above the
crib so a standing child can’t grab it. Always check height as your baby grows. - Secure the ceiling hardware: Use a proper ceiling hook or anchor, not just a tiny nail, especially
if you’ve added extra hanging pieces. - Check connections regularly: Tug gently on strings and knots every so often to make sure nothing
has loosened. - Use non-toxic products: If the mobile is near a baby’s space, choose non-toxic paints, sealers,
and adhesives. - Retire the mobile when needed: Once your child can reach or pull on it, move the mobile to a
different spot in the room or repurpose it as wall decor.
Sustainability: Turn Scraps into Statement Decor
One of the quiet joys of a scrapbook paper mobile is that it makes meaningful use of leftovers.
Many paper crafters are already masters at turning tiny strips and squares into flowers, banners, and mini albums.
Mobiles are a natural extension of that skill: you’re essentially building vertical paper art that shows off patterns
in motion instead of in a flat layout.
Instead of buying disposable decor for parties, baby showers, and birthdays, you can create a four-sided embroidery
hoop mobile that doubles as both decoration and a long-term keepsake. Swap out a few hanging shapes for each season,
or make a new paper column that slips over the same hoop frame. It’s recycling, but with glitter.
Troubleshooting Common Mobile Problems
“My mobile is leaning to one side.”
This usually means one string is shorter, or one side has more weight. Adjust knots on your hanging cords and try to
distribute heavier shapes more evenly. Sometimes moving a single large paper shape from one string to another can
make everything level again.
“The paper is warping or curling.”
Too much glue or moisture can cause scrapbook paper to wrinkle. Use thin layers of adhesive and consider using a
stronger cardstock weight if humidity is an issue in your home. You can also press the panels under a heavy book while
the glue dries to keep them flat.
“The strings keep tangling.”
Mobiles are meant to move, but you don’t want them tying themselves into knots. Try:
- Spacing strings farther apart around the hoop
- Varying their lengths so shapes don’t collide
- Using slightly stiffer thread or fishing line
“It doesn’t look ‘full’ enough.”
That’s an easy fixadd more shapes. Fill in bare spots with smaller pieces, or add an extra inner ring of hanging
strings closer to the four-sided column. Think of it like styling a Christmas tree; sometimes you just need a few more
ornaments.
Real-Life Experiences and Creative Twists with 4-Sided Hoop Mobiles
Once you’ve made one four-sided embroidery hoop mobile, it’s very hard to stop at just one. This project practically
invites experimentation, and many crafters find themselves tweaking the basic idea again and again to fit different
rooms, seasons, and gifting occasions.
For example, one common experience is starting with a simple “practice” mobile for a craft room. You grab leftover
scrapbook sheetsmaybe a mix of stripes, florals, and something slightly questionable from 2012and build your first
column just to see how it goes. You learn where the glue wants to ooze, how long it really takes to dry, and how
important it is to mark your hanging spots carefully. The finished piece might not be perfect, but once you see it
turning slowly in the air, you understand why so many nursery and home decor blogs recommend embroidery hoop mobiles
as beginner-friendly projects.
The next mobile tends to be more intentional. Maybe you choose a tight color palettesay, blush pink, warm gray, and
a tiny hint of gold foiland build a four-sided column for a baby shower gift. You punch out little hearts and stars
from coordinating scraps, string them in a soft cascade, and suddenly you’ve created a personalized present that looks
like it came from a boutique shop. It’s lightweight enough to pack in a gift bag, but meaningful enough to become one
of those “Kept forever” pieces that follow the child from nursery to big-kid room.
Another fun twist is using the same hoop but changing just the paper column throughout the year. Once you’ve figured
out how to tie strings evenly and secure your ceiling hook, making new four-sided columns becomes a quick weekend
refresh instead of a whole new installation. In spring, you might use pastel florals and tiny paper butterflies. In
autumn, you switch to warm plaids, copper tones, and miniature paper leaves. The hoop becomes a permanent fixture,
while the paper design rotates with your mood and the season.
Families often discover that kids love participating in parts of the project, too. Older children can help choose
paper combinations, trace cookie cutters to create fun shapes, or stick matching pieces together over the hanging
thread. Younger kids might simply enjoy watching the mobile spin and naming the colors or shapes they see. The process
becomes an experience as much as the finished objecta little crafting ritual that lives somewhere between decor,
playtime, and memory-making.
Crafters who sell at markets or online also appreciate this type of project because it’s both customizable and
repeatable. Once you’ve dialed in your favorite size, shape spacing, and hanging method, you can produce sets of
coordinated mobiles for different tastes: minimalist neutrals, bold rainbow, botanical prints, or even themes tied to
popular children’s books or nursery styles. Each one still feels unique, but you’re no longer reinventing the wheelor
in this case, the hoopevery time.
And finally, there’s the quiet satisfaction that comes from standing under a mobile you made yourself. The paper
moves with the slightest breeze from a fan or an open window, patterns gliding past each other like a slow-motion
flipbook. You can spot the little details that only you know: the scrap from your wedding invitation tucked into the
floral face, the gold foil star you almost threw away but kept “just in case,” the tiny misaligned seam that proves a
human being made this, not a machine. Those imperfections are what give a four-sided embroidery hoop mobile its
personalityand what make it feel like a tiny, spinning portrait of your creativity.
Conclusion
A 4 sided embroidery hoop mobile using scrapbook paper is the perfect mix of accessible, affordable,
and impressive. You don’t need advanced tools or complex skillsjust a hoop, some paper, and a willingness to play
with color and pattern. In return, you get decor that feels custom-made for your space, whether it’s a nursery,
bedroom, office, or craft room.
From choosing your paper to balancing the final hanging cords, every step gives you a chance to personalize the mobile
further. And once you’ve made one, you’ll realize how easily the concept can be adaptedfor different seasons,
different rooms, and different people in your life. It’s a small project with big impact, and it turns that stack of
“someday” scrapbook paper into something you can enjoy every single day.