Table of Contents >> Show >> Hide
- Why Olive Oil + Sugar Works (And When It Doesn’t)
- Before You Mix: A 60-Second Safety Check
- The Starter Formula (Your “Base” Olive Oil Sugar Scrub)
- Way #1: The Classic “Smooth Operator” Scrub (Simple + Spa-Like)
- Way #2: The Citrus “Glow-Getter” Scrub (Zest + Bright Feel)
- Way #3: The Coffeehouse “Wake-Up Call” Scrub (Coffee + Brown Sugar)
- Way #4: The “Calm Down, Skin” Scrub (Oats + Olive Oil + Sugar)
- Choosing the Right Sugar (Because Not All Sugar Feels the Same)
- How to Use an Olive Oil and Sugar Scrub (Without Overdoing It)
- Storage, Shelf Life, and the “Keep Water Out” Rule
- Troubleshooting (Because DIY Is a Journey)
- Conclusion: Your Skin, But Softer
- Experiences: What People Typically Notice After Using an Olive Oil and Sugar Scrub (About )
- 1) The immediate “wow” softnessespecially on rough patches
- 2) The “I’m moisturized but also kind of slippery” phase
- 3) The scent surprise (a.k.a. why vanilla became everyone’s friend)
- 4) The “too much exfoliation” lesson (we’ve all learned it the hard way)
- 5) The “this is now my Sunday reset ritual” effect
Some people light candles for self-care. Others buy a fancy scrub that costs the same as a small latte and somehow smells like “rainforest confidence.” If you’re in the third campthe “I have sugar, olive oil, and five minutes” crowdwelcome. An olive oil and sugar scrub is one of the easiest DIY body treatments you can make, and when you do it right, it leaves skin feeling smoother, softer, and less like you’ve been living in central heating since 1998.
This guide gives you four practical ways to make an olive oil and sugar scrub (with real-world ratios, options for sensitive skin, and scent ideas that won’t punch your nose). You’ll also learn how to use it safely, store it smartly, and avoid turning your shower into an Olympic skating event.
Why Olive Oil + Sugar Works (And When It Doesn’t)
Sugar = physical exfoliation
Sugar granules act as a physical exfoliant, meaning they help lift away dead skin cells sitting on the surface. That can make rough areas (think elbows, knees, heels, and post-winter shins) feel smoother and look less dull. Sugar also dissolves with water, which is one reason many people find it “friendlier” than super-sharp scrubsif you keep your pressure gentle.
Olive oil = slip, softness, and moisture support
Olive oil is an emollient, which basically means it helps soften and condition skin. It also contains compounds like vitamin E and squalene that are often associated with moisturization and antioxidant support. A little goes a long way: the goal is a silky feel, not “I just wrestled a pizza.”
But… not every skin type loves olive oil
Olive oil can feel amazing on dry body skin, but it’s not universally perfect. Some peopleespecially those prone to breakoutsfind heavier oils can contribute to clogged pores. Translation: olive oil is usually best for body use and rough patches, not your face (more on that below), and it’s smart to patch test if you’re unsure.
Before You Mix: A 60-Second Safety Check
- Skip your face. Regular sugar crystals can be too abrasive for facial skin. Keep this as a body scrub unless you’re using a very fine sugar and your skin is not sensitive (and even then, proceed cautiously).
- Don’t scrub irritated or broken skin. Avoid sunburn, rashes, open cuts, active flare-ups, or freshly shaved “angry skin.”
- Go easy if you use strong actives. If you’re using retinoids, benzoyl peroxide, or strong acids, your skin may be more sensitivedon’t stack aggressive exfoliation on top.
- Patch test if you’re sensitive. Especially if you add essential oils or citrus.
The Starter Formula (Your “Base” Olive Oil Sugar Scrub)
Think of this like a pizza dough. (Stay with me.) Once you nail the base, toppings are easy.
Base ratio options (choose your vibe)
- Thick scrub (great for feet/heels): 2 cups sugar + 1/2 cup olive oil
- Medium scrub (most popular): 1 cup sugar + 1/3 cup olive oil
- Silky scrub (gentler feel): 1 cup sugar + 1/4 cup olive oil
Pro tip: You can always add more sugar if it’s too runny. Fixing “too dry” is also easyadd olive oil one teaspoon at a time. DIY is forgiving like that.
What you’ll need
- Granulated sugar, fine sugar, or brown sugar (more on sugar types soon)
- Extra virgin olive oil (or regular olive oilyour skin won’t ask for the receipt)
- A small mixing bowl + spoon
- A clean, dry jar with a tight lid
- Optional add-ins: vanilla, honey, oats, coffee, citrus zest, essential oils
Way #1: The Classic “Smooth Operator” Scrub (Simple + Spa-Like)
This is the one you make when you want a dependable, no-drama homemade sugar scrub that feels like a basic spa serviceminus the awkward small talk.
Best for
Normal-to-dry skin, rough elbows/knees, quick pre-lotion smoothing.
Ingredients
- 1 cup fine white sugar (or regular sugar if that’s what you have)
- 1/4 to 1/3 cup olive oil
- 1/2 teaspoon vanilla extract (optional, for that “I’m expensive” scent)
- Pinch of salt (optional; adds a tiny bit more gritskip if sensitive)
How to make it
- Pour sugar into a bowl.
- Add olive oil slowly while stirring until it looks like wet sand that wants to moisturize you.
- Stir in vanilla (and salt if using).
- Spoon into a clean, dry jar. Label it so nobody tries to bake cookies with it.
Use it like a pro
Massage onto damp skin using light circular motions for about 20–30 seconds per area, then rinse. Pat dry and moisturize if needed.
Way #2: The Citrus “Glow-Getter” Scrub (Zest + Bright Feel)
If your shower routine needs a little main-character energy, citrus is your friend. Citrus zest adds scent and a fresh feel without needing a full essential oil lab setup.
Best for
Dull-looking body skin, “I need to feel awake” mornings, hands and elbows.
Ingredients
- 1 cup sugar (brown sugar for gentler exfoliation, white sugar for more grit)
- 1/4 cup olive oil
- 1 tablespoon fresh lemon or orange zest
- 1 teaspoon honey (optional, for a cushy texture)
How to make it
- Mix sugar + zest first so the oils in the peel spread evenly.
- Add olive oil and stir until combined.
- Add honey if you want a softer, more “spreadable” scrub.
- Jar it up in a clean, dry container.
Citrus safety note (important)
If you use citrus essential oils (instead of zest), keep the amount very low and patch testsome essential oils can irritate sensitive skin. For most people, zest is the easier, gentler move.
Way #3: The Coffeehouse “Wake-Up Call” Scrub (Coffee + Brown Sugar)
This scrub smells like productivity and questionable life choices made before 9 a.m. Coffee grounds add texture, and brown sugar brings a softer, slightly more moisturizing feel.
Best for
Rough body texture, legs and arms, and anyone who wants that invigorating scrub feeling.
Ingredients
- 3/4 cup brown sugar
- 1/4 cup fine coffee grounds (fresh or usedjust make sure they’re not soaking wet)
- 1/3 cup olive oil
- Optional: 6–10 drops peppermint essential oil or a tiny pinch of cinnamon (skip cinnamon if sensitiveit can tingle fast)
How to make it
- Combine brown sugar + coffee grounds in a bowl.
- Add olive oil and stir until it’s evenly damp and scoopable.
- If adding essential oil, add a few drops, stir, smell, and stop before your scrub becomes a minty chemical weapon.
- Transfer to a jar and seal tightly.
Pro tip
Use this scrub before shaving (not after) if you’re prone to ingrown hairs. After shaving, keep things calm: moisturizer and gentle body wash are usually the better plan.
Way #4: The “Calm Down, Skin” Scrub (Oats + Olive Oil + Sugar)
This version is for anyone whose skin gets cranky easily. Finely ground oats help buffer the scrubby feel, so you get smoother skin without feeling like you sanded a deck.
Best for
Dry or sensitive-leaning body skin, winter itch vibes, arms/legs that flake.
Ingredients
- 1 cup fine sugar (or 1/2 cup fine sugar + 1/2 cup brown sugar)
- 1/4 cup olive oil
- 2 tablespoons finely ground oats (blend rolled oats into a soft powder)
- 1 teaspoon honey (optional)
- Optional: 3–6 drops lavender essential oil (only if you tolerate fragrance well)
How to make it
- Grind oats until powdery (a blender or coffee grinder works).
- Mix sugar + ground oats in a bowl.
- Add olive oil and stir. Add honey if using.
- If using essential oil, keep it minimal and patch test.
- Store in a clean, airtight container.
Choosing the Right Sugar (Because Not All Sugar Feels the Same)
Your sugar choice controls how “scratchy” or “gentle” the scrub feels:
- White granulated sugar: More exfoliation, better for rough patches.
- Fine/caster sugar: Softer feel, good for sensitive areas like hands.
- Brown sugar: Softer granules and a naturally “moist” feelmany people prefer it if they’re easily irritated.
How to Use an Olive Oil and Sugar Scrub (Without Overdoing It)
Step-by-step
- Wet your skin first. Damp skin reduces friction and helps the scrub glide.
- Scoop with a clean spoon. Fingers + shower water = faster contamination.
- Use light pressure. Let the sugar do the work. Scrubbing harder doesn’t equal scrubbing smarter.
- Focus on rough zones. Elbows, knees, heels, hands, and anywhere that feels bumpy.
- Rinse thoroughly. (And please rinse your shower floor too. Future-you deserves traction.)
- Moisturize if needed. Many people can skip lotion after an olive oil scrub, but dry skin might still want a moisturizer.
How often should you use it?
For most people, a sugar scrub works best around 1–2 times per week. If you’re sensitive, once a week (or even less) can be plenty. If you’re using strong skincare actives elsewhere, take it down a notchyour skin barrier will thank you.
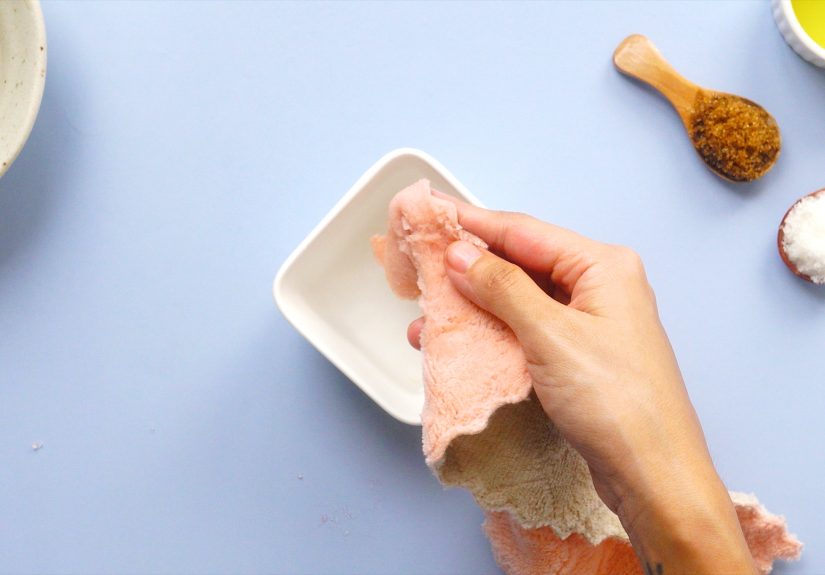
Storage, Shelf Life, and the “Keep Water Out” Rule
DIY scrubs usually don’t include preservatives, so storage matters.
- Use a clean, dry jar with a tight lid.
- Store it outside the shower if possible. Humidity and water drips can shorten shelf life.
- Always scoop with a clean spoon or dry hands.
- If it smells “off,” changes color, or looks funky, toss it. Skin is not the place to practice bravery.
Many homemade sugar scrubs can last for months when kept dry and sealed, but the safest approach is small batches you’ll finish quicklyespecially if your household treats jars like community property.
Troubleshooting (Because DIY Is a Journey)
My scrub is too oily.
Add sugar a tablespoon at a time until it’s scoopable and not sloshing.
My scrub is too dry and crumbly.
Add olive oil one teaspoon at a time. Stir well. Repeat until it holds together like damp sand.
My skin feels irritated afterward.
Stop using it for now. In the future, switch to finer sugar, use lighter pressure, reduce frequency, and skip fragrance/essential oils. If irritation persists, consider checking with a clinician.
I feel slippery after rinsing.
That’s the olive oil doing its thing. Rinse longer, use warmer (not hot) water, and consider using slightly less oil next batch. Also: rinse your tub floor like you’re trying to keep a tiny penguin safe.
Conclusion: Your Skin, But Softer
An olive oil and sugar scrub is simple, cheap, and surprisingly customizable. Start with the base ratio, choose a sugar texture that matches your skin, and pick one of the four styles that fits your mood: classic, citrus, coffee, or oat-calm. Use gentle pressure, don’t over-exfoliate, keep it off irritated skin, and store it smartly. The result is smoother skin without the expensive jar that claims to be “moon-charged.”
Experiences: What People Typically Notice After Using an Olive Oil and Sugar Scrub (About )
Even though a DIY scrub is “just sugar and oil,” the experience can feel surprisingly different depending on how you make it, how you apply it, and what your skin is like that week. Here are some common, realistic experiences people reportplus how to get the best version of each outcome.
1) The immediate “wow” softnessespecially on rough patches
The fastest payoff usually shows up on elbows, knees, and heels. Those areas tend to hold onto dead skin more stubbornly, so even one gentle scrub can make them feel smoother right away. A lot of people describe the feeling as “my lotion finally works again,” because removing that outer flaky layer can make moisturizers spread more evenly. If you want the most dramatic before-and-after, try the Classic or Coffeehouse version on feet and elbows, then pat dry and apply a basic moisturizer.
2) The “I’m moisturized but also kind of slippery” phase
Olive oil leaves a conditioning film that can be a dream for dry skinbut it can also feel like you’re wearing a satin bodysuit made of salad dressing if you used too much. People who love that dewy finish often skip body lotion entirely afterward. People who don’t love it usually fix it in one of two ways: (a) rinse longer with warm water, or (b) reduce oil slightly in the next batch and increase sugar. The goal is “soft,” not “greased lightning.”
3) The scent surprise (a.k.a. why vanilla became everyone’s friend)
Olive oil has a natural scent. Sometimes it’s mild and pleasant; sometimes it’s… noticeably olive-y. Many people find vanilla extract, citrus zest, or coffee grounds help “round out” the smell so it feels more like a spa product and less like you’re prepping appetizers. If you’re sensitive to fragrance, zest can still be strongso start small. The most universally tolerated “upgrade” tends to be vanilla in a simple base scrub.
4) The “too much exfoliation” lesson (we’ve all learned it the hard way)
One of the most common experiences is getting overexcited: scrubbing too hard, too long, or too often because the smoothness feels so good. Then the skin feels tight, looks a little red, or gets extra dry the next day. When that happens, people usually do best by pausing the scrub for a week, switching to gentler cleansing, and focusing on moisturizing. After things calm down, using the scrub once a week with lighter pressure tends to bring back the benefits without the backlash.
5) The “this is now my Sunday reset ritual” effect
Finally, a lot of people discover the biggest benefit is consistency, not intensity. A gentle scrub once a weekespecially in wintercan make skin look more even, feel less itchy, and help rough spots stay under control. It becomes a small routine that feels fancy, even though it took five minutes and came from your pantry. That’s the real flex.