Table of Contents >> Show >> Hide
- Why no-equipment workouts actually work
- What “no equipment” really means
- Before you start: quick safety & intensity rules
- The ultimate no-equipment workout (30 minutes, full body)
- Beginner, intermediate, advanced: choose your difficulty
- How to build a weekly routine (without burning out)
- Progression: how to keep getting results with zero gear
- Common mistakes (and how to fix them)
- Mini workouts you can “stack” on chaotic days
- Real-life experiences: what people notice when they stick with no-equipment workouts
- Conclusion
You don’t need a gym. You don’t need a closet full of matching athleisure. You don’t even need a single lonely dumbbell
collecting dust in the corner like a misunderstood paperweight. If you have a body, a bit of floor space, and the ability
to stand up without making a dramatic “dad noise,” you can get a legit workout with no equipment.
This guide gives you a smart, repeatable no-equipment workout you can do at home, in a hotel room,
or in that awkward strip of space between your bed and your life choices. We’ll cover how to warm up, how to structure
bodyweight training so it actually works, and how to progress so you don’t plateau after Week 2 and start “rewarding”
yourself with snacks for “thinking about exercising.”
Why no-equipment workouts actually work
A good workout isn’t defined by shiny machinesit’s defined by stimulus. Your muscles respond to tension,
your heart responds to effort, and your body adapts when you repeat that challenge over time. Bodyweight training (often
called calisthenics) can build strength, improve endurance, and support mobility because you can adjust:
- Leverage (push-up on a wall → on knees → standard → decline)
- Tempo (slow lowering, pauses, controlled reps)
- Range of motion (squat depth, lunge length, hip hinge control)
- Density (same work in less time, or more rounds)
- Intensity (steady pace vs. intervals/HIIT)
Translation: you can start easy, scale up gradually, and keep getting stronger without buying anything. The “equipment”
is your planand your consistency.
What “no equipment” really means
For this article, “no equipment” means no weights, bands, machines, or special gear. We’ll use only:
- Your body
- The floor
- A wall (optional, but walls are very cooperative training partners)
- Space you can safely move in
If you want to later level up with a band or a pull-up bar, great. But you don’t need them to beginand you can still build
a strong foundation without them.
Before you start: quick safety & intensity rules
1) Warm up like you mean it
Cold muscles + sudden effort = your body filing a complaint with HR. A short dynamic warm-up helps your joints move better
and prepares your heart rate for the work ahead.
2) Use the “talk test” and RPE
- Moderate intensity: you can talk in short sentences.
- Hard intensity: you can say a few words at a time.
- RPE (rate of perceived exertion): aim for about 6–8 out of 10 for work intervals, especially if you’re new.
3) Progress gradually
More isn’t always betterbetter is better. Increase either reps, time, rounds, or difficulty slowly. If you’re doing lots
of high-intensity intervals, keep them limited and balance with easier days.
4) Pain is not a productivity metric
Muscle burn and heavy breathing can be normal. Sharp pain, joint pain, numbness, dizziness, or symptoms that feel “off” are
your cue to stop and get help from a qualified professional.
The ultimate no-equipment workout (30 minutes, full body)
This routine is designed around simple movement patterns: squat, hinge, push, core stabilization, and cardio bursts.
You’ll do a warm-up, two circuits, then a cool-down. Do it 2–4 times per week depending on your schedule and recovery.
Part 1: 5-minute dynamic warm-up
Move continuously at an easy pace. You should feel warmernot wrecked.
- March in place + arm swings – 60 seconds
- Hip hinges (hands on hips, push hips back) – 45 seconds
- Bodyweight squats (easy depth) – 45 seconds
- Reverse lunge step-backs (alternating) – 60 seconds
- Inchworm walkout to high plank (slow) – 60 seconds
- Shoulder circles + thoracic rotations – 30 seconds
Part 2: Strength Circuit (12 minutes)
Set a timer: 40 seconds work / 20 seconds rest. Complete all 6 moves, then repeat for a second round.
Focus on control, steady breathing, and solid form.
-
Squat
Form cues: feet about shoulder-width, sit back and down, keep chest tall, drive through mid-foot.
Make it easier: shallow squats or sit-to-stand from a sturdy chair.
Make it harder: pause 2 seconds at the bottom, or try squat pulses (small controlled range). -
Push-up
Form cues: hands under shoulders, body in a straight line, elbows about 30–45 degrees from your body.
Make it easier: wall push-ups or hands elevated on a stable surface (like a countertop).
Make it harder: slow 3-second lower, or add a pause near the bottom. -
Reverse lunge
Form cues: step back quietly, keep front knee tracking over toes, torso tall.
Make it easier: smaller step-back, hold a wall lightly for balance.
Make it harder: add a knee drive at the top (lunge → stand → knee up). -
Glute bridge
Form cues: feet flat, ribs down, squeeze glutes to lift hips, don’t over-arch your low back.
Make it easier: shorter range.
Make it harder: single-leg bridge (alternate legs each rep). -
Plank (forearms or hands)
Form cues: elbows under shoulders, glutes tight, abs braced, neck neutral.
Make it easier: plank from knees.
Make it harder: shoulder taps (slow, minimal hip sway). -
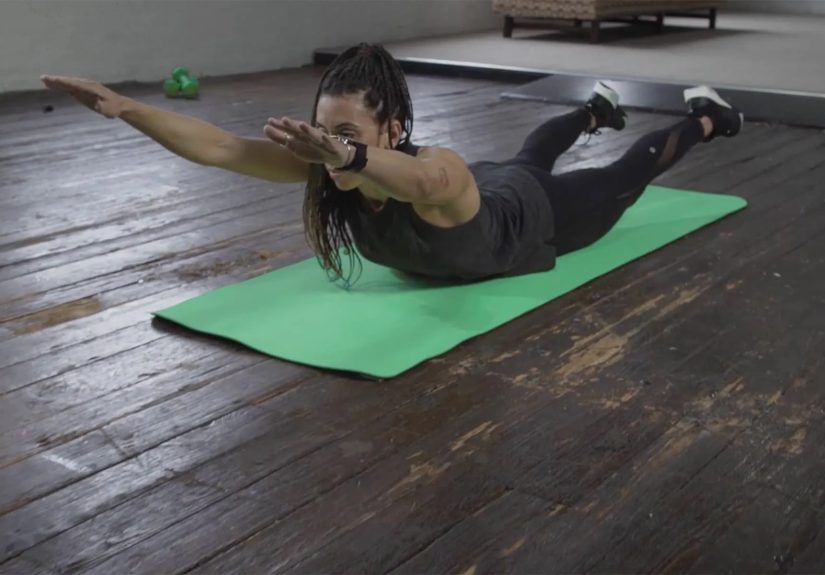
Prone “Y-T” raises (upper back/posture)
How: lie on your stomach, lift arms into a “Y” shape (thumbs up), then a “T” shape. Small controlled lifts.
Why it matters: balances all the pushing work and helps posture.
Make it easier: smaller lifts.
Make it harder: hold the top position 1–2 seconds each rep.
Part 3: Cardio & Core Circuit (10 minutes)
Set a timer: 30 seconds work / 15 seconds rest. Complete all 6 moves, repeat for a second round.
Choose low-impact options if jumping isn’t comfortable.
- High knees (or fast march)
- Mountain climbers (or slow step-in climbers)
- Skaters (or step side-to-side)
- Dead bug (slow core control)
- Side plank (15 seconds each side)
- Squat-to-stand + reach (mobility + heart rate)
Part 4: 3-minute cool-down
- Slow breathing – 5 deep breaths (inhale 4 seconds, exhale 6 seconds)
- Hip flexor stretch – 30 seconds each side
- Chest opener at wall – 30 seconds each side
- Hamstring hinge stretch – 30 seconds
Beginner, intermediate, advanced: choose your difficulty
Beginner version (15–20 minutes)
- Warm-up: 4 minutes
- Strength circuit: 1 round (40/20) of the 6 moves
- Cardio/core: 1 round (30/15) of the 6 moves
- Cool-down: 2 minutes
Intermediate version (30 minutes)
- Do the full plan exactly as written (2 rounds each circuit)
- Use controlled tempo on strength moves (especially push-ups and squats)
Advanced version (35–40 minutes)
- Add a third round to the strength circuit
- Shorten rest: 45/15 for strength, 35/10 for cardio
- Use harder variations: decline push-ups, single-leg bridges, plank with shoulder taps
How to build a weekly routine (without burning out)
A “no-equipment workout” can cover strength and cardio, but your week should still include variety: harder days, easier days,
and rest or active recovery. Here’s a simple structure that fits common health guidelines:
Option A: 3-day plan (great for busy schedules)
- Mon: Full workout (30 minutes)
- Wed: Full workout (30 minutes) + light walk
- Fri: Full workout (30 minutes)
- Other days: 10–30 minutes of walking, stretching, or easy movement
Option B: 4–5 day plan (balanced)
- 2–3 days: Strength-focused circuits (use the Strength Circuit + short cardio finisher)
- 1–2 days: Cardio-focused intervals or brisk walking
- 1–2 days: Mobility/recovery (gentle flow, stretching, easy steps)
If you’re chasing better health, consistency beats perfection. If you’re chasing performance, recovery is part of trainingnot an optional side quest.
Progression: how to keep getting results with zero gear
When people say bodyweight workouts “stop working,” it’s usually because the workout never changes. Use this simple progression ladder:
- Add reps or time (ex: 30s → 40s work intervals)
- Add a round (ex: 2 rounds → 3 rounds)
- Slow the tempo (3 seconds down, 1 second pause)
- Upgrade the variation (incline push-up → floor push-up → decline push-up)
- Improve quality (deeper squat with control, steadier plank with less hip sway)
One more important idea: training to near-fatigue matters more than chasing a magical rep number. If your last few reps feel challenging
while your form stays clean, you’re in the sweet spot.
Common mistakes (and how to fix them)
Mistake 1: Going “all out” every day
If every workout is a max-effort showdown, your body will eventually quit the group chat. Mix intensity: hard days + easy days.
Mistake 2: Rushing reps
Fast reps often turn into “momentum workouts,” where your joints do the work and your muscles just watch. Slow down and own the movement.
Mistake 3: Ignoring the back side of your body
Bodyweight training can become push-heavy. Keep posterior-chain moves (glute bridges, hinges, prone raises) to balance posture and reduce cranky shoulders.
Mini workouts you can “stack” on chaotic days
Not every day deserves a 30-minute block. Here are quick options that still count:
8-minute strength snack
- 40s squat / 20s rest
- 40s push-up variation / 20s rest
- 40s reverse lunge / 20s rest
- 40s plank / 20s rest
- Repeat once
10-minute low-impact cardio
- 1 minute fast march
- 1 minute step jacks (no jumping)
- 1 minute bodyweight good-morning hinges
- 1 minute stair stepping (if available) or brisk hallway walk
- Repeat once
Real-life experiences: what people notice when they stick with no-equipment workouts
When people start a no-equipment routine, they often expect it to feel “too easy” because there’s no heavy metal involved.
Then Week 1 happens. Suddenly, stairs feel like a personal attack, and chairs become suspiciously low. It’s a humbling reminder
that your body weight isn’t a featherit’s a very consistent training load that shows up to every session, no excuses, no shipping delays.
One of the most common early experiences is learning the difference between moving and controlling. A squat done
with momentum feels fine… until you try a slow 3-second descent with a pause at the bottom. People often report that the “hardest”
part of bodyweight training isn’t the exercise itselfit’s staying honest. The moment you stop bouncing and start owning the movement,
your muscles wake up like they’ve been waiting for a formal invitation.
Another frequent win: improved everyday strength. After a few weeks of consistent push-ups (even wall or incline versions), daily tasks
start feeling lightercarrying groceries, pushing a heavy door, moving a box, getting up off the floor. This is the unglamorous magic
of functional fitness: your training starts showing up in real life, not just in the mirror or on a smartwatch graph.
People also tend to notice posture changesespecially if they include upper-back work like prone raises, floor “Y-T” movements, and core stability
drills. A lot of us spend hours folded over screens, so building the muscles that support the shoulders and spine can make you feel “taller”
and less stiff. It’s not that you suddenly become a perfectly aligned human rulerit’s that your body stops feeling like it’s been stored
in a cramped drawer.
Mentally, the biggest shift is often confidence. A no-equipment plan removes common barriers: no commute, no membership,
no waiting for machines, no “I’ll start when I buy the right thing.” People who struggle with consistency often do better when the plan is
simple and friction-free. If your workout is always available, the decision becomes: “Do I have 10–30 minutes?” instead of
“Can I reorganize my entire life to exercise?”
There’s also a learning curve with pacing. Many beginners go too hard too fast, especially with interval-style workouts. A common experience is
realizing that sustainable intensity beats heroic intensity. When people switch from “destroy myself today” to “train smart for months,” their
results usually improvebecause they keep showing up. The body adapts to what you do repeatedly, not what you do once in a burst of motivation.
Finally, people often discover their favorite “anchor moves”the exercises they can measure and improve over time. Maybe it’s holding a plank
with perfect form for 45 seconds. Maybe it’s doing smooth reverse lunges without wobbling. Maybe it’s graduating from wall push-ups to a lower
incline. These small milestones feel surprisingly good, because they’re proof of progress you can’t fake. And once you’ve built that foundation,
adding equipment later becomes a choicenot a requirement.
Conclusion
A workout that requires no equipment isn’t a compromiseit’s a strategy. With a smart plan, you can train strength, cardio, and mobility anywhere,
build habits that actually last, and progress without buying a single thing. Start with the version that feels doable, keep your form clean,
and level up gradually. Your body is already the gym. You just need a schedule and a tiny bit of stubborn consistency.