Table of Contents >> Show >> Hide
- Why Pallet Wood Makes a Great Coffee Table
- Choose Safe Pallets First (Your Lungs Will Thank You)
- Tools and Materials
- Plan the Right Size: Height, Length, and “Will I Trip Over This?”
- Step-by-Step: Build a Pallet Wood Coffee Table That Doesn’t Wobble
- Step 1: Clean it like it’s coming inside your home (because it is)
- Step 2: Disassemble the pallet (optional, but often worth it)
- Step 3: Sort boards like you’re casting a movie
- Step 4: Build (or reinforce) the base
- Step 5: Create a smooth top (the “real coffee table” upgrade)
- Step 6: Sanding without turning your garage into a dust planet
- Step 7: Finish it for real life (hot mugs, spills, and chaos)
- Step 8: Add the fun upgrades
- Common Problems (and How to Fix Them)
- How to Style a Pallet Wood Coffee Table (Without Overdoing It)
- Conclusion
A coffee table from pallet wood is the DIY equivalent of showing up to a party in thrifted vintage and getting compliments
from people who definitely paid full price. It’s rugged, charming, and just imperfect enough to look intentional.
Plus, pallet wood has that “I’ve seen things” grain pattern you can’t buy off a shelf.
But before you start daydreaming about rustic farmhouse vibes and bragging rights, let’s address the plot twist:
not every pallet is a wholesome little bundle of free lumber. Some are totally safe. Some are… “mystery meat,” but in wood form.
This guide will walk you through choosing the right pallets, building a sturdy table, and finishing it so it can survive
real life (hot mugs, pizza nights, and that one friend who always sets drinks down without a coaster like it’s a personality trait).
Why Pallet Wood Makes a Great Coffee Table
Pallet wood is popular for coffee tables because it’s tough, accessible, and full of character. Those dents and color shifts?
That’s not damagethose are stories. And if you like the idea of upcycling, you’ll get the satisfaction of keeping usable wood
out of the waste stream while making something practical.
The big wins
- Budget-friendly: Pallets are often free or cheap, which leaves room in the budget for nicer legs, casters, or a topcoat that doesn’t quit.
- Built-in style: Weathering, saw marks, and mixed tones create an instant rustic or industrial look.
- Modular design: Pallets already have a “table-ish” structure. You can keep them intact for a fast build or dismantle them for a cleaner look.
Choose Safe Pallets First (Your Lungs Will Thank You)
Pallets travel through warehouses, loading docks, and sometimes environments you wouldn’t lickso treat pallet selection like dating:
if it’s covered in red flags (or unknown stains), you can do better.
Read the stamp like a secret code
Many pallets used in international shipping carry an IPPC-style stamp that indicates how the wood was treated. Here’s the part you care about:
HT means heat-treated, while MB means methyl bromide fumigation. For DIY furniture, you want HT.
You want to avoid MB because methyl bromide is toxic and not something you want hanging out in your living room like an uninvited guest.
Bonus nerd note: heat treatment is done to a minimum core temperature for a set time, which is why “HT” is generally considered the safer choice for reuse.
Still, a stamp is not a magical purity sealalways inspect the pallet’s condition and history if possible.
Quick “yes/no” checklist
- YES: Stamped HT, dry, clean-looking, minimal staining, no weird odors, solid boards.
- NO: Marked MB, painted/dyed wood, strong chemical smell, oily spots, fuzzy mold, or pallets that look like they hosted a science experiment.
- NO THANK YOU: Pallets that clearly sat outdoors for ages or absorbed unknown liquids repeatedly.
Where to find pallets (without being “that person”)
Try local warehouses, small retailers, garden centers, or industrial areaspolitely ask if they have unwanted pallets.
Online community listings can also be a gold mine. Wherever you find them, choose pallets in the best condition
so you’re not hauling home a problem you could’ve avoided with a 10-second sniff test.
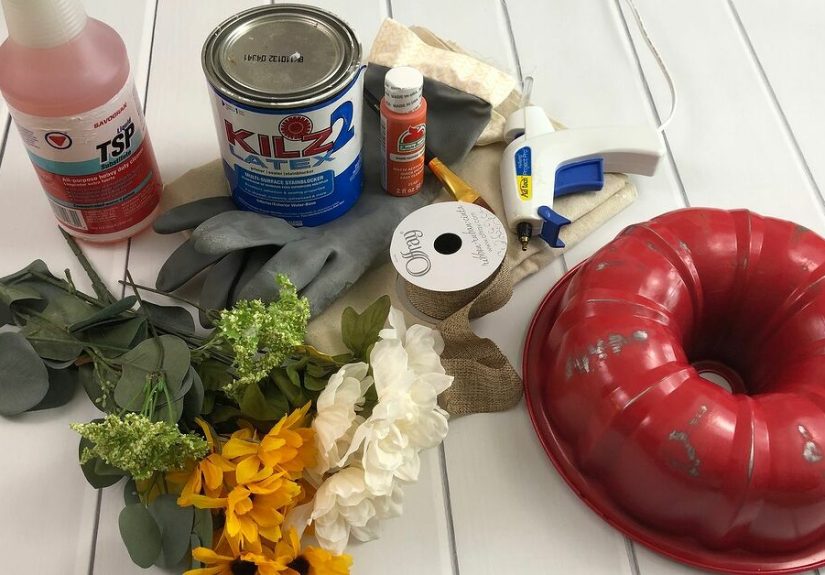
Tools and Materials
You can build a pallet coffee table with basic tools, but a few upgrades make the process faster and far less swear-heavy.
Materials
- 1–2 heat-treated pallets (or pallet boards if you’re rebuilding from scratch)
- Wood screws (1-1/4″ and 2″)
- Wood glue
- Optional: wood filler (for nail holes and gaps)
- Legs (hairpin legs) or casters (wheels), or a simple 2×4 base
- Finish system: stain or paint (optional) + protective topcoat (recommended)
- Sandpaper (60/80, 120, 180/220 grits)
Tools
- Pry bar and hammer or a pallet buster tool
- Reciprocating saw with a demolition/bi-metal blade (huge time saver)
- Circular saw or jigsaw (for trimming)
- Drill/driver + bits
- Clamps (helpful, not mandatory)
- Orbital sander (or sanding block if you enjoy suffering)
- Metal detector (optional but very smart for hidden nails)
- Safety gear: gloves, eye protection, and a dust mask/respirator
Plan the Right Size: Height, Length, and “Will I Trip Over This?”
A coffee table should look right and function right. Pallet furniture is already visually “busy,”
so good proportions keep it from feeling like you dragged a loading dock into your living room.
Simple dimension guidelines
- Height: Most standard coffee tables land in the mid-teens to around 20 inches. For many sofas, 16–18 inches is a sweet spot.
- Length: A common guideline is about two-thirds the length of your sofa.
- Spacing: Leave enough room to walkaim for a comfortable gap from the sofa so knees and shins survive movie night.
Pick your build style
- “Keep the pallet intact” build: Fastest. Great if you like the slatted look and don’t mind gaps.
Add casters and you’re basically done. - “Fill the top” build: Keep the pallet as the base but add boards to close gaps and create a smoother surface.
Best balance of speed and polish. - “Full rebuild” build: Dismantle pallets and build a new tabletop and base. More work, cleaner results, more control over size.
Step-by-Step: Build a Pallet Wood Coffee Table That Doesn’t Wobble
Step 1: Clean it like it’s coming inside your home (because it is)
Start by scrubbing the pallet with soapy water or a diluted bleach solution, then rinse (a power washer works great if you have one).
Let it dry completelysunlight helps with drying and general “de-grossing.” Don’t rush this step.
Wet wood + sanding = gummy mess + sadness.
Step 2: Disassemble the pallet (optional, but often worth it)
If you’re filling gaps or rebuilding, dismantling is the move. The fastest method is using a reciprocating saw
to cut through the nails between slats and supports. Use a demolition/bi-metal blade; longer blades help reach awkward angles.
Wear bootsnails fall. Nails always fall.
Prefer fewer tool noises? Use a pry bar or pallet buster tool and work slowly to reduce splitting.
Either way: remove or flatten every nail and staple. Hidden metal is how saw blades go to die.
Step 3: Sort boards like you’re casting a movie
Separate boards into three piles: “perfect for tabletop,” “fine for hidden structure,” and “nice try.”
Look for cracks, twists, and soft spots. If you have a metal detector, scan boardspallets love hiding surprise nails.
Step 4: Build (or reinforce) the base
If you’re using an intact pallet, check it for square and rigidity. Add 2×4 stretchers or corner blocks inside the frame if it flexes.
If you’re doing legs, a simple approach is to screw a perimeter “skirt” under the pallet so you have thick wood to bite into.
Predrill holes to prevent splittingpallet wood can be dry and cranky.
Step 5: Create a smooth top (the “real coffee table” upgrade)
Leaving the slats exposed looks cool, but crumbs will migrate into those gaps like they’re paying rent.
To build a solid surface, attach pallet boards across the top with glue + screws from the underside when possible.
Stagger joints like hardwood flooring for strength and visual flow.
Want it extra clean? Rip boards to consistent widths with a table saw (optional), or use a planer if you have one.
If gaps remain, you can either embrace them (rustic!) or use thin filler strips for a tighter look.
Step 6: Sanding without turning your garage into a dust planet
Start with 60/80 grit to remove splinters and roughness, then move to 120, then 180/220 for a smooth touch.
Don’t over-sand if you want the weathered lookjust make it comfortable and safe.
Softly round sharp edges with sandpaper or a router roundover bit.
Safety note: wood dust can irritate lungs and trigger allergic reactions in some people.
Wear eye protection and use a proper dust mask or respirator, especially when sanding.
If you can, use dust collection or sand outdoors.
Step 7: Finish it for real life (hot mugs, spills, and chaos)
Here’s the honest truth: the finish is what separates “cute DIY” from “why is my table permanently ringed like Saturn?”
A coffee table takes abuseheat, moisture, friction, and whatever your friend’s nachos are doing.
Choose a protective finish that matches your style and your patience level.
Finish options that actually make sense
- Water-based polyurethane: Dries clearer (less amber), lower odor, faster recoat times.
Great if you like the natural pallet color. - Oil-based polyurethane: Adds warmth/amber tone and is known for strong durability.
Great if you want a richer, aged look. - Wax-only finish: Looks nice but is low on durability and doesn’t love heat.
Better as a final touch over a more protective base, not as the only line of defense for hot coffee.
A practical finishing schedule
- Vacuum dust thoroughly. Wipe with a slightly damp cloth and let dry.
- If staining: test stain on a scrap board first (pallet wood varies wildly).
- Apply 2–4 thin coats of your chosen topcoat (poly), lightly sanding between coats with 220 grit.
- Let it cure before heavy use. “Dry to touch” is not the same as “ready for a pizza box and three sodas.”
Step 8: Add the fun upgrades
- Casters: Great for small spaces and cleaning. Choose locking wheels so your table doesn’t wander off mid-board game.
- Hairpin legs: Instant mid-century/industrial vibe. Keep height in a comfortable range for your seating.
- Lower shelf: Add slats between the base supports for storage (blankets, books, baskets).
- Lift-top: More advanced, but amazing for laptop meals and hidden storage.
- Glass top: Protects the wood while still showing it offespecially good if you love the rough texture but want easy cleaning.
Common Problems (and How to Fix Them)
“My tabletop looks like a potato chip”
Warping happens when boards are unevenly dried or stressed. Use more fasteners, add cross braces underneath,
and consider laminating boards edge-to-edge. Also, seal all faces (top and bottom) to reduce moisture imbalance.
“It wobbles when someone breathes near it”
Wobble usually comes from uneven legs, weak joinery, or a twisted base. Check for square, add corner blocks,
and use levelers or furniture pads. If using casters, make sure they’re installed at consistent heights.
“Why does it smell weird?”
If a pallet smells like chemicals, mildew, or mystery warehouse goo, don’t bring it inside.
No finish can erase “dock funk” forever. Start with better pallets.
How to Style a Pallet Wood Coffee Table (Without Overdoing It)
Pallet wood already has texture and visual personality, so styling works best when it’s simple and intentional.
A tray corals remotes and coasters, a small plant adds life, and a couple of books make it feel curated instead of cluttered.
If your finish is durable, you can actually use the table like… a table. Revolutionary concept.
Conclusion
Building a coffee table from pallet wood is part woodworking project, part treasure hunt, and part “what on earth is that stain?”
Choose safe, clean pallets, plan your dimensions for your space, and invest time in sanding and a durable topcoat.
Do it right and you’ll end up with a table that looks custom, feels solid, and has a story that’s way more interesting than
“I clicked ‘Add to Cart.’”
Experience: Field Notes From Real Pallet Builds (The Extra Stuff People Don’t Tell You)
The first time you build with pallet wood, you learn a beautiful lesson: “free” wood is only free in the same way
a free puppy is free. The material cost might be zero, but the time cost has a whole personality. My biggest surprise
was how long it takes to go from “pile of pallets” to “clean, usable boards.” The disassembly step alone can feel like
a full-contact sportespecially if you insist on saving every slat without splitting it. Once I started using a reciprocating saw
to cut through nails, the whole process became less like wrestling and more like woodworking.
Another lesson: pallets are inconsistent on purpose. They’re designed for shipping, not for matching grain patterns in your living room.
That means you have to design with variation in mind. When I leaned into italternating light and dark boards, keeping a few stamps visible,
letting small dents staythe table looked intentional and interesting. When I tried to force “perfect,” I spent hours sanding away character,
and it still didn’t look like factory furniture (because it wasn’t). The sweet spot is “comfortable to touch, still full of history.”
The finish is where your future self will either thank you or silently judge you every time you see a water ring.
Early on, I used a softer finish because it looked warm and natural. It also collected every cup mark like a scrapbook.
Switching to a tougher protective topcoat changed everything. The table became easy to wipe down, less prone to staining,
and honestly more relaxing to live with. If you love the waxy, matte look, you can still get closejust use a durable base coat
first and save wax for that final “hand-rubbed” vibe.
The most underrated upgrade is a good base. A pallet top can be gorgeous, but if the legs are flimsy or the caster plates are mounted into weak wood,
the whole table feels cheap. Adding internal blocks, predrilling every screw, and using hardware meant for the job (not the random screws you found
in a junk drawer from 2011) makes the table feel solid. Also: measure your sofa height before you commit. A table that’s too tall makes the room feel tight;
too low and you’ll feel like you’re reaching for snacks on the floor. Getting the height right is the difference between “DIY” and “designed.”
Finally, pallet tables live their best lives when you give them a purpose. Need storage? Add a shelf and baskets.
Need flexibility? Add locking casters. Want a cleaner surface? Fill the gaps or add a glass top.
The best builds aren’t the fanciestthey’re the ones that match how you actually use your living room.
If your house is the gathering place, build for spills. If you love minimalist styling, keep the base simple and let the wood do the talking.
And if you have pets or kids, round those corners like your shins depend on itbecause they do.