Table of Contents >> Show >> Hide
If you’re looking to add a unique touch to your home while embracing the latest trends in lighting and design, look no further than a DIY Color Changing Live Edge LED Shelf. Combining the natural beauty of live edge wood with the modern flair of LED lights, this project will not only enhance the atmosphere of any room but also give you a satisfying sense of accomplishment. This guide will walk you through the steps, materials, and tools you need to create your own custom shelf that changes colors and fits perfectly with your home’s decor.
What Is a Live Edge LED Shelf?
A live edge shelf is a wooden shelf where the edges of the wood retain the natural shape of the tree, including knots, curves, and imperfections. This type of shelf showcases the wood’s beauty in its most natural form. When combined with LED lights, especially color-changing ones, it becomes a striking piece of functional decor. The color-changing LED lights can be controlled remotely, offering customizable ambiance for different settings.
Materials You’ll Need
- Live Edge Wood Slab: Look for a slab with interesting grain patterns, as the beauty of the live edge is a key feature of the design.
- LED Strip Lights: Choose RGB (Red, Green, Blue) LED strips for color-changing capabilities. Ensure they are long enough to run along the edges of your shelf.
- Wood Finish: A wood finish or clear sealant to protect the natural wood and highlight its texture.
- Mounting Hardware: Floating shelf brackets or wall mounts to secure the shelf.
- Power Supply: An adapter to connect the LED lights to an electrical outlet.
- Tools: A saw, drill, measuring tape, and screwdriver. Optionally, a sander if you want to smooth out the edges of the wood slab.
Step-by-Step Guide to Building Your Color Changing Live Edge LED Shelf
Step 1: Choose Your Wood Slab
The first step in creating your live edge LED shelf is to select the perfect wood slab. Ideally, you want to choose a piece with interesting grain patterns, such as oak, walnut, or maple. When selecting the wood, consider the size of your shelf and how it will fit into the space you plan to place it. You can find live edge slabs at specialty lumber yards or even some home improvement stores.
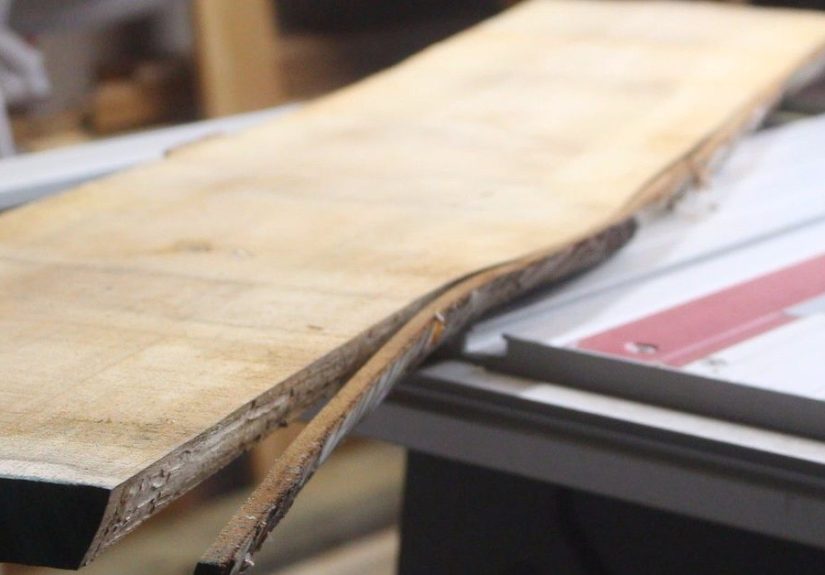
Step 2: Cut and Sand the Wood
Once you’ve chosen your wood slab, it’s time to cut it to the desired length. If the wood isn’t already finished, you may want to sand it down to smooth the surface and edges. You can use a power sander for a smoother finish or leave some texture for a more rustic look. The goal is to enhance the natural beauty of the wood while ensuring the surface is safe to handle and stable for the LED lights.
Step 3: Apply a Wood Finish
Next, apply a wood finish or clear sealant to the surface of the wood to protect it and bring out the natural colors of the grain. This step is optional but recommended for both aesthetic and protective purposes. Make sure to let the finish dry fully before proceeding to the next step.
Step 4: Attach the LED Strip Lights
Now, it’s time to add the fun part – the LED strip lights! Measure the length of your shelf and cut the LED strip to fit. Many LED strips come with adhesive backing, which makes it easy to apply them directly to the underside of the shelf. Position the strip along the edges, leaving enough space for wiring at both ends. Connect the power supply and check that the lights work before continuing. You should be able to adjust the colors of the LED lights using a remote or smartphone app.
Step 5: Install the Shelf Brackets
For a floating shelf look, you will need wall brackets that are capable of supporting the weight of the shelf. Install the brackets on the wall, making sure they are level. Once the brackets are securely in place, you can mount the shelf. Be sure to check that the LED strip wiring is not pinched or obstructed.
Step 6: Wire the Lights and Secure Everything
Once the shelf is mounted, connect the power supply for the LED lights. Depending on the type of LED lights you purchased, you may need to hide the wires. You can use cable clips or small holes drilled into the back of the shelf to guide the wires neatly along the wall. Plug everything into an electrical outlet and test the lights once more to ensure they are functioning properly.
Choosing the Right Color Scheme
One of the most appealing features of this DIY shelf is the ability to change the colors of the lights. Depending on the mood or occasion, you can customize the look of your shelf with different colors. Opt for calming blues and greens for a peaceful vibe or bright reds and oranges for an energizing effect. Additionally, many color-changing LEDs offer customizable settings like “fading” and “flashing,” which add even more visual interest to your setup.
Why You Should Try a DIY Color Changing Live Edge LED Shelf
Creating a color-changing live edge LED shelf not only adds a touch of uniqueness to your space, but it also gives you full control over the ambiance of your room. Whether you want to create a cozy reading nook, an eye-catching piece in your living room, or a sleek display in your office, this DIY project offers versatility. It’s also a great conversation starter when guests come over!
DIY Color Changing Live Edge LED Shelf | A Creative Touch to Your Home
As more people embrace DIY home decor projects, a color-changing live edge LED shelf is a fantastic way to add both style and function to your home. The rustic charm of live edge wood paired with the sleekness of modern LED lighting makes it an ideal addition to any room. Plus, the ability to change colors based on your mood or time of day makes it a versatile design element.
Adding Personal Touches
For added personalization, consider incorporating additional elements such as plants, small sculptures, or books on your shelf. These elements not only make the shelf more practical but also give it a unique character that reflects your style. It’s the little touches that make a DIY project like this one truly special.
Conclusion
Building your own DIY Color Changing Live Edge LED Shelf is an excellent way to inject some personality into your living space while making a bold design statement. Not only will you have a one-of-a-kind shelf, but you’ll also enjoy the customizable lighting that adapts to your mood and needs. Follow the steps in this guide, and you’ll soon be the proud owner of a beautiful and functional piece of furniture that enhances your home decor.
The most challenging part for me was the installation of the LED strip lights. While it was relatively easy to attach the lights to the shelf itself, I had to be careful about hiding the wires. I used some small cable clips to keep everything tidy, which helped maintain the sleek look I wanted. I also found it essential to select the right LED stripchoosing one with both color-changing and dimming capabilities gave me even more flexibility to adjust the lighting to suit different moods.
Once the shelf was finished and mounted on the wall, it instantly transformed the room. The changing colors of the lights added an unexpected flair, making the shelf not just functional but also a decorative piece. I’ve placed plants, books, and a small sculpture on the shelf, which complements the rustic wood and the modern, sleek lighting. This DIY project has become one of my favorite pieces in my home!
Share On Social