Table of Contents >> Show >> Hide
- Why Plates Make Perfect Multi-Purpose Decor
- Tools and Materials You’ll Actually Use
- Step 1: Choose Plates with Purpose (and a Tiny Bit of Caution)
- Step 2: Prep Like You Mean It (This Is Where DIYs Win or Lose)
- Decorating Methods That Look Expensive (Even If They Aren’t)
- Sealing and Durability: What Holds Up in Real Life
- 9 DIY Multi Purpose Plate Decor Projects (With Practical Uses)
- 1) The Plate Wall Gallery (Art That’s Easy to Rearrange)
- 2) Entryway Key + Mail Plate
- 3) Jewelry Dish with Ring Cone
- 4) Candle Centerpiece Base
- 5) Plant Saucer That Looks Intentional
- 6) Desk Catch-All for Daily Clutter
- 7) Tiered Tray from Plates (The Classic “It Looks Like a Boutique” Build)
- 8) Decorative “Mini Tray” with Handles
- 9) Seasonal Swap Plate Stand Decor
- Hanging and Display: Make It Secure (Because Gravity Is Petty)
- Cost and Time: A Realistic Mini Analysis
- Common Mistakes (and Easy Fixes)
- Care and Cleaning
- Real-World Experiences with DIY Multi Purpose Plate Decor (The “What You’ll Actually Notice” Section)
- Conclusion
Plates are wildly underemployed. Most of them spend their lives waiting for tacos and quietly judging your portion sizes.
But with a little DIY magic, a “regular” plate can become wall art, an entryway catch-all, a candle centerpiece, a jewelry dish,
a tiered tray, or even a mini organizer that makes your home look like you have your life together (at least from across the room).
This guide walks you through DIY multi purpose plate decor from start to finishhow to choose the right plate,
decorate it with finishes that actually last, and turn it into pieces that are both pretty and practical. Expect specific project ideas,
realistic tips, and a few gentle reminders that gravity is undefeated.
Why Plates Make Perfect Multi-Purpose Decor
Plates are already designed to be durable, easy to wipe clean, and visually pleasing. They come in endless sizes, shapes,
and patterns, and they’re cheap to sourcethrift stores, discount shops, and hand-me-down boxes labeled “misc kitchen stuff”
are basically plate gold mines.
- Built-in structure: A plate is rigid, smooth, and holds shape better than most DIY materials.
- Instant style: Even plain white plates can look high-end with the right finish.
- Endlessly flexible: Hang it, stack it, prop it, mount hardware to it, or use it as a base for other decor.
- Budget-friendly: You can create a full display wall for less than the cost of one “designer” framed print.
Tools and Materials You’ll Actually Use
Plate Basics
- Thrifted plates, platters, or saucers (ceramic, porcelain, stoneware, or glass)
- Dish soap + degreaser (or rubbing alcohol for final wipe-down)
- Microfiber cloths or lint-free towels
Decorating Supplies (Pick Your Adventure)
- Acrylic paint (craft paint is fine), paint pens, or porcelain paint markers
- Decoupage medium + foam brush
- Scrapbook paper, napkins, fabric, or printable patterns
- Painter’s tape, stencils, or vinyl decals
- Metallic wax, gold leaf, or gilding paint (optional but dangerously satisfying)
Finishing and Display Hardware
- Clear topcoat: spray sealer, brush-on varnish, or specialty “dishwasher-safe” craft sealers (decor-only is easiest)
- Plate hangers (spring-style or wire rim hangers)
- Adhesive hanging discs (for lighter plates)
- Plate stands or easels (for shelves and countertops)
- Wall hooks, nails, anchors, or picture hanging hardware matched to your wall type
Step 1: Choose Plates with Purpose (and a Tiny Bit of Caution)
Start by deciding what job your plate is applying for. A large platter is great as a tray or centerpiece base. A salad plate
makes a perfect wall accent. A saucer becomes a jewelry dish. The “right” plate is the one that fits your planand your space.
Best Plate Types for DIY
- White ceramic plates: ideal for paint, stencils, decals, and modern looks.
- Clear glass plates: perfect for reverse decoupage (decorate the back so the front stays glossy).
- Textured or scalloped plates: add instant character, especially for cottage and vintage styles.
- Heavy platters: great for “statement” decor, but they need stronger hanging hardware.
Safety Note (Especially for Vintage Finds)
If you’re using older or imported plates, treat them as decor-first. Some vintage ceramicware can contain
glazes or decorations that may not be appropriate for food use. For multi-purpose projects that might touch food (like a serving tray),
use newer plates labeled food-safe, or keep the decorated surface away from food contact (for example: decorate the underside only).
When in doubt, let the plate live its best life on a wall or shelf.
Step 2: Prep Like You Mean It (This Is Where DIYs Win or Lose)
The difference between “wow” and “why is it peeling?” is usually prep. Plates collect oils, fingerprints, and that mysterious
invisible film that makes paint slide around like it’s on a waterpark ride.
- Wash thoroughly with dish soap and warm water. Rinse and dry fully.
- Degrease with rubbing alcohol or a gentle degreaser; let it air-dry.
- Optional: scuff sand glossy ceramic very lightly with fine-grit sandpaper for better adhesion.
- Dust off sanding residue and wipe again before decorating.
Decorating Methods That Look Expensive (Even If They Aren’t)
1) Reverse Decoupage on Glass Plates
Reverse decoupage is the cheat code for glossy, professional-looking plates. You decorate the back of a clear glass plate,
so the front remains smooth and shinyand the design is protected behind the glass.
- Place the plate upside down on wax paper.
- Cut your paper or fabric to match the plate’s inner circle.
- Apply decoupage medium to the back of the plate.
- Press your design down, smooth out bubbles, and add another coat over it.
- Once dry, paint the back with a solid color to make the design pop (white often works best).
- Seal if needed, then flip it over and admire your suspiciously fancy “store-bought” plate.
Best for: wall plates, shelf plates, and decorative catch-alls that won’t be scrubbed daily.
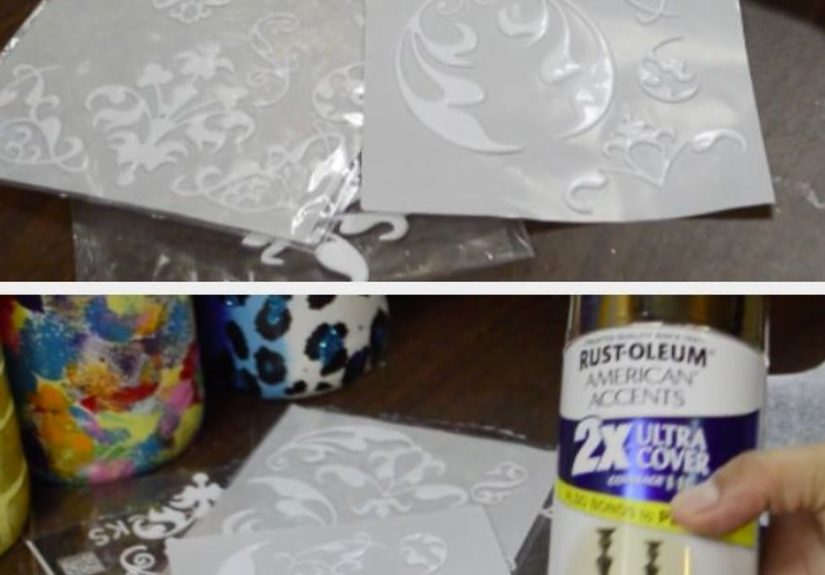
2) Painted Patterns and Stencil Designs
Want a modern look? Paint a bold arch, checkerboard, or simple stripe. Want classic? Try a stencil border.
Want to feel like an artist? Paint a wonky lemon and call it “whimsical.” It works. Trust the process.
- Minimalist: one color + one geometric shape, finished with a matte clear coat.
- Coastal: soft blues, thin stripes, and a semi-gloss finish.
- Maximalist: layered stencils, metallic accents, and a glossy topcoat.
3) Gilded Edges (The “I Have Taste” Upgrade)
Metallic wax or gilding paint along the rim makes almost any plate look custom. Keep it thin and slightly imperfect for a
handmade vibeor go crisp and clean for a modern finish. Either way, it reads “intentional,” which is the entire point of decor.
4) Raised Details with Air-Dry Clay
For plates that do more than just sit there looking pretty, air-dry clay can add little dividers, ring cones, or textured accents.
Glue clay pieces after drying, then paint and seal.
Best for: jewelry plates, desk catch-alls, and organizer trays.
Sealing and Durability: What Holds Up in Real Life
Most decorated plates are happiest as decorative pieces. If you need something that handles frequent wiping or light use,
choose stronger sealers and avoid decorating areas that will be scraped by keys, coins, or enthusiastic snackers.
- Wall-only decor: any quality clear spray sealer is usually enough.
- Catch-all trays: use a tougher clear coat (multiple thin layers) and let it cure fully.
- Food-contact surfaces: keep the decorated area away from food, or use products explicitly labeled food-safe and follow cure times carefully.
Pro tip: “Dry” is not the same as “cured.” Many finishes need days to reach full hardness. Patience now saves heartbreak later.
9 DIY Multi Purpose Plate Decor Projects (With Practical Uses)
1) The Plate Wall Gallery (Art That’s Easy to Rearrange)
A plate wall turns a blank kitchen, dining, or hallway space into a focal point. Mix sizes and patterns, or keep it monochrome for a
calmer look. Lay everything out on the floor first, snap a photo, then transfer the layout to the wall.
- Style tip: group plates in odd numbers (3, 5, 7) for a balanced, curated feel.
- Spacing rule: keep gaps consistent so it looks designed, not accidental.
2) Entryway Key + Mail Plate
Use a medium plate as a wall-mounted landing pad. Add small hooks beneath it (mounted to a backing board or a separate strip)
for keys, dog leashes, or sunglasses. Suddenly you’re organized. Briefly.
3) Jewelry Dish with Ring Cone
Glue a small air-dry clay cone (or a tiny thrifted knob) to the center of a saucer to hold rings. Add sections with clay “walls”
if you want to separate earrings, pins, or hair ties.
4) Candle Centerpiece Base
A large platter makes a gorgeous centerpiece tray for pillar candles, seasonal greenery, or a small vase. It also protects your table
from wax drips and “oops” water rings.
- Winter: white candles + pine sprigs + metallic accents
- Spring: bud vase + tulips + pastel taper candles
- Everyday: a single sculptural candle + a match holder
5) Plant Saucer That Looks Intentional
Use a sturdy plate under a plant pot as a drip tray that doesn’t scream “I bought this at the last minute.” Choose a plate
slightly wider than the pot, and seal it if it will meet regular moisture.
6) Desk Catch-All for Daily Clutter
A plate on your desk collects the small stuffpaperclips, earbuds, receipts, that one coin you’ve carried for three weeks.
Choose a design that makes the mess look curated. That’s the entire trick.
7) Tiered Tray from Plates (The Classic “It Looks Like a Boutique” Build)
Stack two or three plates with candleholders or short columns between them to create a tiered display tray. This is great for
coffee bars, bathroom counters, or holiday decor.
- Pick plates in graduating sizes (largest on bottom).
- Choose spacers (candleholders, small wood rounds, or sturdy posts).
- Glue with a strong adhesive suited for ceramics/glass (follow cure times).
- Optional: add a handle on top with a knob or drawer pull.
8) Decorative “Mini Tray” with Handles
Turn a large platter into a tray by attaching small handles (often easiest with an adhesive designed for the material).
Use it for perfumes, coffee syrups, or as a “guest towel + soap” base in the bathroom.
9) Seasonal Swap Plate Stand Decor
If you love decorating but hate commitment, this one’s for you. Keep plates on stands and rotate them by season:
fall pumpkins, winter plaid, spring florals, summer citrus. It’s like holiday decor, but calmer.
Hanging and Display: Make It Secure (Because Gravity Is Petty)
Plate decor is only charming until it becomes a ceramic surprise attack. Choose hanging methods based on plate weight,
wall type, and whether you’re renting.
Common Hanging Options
- Spring plate hangers: grip the rim; often a solid choice for heavier plates.
- Adhesive hanging discs: useful for lighter plates when applied correctly and fully cured.
- Picture hanging hardware: match the wall anchor and hook to the weight and wall material.
- Plate stands: safest option for valuable or fragile piecesno wall impact, easy to move.
Placement Tips That Look Designer (Not Random)
- Eye-level matters: anchor the arrangement so the center feels naturally placed when standing.
- Use a “hero” plate: one larger or bolder piece that leads the composition.
- Repeat an element: a shared color, rim style, or motif ties mismatched plates together.
- Balance the weight visually: if one side has a big platter, give the other side two medium plates.
Cost and Time: A Realistic Mini Analysis
DIY plate decor can be budget-friendly, but your costs depend on whether you already own supplies.
Here’s a common range for a single project:
- Thrifted plate: $1–$6 (platters sometimes more)
- Decoupage/paper supplies: $0–$10 (often leftovers you already have)
- Paint + topcoat: $5–$15 (but lasts for multiple projects)
- Hanger/stand: $3–$12 depending on type
Time estimate: most projects take 30–90 minutes of hands-on work, plus drying/curing time.
The secret is doing two or three plates at once so the waiting feels productive instead of personal.
Common Mistakes (and Easy Fixes)
Paint Beading Up
Usually a prep issue. Clean again with rubbing alcohol, lightly scuff sand if needed, and try a thin primer layer.
Wrinkled Decoupage
Use thinner paper, smooth from the center out, and apply medium in lighter coats. Wrinkles that dry can sometimes be minimized
with gentle sanding and another topcoat.
Plate Falls Off the Wall
Double-check weight ratings, wall type, humidity exposure, and whether the hanging method is appropriate for the plate.
When a plate is heavy, valuable, or fragile, choose stronger mechanical support (or use a stand).
Care and Cleaning
- Decor plates: wipe with a soft, damp cloth; avoid soaking or harsh scrubbing.
- Catch-alls: use felt pads under keys/metal items to reduce scratches.
- Wall plates: dust occasionally; check hangers every few months if you live in a high-vibration area (hello, slamming doors).
Real-World Experiences with DIY Multi Purpose Plate Decor (The “What You’ll Actually Notice” Section)
Here’s the part people don’t always tell you: DIY plate decor is incredibly forgiving… right up until the moment it isn’t.
The good news is that most “oops” moments are predictableand preventableonce you know what tends to happen in real homes.
First, a lot of DIYers discover that plates behave differently depending on their finish.
Glossy plates can look sleek, but they’re also the ones that make paint and glue act like they’re trying to escape.
Many crafters end up loving the “boring” plates the mostsimple matte or lightly textured ceramicsbecause the surface grabs paint
and topcoat more reliably. It’s not glamorous, but it’s the difference between a design that lasts two seasons and one that lasts
until you redecorate your kitchen in the year 2047.
Another common experience: your first plate wall layout will look amazing on the floor… and slightly chaotic on the wall.
That’s because floors forgive spacing. Walls highlight it. People who get the most “designer” look usually do two things:
(1) they keep the spacing consistent, and (2) they choose one unifying detaillike a repeated rim color, a shared motif,
or a small set of complementary tones. Even when the plates are mismatched, that one repeated element makes the collection feel
curated instead of accidental. It’s the same concept as wearing an outfit where your shoes match your beltexcept the plates are your shoes,
and the wall is your belt, and now we’ve gone too far with the metaphor.
If you’re turning plates into functional decorlike entryway catch-alls or key stationsmany people learn quickly that
traffic patterns matter. A plate placed near a doorway will collect more dings than the same plate on a quiet shelf.
Keys and coins are tiny wrecking balls. A helpful trick is lining the plate with a thin felt circle or adding little adhesive pads
where metal items land most often. It doesn’t ruin the look, and it keeps your topcoat from looking “weathered” in a way that screams
“I drop my keys like I’m ending a scene in an action movie.”
For decoupage plates, the shared experience is that bubbles are not a moral failure.
They happen. Paper expands when it absorbs medium, and even careful smoothing can leave a few tiny pockets.
Many DIYers find that thin layers, patience, and a gentle squeegee-style smoothing tool help a lot. Also: letting the plate dry fully
before adding another coat is not just a “nice suggestion.” It’s the difference between crisp and cloudy.
And finally, there’s the lesson everyone learns once: hanging methods aren’t just about convenience.
Adhesive options are temptingespecially in rentalsbut plates are both heavy and fragile, a combination that deserves respect.
People who love their plate decor long-term often switch to sturdier hangers, proper hooks, and wall hardware matched to the weight.
The funny part is that this is usually learned after “the incident,” which is rarely funny in the moment.
If you want to skip the incident, treat your plate display like art: use the right hardware, distribute weight properly,
and don’t gamble with anything irreplaceable.
The best part of all these real-life observations is that they make the DIY process less mysterious. Once you know what tends to go wrong,
you can plan around itand then DIY plate decor becomes what it’s meant to be: a satisfying way to turn everyday objects into pieces that
feel personal, useful, and genuinely beautiful. Plus, it gives your plates a career path beyond “holding nachos,” and honestly, they deserve that.
Conclusion
DIY multi purpose plate decor is one of the easiest ways to upgrade your home without committing to expensive art
or complicated builds. Whether you’re styling a plate wall, making a tiered tray, or creating a daily catch-all that keeps clutter contained,
plates offer structure, style, and flexibility. Focus on good prep, choose finishes that match how the piece will be used, and hang everything
like you expect gravity to audition for a starring role. Do that, and your plates won’t just look prettythey’ll actually help your space work better.