Table of Contents >> Show >> Hide
- Why a Pom Pom Mobile Works for So Many Spaces
- Quick Overview
- Materials and Tools
- Step 1: Plan Your Design (So It Looks “Intentional”)
- Step 2: Make Fluffy Yarn Pom Poms
- Step 3: Prep Your Mobile Ring (Embroidery Hoop Setup)
- Step 4: Create the Top Hanging Point
- Step 5: Attach the Pom Poms
- Nursery Safety Notes (Important)
- Step 6: Hang the Mobile
- Customization Ideas (Make It Yours)
- Troubleshooting (Because Pom Poms Have Opinions)
- Care and Maintenance
- Final Thoughts
- Extra: Real-World Crafting Experiences (The Part You’ll Relate To)
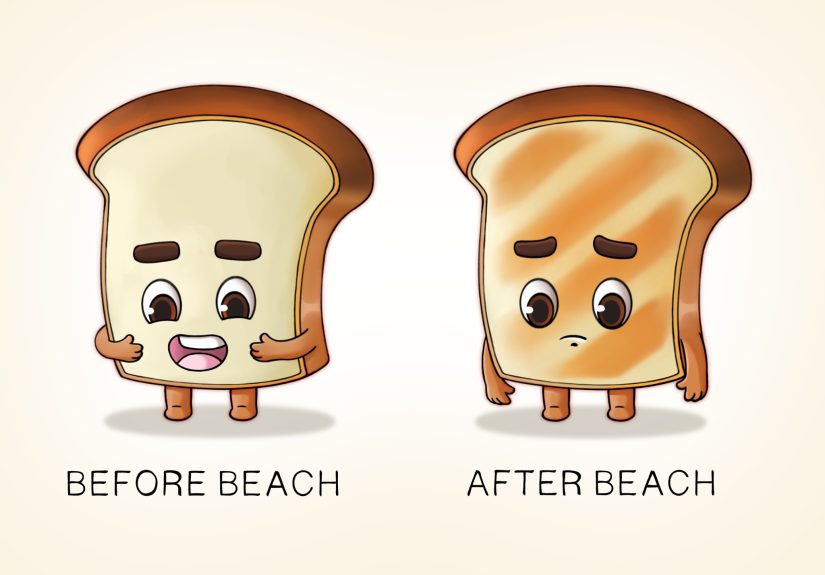
If your room (or nursery, or craft corner, or “please-ignore-the-laundry” zone) needs a little sparkle without the
commitment of painting an accent wall at 11 p.m., a pom pom mobile is the sweet spot. It’s soft, colorful, and
weirdly soothing to watchlike a low-budget, yarn-based lava lamp. Best part: you can make one with basic supplies,
a tiny bit of patience, and a willingness to accept that the first pom pom may look like a stressed-out sea urchin.
This tutorial walks you through planning, making fluffy yarn pom poms, building a balanced mobile frame (hello,
embroidery hoop), and hanging it safely. You’ll also get design ideas, troubleshooting tips, and a long “experience”
section at the end (because crafting is never just craftingit’s a whole emotional journey).
Why a Pom Pom Mobile Works for So Many Spaces
A pom pom mobile is one of those rare DIYs that looks boutique but doesn’t require boutique skills. Pom poms add
texture (great for cozy décor), color (great for bright spaces), and movement (great for making a corner feel
“styled” without buying more furniture). You can hang it:
- Over a changing table (visual interest without taking up surface space)
- In a reading nook or play corner
- In a dorm room or craft room to soften hard angles
- As party décor (swap the hoop for a branch for a boho vibe)
And yesmany people make mobiles for nurseries. If you’re doing that, we’ll cover safety and placement later.
(Because “cute” should never outrank “safe.”)
Quick Overview
- Time: 1.5–3 hours (depends on pom pom count and your snack breaks)
- Skill level: Beginner-friendly
- Estimated cost: $15–$40 (mostly yarn; thrifted hoops help)
- Best yarn types: Worsted weight for classic fluffy pom poms; bulky yarn for extra drama
Materials and Tools
Main Supplies
- Yarn in 2–6 colors (worsted weight is the easiest “starter yarn”)
- 1 embroidery hoop (10–16 inches is a great range)
- Strong cord for hanging (nylon cord, cotton cord, or sturdy string)
- Scissors (sharp = happier pom poms)
- Measuring tape or ruler
Pom Pom Maker Options
- Store-bought pom pom maker (fast and consistent)
- Cardboard circles (classic DIY method)
- Cardboard rectangle (quick wrap-and-tie method)
- Fork method (great for tiny pom poms)
- Your hand (works in a pinch, but size can vary)
Helpful Extras
- Hot glue gun (optional, for knot insuranceuse sparingly)
- Yarn needle (for cleaner knots and hiding ends)
- Wooden beads (optional, for a modern/Scandi look)
- Fishing line (optional, for a “floating” effect)
Step 1: Plan Your Design (So It Looks “Intentional”)
You can freestyle, but a quick plan saves you from ending up with a mobile that looks like a yarn store sneezed.
Pick one of these easy design approaches:
Easy Color Schemes
- Ombre: Light to dark in one color family (calm and polished)
- Two-tone: Neutral base + one bright accent (modern and playful)
- Rainbow: Balanced chaos (best for playrooms)
- Seasonal: Winter whites, fall rust, spring pastels, summer brights
How Many Pom Poms Do You Need?
For a single-ring mobile, a good starting point is 12–24 pom poms. If you want a fuller look,
aim for 20–30. Using smaller pom poms? Increase the count. Using big fluffy pom poms? Fewer will still look
substantial.
Choose Your Pom Pom Sizes
A mix of sizes adds depth. Try something like:
- 6 large pom poms (2.5–3.5 inches)
- 10 medium pom poms (2–2.5 inches)
- 6 small pom poms (1–1.5 inches)
Pro tip: If you’re going for a minimalist mobile, keep the sizes consistent. If you’re going for “whimsical,”
mix sizes and lengths.
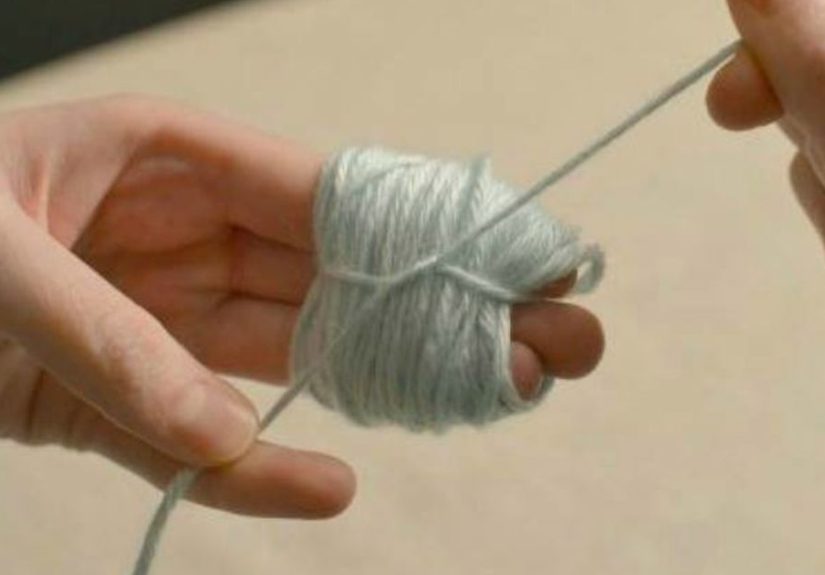
Step 2: Make Fluffy Yarn Pom Poms
The key to a great pom pom is density. More wraps = fuller pom pom. If your pom poms look thin,
don’t panic. They’re not “bad,” they’re just… going through a phase. Wrap more yarn and they’ll glow up.
Method A: Cardboard Circle Method (Classic and Super Fluffy)
-
Cut two cardboard circles the size you want your pom pom. Cut a smaller circle out of the
middle (like a donut). -
Stack the two donut shapes. Hold the yarn tail against the cardboard and start wrapping yarn
around the ring. - Wrap until the ring is very full. The fuller the ring, the fluffier and rounder the pom pom.
- Cut around the outer edge between the two cardboard pieces.
-
Slide a long piece of yarn between the cardboard layers and tie a very tight knot around the
cut strands. Double-knot it. - Remove cardboard and fluff the pom pom.
- Trim with sharp scissors until it’s round and tidy.
Method B: Cardboard Rectangle Method (Fast and Flexible)
- Cut a rectangle of cardboard (width roughly equals your desired pom pom diameter).
- Wrap yarn around the cardboard 60–120 times depending on thickness you want.
- Slide a long strand of yarn under the wraps and tie tightly at the center.
- Cut the loops on both ends, fluff, and trim into a sphere.
Method C: Fork Method (Best for Tiny Pom Poms)
- Wrap yarn around a fork (more wraps = denser pom pom).
- Slide a piece of yarn through the center gap and tie tightly.
- Slip it off the fork, cut loops, fluff, and trim.
Trim Like a Pro
- Fluff first: Shake and roll the pom pom between your hands before trimming.
- Trim gradually: Small snips beat big regret.
- Rotate as you cut: Turn it constantly so it becomes round, not “flat on one side.”
Keep the yarn tails from your center knot! Those tails are your built-in attachment strings, and they’ll save you
from extra tying later.
Step 3: Prep Your Mobile Ring (Embroidery Hoop Setup)
An embroidery hoop is perfect because it’s lightweight, strong, and already a neat circle. You can also use a
wooden ring, metal macramé ring, or a smooth branch for a more natural look.
Option 1: Keep the Hoop Natural
If your hoop is wood and you like the look, leave it as-is. Lightly sand rough spots so the cord doesn’t snag.
Option 2: Wrap the Hoop in Yarn
- Secure the yarn end with a tight knot on the hoop.
- Wrap yarn around the hoop tightly, side-by-side.
- Add a dot of glue only at the start and end if you want extra hold.
- Tie off and tuck the end under a few wraps for a clean finish.
Wrapping can also “hide” attachment knots, which is great if you want a cleaner, boutique look.
Step 4: Create the Top Hanging Point
You want the mobile to hang level, not tilt like it’s giving your ceiling a side-eye. A reliable method is
using three evenly spaced cords attached to the hoop and tied together at the top.
- Cut three equal lengths of cord (start with 24–36 inches; you can shorten later).
- Tie them to the hoop at three points, evenly spaced (imagine a triangle on the circle).
- Bring the cords up and tie them together in a strong knot at the top.
- Leave extra cord above that knot for hanging from a hook.
Test it: lift the mobile by the top knot. If the hoop tilts, adjust the tie points until it hangs level.
Step 5: Attach the Pom Poms
Here’s where the magic happens. You’ll tie pom poms at different lengths so the mobile has movement and depth.
Keep your lengths varied, but not chaotic.
Recommended Hanging Lengths
- Short: 8–10 inches from hoop to pom pom
- Medium: 12–14 inches
- Long: 16–20 inches
Attachment Steps
- Decide where each pom pom will go. Lay them out on a table in a circle pattern first.
- Cut cord pieces for each pom pom (or use the pom pom’s own yarn tails if long enough).
- Tie each pom pom to the hoop with a double knot.
- Space them out so the mobile looks balanced from all angles.
- Trim any excess cord ends or hide them by wrapping the hoop (if you wrapped it).
Balance Check (Don’t Skip This)
Hang your mobile temporarily (a doorknob hook works) and step back. If it tilts, you have options:
- Move one heavy pom pom closer to the center or swap sides.
- Shorten a cord on the “heavy” side to reduce leverage.
- Add a small pom pom to the lighter side as a counterweight.
Once it hangs straight, you can add a tiny dot of glue to important knots for security. (Not required, but it
can help if you live with curious hands, pets, or a ceiling fan that thinks it’s a DJ.)
Nursery Safety Notes (Important)
If your mobile is going near a baby’s sleeping area, prioritize safe placement and secure installation. Mobiles
should be high enough that a baby can’t reach or pull them down, and they should be removed once a baby can get
up on hands and knees (or around 5 monthswhichever comes first). Avoid long cords, loops, or dangling strings
where babies can reach them.
Common-Sense Safety Checklist
- Use sturdy knots and strong cord; test by gently tugging each attachment.
- Keep all hanging elements well out of reach.
- Inspect regularly for loose pieces or fraying.
- Remove the mobile once baby becomes more mobile and can potentially grab it.
If you’re unsure about placement, hang the mobile above a changing table or reading corner instead of directly
above a crib. It still looks adorable, and it’s often easier to keep out of reach.
Step 6: Hang the Mobile
Choose a hanging method based on your space and comfort level. The goal is: secure, stable, and not in the path
of fans, doors, or grabby little hands.
Hanging Options
- Ceiling hook: Best for a clean floating look. Use appropriate anchors for your ceiling type.
- Wall bracket: Great if you don’t want ceiling holes.
- Sturdy adhesive hook: Works only if the mobile is very light and the hook is rated for more than the weight.
After hanging, watch the mobile for a minute. If it spins wildly, it may be too close to an air vent. If it
hangs still like it’s refusing to participate, that’s also fine“calm décor” is a vibe.
Customization Ideas (Make It Yours)
1) Add Shapes
Tie in felt stars, moons, or clouds between pom poms. Keep pieces lightweight and securely attached.
2) Make a Two-Tier Mobile
Use a second smaller hoop hanging below the first. Attach fewer pom poms to the bottom hoop for a layered look.
3) Go Minimalist
Use only 6–10 pom poms in neutral colors, with clean, equal spacing and consistent cord lengths.
4) Mix Yarn Textures
Combine smooth acrylic yarn with wool or chenille for visual interest. Just remember: some specialty yarns shed,
so test by rubbing a finished pom pom between your hands.
Troubleshooting (Because Pom Poms Have Opinions)
My pom poms look scraggly.
Wrap more yarn. Then trim gradually while rotating the pom pom. Scraggly usually means “not dense enough” or
“needs a haircut.”
The mobile tilts.
Rebalance by shifting heavier pom poms, changing cord lengths, or redistributing spacing. A tiny adjustment can
fix a big tilt.
Knots keep slipping.
Use a double knot and consider a tiny dot of glue. Also, make sure your cord isn’t too slippery for the hoop
material.
It tangles when it spins.
Increase spacing between hanging points and avoid extremely long cords close together. If needed, use slightly
stiffer cord or fishing line.
Care and Maintenance
- Dusting: Use a lint roller or a handheld vacuum on low with a brush attachment.
- Spot clean: Lightly dab with a damp clothavoid soaking wool pom poms.
- Refresh shape: Fluff and trim stray fibers as needed.
- Periodic safety check: Confirm knots are tight and nothing is loosening over time.
Final Thoughts
A DIY pom pom mobile is one of those projects that feels joyful from start to finishcolor choices, texture,
that satisfying “snip snip” trimming moment, and the payoff of seeing it sway gently in the air. It’s also a
craft you can personalize endlessly: bold and bright, soft and neutral, minimalist, maximalist, or something
in between.
Make it once, and you’ll start spotting opportunities everywhere. A holiday version? Sure. A “college apartment
needs whimsy” version? Absolutely. A “my cat has too much confidence” version? Maybe hang it a little higher.
Extra: Real-World Crafting Experiences (The Part You’ll Relate To)
Let’s be honest: the internet makes DIY projects look like a breezy montage where someone smiles softly, trims a
pom pom in perfect silence, and somehow never loses the scissors. Real life is different. Real life is: your yarn
rolls away, your cord tangles into a knot that could qualify as modern art, and you briefly wonder if buying a
premade mobile would be “self-care.” (It would. But we’re here now.)
One of the biggest “aha” moments people have with pom pom mobiles is learning that density changes everything.
A pom pom can look amazing on the maker and then deflate emotionally when you cut it. That’s not the pom pom being
dramatic (okay, it is)it’s usually because there weren’t enough wraps. The good news: once you do two or three,
your hands learn the feel of “full enough.” It becomes instinct. You’ll pick up the yarn and think, “This needs
30 more wraps,” like a yarn psychic.
Trimming is also its own craft skill. The first time you trim, you might go too far and end up with a pom pom that
looks like a small planet that lost a fight with gravity. But after a few tries, you’ll start trimming in slow
circles, rotating the pom pom, and snipping tiny bits instead of hacking away. Many crafters find this part weirdly
calminglike shaping a hedge, but softer, and with fewer bugs.
Another common experience: color decisions take longer than the actual building. You think you’ll
pick “three easy colors,” and suddenly you’ve got eight skeins on the floor like you’re auditioning to be the yarn
curator of a tiny museum. A trick that helps is choosing one “hero color” (the main color), one neutral (cream,
gray, tan), and one accent (a fun pop). That trio is hard to mess up. If you do want more colors, keep them within
the same “temperature” (all warm tones or all cool tones) so it looks intentional.
Balancing the mobile is where many people discover they accidentally made a physics project. The mobile might tilt
slightly and you’ll swear the hoop is haunted. Usually it’s just weight distribution: a thicker yarn pom pom or a
larger pom pom on one side pulls more than you expect. The fix is almost always simpleswap a pom pom, shorten a
cord, or slide the attachment point a couple inches. The experience teaches patience, and also teaches that you
should test-hang before you “finalize” knots. Temporary knots first, permanent knots second. This one tip saves a
lot of frustration.
If you’re making the mobile for a nursery, there’s a special emotional layer too: people often find it meaningful
to build something by hand, even if it’s not “perfect.” The tiny imperfections become part of the story. Maybe one
pom pom is slightly larger, or one hangs a bit shorter, and you’ll notice it foreverwhile everyone else will just
say, “Wow, you MADE that?” That’s the fun of handmade décor: it feels warm and personal in a way store-bought items
rarely do.
Practical reality check: crafting with yarn creates fluff. There will be yarn bits. They will cling to your socks.
They will appear on your shirt in places you didn’t know shirts could hold lint. Many people keep a lint roller
nearby and do a quick cleanup at the end, especially if the mobile is going into a room where you want it to look
crisp and tidy. Also: if you have pets, yarn is basically celebrity gossipeveryone wants to get involved. Craft
in a closed room if you can, or prepare to politely negotiate with a cat who believes the pom poms belong to them.
Finally, there’s a kind of quiet joy that happens when you hang the finished mobile and see it move. It’s gentle,
soft, and a little magicalespecially when the light hits the yarn and the colors look richer than they did on the
skein. Many makers end up doing a second one because the first teaches you what you really like: more spacing, fewer
colors, bigger pom poms, or a cleaner minimalist look. So if your first mobile isn’t “exactly” what you imagined,
that’s not failure. That’s Version 1. And Version 2? Version 2 is going to be a masterpiece.