Table of Contents >> Show >> Hide
- Why a Stenciled Border Works (Even If You’re Not “Crafty”)
- Supplies and Tools
- Before You Start: Quick Safety Check
- Step-by-Step: How to Make a DIY Stenciled Border Coffee Table
- 1) Inspect the Table (AKA: Find the Drama Early)
- 2) Clean Like You Mean It
- 3) Scuff Sand (You’re Not Removing the FinishYou’re Giving It Tooth)
- 4) Prime for Adhesion (Especially on Glossy or Stained Wood)
- 5) Paint the Base Coat (Smooth First, Fancy Later)
- 6) Plan Your Border (Measure Twice, Tape Once)
- 7) Seal the Base (Optional Pro Move for Cleaner Lines)
- 8) Position and Secure the Stencil
- 9) Stencil Paint Technique (The Anti-Bleed Rule: Less Paint Than You Think)
- 10) Corners Without Tears
- 11) Peel the Stencil at the Right Time
- 12) Fix Small Oops (Because DIY Is Basically “Oops Management”)
- 13) Topcoat for Durability (Coffee Tables Live Hard Lives)
- Design Ideas for Your Stenciled Border
- Troubleshooting: Quick Fixes for Common Problems
- Care Tips So Your Work Stays Pretty
- Conclusion
- Experiences and Lessons Learned (The Part Where Reality Shows Up)
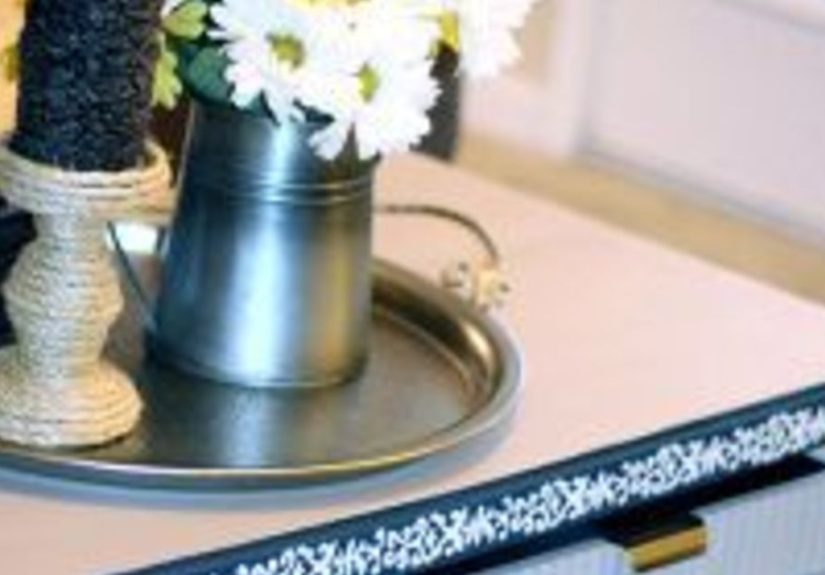
There are two kinds of coffee tables in this world: the ones that quietly hold your snacks, and the ones that
announce your snacks. A stenciled border coffee table is the second kindbecause a crisp border is basically
eyeliner for furniture. It frames the top, distracts from tiny dings, and makes a thrift-store find look like it
wandered out of a boutique and forgot to mention the price tag.
This guide walks you through a durable, real-life-friendly makeover: prep that actually helps paint stick, stenciling
that doesn’t bleed like a sad watercolor, and a topcoat strategy that can survive mugs, remote controls, and the
occasional “I swear I used a coaster” situation.
Why a Stenciled Border Works (Even If You’re Not “Crafty”)
A border is the easiest way to make a plain tabletop look intentional. Instead of covering the entire surface with a
full pattern (which can feel like a visual wrestling match), a border:
- Frames the tabletop like artwork, making the center feel calm and usable.
- Hides edge wearexactly where tables get beat up the most.
- Adds “custom” vibes without custom-budget pain.
- Plays well with any style: modern, farmhouse, boho, coastal, you-name-it.
Supplies and Tools
You don’t need a garage full of gadgets. You need the right basicsand the patience to use thin layers (your future
self will thank you).
Materials
- Cleaner/degreaser (or warm water + mild dish soap)
- Sandpaper (120–150 grit for scuff sanding, 220 grit for smoothing between coats)
- Tack cloth or lint-free rags
- Primer (bonding primer is your best friend for glossy finishes)
- Paint for base coat (furniture paint, enamel, or quality interior latex)
- Stencil (mylar stencils are durable and easy to clean)
- Painter’s tape (quality tape is cheaper than redoing the whole top)
- Repositionable spray adhesive (optional, but helpful for crisp edges)
- Stencil brush, dense foam pouncer, or small foam roller
- Stencil paint (acrylic craft paint works; furniture paint works toouse very little)
- Topcoat (water-based polyurethane or polycrylic for a clear, protective finish)
Nice-to-Haves
- Small level or straightedge
- Measuring tape + pencil
- Flexible corner ruler (for perfect border spacing)
- Small artist brush for touch-ups
- Drop cloth and nitrile gloves
Before You Start: Quick Safety Check
If your table is older (especially anything that might date back decades), be cautious with sanding old finishes.
Painted surfaces in homes or items from the pre-1978 era can involve lead-based paint risk. If you’re not sure,
consider using a lead test kit and follow lead-safe practices (and if there’s a chance of lead, avoid dry sanding and
keep dust contained). Work in a well-ventilated area, wear a mask when sanding, and protect your eyes.
Step-by-Step: How to Make a DIY Stenciled Border Coffee Table
1) Inspect the Table (AKA: Find the Drama Early)
Set the table under good light and check:
- Loose veneer or lifted edges
- Sticky residue (old wax, furniture polish, mystery syrup)
- Deep scratches or dents
- A wobbly base (tighten screws nowfuture-you will spill less coffee)
Fill dents with wood filler if needed, let it dry, then sand it smooth. Don’t chase perfectionjust aim for “smooth
enough that your stencil won’t snag.”
2) Clean Like You Mean It
Paint hates grease. So does primer. So does your soul when the finish peels off in a month. Wash the tabletop with a
degreaser or warm soapy water, rinse, and let it dry fully. If the table has been polished a lot, consider a stronger
cleaner designed to cut waxy buildup.
3) Scuff Sand (You’re Not Removing the FinishYou’re Giving It Tooth)
Lightly sand the surface to dull any shine. Your goal is a consistent, matte-looking scuffnot bare wood. Use
120–150 grit for glossy finishes, then wipe away dust with a tack cloth or lint-free rag. This step is one of the
biggest reasons painted furniture lasts.
4) Prime for Adhesion (Especially on Glossy or Stained Wood)
Apply one thin coat of primer. If the table is stained dark or has tannins, primer helps prevent bleed-through and
gives your base color a clean, even start. Let it dry according to the label, then lightly sand with 220 grit to
remove bumps. Wipe off dust.
5) Paint the Base Coat (Smooth First, Fancy Later)
Roll or brush on your base color in thin coats. Two coats are common. For a border stencil, solid neutrals work
beautifully (white, cream, greige, charcoal), but don’t be afraid of colornavy with a warm white border is a classic.
Let the final base coat dry well. “Dry to the touch” is not the same as “ready for tape and stencils.” If you rush,
you’ll pull paint up like a bad sunburn.
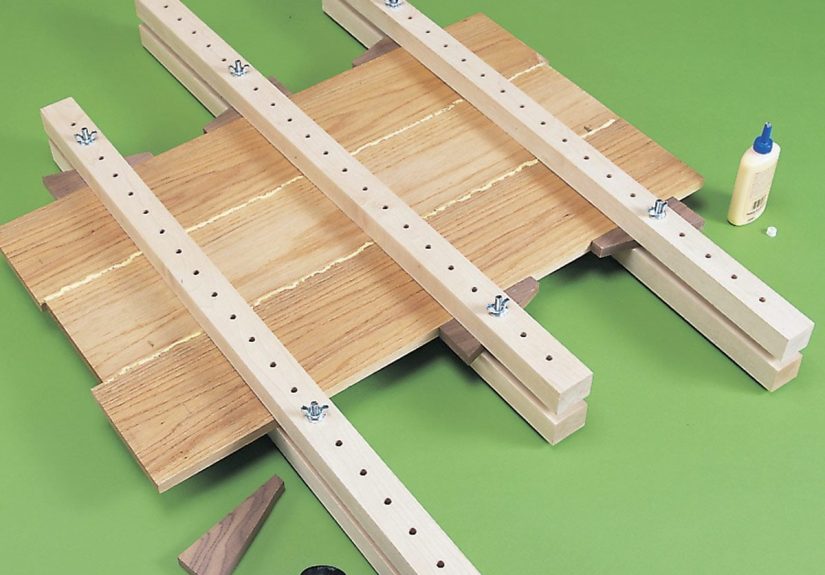
6) Plan Your Border (Measure Twice, Tape Once)
Decide how wide you want the border. Common looks:
- 1–2 inches for subtle framing
- 3–5 inches for a bold, statement border
Measure in from the edge and mark light pencil dots at intervals around the tabletop. Use a straightedge to connect
them lightly (or use painter’s tape as your “line”). This becomes your guide for stencil placement so your border
doesn’t drift.
7) Seal the Base (Optional Pro Move for Cleaner Lines)
If you want extra insurance against bleed, you can brush on a very thin clear coat (or even a light layer of the
base color) before stenciling. The idea is to seal tiny gaps so the stencil color can’t sneak underneath. Let it dry
before the stencil goes down.
8) Position and Secure the Stencil
Align the stencil with your guide marks. Use painter’s tape to secure edges. If your stencil has delicate cutouts,
a light mist of repositionable spray adhesive on the back can help hold details flat. Let adhesive get tacky for a
minute or two so it doesn’t transfer goo onto your tabletop.
For long borders, you’ll likely repeat the stencil in sections. Use registration marks if your stencil has them, or
create your own: place tiny pencil marks at key points so the next repeat lines up.
9) Stencil Paint Technique (The Anti-Bleed Rule: Less Paint Than You Think)
The #1 cause of messy stenciling is too much paint. Load your stencil brush or foam pouncer lightly, then offload
most of it onto a paper towel. It should feel almost dry.
- Use a pouncing motion (straight up and down) instead of brushing sideways into edges.
- Work from the center out so you don’t shove paint under the stencil openings.
- Build color slowly with 2–4 light passes instead of one heavy coat.
If you want a super crisp look, keep your paint slightly thicker (not watery). Thin paint loves to travel.
10) Corners Without Tears
Corners can be tricky because the pattern may not “turn” neatly. Three good options:
- Mitered corners: Stop the stencil short and connect corners with a small detail stencil or hand touch-up.
- Corner stencils: Use matching corner pieces designed for borders.
- Intentional break: Leave a tiny gap at the corner and add a small motif (dot, leaf, diamond) as a “cap.”
11) Peel the Stencil at the Right Time
Remove the stencil carefully while the paint is still slightly wet (not drippingjust not fully cured). Pull tape
back on itself at a low angle. If paint has built up on stencil edges, pause and wipe the stencil clean before the
next repeat. Clean stencil = crisp stencil.
12) Fix Small Oops (Because DIY Is Basically “Oops Management”)
Minor bleed? Let it dry, then:
- Use a small artist brush with base color to sharpen edges.
- For tiny dots, a toothpick can gently scrape a speck off if the paint hasn’t fully hardened.
If a whole section shifted, don’t panic. You can repaint the base in that area, let it dry, and redo the stencil.
This is why borders are greatyou’re fixing a strip, not the whole tabletop.
13) Topcoat for Durability (Coffee Tables Live Hard Lives)
A coffee table top needs protection. Choose a clear finish that matches your paint type (water-based finishes are
popular for low odor and easy cleanup). Apply thin, even coats with a quality synthetic brush or foam applicator.
Lightly sand between coats with 220 grit once dry to smooth dust nibs.
How many coats? For a tabletop, aim for at least 3 coats, more if the table gets heavy use. Pay attention to dry and
recoat times on your product label, and remember: “dry” isn’t the same as “fully cured.” Even if it feels dry, it may
take days to harden to full durabilityso be gentle early on.
Design Ideas for Your Stenciled Border
The border is your chance to set the vibe. Here are a few proven pairings:
Modern + Clean
- Matte black base + thin white geometric border
- Warm white base + charcoal Greek key border
Farmhouse + Cozy
- Soft greige base + slightly distressed black border
- Cream base + faded barn-red border (sealed well for a worn-in look)
Boho + Pattern Love
- Sage green base + terracotta Moroccan border
- White base + navy tile-inspired border
Faux Inlay Look
Use a stencil with a repeating “inlay” motif, then do two close shades (like tan + caramel) to mimic wood inlay. It’s
dramatic, but still just paint.
Troubleshooting: Quick Fixes for Common Problems
Problem: Paint Bleed Under the Stencil
- Use less paint and offload more.
- Switch to pouncing instead of brushing.
- Secure stencil edges better (tape and/or light spray adhesive).
- Try sealing edges with base color first, then apply stencil color.
Problem: The Border Looks Crooked
- Measure from the same reference point (usually the tabletop edge).
- Use a straightedge and pencil guide marks.
- Step back between repeatsyour eyes catch drift faster than your tape does.
Problem: Raised Paint Ridges
- Use thinner layers; avoid “puddles.”
- Lightly sand ridges once fully dry, then topcoat to level the finish.
Care Tips So Your Work Stays Pretty
- Give it time: Avoid heavy use until the topcoat has hardened (follow your product’s cure guidance).
- Be coaster-polite: Especially for the first weekheat and moisture can mark soft finishes.
- Clean gently: Use a soft cloth and mild soap; skip harsh sprays that can dull topcoats.
Conclusion
A DIY stenciled border coffee table is the sweet spot between “basic paint job” and “how is this not store-bought?”
With solid prep, stingy paint application (seriouslybe stingy), and a tough clear coat, you’ll get a tabletop that
looks sharp and holds up to real life. And every time someone asks where you bought it, you get to smile and say,
“Oh, this old thing? I made it.” (Optional: hair flip.)
Experiences and Lessons Learned (The Part Where Reality Shows Up)
The first time I tried a stenciled border on a coffee table, I was extremely confident for someone holding a stencil
brush like it was a magic wand. I had a cute pattern picked out, a fresh base coat, and the kind of optimism that
only exists right before paint does something surprising. I taped the stencil down, dipped my brush, and started
“painting” like I was coloring a poster board in third grade. Within minutes, I learned an important truth:
stenciling is less like painting and more like politely convincing pigment to sit still.
My biggest early mistake was using too much paint. It felt logicalmore paint equals better coverageexcept stencils
interpret that as a personal invitation to leak under every edge. The fix wasn’t fancy; it was discipline. Offload
most of the paint onto a paper towel until the brush seems almost dry, then pounce lightly. Once I did that, the
stencil started behaving like it had signed a contract.
The second surprise was how much alignment matters on a long border. When you repeat a stencil around a tabletop,
tiny shifts add up. What starts as “barely noticeable” becomes “why does this border look like it’s slowly fleeing
the scene?” My solution was to create simple registration marks: a couple of tiny pencil dots at repeat points and a
quick check with a straightedge before each section. It took an extra minute per repeat and saved me an hour of
annoyed repainting.
I also learned that painter’s tape is not all created equal. Cheaper tape can let paint seep or, worse, pull up your
base coat when you remove itespecially if the paint hasn’t had enough time to dry. Now I treat drying time like a
rule, not a suggestion. If the can says “recoat in a few hours,” that doesn’t automatically mean “stencil and tape
with abandon.” When in doubt, I wait longer and test tape on a hidden spot first.
Humidity is another quiet troublemaker. On a muggy day, paint stays tacky longer, and tape can leave marks or lift
edges. If the air feels like soup, I either run a fan for airflow (not blasting dust onto wet paint) or I postpone
the stenciling step. The best DIY upgrade is sometimes… patience. Very annoying, very effective.
Finally, topcoat changed everything. Before I started sealing properly, my “finished” table looked great until the
first week of actual use. A sweating glass left a ring. A warm mug left a dull spot. The table wasn’t ruined, but it
was a clear sign that coffee tables don’t live gentle lives. Once I committed to multiple thin coats of a durable
clear finishand respected cure timethe table stopped acting fragile and started acting like furniture.
The funniest part is that the end result always looks more advanced than it is. Guests assume you did something
complicated, when really you did three things well: prep, light layers, and protection. If you’re nervous, start
with a simple border pattern and a forgiving color combo. Your second table will be better than your first. Your
third table will have you side-eyeing every plain tabletop in your house like it’s missing its eyeliner.