Table of Contents >> Show >> Hide
- Why West Elm-Style Hanging Planters Are So Popular
- Project Overview
- Supplies and Tools You’ll Need
- Step-by-Step: How to Build a West Elm Modern Hanging Planter Knock-Off
- Design Variations to Make It Your Own
- Styling Ideas for Your Modern Hanging Planter
- Safety Tips and Common DIY Mistakes to Avoid
- Real-Life DIY Experiences: What You Learn After Building a Few
Love West Elm’s modern hanging planters but not the “my-wallet-is-crying” price tag? You’re in the right place. This DIY West Elm modern hanging planter
knock-off gives you the same clean, geometric look for a fraction of the cost, using basic tools, plywood, and a little bit of patience. It’s the kind of
project that looks high-end and “designer,” but secretly came from your scrap wood pile and a Saturday afternoon.
This tutorial walks you through how to build a modern diamond-shaped hanging planter inspired by West Elm and featured on Remodelaholic-style projects.
You’ll get step-by-step instructions, ideas for variations, styling tips, and real-life lessons learned so you can avoid the usual DIY “oops” moments.
Why West Elm-Style Hanging Planters Are So Popular
West Elm has built a reputation for modern, airy home decor that mixes natural materials, simple lines, and a slightly mid-century vibe. Their hanging
planters tick all those boxes. They’re:
- Space-saving: Perfect for small apartments, rentals, or rooms where floor and shelf space are limited.
- Modern and sculptural: The planter doubles as wall art or a focal point in a corner.
- Plant-friendly: Ideal for trailing houseplants that love to spill over the edge.
The downside? Stylish planters from big-name brands can easily cost $50–$150 each, especially for designs with interesting shapes or materials. That’s why
a DIY knock-off is so appealing: you get the same aesthetic but with custom sizing, custom finishes, and way less financial guilt.
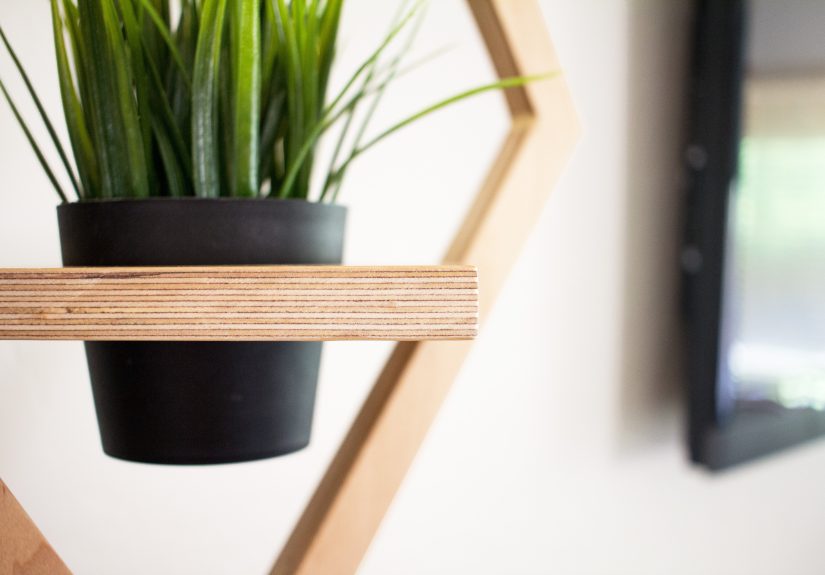
Project Overview
This DIY version is a wood-framed hanging planter with a geometric diamond outline and a center shelf that holds a small pot. It’s designed to be:
- Beginner- to intermediate-friendly: A great first project if you’re new to power tools.
- Budget-conscious: Especially affordable if you use leftover plywood and scrap materials.
- Customizable: Change the size, stain color, or hanging method to match your decor.
Supplies and Tools You’ll Need
Materials
- 3/4″ or 1/2″ plywood (a small sheet or large scrap is usually enough)
- Wood glue
- 1 1/4″ brad nails or small wood screws (optional but helpful)
- Sandpaper (120- and 220-grit)
- Wood filler (for any gaps or nail holes)
- Stain and clear topcoat, or paint and sealer
- A small plant pot (typically 3–4″ diameter) and plant
- Hanging hardware:
- 1 screw-in cup hook or eye hook
- Chain, rope, or leather cord for hanging
- Ceiling hook or wall bracket rated for the total weight
- Painter’s tape or clamps (for glue-up)
Tools
- Measuring tape and pencil
- Straightedge or ruler
- Jigsaw, circular saw, or table saw (for cutting the basic shape)
- Miter saw or circular saw with angle settings (for precise angled cuts, if you build from frame pieces)
- Drill and drill bits (including a hole saw or jigsaw for the pot opening)
- Orbital sander (optional but nice)
- Safety glasses, hearing protection, and a dust mask
Step-by-Step: How to Build a West Elm Modern Hanging Planter Knock-Off
1. Plan Your Shape and Size
The original modern hanging planter that inspired this project has a simple geometric diamond frame with a smaller shelf inside. To keep the proportions
similar, aim for a piece that’s roughly 20–24 inches tall and 14–18 inches wide. You can scale up or down depending on your wall space and pot size.
On your plywood, draw a vertical centerline. Mark the top and bottom points of your diamond along that line. Then mark the widest points out to each side.
Connect those four points with straight lines to form a big diamond. You now have the outer frame.
Next, sketch a smaller diamond inside the first one, inset about 1 inch from the outer edges. This inner outline becomes the opening of the frame. You can
either cut the frame as one big hollow diamond or build it from separate pieces of wood joined at the corners.
2. Mark and Cut the Frame
If you’re cutting the frame from a single sheet:
- Use a jigsaw to cut along the outer diamond lines.
- Drill a starter hole inside the inner diamond, then carefully cut along the inner lines to remove the center.
- Take your time on the corners; slow and steady beats fast and wobbly.
If you prefer to build the frame from strips:
- Rip plywood or solid wood into strips 1 1/2″ to 2″ wide.
- Cut four pieces with matching angles at the ends so they form a diamond when assembled.
- Use wood glue and brad nails to join the corners, checking for square (or in this case, consistent angles).
3. Cut the Plant Shelf
The center shelf holds your planter and gives the piece its functional, not-just-decorative feel. Cut a rectangle or diamond-shaped shelf that fits snugly
inside the frame, positioned roughly halfway between the top and bottom points.
To hold the pot:
- Measure your pot’s top diameter.
- Mark a circle slightly smaller than that on the shelf (for a snug fit).
- Use a hole saw or jigsaw to cut out the circle.
Test-fit the pot. It should sit securely in the opening without falling through, but not so tight that you need a crowbar to get it back out.
4. Attach the Shelf to the Frame
Once the shelf fits, dry-fit everything together. Center the shelf inside the frame and mark its position lightly with pencil. Then:
- Apply wood glue where the shelf meets the frame.
- Clamp in place or use brad nails/screws from the outside of the frame into the shelf edges.
- Wipe away any glue squeeze-out with a damp cloth.
Let the glue cure according to the manufacturer’s instructions. This joint carries the weight of the plant, so don’t rush this step.
5. Sand and Finish the Planter
Sand all surfaces with 120-grit, then 220-grit sandpaper. Round over any sharp corners slightly so the planter looks polished (and is nicer to bump into).
Fill nail or screw holes with wood filler, let dry, and sand smooth.
Finish options:
- Natural modern look: Use a light stain (like natural, golden oak, or a soft gray) and top it with a clear polyacrylic.
- Scandi white: Paint the frame white or off-white and keep the pot terra-cotta or black for contrast.
- Bold statement: Go dark with walnut stain or matte black paint for dramatic contrast against a light wall.
If you plan to hang the planter in a humid spot or near a bright window where condensation might form, be sure your topcoat is rated for that environment.
6. Add Hanging Hardware
Once the finish is completely dry, it’s time to hang this beauty.
- Mark the top center point of the frame.
- Pre-drill a small pilot hole.
- Screw in a cup hook or eye hook.
- Attach chain, rope, or leather cord to the hook and tie or clip it to a ceiling hook.
Always use wall and ceiling anchors appropriate for your ceiling type (drywall, plaster, or joists) and weight. Planter + soil + water + pot can add up
fast, so err on the safe side.
7. Pot Your Plant and Style It
Choose a lightweight pot that fits your center hole comfortably. For indoor spaces, good plant choices include:
- Golden pothos or philodendron (great trailers and very forgiving)
- String of hearts or string of pearls (for a delicate, cascading look)
- Small ferns if you have a humid, bright bathroom
- Faux plants if your thumb is more “digital” than “green”
Use a well-draining potting mix and consider a pot with a built-in saucer or an inner plastic liner so excess water doesn’t drip onto your wood or floors.
Design Variations to Make It Your Own
Change the Shape
The diamond outline is classic West Elm-inspired, but you can adapt the design to:
- Hexagon or octagon: More sides, more modern geometric appeal.
- Circle + crossbars: Use a round frame with a simple cross-shaped shelf inside.
- Minimal rectangle: A tall rectangular frame with a floating shelf feels architectural and sleek.
Swap the Hanging Material
Instead of chain, try:
- Rope: Adds a coastal or boho touch.
- Leather straps: A chic, warm detail that pairs well with mid-century decor.
- Metal cable: Ultra-modern and nearly invisible from a distance.
Play With Color Blocking
For a more graphic look, stain the outer frame a deep wood tone and paint the interior shelf white, or vice versa. You can also paint just the inner edge of
the frame for a subtle pop of color that shows as you walk around the room.
Styling Ideas for Your Modern Hanging Planter
- In a living room corner: Hang it near a window where it can frame the view and soften the angle of the room.
- Above a console or sideboard: Layer the planter with framed art and tabletop decor for a gallery-like moment.
- In a grouping: Make two or three planters at different sizes and hang them at staggered heights along a wall.
- In a bedroom: Use a trailing plant as a living “curtain” beside the bed for a cozy, retreat-like feel.
Because the design is so clean and modern, it pairs beautifully with simple pots and understated plants. Let the shape and the greenery do most of the
talking instead of piling on too many patterns.
Safety Tips and Common DIY Mistakes to Avoid
- Don’t skip the studs: If your planter ends up heavy, use a ceiling joist or heavy-duty anchor, not just a random drywall screw.
- Watch the water: Overwatering means extra weight and potential drips on your floor. Use a drip tray or waterproof liner.
- Test weight before hanging high: Put the planter together, add the pot and soil, then gently lift by the chain to make sure all joints
feel solid. - Mind the light: Choose plants that match your light conditions. Even the prettiest planter can’t fix a sad, sun-starved fern.
Real-Life DIY Experiences: What You Learn After Building a Few
The first time you build a West Elm-inspired hanging planter, it feels a little like solving a puzzle. The drawing is easy, but lining up angles and
getting the shelf perfectly centered is where the real learning happens. Here are some honest lessons and experiences that tend to show up once you’ve made
oneor threeof these.
Perfection Is Optional, Looking Good Is Not
On paper, you might plan out exact angles and measurements. In real life, your saw wanders a hair to the left, your line wasn’t as square as you thought,
and suddenly the diamond looks slightly “off.” The good news? Once the planter is sanded, finished, and hanging with a lush plant in it, those tiny flaws
disappear. People notice the overall shape and the greenery, not the microscopic gap in that one corner.
Many DIYers report that after the first planter, they relax. The second or third version tends to go faster, and the cuts get more accurate simply because
your hands and eyes are now familiar with the shape. Think of the first one as your prototype and the rest as your “product line.”
The Budget Win Feels Really, Really Good
One of the best parts of a knock-off project is the moment you mentally compare your material cost to the retail price. Plywood offcuts, a small pot, and a
bit of hardware rarely come close to what a store charges for a designer planter. When you hang up your finished piece and realize you spent more on
takeout last week than on your new “West Elm style” decor, it’s incredibly satisfying.
Over time, that budget advantage adds up. Maybe you start with one planter in the living room, then add another in the bedroom, then a trio on the covered
porch. Instead of wondering if you can afford multiples, you’re mostly wondering if you have enough wall space and plants to fill them.
Customization Becomes Addictive
After one successful build, it’s almost impossible not to experiment. Maybe you switch from a diamond frame to a hexagon. Maybe you stain the frame a deep
walnut and paint the shelf white. Maybe you swap chain for thick leather straps and brass hardware for a more refined look.
The core design is simple enough that small changes make a big visual impact. Some DIYers even build a mini collection that all share a similar finish but
different shapes, so the plants feel connected without looking identicallike a curated gallery of living sculptures.
Practical Lessons You Only Learn by Living With It
Once the planter is part of your everyday space, a few practical details stand out:
- Height matters: Hang it high enough that you’re not ducking under it, but low enough that watering doesn’t require a step stool and a
prayer. - Light changes: That “perfect” corner might shift with the seasons. You may find yourself rotating plants or swapping in varieties that
handle lower light during winter. - Weight creep: Wet soil is surprisingly heavy. After a good watering, you’ll appreciate that you overbuilt the frame and chose a strong
anchor.
Over time, the planter stops feeling like a DIY project and just becomes part of how your home looks and functions. It frames a view, fills an empty
vertical space, and quietly broadcasts “someone handy lives here.”
From “I Could Never” to “What Else Can I Build?”
Maybe the biggest experience of all is the confidence boost. A geometric hanging planter looks like something that would show up in a catalog or a designer
mood board. When you build it yourself, you cross an invisible line from “I buy decor” to “I make decor.”
That shift tends to snowball. You start eyeing other high-end piecesa side table, a lamp, a set of tabletop plantersand thinking, “Could I knock that off
too?” Spoiler: you probably can. The skills you learn heremeasuring carefully, cutting cleanly, sanding, finishing, and hanging safelytranslate to dozens
of other projects.
In the end, this DIY West Elm modern hanging planter knock-off isn’t just a pretty piece on your wall. It’s proof that with a bit of planning, a few
affordable materials, and a willingness to try, you can bring high-end style into your home on a real-life budgetand have a lot of fun doing it.