Table of Contents >> Show >> Hide
- What a Wood Chisel Actually Does
- Main Types of Wood Chisels
- Chisel Anatomy: The Parts That Matter
- How to Choose Your First Wood Chisel Set
- How to Use Wood Chisels the Right Way
- Sharpening: The Thing You Cannot Ignore
- Safety Tips for Using Wood Chisels
- Common Beginner Mistakes
- Which Wood Chisels Should You Buy First?
- Shop Experience: What Wood Chisels Teach You Over Time
- Conclusion
Wood chisels are the quiet overachievers of the shop. They do not beep, buzz, or demand a charging cable, yet they can fine-tune a dovetail, clean out a hinge mortise, trim proud joinery, and rescue a cut that wandered off course because your saw briefly lost its confidence. In other words, a good chisel is part scalpel, part crowbar, and part therapist for bad woodworking decisions.
If you are new to woodworking, choosing chisels can feel oddly complicated. Bench chisels, mortise chisels, paring chisels, beveled edges, socket handles, O1 steel, A2 steel, water stones, diamond plates, honing guides, microbevels: suddenly a simple metal blade starts sounding like a graduate seminar. The good news is that you do not need a museum’s worth of tools to work cleanly and accurately. You need the right types, the right sizes, a sharp edge, and a basic understanding of how each chisel wants to be used.
This guide breaks it all down in plain English. We will cover the main kinds of wood chisels, how to choose your first set, what blade sizes matter most, how to sharpen them without turning the process into a spiritual crisis, and how real woodworkers actually use them in the shop. By the end, you should know exactly what to buy, how to maintain it, and why a sharp 1-inch chisel can sometimes feel like a superpower in a wooden handle.
What a Wood Chisel Actually Does
At its core, a wood chisel is a hand tool for cutting, paring, chopping, and scraping wood fibers. That sounds simple, but the range of work is huge. A chisel can remove waste between layout lines, flatten the bottom of a recess, square the corners of a drilled mortise, shave end grain flush, or sneak up on a perfect fit when a joint is just a hair too tight. In fine woodworking, it is often the tool that turns “close enough” into “that looks intentional.”
That precision is why chisels remain essential even in power-tool shops. Routers and table saws can do a lot, but they cannot always reach into a small corner, register directly off a knife line, or whisper, “Let’s just take off one more paper-thin shaving.” A chisel can. That is why woodworkers keep reaching for them long after the novelty of louder tools has worn off.
Main Types of Wood Chisels
Bench Chisels
If chisels had a starter home, it would be the bench chisel. This is the general-purpose choice and the one most woodworkers should buy first. Bench chisels usually have medium-length blades, flat backs, and beveled edges that help them fit into tight spaces such as dovetails and corners. They can handle both paring by hand and light chopping with a wooden mallet.
For most woodworking tasks, bench chisels do the lion’s share of the work. Cutting hinge mortises, trimming tenon shoulders, cleaning up dados, and refining joints are all well within their comfort zone. If you only own one type of chisel, this should be it.
Paring Chisels
Paring chisels are the long, lean specialists. Their blades are longer and more slender, which gives you extra control for hand-guided slicing and trimming. They are designed for finesse, not force. That means no mallet blows. Smacking a paring chisel with a mallet is like entering a greyhound in a sumo match: wrong event, bad outcome.
These chisels shine when you are tuning a delicate joint, trimming flush surfaces, shaving end grain, or sneaking up on a piston-fit box lid. They are excellent tools, but beginners do not need a whole set right away unless they know they will be doing a lot of fine joinery by hand.
Mortise Chisels
Mortise chisels are built for hard work. They are thicker, stronger, and designed to take repeated mallet strikes while levering chips out of deep, narrow mortises. Their beefier cross section resists twisting and bending, which matters when you are chopping a rectangular hole that needs straight walls and square corners.
If you cut a lot of traditional mortise-and-tenon joinery by hand, a mortise chisel earns its keep. If not, a bench chisel can handle occasional mortise work, especially for lighter-duty tasks. Many hobbyists wait before buying dedicated mortise chisels, and that is a perfectly sensible move.
Butt Chisels and Specialty Chisels
Butt chisels are essentially shorter bench chisels. They are handy in cramped spaces and often used for hinge work or small projects. Then there is the specialty crowd: skew chisels, corner chisels, slicks, dovetail chisels, Japanese chisels, and more. They all have their place, but most woodworkers can get very far with a solid group of bench chisels before wandering into the specialty aisle and adopting tools like a person at an animal shelter.
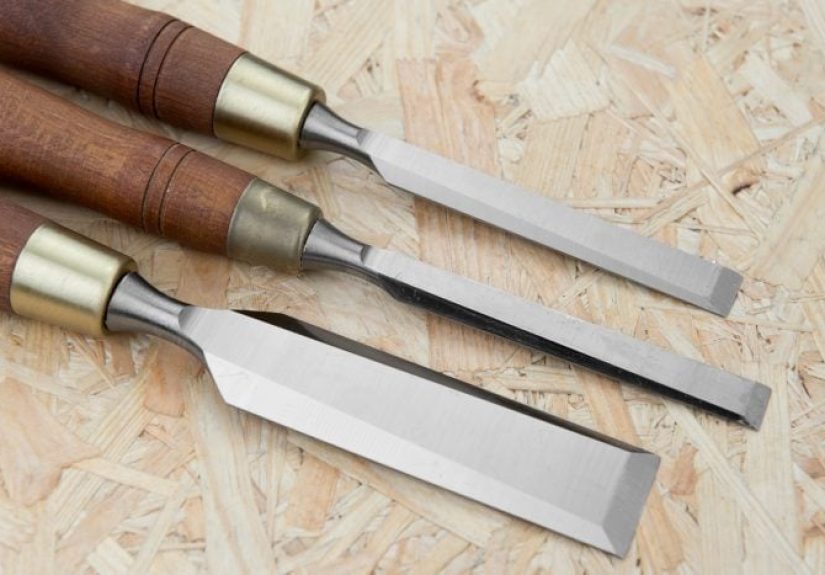
Chisel Anatomy: The Parts That Matter
Knowing the anatomy helps you shop smarter. The back of the chisel is the flat face that rides against your work and must be truly flat near the cutting edge. The bevel is the angled face ground at the cutting end. The cutting edge is where the actual magic happens, or where the tears begin if it is dull.
You will also hear about socket and tang construction. Socket chisels have a hollow socket that receives the handle. Tang chisels have a pointed tang driven into the handle. Both can work beautifully. The real question is less about prestige and more about build quality, balance, and whether the handle feels good in your hand after an hour of use.
How to Choose Your First Wood Chisel Set
If you are starting from scratch, do not overcomplicate this. Buy a small set of good bench chisels and spend the rest of your budget on sharpening supplies. A mediocre chisel that is properly sharpened will usually outperform an expensive chisel with a neglected edge. Sharpness is the real luxury brand in woodworking.
A practical starter set usually includes these sizes:
- 1/4 inch: Great for smaller joinery, hinge gains, and tight cleanup work.
- 1/2 inch: The all-around workhorse for general tasks.
- 3/4 inch: Useful for broader trimming and cleanup.
- 1 inch: Excellent for paring, flushing surfaces, and wide shoulder work.
Some woodworkers also like an 1/8-inch chisel for tiny work, while others skip it because narrow chisels can be easier to misuse or break. For most people, the four-size setup above is the sweet spot between versatility and cost.
What About Steel?
You will often see O1 and A2 tool steel in western-style chisels. O1 steel tends to sharpen more easily and can take a very fine edge. A2 steel usually holds an edge longer but can take a bit more effort to sharpen. Neither is automatically “better.” It depends on whether you value quick sharpening sessions or longer intervals between them.
In practice, beginners often obsess over steel long before they master sharpening. That is a bit like debating racing tires before learning where the brake pedal is. Buy quality steel, yes, but prioritize a chisel that is well made, feels balanced, and can be sharpened consistently with the system you actually plan to use.
Handle Material and Strikeability
Wood handles feel traditional and comfortable, while synthetic handles often tolerate rougher jobsite use. If you plan to strike your bench chisels regularly, look for handles designed for mallet use. Wooden mallets are generally kinder than metal hammers, both to the handle and to your nerves.
How to Use Wood Chisels the Right Way
There are two basic modes: paring and chopping. Paring means pushing the chisel by hand for controlled, fine cuts. Chopping means striking it with a mallet to remove waste. The cut direction, grain direction, and support under the workpiece all matter. If the grain runs uphill into your cut, the chisel may dive deeper than expected and tear fibers ahead of the edge. That is woodworking’s way of reminding you to pay attention.
For clean results, work to layout lines, take light cuts, and let the flat back register where accuracy matters. When paring flush, especially with a wide chisel, keep the back flat to the reference surface and shave a little at a time. When chopping a recess or mortise, make a series of controlled cuts instead of trying to excavate half the board in one heroic swing.
Sharpening: The Thing You Cannot Ignore
Here is the truth every woodworker eventually learns: dull chisels are harder to control, more frustrating to use, and often less safe than sharp ones. If your chisel crushes fibers instead of slicing them, it is not “sort of sharp.” It is a butter knife wearing a disguise.
Flatten the Back First
Before a new chisel is truly ready, the back needs flattening near the edge. You do not necessarily need to polish the entire blade into a mirror from handle to tip, but the first portion near the cutting edge should be flat and refined. This is what allows the edge to meet the wood cleanly and register accurately against surfaces.
Common Bevel Angles
For standard bench chisels, a 25-degree primary bevel is a common and practical starting point. Many woodworkers then add a small microbevel around 30 degrees for a quicker touch-up and a more durable edge. Paring chisels often use a lower angle for easier slicing, while tools meant for heavier work may benefit from a slightly steeper cutting angle.
The exact number is less important than consistency. An edge sharpened repeatably at a sensible angle beats a theoretically perfect angle that changes every time you touch a stone.
Sharpening Systems
Woodworkers love arguing about sharpening systems almost as much as they love buying clamps. The main options are water stones, oil stones, diamond stones, sandpaper-on-glass systems, and powered grinders for heavy reshaping. All of them can work.
If you are a beginner, a honing guide can be a lifesaver. It keeps the chisel at a fixed angle and helps you produce consistent, square bevels without needing years of practice. Freehand sharpening is a useful skill, but a guide removes variables and gets you to “sharp” faster. That is a win.
Maintenance Habits That Matter
Do not wait until a chisel is embarrassingly dull. Touch it up regularly. A few strokes on a stone at the correct angle are far easier than rebuilding a chipped, rounded edge from scratch. Keep your stones flat, keep your blades dry, and store chisels with edge guards or in a rack where the tips are protected. Rust and concrete floors are both deeply unimpressed by fine tool steel.
Safety Tips for Using Wood Chisels
Always cut away from your body and keep your off hand out of the danger zone. Clamp the work whenever possible. Use a wooden mallet instead of a metal hammer unless the tool is specifically designed for that abuse. Keep the edge covered when stored, and never toss chisels into a drawer where they can bang together and dull each other like bickering siblings.
Also, inspect used or old chisels carefully. If a blade is badly overheated, ground too short, or damaged at the edge, the bargain may not be such a bargain. A blue-tinted edge from overheating is a warning sign, not a charming personality trait.
Common Beginner Mistakes
- Buying too many specialty chisels before learning the basics.
- Ignoring sharpening until the tool barely cuts.
- Using the wrong chisel for the job, especially striking a paring chisel.
- Forcing deep cuts instead of taking light, controlled passes.
- Assuming expensive steel can compensate for poor technique.
- Storing chisels loose, unprotected, and one bad bump away from damage.
The fix for all of these is simple: use a basic set often, sharpen consistently, and let experience teach you what you actually need next.
Which Wood Chisels Should You Buy First?
If you want the practical answer, here it is: start with a quality set of bench chisels in 1/4 inch, 1/2 inch, 3/4 inch, and 1 inch. Add a honing guide, a reliable sharpening surface, and a small wooden mallet. Then build skill before building a giant collection.
Once you know your style of work, you can branch out. If you hand-cut lots of mortise-and-tenon joints, get a mortise chisel. If you love delicate joinery and flush trimming, add a long paring chisel. If you are drawn to Japanese tools, learn their setup and maintenance needs before diving in. There is no shame in starting small. In fact, starting small is usually how woodworking prevents starting expensive.
Shop Experience: What Wood Chisels Teach You Over Time
The first real lesson wood chisels teach is humility. On day one, a beginner often thinks a chisel is just a sharpened bar of steel with a handle. Then the first hinge mortise looks like a beaver chewed it during a stressful week, and suddenly the lesson arrives: technique matters, grain direction matters, sharpness matters, and patience matters most of all.
Over time, though, chisels become deeply personal tools. You learn that your 1/2-inch chisel is the one you reach for without thinking. You notice that your 1-inch chisel is not just for big work; it is often the best tool for precise paring because the width keeps it stable against a reference surface. You learn that a narrow chisel is wonderful until you twist it carelessly and remember, very vividly, why “light pressure” is not just a suggestion.
Experience also changes how you think about sharpening. At first, sharpening feels like a delay. You want to build the box, fit the drawer, hang the door, and move on with your life. Then one day you use a freshly honed chisel that glides through end grain like it has insider information, and suddenly sharpening stops feeling like maintenance and starts feeling like part of the craft. A sharp tool is not a separate topic from woodworking. It is woodworking.
Another lesson comes from repair work. Chisels are often the tools that save a project after other tools make the mess. A saw kerf wanders. A router bit leaves a fuzzy corner. A tenon shoulder needs one more whisper of trimming. A plug sticks up just enough to ruin your victory lap. The chisel steps in quietly and fixes the problem. That rescue role is one reason experienced woodworkers become so attached to them. They are not only cutting tools; they are correction tools.
Then there is the matter of control. Power tools are excellent for speed and repeatability, but chisels create a different relationship with the wood. You feel the density shift, the grain change, and the exact moment the edge begins to slice rather than scrape. That feedback teaches hand skills no machine can give you. It teaches restraint. It teaches accuracy. It teaches you when to stop before the wood argues back.
Perhaps the best experience of all is this: as your skills improve, chisels become less dramatic. That is a compliment. Instead of wrestling the tool, you simply use it. A shoulder gets pared. A mortise gets cleaned. A joint slips together. No fireworks, no fanfare, just the deeply satisfying sense that the tool did exactly what you asked because you finally learned how to ask properly. That is when woodworking gets especially fun.
So yes, wood chisels can seem old-fashioned in a world full of cordless everything. But in real shops, they remain among the most useful, precise, and satisfying tools you can own. Learn to choose them well, sharpen them often, and use them with intention, and they will reward you for years. Possibly decades. Possibly long enough that someone else inherits them and says, “Wow, whoever owned these knew what they were doing.” That is not a bad legacy for a humble strip of steel.
Conclusion
A good guide to wood chisels for woodworking really comes down to three ideas: choose the right type, keep it sharp, and use it with control. Bench chisels should be the foundation for most woodworkers, with paring and mortise chisels added only when your projects truly call for them. A small group of well-chosen sizes will handle the majority of shop tasks more effectively than a giant set you barely understand.
Just as important, sharpening is not optional. The best chisel in the world becomes frustrating when dull, while a modestly priced chisel can perform beautifully when the back is flattened and the edge is honed correctly. Pair that with smart technique, safe handling, and a little real shop experience, and a chisel becomes much more than a hand tool. It becomes one of the most precise and dependable partners in woodworking.