Table of Contents >> Show >> Hide
- Why Make Eggnog from Scratch?
- Homemade Eggnog Recipe (Cooked and Safe)
- How to Make It Taste Amazing (Not Just “Pretty Good”)
- Best Alcohol for Eggnog (Optional)
- Important Food Safety Tips for Homemade Eggnog
- How to Store Homemade Eggnog
- Homemade Eggnog Variations
- Troubleshooting a Homemade Eggnog Recipe
- Serving Ideas (Because Presentation Matters)
- Frequently Asked Questions
- Conclusion
- Experiences Related to “Homemade Eggnog Recipe” (Extended Notes)
If holiday drinks had a fancy awards show, eggnog would absolutely show up in velvet, over-accessorized with nutmeg, and somehow still win “Best Comfort Beverage.” A great homemade eggnog recipe is rich, creamy, lightly spiced, and miles fresher than the carton versionwithout tasting like melted candle wax and regret.
This guide gives you a safe, cooked homemade eggnog recipe (the kind that tastes amazing and won’t make your cautious relatives give you a side-eye), plus tips for flavor, texture, make-ahead prep, storage, and optional booze. It’s based on common techniques and ingredient patterns used by trusted U.S. food publishers and current U.S. food safety guidance, then rewritten into one practical, easy-to-follow version.
Why Make Eggnog from Scratch?
Because homemade eggnog tastes like the holidays actually showed up and did their job. When you make it yourself, you control:
- Sweetness: No sugar overload.
- Thickness: Go spoonable or sippable.
- Spices: Nutmeg-forward, vanilla-forward, or a cinnamon cameo.
- Alcohol: Keep it family-friendly or build a grown-up punch bowl.
- Food safety: Use a cooked custard base and sleep well.
The best homemade eggnog lands somewhere between a drink and a dessert: silky, custardy, and aromatic, with a soft finish from vanilla and nutmeg. It should taste festivenot heavy-handed.
Homemade Eggnog Recipe (Cooked and Safe)
Yield, Time, and Texture
- Yield: About 6 cups (6–8 servings)
- Prep time: 15 minutes
- Cook time: 10–15 minutes
- Chill time: 2 hours minimum (overnight is even better)
- Texture: Creamy, pourable, lightly custardy
Ingredients
- 6 large egg yolks
- 1/2 to 3/4 cup granulated sugar (start with 1/2 cup if you like less sweet)
- 2 cups whole milk
- 1 cup heavy cream
- 1/4 teaspoon fine salt
- 1/2 teaspoon ground nutmeg (plus more for garnish)
- 1 teaspoon pure vanilla extract
- Optional: 2–6 tablespoons bourbon, rum, or brandy (or a mix), to taste
- Optional garnish: whipped cream, cinnamon, cinnamon sticks, freshly grated nutmeg
Optional for a Frothier “Classic Party” Finish
- 2 pasteurized egg whites, whipped to soft peaks or lightly whipped cream folded in before serving
Equipment
- Medium saucepan (heavy-bottomed is ideal)
- Whisk
- Mixing bowl
- Fine-mesh strainer (highly recommended)
- Instant-read thermometer (best for confidence and consistency)
- Pitcher or jar for chilling
Step-by-Step Instructions
- Whisk the yolks and sugar.
In a medium bowl, whisk the egg yolks and sugar until the mixture looks lighter in color and slightly thickened. You’re not making a meringue herejust combining and smoothing things out. - Heat the dairy and spices.
In a saucepan, combine the milk, heavy cream, salt, and nutmeg. Warm over medium heat, stirring occasionally, until the mixture is steaming and just starting to simmer around the edges. Do not boil. - Temper the eggs.
Slowly pour about 1/2 cup of the hot milk mixture into the yolk mixture while whisking constantly. Repeat with another 1/2 to 1 cup. This gradual warming keeps the eggs from scrambling and keeps your holiday spirit intact. - Cook the custard base.
Pour the tempered egg mixture back into the saucepan. Cook over medium-low heat, whisking or stirring constantly, until it thickens slightly and reaches 160°F. It should coat the back of a spoon. - Strain and finish.
Remove from heat. Stir in vanilla extract and any alcohol (if using). Pour through a fine-mesh strainer into a clean pitcher or bowl to catch any tiny cooked bits and guarantee a silky texture. - Cool quickly.
Set the container in an ice bath (a bowl of ice and water) and stir for several minutes until no longer hot. This helps preserve texture and improves food safety. - Chill thoroughly.
Cover and refrigerate for at least 2 hours, preferably overnight. Eggnog tastes better once the flavors have time to mingle. (Yes, your fridge is basically the VIP lounge for flavor development.) - Serve.
Stir before pouring. Garnish with grated nutmeg and a little cinnamon, and top with whipped cream if you want it extra festive. For a frothier version, fold in whipped pasteurized egg whites or lightly whipped cream just before serving.
How to Make It Taste Amazing (Not Just “Pretty Good”)
1) Fresh Nutmeg Makes a Huge Difference
Pre-ground nutmeg works, but freshly grated nutmeg gives eggnog that unmistakable warm, aromatic holiday smell. It’s the difference between “Nice drink” and “Who made this and why are they not catering every family gathering?”
2) Don’t Overcook the Custard
Eggnog thickens more as it chills. If you cook it too far, it can turn overly thick or grainy. Aim for a light custard consistency at the stove, not pudding.
3) Balance the Sweetness
Store-bought eggnog is often very sweet. Homemade eggnog benefits from restraint. Start at 1/2 cup sugar, then taste after chilling. If needed, whisk in a little extra sugar or simple syrup before serving.
4) Add Alcohol After Cooking
If you’re making a boozy eggnog recipe, add spirits after the custard is cooked and removed from the heat. This preserves flavor and lets you control the final punch.
Best Alcohol for Eggnog (Optional)
A classic eggnog cocktail usually features one or a mix of these:
- Bourbon: warm vanilla and caramel notes
- Dark rum: molasses-like sweetness and spice
- Brandy: smooth, fruity, traditional holiday flavor
Easy starter ratio for this batch: 2 tablespoons bourbon + 2 tablespoons dark rum + 1 tablespoon brandy.
Taste and adjust. You can also set up an “add-your-own-spirit” station and keep the base nonalcoholic so everyone is happy.
Important Food Safety Tips for Homemade Eggnog
A lot of traditional eggnog recipes use raw eggs, but a cooked eggnog base is the safest and most widely recommended approach for homemade versionsespecially if serving kids, older adults, pregnant people, or anyone with a weakened immune system.
- Cook the egg mixture to 160°F for a safe custard base.
- If using uncooked eggs or egg whites in any variation, use pasteurized eggs or pasteurized egg products.
- Keep eggnog refrigerated and serve it cold.
- Don’t leave it sitting out for long at room temperature during parties.
- Alcohol does not reliably make raw-egg eggnog safe.
In other words: bourbon is a flavor strategy, not a food safety plan.
How to Store Homemade Eggnog
- Refrigerator: Store covered in the coldest part of the fridge (not the door).
- Best flavor window: 1–3 days for a cooked homemade eggnog recipe.
- Stir before serving: Separation is normal.
- Party rule: Return it to the fridge promptly after serving.
If you’re serving a crowd, pour out a smaller amount at a time and refill from a chilled pitcher instead of leaving the whole batch on the counter.
Homemade Eggnog Variations
Nonalcoholic Eggnog Recipe
Simply skip the alcohol. To boost flavor, add an extra 1/2 teaspoon vanilla and a tiny pinch of cinnamon or allspice. This version is great for kids and for anyone who just wants the creamy holiday vibes without the buzz.
Lighter Eggnog
Replace some or all of the heavy cream with more whole milk (or 2% milk). It won’t be as rich, but it’ll still taste festive. You can also reduce sugar slightly and let the spices do more of the heavy lifting.
Extra-Thick Eggnog
Use 7–8 yolks instead of 6, or reduce the milk by 1/2 cup. Chill overnight for even more body. This is the kind of eggnog that makes you consider dessert optional.
Spiced Eggnog
Add a small cinnamon stick while heating the milk and cream, then remove before straining. A pinch of cloves or allspice also works, but use a light handthis is eggnog, not potpourri.
Troubleshooting a Homemade Eggnog Recipe
Why is my eggnog lumpy?
The eggs likely cooked too quickly. Strain it while warm. If it’s only slightly grainy, a quick blend can often smooth it out.
Why is my eggnog too thin?
It may not have reached 160°F, or it hasn’t chilled long enough. Chill longer first; if needed, gently reheat and cook a bit more (carefully) next time.
Why is my eggnog too thick?
Stir in a splash or two of cold milk until it reaches your preferred consistency.
Why does it taste “eggy”?
Usually it needs more vanilla, nutmeg, chilling time, or a pinch more salt. Cold temperatures mellow egg flavor and improve balance.
Serving Ideas (Because Presentation Matters)
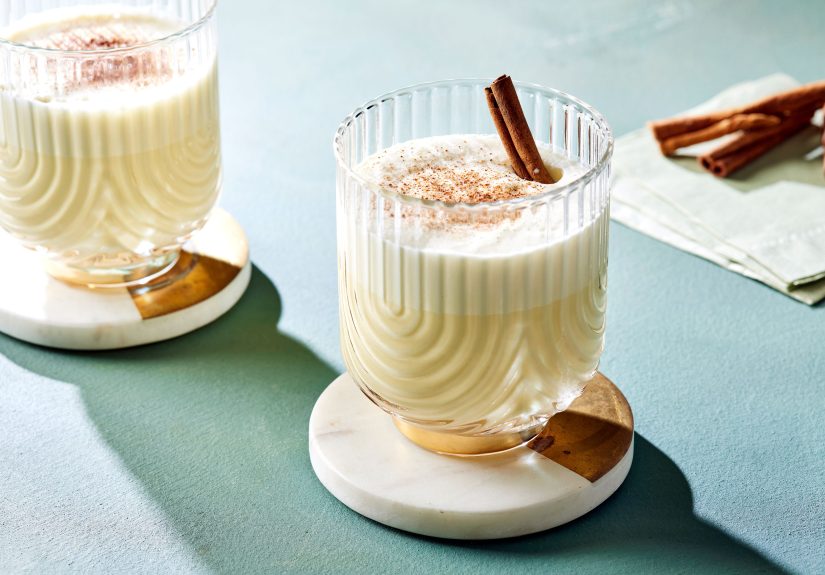
- Serve in small mugs, punch cups, or clear glasses to show off the creamy color.
- Garnish with freshly grated nutmeg right before serving for aroma.
- Add a cinnamon stick for a cozy look (and a built-in stirrer).
- Top with softly whipped cream for a dessert-style finish.
- Pair with gingerbread, sugar cookies, or pecan pie bars.
Frequently Asked Questions
Can I make homemade eggnog ahead of time?
Yes, and you should. A chilled overnight rest improves flavor and texture. Just stir before serving.
Can I freeze eggnog?
You can, but the texture may separate after thawing. If you freeze it, thaw in the refrigerator and whisk or blend before serving. Fresh is usually better for the creamiest results.
Do I need a thermometer?
It’s strongly recommended, especially for first-timers. Eggnog is easy, but a thermometer removes the guesswork and helps you nail the safe temperature and the right custard texture.
Can I use whole eggs instead of yolks?
Yes, but the texture will be a little lighter and less rich. Many classic recipes use separated eggs for a richer base plus optional whipped whites for foam.
Conclusion
A great homemade eggnog recipe is one of the easiest ways to level up the holiday season. With a cooked custard base, good dairy, real vanilla, and fresh nutmeg, you get a drink that’s creamy, balanced, and undeniably festivewithout the raw-egg guesswork. Whether you serve it alcohol-free for the family or spiked for a holiday gathering, homemade eggnog is one of those recipes that feels special every single time.
Make one batch, and there’s a very real chance you’ll become “the eggnog person” in your friend group. That’s a title worth keeping.
Experiences Related to “Homemade Eggnog Recipe” (Extended Notes)
One of the most common experiences people have with homemade eggnog is surpriseusually followed by, “Wait… this is way better than store-bought.” That reaction makes sense. Many first-time cooks expect eggnog to be difficult, finicky, or old-fashioned in a bad way. Instead, they find that it’s basically a simple custard technique in beverage form: heat, temper, whisk, chill, done. Once that clicks, homemade eggnog starts feeling less like a mysterious holiday ritual and more like a reliable seasonal recipe you can actually own.
Another very common experience is the “almost scrambled egg” moment. Nearly everyone who makes eggnog for the first time gets nervous during tempering. The hot milk goes in, the whisking speeds up, and for about ten seconds it feels like the recipe is one bad decision away from becoming sweet breakfast. The good news is that this is normal. With steady whisking and medium-low heat, the mixture usually comes together beautifully. And even if a few tiny bits cook too fast, straining fixes most mistakes. That’s why a fine-mesh strainer is such a confidence boosterit turns “I ruined it” into “actually, this looks silky.”
There’s also the experience of discovering your household’s “eggnog personality.” Some people love a thick, spoon-coating version with extra yolks and whipped cream on top. Others want it lighter, colder, and less sweetsomething they can sip casually while decorating the tree. In many homes, the best solution is a neutral base plus mix-ins at serving time. One person adds bourbon, another adds rum, someone else adds nothing and asks for extra nutmeg. Suddenly one recipe works for everybody, and no one has to argue over whether the bowl should be boozy.
Families with kids often report that nonalcoholic homemade eggnog becomes part drink, part tradition. It’s the thing that shows up during cookie baking, movie night, or the annual untangling-of-the-lights event. Kids may not care about custard technique, but they absolutely notice the garnish. A little whipped cream and cinnamon on top can turn a simple mug into a “holiday special.” For adults, that same base can later become a coffee add-in, an eggnog latte, or a weekend brunch treat. Homemade eggnog is one of those rare recipes that feels festive in multiple settings, not just one formal party.
A final experience many home cooks mention is how adaptable the recipe becomes after the first successful batch. Once you know the method, you stop reading it like a strict rulebook and start using it like a framework. You adjust the sugar, swap in more milk, add cinnamon sticks, or test a bourbon-brandy blend. You learn how long your fridge needs to chill it to your preferred thickness. You learn that stirring before serving matters. You learn that freshly grated nutmeg does in fact make you feel like a very competent person. And that’s the beauty of homemade eggnog: it starts as a recipe, but it often turns into a holiday signature.