Table of Contents >> Show >> Hide
- Why Make a Homemade Pole Pruner?
- What a Pole Pruner Actually Does
- Before You Build: Safety Rules You Cannot Ignore
- Best Homemade Pole Pruner Design (Beginner-Friendly)
- Advanced DIY Version: Rope-Operated Homemade Pole Pruner
- How to Use a Homemade Pole Pruner Without Butchering the Tree
- When to Prune (So Your Tree Doesn’t Hate You)
- Common Homemade Pole Pruner Mistakes (and Easy Fixes)
- Maintenance for Your DIY Pole Pruner
- When a Homemade Pole Pruner Is Not Enough
- Conclusion
- Extra 500-Word Experience Section: Real-World Homemade Pole Pruner Lessons
If you’ve ever stared at a branch just out of reach and thought, “I can absolutely handle this without hiring a full tree crew,” welcome. You are among friends. A homemade pole pruner can be a smart, budget-friendly tool for light pruningif you build it thoughtfully and use it with a safety-first mindset.
This guide walks you through how to make a practical homemade pole pruner, what materials work best, what not to do (there are a few surprisingly creative mistakes), and how to prune correctly so your tree stays healthy instead of looking like it lost an argument with a lawn mower.
Important note: A DIY pole pruner is best for small branches and routine maintenance from the ground. If branches are large, heavy, storm-damaged, or anywhere near power lines, stop and call a certified arborist.
Why Make a Homemade Pole Pruner?
A store-bought pole pruner is great, but not everyone wants to spend the money right awayespecially if you only need it a few times a year. A homemade version can help you:
- Reach light branches safely from the ground
- Avoid risky ladder pruning for simple jobs
- Repurpose tools you already own
- Customize reach for your yard’s tree height
- Learn better pruning habits before investing in premium equipment
The key is to build for control, not maximum reach. The longer the pole, the harder it becomes to aim, stabilize, and avoid accidental damage to bark, fences, gutters, or your dignity.
What a Pole Pruner Actually Does
Most pole pruners are either:
- Pole saws (a pruning saw blade on a long pole)
- Rope-operated pole pruners (a hooked cutting head with a blade moved by pulling a rope)
- Combination tools (both a saw and rope pruner head)
For a homemade build, the easiest and most reliable project is a pole saw. A rope-operated cutting head is more advanced but still doable if you use quality hardware and keep expectations realistic.
Before You Build: Safety Rules You Cannot Ignore
1) Never use it near power lines
This is the big one. If branches are near utility lines, do not DIY it. Not with a wood pole. Not with a fiberglass pole. Not “just for one quick cut.” Utility-line clearance work is specialized for a reason.
2) Stay on the ground
A homemade pole pruner is supposed to reduce ladder use, not become a balancing act accessory. If you find yourself thinking, “I’ll just climb one step to get a better angle,” that’s your sign to stop.
3) Limit branch size
DIY tools are for small, manageable limbs. As a rule of thumb:
- Rope-pruner head DIY: best for green branches around 1/2 to 1 inch (depending on blade quality and leverage)
- Pole saw DIY: often workable for branches up to about 1.5 to 2 inches, depending on wood species and pole stability
If a branch is heavy enough to swing, split, or drop unpredictably, it is no longer a “casual Saturday project.”
4) Wear basic protective gear
- Safety glasses or face shield
- Gloves with grip
- Long sleeves
- Sturdy shoes (not sandals, not flip-flops, not “yard crocs”)
- A hard hat if you’re working under dense canopy or deadwood
Best Homemade Pole Pruner Design (Beginner-Friendly)
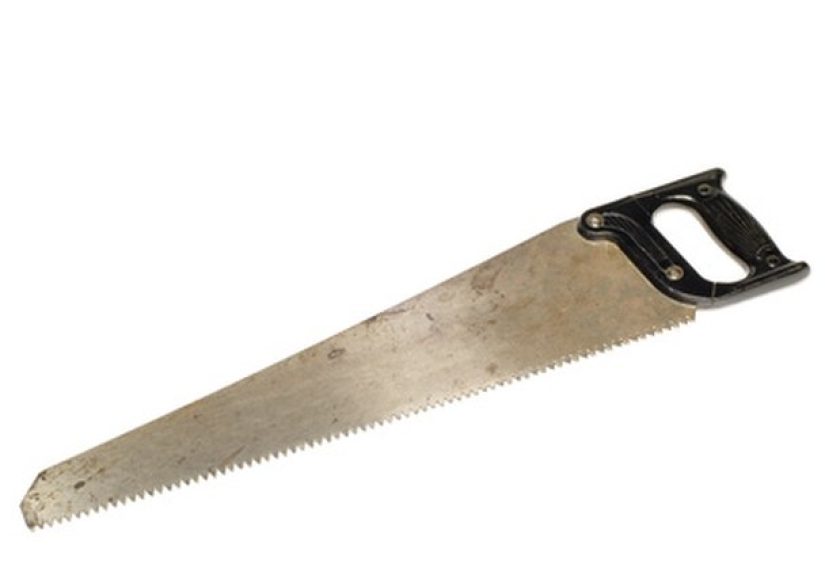
Option A: Homemade Pole Saw (Recommended)
This is the most dependable DIY setup for homeowners. It is simple, cheap, and less fussy than a rope-and-blade system.
Materials
- A pruning saw blade (replacement blade or compact pruning saw head)
- A sturdy pole (fiberglass extension pole, painter’s pole, or straight hardwood pole)
- 2 U-bolts or heavy-duty hose clamps (stainless steel preferred)
- Flat metal bracket or mounting plate (optional but helpful)
- Rubber strip or old inner tube (for grip and anti-slip mounting)
- Lock nuts / washers (if using U-bolts)
- Drill (if mounting through a bracket)
- Wrench / screwdriver
- Sandpaper (to smooth pole handle area)
- Bright tape (for visibility and marking max hand position)
Why fiberglass is usually the best choice
Fiberglass poles are lightweight, durable, and easier to control than many long wooden poles. They also resist flex better than some bargain extension setups. Aluminum can be strong, but it conducts electricity and is a poor choice for pruning work in typical yards where overhead hazards may exist.
Step-by-Step Build
- Choose the right pole length.
Start shorter than you think. A 6–10 foot pole is often more useful than an awkward 16-foot noodle. You can always upgrade later.
- Prepare the mounting end.
Clean the pole tip and wrap a thin rubber strip where the saw will sit. This reduces slipping and protects the pole surface.
- Position the saw blade.
Mount the blade so the cutting teeth face the correct stroke direction (many pruning saws cut on the pull stroke). Keep the blade aligned with the pole’s centerline for better control.
- Secure the blade with U-bolts or clamps.
Tighten evenly. If using a bracket, sandwich the saw tang between bracket and pole for a stronger mount. No wobble allowed.
- Test at waist height first.
Make a few cuts on scrap branches before raising the tool. If the blade shifts, stop and rebuild the mount.
- Add visibility tape and grip marks.
Wrap bright tape near the lower grip and at your “do not choke up past here” line. This sounds silly until you use it under a leafy canopy.
Advanced DIY Version: Rope-Operated Homemade Pole Pruner
If you want to cut live branches more cleanly than a saw, a rope-operated cutting head can be excellentbut only if it’s built with the right parts. The easiest route is to use a replacement pole-pruner head (or a salvaged manual pole pruner head) and attach it to your pole securely.
Materials (Advanced Build)
- Pole-pruner cutting head (hook + blade assembly)
- Fiberglass or hardwood pole
- Mounting bolts / brackets (matching head design)
- Pulley or rope guide (if not built into the head)
- Pruning rope (smooth, durable, non-stretch)
- Return spring (optional, depending on head design)
- Mechanical fasteners (not just glue)
Important: Do not improvise a cutting head with random sheet metal and a utility blade. That’s not a pole pruner. That’s a future emergency room story.
How to Set It Up Correctly
- Mount the cutting head firmly to the pole tip using bolts and a matching ferrule or bracket.
- Route the rope through the head’s pulley/guide so the pull action closes the blade smoothly.
- Test blade return action at shoulder height before overhead use.
- Trim rope length so it clears your feet but still allows a full pull stroke.
- Add a small rope handle or knot for grip control.
This type of DIY build can produce cleaner cuts on smaller living branches than a saw, especially when you are trying to remove a twiggy branch without tearing bark.
How to Use a Homemade Pole Pruner Without Butchering the Tree
Know what to cut
Start with the easy wins:
- Dead twigs and deadwood
- Broken tips
- Crossing branches (small diameter only)
- Low-risk branches rubbing against structures (if safely reachable)
- Water sprouts or suckers in accessible areas
Avoid major structural pruning with a homemade tool unless you know exactly what you’re doing and the cuts are small.
Use the 3-cut method for heavier limbs
If a limb is large enough that bark could tear when it falls, don’t make one dramatic hero cut. Use the three-cut method:
- Undercut first a short distance from the trunk or parent branch.
- Top cut second slightly farther out to remove the limb’s weight.
- Final cut just outside the branch collar (not flush to the trunk, and not leaving a stub).
This helps protect the branch collar and bark, which matters because proper cuts seal and compartmentalize better over time.
Don’t “top” trees
Cutting the top off a tree or making random heading cuts to force it shorter is a classic mistake. It can stress the tree, trigger weak regrowth, and create long-term structure problems. A homemade pole pruner should be used for selective pruning, not tree torture.
When to Prune (So Your Tree Doesn’t Hate You)
There’s no one-size-fits-all schedule for every species, but these general timing rules work for many home landscapes:
- Dead, damaged, or diseased branches: remove promptly when noticed
- Many deciduous trees: late winter / dormant season is often ideal for structure pruning
- Spring-flowering trees: prune soon after bloom if you want to preserve next year’s flowers
- Light summer pruning: can help reduce growth in some cases, but avoid heavy stress during extreme heat
If you’re unsure, look up the species-specific pruning window before making multiple cuts. Good pruning is half timing, half technique.
Common Homemade Pole Pruner Mistakes (and Easy Fixes)
Mistake #1: Pole is too long and whippy
Fix: Shorten it. A controlled 8-foot tool beats a floppy 14-foot regret stick every time.
Mistake #2: Dull blade
Fix: Sharpen or replace the blade. Dull tools crush tissue, tear bark, and make you work harder.
Mistake #3: Loose mounting hardware
Fix: Check all fasteners before each session. Vibration loosens hardware faster than people expect.
Mistake #4: Cutting too close to the trunk
Fix: Find the branch collar and cut just outside it. Do not make flush cuts.
Mistake #5: Using it from a ladder
Fix: Don’t. Reposition, shorten the scope of work, or call a pro.
Maintenance for Your DIY Pole Pruner
A homemade pole pruner only stays “clever” if it keeps working. Here’s the maintenance routine:
- Clean sap and debris after each use
- Dry metal parts before storage
- Lightly oil blade and moving parts
- Sharpen cutting edges regularly
- Disinfect blades when moving between diseased and healthy plants
- Inspect rope for fraying (rope-operated version)
- Check clamps/bolts for looseness
- Store indoors or under cover
If bleach is used for disinfection, rinse and dry tools afterward to reduce corrosion. Many homeowners prefer alcohol-based disinfection for convenience, but the best choice can depend on the disease issue you are dealing with.
When a Homemade Pole Pruner Is Not Enough
Here’s your “be honest with yourself” checklist. Call a professional if:
- The branch is near power lines
- The cut is above your control range
- The limb is heavy enough to damage property if it swings
- The tree is cracked, storm-damaged, or leaning
- You need a chainsaw overhead
- You’re tempted to stand on a roof or ladder
A good DIYer knows when the safest tool is a phone call.
Conclusion
A homemade pole pruner can absolutely earn a place in your garageespecially if you build a simple, sturdy pole saw or retrofit a proper rope-pruner head. The secret isn’t fancy hardware. It’s using the right materials, keeping cuts small, pruning with tree health in mind, and refusing to turn a basic yard task into a stunt.
Build it for control. Use it from the ground. Make clean cuts. Stop when the job becomes risky. Your trees (and your future self) will thank you.
Extra 500-Word Experience Section: Real-World Homemade Pole Pruner Lessons
Below is a realistic, experience-based composite of what many homeowners run into when they first start using a homemade pole pruner.
The first time most people use a homemade pole pruner, they learn the same lesson in about thirty seconds: overhead pruning looks easy until the branch is above your face and the pole suddenly feels twice as heavy. A branch that seemed “tiny” from the patio can look suspiciously sturdy once your saw teeth touch bark. That moment is actually a giftit forces you to slow down, get your stance right, and make a better decision.
One common experience is overbuilding the tool. People start with a long pole because they want “maximum reach,” then discover the tool flexes, twists, and drifts off target. After a few wobbly attempts, they shorten the pole by two feet and suddenly everything improves. The cuts become cleaner, the tool feels predictable, and the whole job goes faster. In other words: less reach, more control, better results.
Another frequent surprise is how much difference a sharp blade makes. Homeowners often test a DIY pole saw with an older blade sitting in the garage and think the design is the problem. Then they install a fresh pruning saw blade and the same tool starts cutting smoothly. The branch drops cleanly, the bark doesn’t tear, and confidence goes up immediately. The homemade setup wasn’t the weak pointthe dull blade was.
People also tend to underestimate cleanup and planning. The most successful DIY pruning sessions usually start with five quiet minutes of prep: looking up for hazards, identifying where the branch will fall, moving patio furniture, and clearing the ground so nobody trips over a hose mid-cut. It’s not glamorous, but it turns the project from “chaotic yard wrestling” into a controlled task.
There’s also a learning curve with pruning judgment. Beginners often want to remove every branch that looks messy. Then they step back and realize they’re about to over-prune. A better approach is to make one or two cuts, walk back, and reassess the tree’s shape. Many experienced gardeners develop a rhythm: cut, step back, squint, sip water, cut again. Trees reward patience.
And finally, nearly everyone has a moment where they wisely stop. Maybe a limb is heavier than expected. Maybe the angle is wrong. Maybe the branch is closer to a wire than it looked from the ground. That decision to stop is not failureit’s exactly what smart DIY yard work looks like. The homemade pole pruner still did its job: it handled the safe cuts and revealed where professional help was appropriate.
The best long-term experience with a homemade pole pruner is not “I can cut anything now.” It’s “I know what I can do safely, and I can do it well.” That’s a much better skill, and it tends to keep both trees and homeowners in far better shape.