Table of Contents >> Show >> Hide
- Why blanch cauliflower before freezing?
- What you’ll need
- Step-by-step: blanch and freeze cauliflower
- 1) Choose cauliflower worth freezing
- 2) Wash, trim, and cut into even pieces
- 3) Optional (but handy): a quick brine soak for insects
- 4) Set up your blanching station (before the boiling starts)
- 5) Blanch (boiling water method)
- 6) Shock in an ice bath (cooling matters as much as blanching)
- 7) Drain and dry thoroughly
- 8) Freeze in the style that fits your future plans
- 9) Package to prevent freezer burn
- Blanching times, altitude notes, and “don’t wing it” rules
- How long does frozen cauliflower last?
- How to cook with frozen cauliflower (no thaw required)
- Troubleshooting: common cauliflower freezer problems
- Food safety notes (quick but important)
- FAQs
- Real-life experiences and “wish-I-knew” tips (about )
- Conclusion
Cauliflower is one of those “blink and it’s floppy” vegetables: crisp and proud on Tuesday, somehow sad and speckled by Friday. Freezing solves thatif you do one key step first: blanching. Think of blanching as pressing the pause button on cauliflower’s natural aging process. It takes minutes now and saves you from pulling out a freezer bag later that tastes like… polite disappointment.
In this guide, you’ll learn exactly how to blanch and freeze cauliflower (florets, stems, and all), the right timing, how to avoid mush, and the best ways to package it so freezer burn doesn’t move in rent-free.
Why blanch cauliflower before freezing?
Cauliflower (like most vegetables) contains enzymes that keep working after harvest. In the fridge, those enzymes slowly dull flavor, change color, and soften texture. In the freezer, the cold slows them down, but doesn’t reliably stop them. Blanchingbriefly heating in boiling water or steaminactivates those enzymes so your frozen cauliflower stays brighter, sweeter, and less “sulfur-y” over time.
Bonus perks: blanching also rinses away surface dirt and reduces microorganisms. It’s mainly a quality step (not a magical sterilizer), but it’s the difference between “tossed into a curry” and “why does this smell like a science fair?”
What you’ll need
- Fresh cauliflower (1–2 heads, or more)
- Large pot (big enough to keep water boiling strongly)
- Basket/strainer or slotted spoon (to lift florets fast)
- Big bowl or clean sink for an ice bath
- Ice (yes, real icethis isn’t the time for “tap water optimism”)
- Clean towels or paper towels (for drying)
- Freezer bags or freezer-safe containers
- Marker + labels (Future You will be grateful)
- Sheet pan (optional, for “tray freezing” so pieces don’t clump)
Step-by-step: blanch and freeze cauliflower
1) Choose cauliflower worth freezing
Pick heads that are compact, firm, and creamy white (or the natural color for purple/orange varieties), with tight florets and minimal browning. Limp cauliflower can be frozen, but it will not miraculously come back with a better attitude.
2) Wash, trim, and cut into even pieces
Remove the leaves and trim the stem end. Cut cauliflower into florets about 1 inch across. Try to keep pieces similar in size so they blanch evenly. Thick stem pieces are totally usablejust cut them into smaller chunks (about 1/2–1 inch) so they heat through in the same time.
3) Optional (but handy): a quick brine soak for insects
If your cauliflower is garden-fresh (or you simply don’t trust nature’s tiny stowaways), soak the pieces for about 30 minutes in a salt-water solution (a common home-preservation ratio is a few teaspoons of salt per gallon of water), then drain and rinse. If you’re using store-bought cauliflower and it looks clean, feel free to skip this step.
4) Set up your blanching station (before the boiling starts)
Organization is the secret ingredient here.
- Pot of water: Fill a large pot with water and bring it to a rolling boil. Use enough water that it will return to a boil quickly after you add cauliflower.
- Ice bath: While the water heats, fill a large bowl (or clean sink) with cold water and plenty of ice. You want it truly cold so cooking stops fast.
- Dry zone: Lay out clean towels or paper towels near your packaging area.
- Timer: Blanching is not the moment for “I’ll just eyeball it.”
5) Blanch (boiling water method)
When the water is at a strong, rolling boil, add cauliflower in batches. Don’t crowd the potif the boil dies, your timing becomes guesswork, and guesswork leads to mush.
Blanching time for cauliflower florets (about 1 inch): 3 minutes.
- Lower the florets into boiling water (a basket makes this easy).
- Cover the pot if you canthis helps the water return to a boil quickly.
- Start timing when the water returns to a full boil.
- Blanch for the full time, keeping heat high.
Steam blanching option: You can steam blanch if you prefer, but it generally takes longer (often about 1.5 times as long as boiling-water blanching). For cauliflower, that commonly lands around 5 minutes for florets.
6) Shock in an ice bath (cooling matters as much as blanching)
As soon as the blanching timer ends, immediately transfer the cauliflower into the ice bath. Stir it around so all pieces cool evenly. Let it cool for about the same length of time you blanched (so, roughly 3 minutes for water-blanched florets). This step stops cooking and protects texture.
7) Drain and dry thoroughly
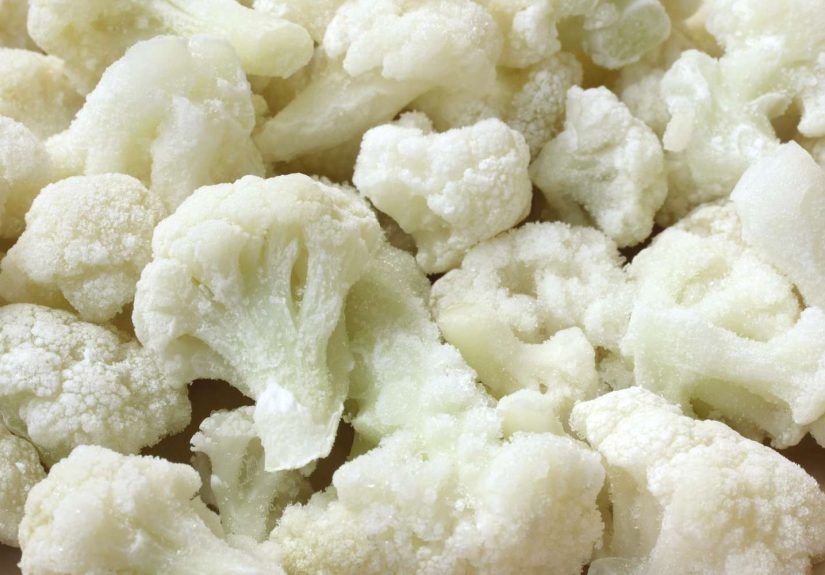
Drain the cooled cauliflower very well. Excess water turns into extra ice crystals, which can damage texture and encourage freezer burn over time. If you have the patience, pat the florets dry with a towel. You don’t need them bone-dryjust not dripping like they took a swimming lesson.
8) Freeze in the style that fits your future plans
Option A: Tray-freeze (best for “grab a handful” convenience)
Spread dried florets in a single layer on a parchment-lined sheet pan. Freeze until solid (usually a few hours). Then transfer to freezer bags or containers. This prevents clumping so you can pour out exactly what you need.
Option B: Direct pack (best for speed)
Skip the tray and pack drained florets right away into freezer bags/containers. You may get some clumping, but it still works great for soups, casseroles, and blended dishes.
9) Package to prevent freezer burn
Air is the enemy of frozen vegetables. Use freezer-grade bags or containers and remove as much air as possible. For bags: press out air, seal, and freeze flat for efficient storage. For rigid containers: leave a little headspace if your container requires it for expansion (especially with wide-mouth jars designed for freezing).
Label everything with “Cauliflower,” the date, and the format (“florets,” “stems,” “ready for soup,” etc.). Future You should not have to play “Freezer Mystery Roulette.”
Blanching times, altitude notes, and “don’t wing it” rules
For standard cauliflower florets (about 1 inch), 3 minutes in boiling water is the widely recommended sweet spot. But a few factors can change your results:
- Altitude: If you’re at higher elevation (commonly cited around 5,000 feet and above), blanching may need a bit more time (often about 4 minutes for cauliflower) because water boils at a lower temperature.
- Piece size: Larger chunks heat slower. Keep pieces consistent and close to 1 inch for predictable results.
- Batch size: Too much cauliflower at once drops the water temperature. Work in batches so the water returns to a boil quickly.
- Microwave blanching: Many food-preservation programs don’t recommend it for consistent enzyme inactivation. If you care about long-term quality, stick with boiling water or steam.
How long does frozen cauliflower last?
If kept at 0°F (-18°C) or below, frozen cauliflower stays safe for a long time. Quality, however, is a different story. For best taste and texture, aim to use it within about 8–12 months. Some preservation guides suggest it can hold high quality even longer when packaged very well and frozen quicklybut most home cooks find the sweet spot is within the first year.
How to cook with frozen cauliflower (no thaw required)
Most of the time, you can cook cauliflower straight from frozen. In fact, thawing can make it watery (especially for roasting). Here are easy ways to use it:
Roasted cauliflower (best for texture)
Heat oven to 425°F. Toss frozen florets with oil, salt, pepper, garlic powder, and smoked paprika. Roast on a hot sheet pan (don’t crowd it) until browned at the edges, about 25–35 minutes. Finish with lemon or Parmesan.
Soups and stews (the freezer’s natural habitat)
Add frozen florets directly to simmering soup. They soften quickly and blend beautifully into creamy cauliflower soup (even without cream).
Cauliflower mash
Simmer frozen cauliflower until very tender, drain well, then mash or blend with butter/olive oil, salt, pepper, and a little roasted garlic. Drain thoroughly so it doesn’t become “cauliflower puddle.”
Stir-fries and curries
Toss frozen florets into a hot skillet or wok near the end of cooking. They’re already partly cooked from blanching, so they don’t need long.
What about cauliflower rice?
Cauliflower rice is often frozen without blanching for convenience, but texture can vary. If you freeze it raw, freeze flat in thin layers and plan to cook it straight from frozen in a hot pan to drive off moisture. If you’re picky about texture over long storage, freezing florets (blanched) and ricing later tends to keep quality more consistent.
Troubleshooting: common cauliflower freezer problems
“It’s mushy.”
- Likely cause: Overblanching, pieces cut too small, or thawing before cooking.
- Fix: Keep florets near 1 inch, blanch for the recommended time, cool fast, and cook from frozen when possible.
“It tastes strong or smells extra cabbage-y.”
- Likely cause: Underblanching (enzymes kept working in the freezer) or older cauliflower.
- Fix: Blanch fully, freeze quickly, and use within the best-quality window.
“There’s ice/frost inside the bag.”
- Likely cause: Not draining/drying enough, or a bag that wasn’t sealed airtight.
- Fix: Drain better, tray-freeze, remove air, and use freezer-grade packaging.
“Freezer burn.”
- Likely cause: Air exposure over time.
- Fix: Squeeze out air, use thicker bags (or vacuum seal), freeze flat, and don’t store near the freezer door.
Food safety notes (quick but important)
Freezing keeps food safe by stopping bacterial growth, but it doesn’t necessarily kill bacteria already present. Start with clean hands, clean equipment, and fresh cauliflower. Keep your freezer at 0°F (-18°C) or below, and when in doubt about an off smell beyond normal “cabbage vibes,” trust your senses and toss it.
FAQs
Can I freeze cauliflower without blanching?
You can, and it will be safebut quality usually drops faster (color, flavor, and texture). If you’re freezing for more than a short stint, blanching is the best practice for top results.
Should I blanch in salted water?
Many preservation recipes use lightly salted water, and some also use a salt-water soak to help remove insects. It’s not strictly required for enzyme control, but it can help with flavor and traditional preservation workflows.
Do I need to cool in ice water, or is cold tap water enough?
Ice water is best because it stops cooking quickly. Cold tap water can work if it stays very cold and you change it often, but ice is more reliable.
What’s the best way to store portions?
Freeze in recipe-sized bags: 1–2 cups for sides, 3–4 cups for soups, and “one sheet-pan’s worth” if roasting is your go-to. Flatten bags for faster freezing and easier stacking.
Real-life experiences and “wish-I-knew” tips (about )
The first thing people notice when they start freezing cauliflower is that the process is strangely fastright up until it isn’t. One minute you’re cutting florets, and the next minute you’re juggling boiling water, ice baths, dripping colanders, and a freezer drawer that suddenly feels too small for modern life. The trick is to set up like you’re hosting a tiny cooking show: everything within arm’s reach, timer ready, ice bath already icy, bags opened and labeled before the first floret ever meets the pot. That small bit of prep turns the whole job from chaotic to smooth.
Another common “aha” moment: batch size matters more than enthusiasm. It’s tempting to dump in half a head of cauliflower to “save time,” but if the water stops boiling hard, your blanch becomes a lukewarm spa day. That’s how you end up with frozen cauliflower that looks fine but develops that dull color and stronger odor later. Smaller batches feel slower, but they’re actually faster in total because you’re not redoing anythingand the water returns to a boil quickly, which keeps timing accurate.
Then there’s the ice bath. People try to shortcut it with cold water and a prayer, and sometimes it works… until it doesn’t. Cauliflower holds heat in the thicker stem pieces, and without truly cold water (and enough of it), the florets keep cooking. Overcooked cauliflower is basically destined for soup, which is not a tragedy, but it’s not what you wanted when you pictured crisp-tender roasted florets in February. If you’re processing a lot, keep an extra bag of ice on standby. Ice is cheaper than regret.
Packaging is where the “looks fine now” problems are born. The most common freezer-burn scenario is a bag that’s mostly sealed, but not quitelike a zipper that missed one tiny corner. Press out air, seal carefully, and freeze bags flat so they chill quickly. Flat bags also stack nicely, which means you’ll actually use what you froze instead of finding it during a future archaeological dig. If you tray-freeze first, you’ll also avoid the “frozen cauliflower boulder” problem, where you have to bang the bag on the counter like you’re trying to start a lawnmower.
Finally, there’s the usage lesson: frozen cauliflower shines in dishes where texture isn’t the only star. It roasts surprisingly well if you don’t thaw it (high heat, plenty of space on the pan), and it’s fantastic in blended soups, curries, casseroles, and mash. If you thaw it first, it tends to release water, which can make things soggy. When in doubt, cook from frozen and let heat do the work. The biggest win is psychological: once you’ve got neatly labeled cauliflower in the freezer, weeknight cooking gets easierlike you gave your future self a small, thoughtful gift that tastes like dinner.
Conclusion
Blanching and freezing cauliflower is simple once you nail the rhythm: cut evenly, blanch for the right time, cool fast, dry well, package airtight, and freeze quickly. Do it right and you’ll have cauliflower ready for roasting, soups, mash, and quick stir-fries without the panic of produce going bad in the fridge. Your freezer can be a tool of peace, not a museum of forgotten vegetables.