Table of Contents >> Show >> Hide
- Why the Belt Matters More Than You Think
- How to Choose the Right Sanding Belt
- 1) Match the Belt Size (Width × Length)
- 2) Pick the Right Grit (Your Scratch Pattern Strategy)
- 3) Choose the Abrasive Material (What the Grit Is Made Of)
- 4) Backing and Coating: The Belt’s “Skeleton” and “Anti-Clog Armor”
- 5) The Joint (Splice) and Direction Arrows: The Sneaky Detail That Saves Your Belt
- 6) What “Good Quality” Looks Like (Without Needing a Lab Coat)
- How to Change a Belt Sander Belt (Step-by-Step)
- Troubleshooting: When the Belt Misbehaves
- Make Your Belts Last Longer (And Save Money)
- Safety Stuff That Saves Fingers (and Pride)
- Conclusion
- Shop Stories & Lessons Learned (Real-World Experience)
A belt sander is basically a gym treadmill for sandpaperexcept instead of counting steps, it counts how many tiny mistakes you can erase from a board in 3 seconds flat.
The only catch? The belt you choose (and how you install it) decides whether your sander behaves like a smooth-cutting superhero… or like a shopping cart with one cursed wheel.
This guide will help you pick the right sanding belt for your project, swap it safely, and dial in tracking so the belt stays centered. We’ll also cover grit strategy,
abrasive materials, backing types, belt joints, and the small maintenance habits that make belts last longer (and make you look more competent than you feel).
Why the Belt Matters More Than You Think
Belt sanders remove material fast. That’s the appealand the danger. With the wrong belt, you can burn wood, clog the abrasive, carve trenches, round over edges you wanted crisp,
or turn your “quick smoothing” into a “why is my tabletop shaped like a potato chip?” moment.
The right belt gives you:
quick cutting without overheating, predictable scratch patterns, less clogging, and better control. The right installation gives you:
stable tracking, fewer torn belts, and fewer “why is it screaming?” sounds.
How to Choose the Right Sanding Belt
1) Match the Belt Size (Width × Length)
Start with the least glamorous step: buy the size your sander actually uses. Belt sizes are written as width × length (for example, 3" × 21").
Common handheld sizes include 3" × 21" and 3" × 18", while benchtop/combination sanders often use different lengths (like 4" × 24").
The easiest way to confirm size:
check the old belt (it’s usually printed on the inside), check the label on the tool, or check your owner’s manual.
If you “eyeball it,” you’ll eventually own a beautiful collection of belts that fit absolutely nothing.
2) Pick the Right Grit (Your Scratch Pattern Strategy)
Grit is the “how aggressive are we being?” number. Lower numbers are coarser and remove material faster; higher numbers refine and smooth.
Belt sanders excel at the early stages: leveling, flattening, removing finish, and shaping. For truly fine finishing, you’ll often switch to a random-orbit sander afterward.
Practical grit ranges (typical woodworking and DIY use):
- 36–60 grit: Heavy removal (paint/finish stripping, flattening glued panels, leveling proud joints).
- 80–120 grit: General smoothing, blending, and removing coarse scratches.
- 150–220 grit: Lighter refinement and prep (often better done with a different sander for a cleaner finish).
A simple progression that behaves well:
60 → 80 → 120 for most rough-to-smooth work. If you start at 36, it’s powerfuljust remember it can also remove your optimism.
3) Choose the Abrasive Material (What the Grit Is Made Of)
Not all sanding belts are the same “sand.” The abrasive grain affects cutting speed, heat, and belt life. Pick based on what you’re sanding:
-
Aluminum oxide: The all-purpose workhorse for wood. Good cut, good value, common everywhere.
If you’re sanding hardwoods, softwoods, plywood, or general DIY surfaces, this is usually the default choice. -
Zirconia alumina (often just called “zirconia”): More aggressive, longer-wearing, and often a better choice for tougher jobsespecially metal or heavy stock removal.
Great when aluminum oxide feels like it’s giving up early. -
Ceramic: Premium performance, especially under higher pressure or on harder materials. Often runs cooler and lasts longer in demanding work,
but can be overkill for light hobby sanding. -
Silicon carbide: Very sharp and commonly recommended for certain metals (especially non-ferrous) and harder/slicker materials like plastics.
Also used for specialty sanding needs.
Quick examples:
If you’re flattening a hardwood butcher-block glue-up, zirconia or ceramic can stay sharp longer.
If you’re removing old paint from trim (and it clogs easily), the coating/backing choice matters as much as grit.
If you’re shaping metal brackets, zirconia/ceramic is usually the right kind of “angry.”
4) Backing and Coating: The Belt’s “Skeleton” and “Anti-Clog Armor”
The backing is the material holding the abrasive. Many quality belts are cloth-backed (durable, flexible enough for rollers),
and the cloth is often rated by weight (like J, X, Y). The bigger/heavier the backing, the tougher and stiffer it tends to be.
- J-weight: More flexible, good for contours and lighter pressure.
- X-weight: A common all-around choicedurable for general sanding and stock removal.
- Y-weight: Heavy-duty backing built for higher pressure and more punishing work (often seen in industrial/metal applications).
Coating matters too:
open-coat belts have more space between grains, which helps resist clogging (great for softwoods, resinous woods, and finish removal).
closed-coat belts pack more abrasive per square inch for potentially faster cutting, but they can load up sooner on gummy materials.
Some belts also have anti-loading coatings (often called stearated) that help keep dust from packing in.
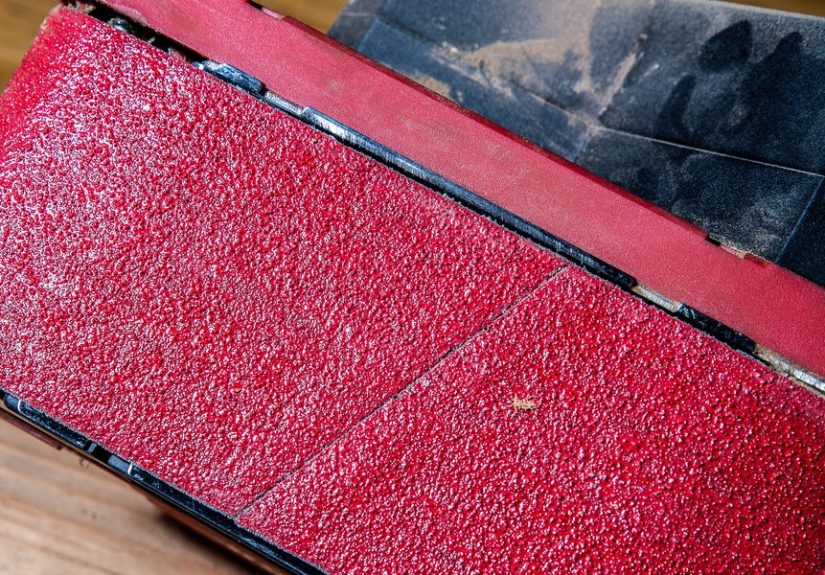
5) The Joint (Splice) and Direction Arrows: The Sneaky Detail That Saves Your Belt
Sanding belts are a loop, which means there’s a joint where the ends meet. Common joint styles include lap joints and butt/tape joints.
Why you care: some joints are directional, and some are smoother-running than others.
If your belt has arrows printed inside, follow them. Directional belts are meant to run one way so the seam doesn’t catch or lift.
If the belt is installed backward, it can track poorly, wear prematurely, or feel bumpier.
Rule of thumb:
arrows on belt = match the arrow on the sander’s housing. No arrows usually means it can run either direction.
(And yes, ignoring arrows is a great way to invite chaos into your workshop.)
6) What “Good Quality” Looks Like (Without Needing a Lab Coat)
When you’re comparing belts, look for:
strong, clean seams; even grit coverage; sturdy edges; and a backing that doesn’t feel like it will tear if you look at it sternly.
If you do a lot of sanding, better belts usually save money because you replace them less often (and they waste less of your life).
How to Change a Belt Sander Belt (Step-by-Step)
Before You Start: Safety and Setup
- Unplug the tool (or remove the battery). This is non-negotiable.
- Wear eye protection. Add hearing protection if you value your inner peace.
- Clamp your workpiece when possible. A belt sander can “walk” a board right off the bench.
- If you’re sanding dusty materials, use a dust bag or vacuum, and consider a respirator.
Step 1: Release the Tension Lever
Most handheld belt sanders have a lever that releases belt tension. Flip or pull it to slacken the belt.
The belt should loosen enough to slide off the front and rear rollers.
Step 2: Remove the Old Belt and Inspect the Tool
Slide the old belt off. Then do a quick inspection:
check the rollers for pitch buildup, packed dust, or damage; look at the platen (the flat surface behind the belt) for wear;
and clear out dust from vents and the belt path.
If your belt has been tracking off to one side, look for obvious culprits: caked debris on a roller edge, a damaged roller surface,
or a belt that’s torn on one side from rubbing the housing.
Step 3: Install the New Belt (Direction Matters)
Slide the new belt over the rollers. If there are arrows inside the belt, align them with the direction indicated on the sander.
Try to center the belt by eye before re-tensioningthis makes tracking adjustment easier.
Step 4: Re-Engage Tension
Flip the lever back to apply tension. The belt should feel snug and sit properly on the rollers.
If it looks wildly off-center at rest, release tension and reseat it before turning the sander on.
Step 5: Adjust Belt Tracking (The “Keep It From Yeeting Itself” Step)
Tracking is what keeps the belt running in the middle instead of drifting left/right and chewing up your tool.
Many sanders have a tracking knob near the front roller.
- Hold the sander firmly (two hands is smart).
- Turn it on and watch where the belt wants to drift.
- Turn the tracking knob in small increments until the belt runs centered on the platen/rollers.
- Let it run for a few seconds and confirm it stays put.
Pro tip: tiny knob adjustments can make a big difference. Don’t spin it like you’re cracking a safe in a spy movie.
Dial it in gently, like seasoning soup.
Troubleshooting: When the Belt Misbehaves
Belt keeps walking off one side
- Tracking knob needs adjustment: Re-center while running.
- Belt installed backward: If it’s directional, match the arrows.
- Wrong belt size: Even “close” can behave badly.
- Dirty/worn rollers: Pitch buildup can steer the belt like a tiny rudder.
- Worn platen or damaged roller: If tracking was fine and suddenly isn’t, inspect parts for wear.
Belt slips or stalls
- Too much pressure: Let the belt do the work. Pressing harder can slow the belt and overheat the surface.
- Worn belt: Dull grit increases friction and heat without cutting well.
- Dust/pitch on rollers: Clean themgrime reduces grip.
Belt leaves deep scratches that won’t go away
- Grit is too coarse: Move up through a sensible progression.
- You skipped grits: Jumping from 60 to 220 is like jumping from a bicycle to a rocket and wondering why you crashed.
- You stopped moving: Keep the tool in motion; belt sanders are not “pause-friendly.”
Wood is burning or getting shiny
- Belt is loaded/clogged: Clean it or replace it.
- Too fine a grit too early: Fine grits can burnish rather than cut if the surface is already gummy or the belt is dull.
- Too much pressure: Again: lighten up. Your project isn’t trying to escape the bench.
Make Your Belts Last Longer (And Save Money)
Clean the Belt Instead of “Just Replacing It”
A sanding belt cleaner (often a crepe rubber stick) can remove packed sawdust and restore cutting biteespecially on wood.
With the sander running, you gently press the stick against the belt to “unload” it. It’s oddly satisfying, like power-washing but quieter.
Choose Open-Coat or Anti-Loading Belts for Gummy Jobs
Softwoods, painted surfaces, and some finishes can clog belts quickly. Open-coat or anti-loading belts help resist that buildup.
If you’re stripping old finish and your belt looks glazed after 90 seconds, the belt isn’t “bad”it’s just the wrong belt for the mess you’re making.
Store Belts Flat and Dry
Belts don’t love humidity, heat, or being crumpled like a bad receipt in your pocket.
Store them flat or hanging, in a dry spot. Kinked belts can track oddly and wear faster.
Safety Stuff That Saves Fingers (and Pride)
Belt sanders are powerful. Respect them the way you respect a kitchen mandoline: useful, efficient, and absolutely not your friend.
- Use two hands whenever possiblebelt sanders can torque or “grab” unpredictably.
- Avoid loose clothing and jewelry. If it can dangle, it can tangle.
- Start off the work and ease onto the surface once the belt is at speed.
- Keep the tool moving to avoid gouges and heat spots.
- Mind the dust. Wood dust (and especially finish dust) is not a seasoning.
Conclusion
Choosing the right belt is a mix of matching size, selecting the right grit progression, picking an abrasive grain that suits your material,
and paying attention to backing, coating, and the belt’s seam style. Changing the belt is usually quickrelease tension, swap belts, re-tension,
then adjust tracking until it runs centered.
Once you’ve done it a couple times, it becomes second naturelike riding a bike, except the bike is loud and tries to sand your mistakes into evidence.
Dial in the belt, keep it clean, and your belt sander will stay fast, predictable, and (mostly) drama-free.
Shop Stories & Lessons Learned (Real-World Experience)
Let’s talk about what actually happens in real workshopswhere “perfect technique” meets “I’m sanding this at 11:48 p.m. because I promised it would be done tomorrow.”
These lessons are the kind you only learn after a belt sander has humbled you at least once.
First: the belt sander is not a finishing sander, no matter how tempting it is to keep going until everything looks like glass. Many people try to take a belt sander to 220 grit
on a tabletop and then wonder why the finish highlights faint racing stripes. The belt’s linear scratch pattern is honestpainfully honest. A smarter move is to use the belt sander
to get flat and consistent (often ending around 80–120), then switch to a random-orbit sander to erase the straight-line evidence. Think of the belt sander as the bulldozer and the
random-orbit as the landscape crew that makes it pretty.
Second: tracking problems are usually “small” problems pretending to be “big” ones. A belt that keeps drifting might make you assume the tool is broken, but often it’s one of three
boring culprits: (1) the belt isn’t seated evenly on the rollers, (2) the tracking knob needs a tiny adjustment, or (3) there’s gunk on a roller edge steering the belt like a rudder.
Clean the rollers, reseat the belt, and adjust tracking in baby steps. The belt sander responds best when you treat it like a fussy cat: calm movements, no sudden decisions.
Third: pressure is not the same thing as progress. Pressing harder can actually slow cutting because it increases friction and heat, which clogs the belt faster and risks burning wood.
The “pro move” is letting the abrasive do the cutting while you focus on steady motion and flat contact. If you feel the urge to push harder, it usually means the belt is too fine,
too dull, too clogged, or simply the wrong abrasive type for the job. Changing belts feels like admitting defeat, but it’s actually just choosing efficiency over stubbornness.
(Your forearms will thank you.)
Fourth: seams are real, and your project will find them. With some belts, you can feel a slight bump each time the joint passes over the platen. On a big flat surface, that bump can
translate into subtle rhythmic marks if you linger. If you’re chasing the smoothest results, spend a little extra on belts with smoother-running splices or better construction,
and keep the sander moving. Also, if the belt has direction arrows, follow themdirectional seams are designed to run one way so they don’t catch and lift.
Fifth: belt cleaners are wildly underrated. If you do a lot of sanding on resinous softwoods, plywood glue lines, or anything with finish residue, belts can clog fast.
A quick pass with a cleaning stick can bring a “dead” belt back to life long enough to finish a pass or two. It’s not magicjust maintenancebut it feels like magic the first time
you watch packed dust peel off in gummy little ribbons. If you sand often, keep a cleaner stick near the tool like it’s part of the sander, not an optional accessory.
Finally: the belt sander is a precision tool disguised as a brute. Yes, it can remove a lot of material quicklybut it can also do surprisingly controlled work when you respect its
balance. Start with the sander’s weight, not your body weight. Approach edges carefully to avoid rounding. Use the front roller for controlled “nibbling” when leveling a proud joint.
And when flattening a panel, vary your passes and check your work often. The fastest way to ruin a surface is to assume you’re done without checking. The fastest way to look like a pro
is to stop early, inspect, then make the next pass with intention.
If you take nothing else from these shop stories: belts are consumables, tracking is delicate, pressure is optional, and cleaning is a cheat code.
Master those, and your belt sander stops being a chaos machine and starts being the most efficient “make it flat” tool in your shop.