Table of Contents >> Show >> Hide
- Before You Start: Safety + The “Please Don’t Break Your Air Fryer” Checklist
- The 5-Minute Quick Clean (Do This After Every Use)
- Deep Clean for Grease Removal (Weekly, or When It Smokes/Smells)
- How to Clean the Heating Element in a Ninja Air Fryer (Without Panic)
- Don’t Forget the Exterior and Vents
- Pro Tips to Prevent Grease Buildup (So Cleaning Is Almost Boring)
- Troubleshooting: Common Ninja Air Fryer Cleaning Problems
- FAQ
- Real-Life Cleaning Experiences: The Grease Battles That Taught Me Everything (Bonus 500+ Words)
- Conclusion
Your Ninja air fryer is basically a countertop superhero: it turns frozen fries into crispy happiness and makes chicken wings feel like a life choice, not a lifestyle. But every hero has a weakness… and for an air fryer, it’s grease. Grease that clings like it pays rent. Grease that turns into a smoky “kitchen mood” the next time you cook.
The good news: learning how to clean a Ninja air fryer isn’t hard, and you don’t need a chemistry degree or a pressure washer. You just need the right approach, the right tools, and a tiny bit of consistency (the same way you “totally” floss every day).
Before You Start: Safety + The “Please Don’t Break Your Air Fryer” Checklist
- Unplug it and let it cool completely. Hot metal and damp cloths are not a vibe.
- Never submerge the main unit (the part with the electronics). It’s not a cast-iron skillet; it does not need a bath.
- Skip abrasive scrubbers (steel wool, harsh scouring pads). They can wreck nonstick surfaces.
- Don’t run the air fryer with soapy water inside even if a viral video swears it works “like magic.” Magic is not UL-listed.
What You’ll Need
- Degreasing dish soap
- Non-abrasive sponge or soft-bristle brush
- Microfiber cloths or soft dishcloths
- Bottle brush or toothbrush (designate one for “appliance duty”)
- Baking soda (for deep-clean paste)
- White vinegar (optional, mostly for odors)
- Paper towels
The 5-Minute Quick Clean (Do This After Every Use)
If you only remember one thing, make it this: the easiest grease to remove is the grease that hasn’t had time to become a fossil. A quick clean after each cook keeps your Ninja air fryer from turning into a smoke machine later.
Step 1: Remove the Basket/Drawer and Crisper Plate
Pull out the drawer (or baskets, if you have a dual-basket model). Remove the crisper plate/rack inside. These parts take the most grease and deserve the most attention.
Step 2: Wash With Warm, Soapy Water
Use warm water + a few drops of degreasing dish soap. A soft sponge or brush is perfect for scrubbing corners, vents, and the little grooves where grease likes to hide.
Step 3: Dishwasher (Only If Your Model Allows It)
Many Ninja air fryer accessories are dishwasher-safe, but not all models treat every part the same. Some baskets/drawers are hand-wash only, while crisper plates are often dishwasher-safe. Check your manual for your specific model. If you do use the dishwasher, put nonstick parts on the top rack to be gentler on the coating.
Step 4: Wipe the Interior + Exterior
With the basket removed, wipe the interior base with a damp cloth. Then wipe the exterior (especially the handle areagrease loves handles because hands are basically grease-delivery devices).
Step 5: Dry Everything Completely
Air-dry or towel-dry. Moisture left behind can cause odors and can shorten the life of coatings over time. Put the parts back only when they’re fully dry.
Deep Clean for Grease Removal (Weekly, or When It Smokes/Smells)
If your Ninja air fryer smells “off,” smokes, or looks like it just came back from a bacon festival, it’s time for a deep clean. Grease buildup near the heating element is a common culprit for smoke and funky odors.
Method A: The Classic Soak (Best for Sticky, Baked-On Grease)
- Fill the sink with hot (not boiling) water and a generous squirt of degreasing dish soap.
- Soak the basket/drawer and crisper plate for 10–30 minutes. (Yes, soaking counts as cleaning. Let science do the cardio.)
- Scrub gently with a non-abrasive sponge or soft brush.
- Rinse thoroughly and dry completely.
Method B: Baking Soda Paste (For “Grease That Won’t Take a Hint”)
When grease is truly committed, baking soda is your friendly, mild abrasive. Make a paste with baking soda + a few teaspoons of water until it’s spreadable like frosting (but please don’t taste it).
- Apply paste to greasy areas on the basket, crisper plate, or drawer.
- Let it sit 10–20 minutes.
- Scrub gently with a soft sponge/brush.
- Wipe/rinse clean and dry.
Method C: The “Dishwasher Tablet Soak” Shortcut (Use With Common Sense)
Some cleaning pros and appliance writers recommend soaking removable parts in hot water with a dishwasher tablet/pod to loosen stubborn grease. This can work well for heavily baked-on grimebut do it in the sink and keep the main unit far away from water. Rinse thoroughly afterward so no detergent residue remains.
Odor Reset: Vinegar (Optional)
If your air fryer smells like last week’s fish tacos, a vinegar wipe can help neutralize odors. Use diluted white vinegar on a cloth for wipe-downs, then follow with a clean damp cloth and dry. (Vinegar is great for odors; dish soap is usually better for grease.)
How to Clean the Heating Element in a Ninja Air Fryer (Without Panic)
The heating element is the “ceiling” of your air fryeralso known as the splatter zone. You don’t need to make it sparkle like a showroom model, but you do want to remove burnt-on residue that can cause smoke.
Step-by-Step
- Unplug and cool completely.
- Remove the basket/drawer so you can access the interior.
- Dry brush first: use a soft, dry brush to loosen crumbs and flakes so they fall away.
- Wipe gently: use a slightly damp cloth (not dripping) to wipe the heating element area.
- For stubborn grime: use a small amount of baking soda paste on a damp cloth and gently rub, then wipe clean with a fresh damp cloth.
- Dry fully before using again.
Important Notes
- No steel wool and no harsh abrasives on the heating element.
- No spraying cleaners directly inside the unit. Put cleaner on the cloth, not the appliance.
- If grease buildup is severe and you’re tempted to “take it apart,” pause. Disassembly can void warranties and create safety issues.
Don’t Forget the Exterior and Vents
Grease doesn’t only live inside the basket. Over time, it can collect on the exterior and around vents.
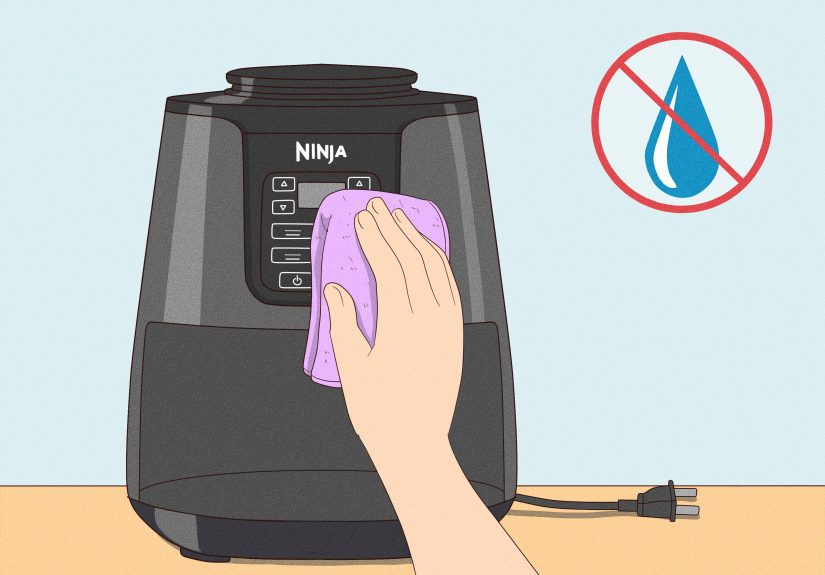
- Exterior: wipe with a damp cloth and a drop of dish soap if needed, then wipe again with a clean damp cloth.
- Control panel: use a lightly damp microfiber cloth onlyno soaking, no aggressive cleaners.
- Vents: use a dry brush or cloth to remove dust/crumbs. Keep water away from vent openings.
Pro Tips to Prevent Grease Buildup (So Cleaning Is Almost Boring)
1) Clean While It’s Fresh
You don’t need to scrub immediately after cooking (let it cool), but don’t leave it overnight to “marinate” in grease. That’s how you get permanent souvenir stains.
2) Don’t Overfill the Basket
Overfilling increases splatter and pushes food closer to the heating element. More splatter = more smoke = more regret.
3) Use Oil Wisely
Air fryers need less oil than deep frying. Using too much oil can cause excess grease pooling and sticky buildup.
4) Consider Liners (With Airflow in Mind)
Perforated parchment liners or silicone liners can reduce mess, but they should never block airflow. Avoid using liners during preheating without food weighing them down, and make sure the liner fits your basket properly.
5) Watch Sugary Sauces
Honey, hoisin, and sugary glazes caramelize fastand then they become a “scrub for your life” situation. If you love sticky sauces, consider adding them near the end of cooking or using foil/liners responsibly for easier cleanup.
Troubleshooting: Common Ninja Air Fryer Cleaning Problems
“My air fryer is smoking.”
Smoke is often caused by grease or residue near the heating element. Deep clean the basket/drawer and gently clean the heating element area. Also make sure there isn’t pooled grease in the bottom of the drawer.
“There’s a sticky film that won’t come off.”
Try the baking soda paste method, then rinse thoroughly. Sticky film often comes from aerosol cooking sprays or sugary marinades that polymerize onto nonstick surfaces.
“The nonstick coating is flaking.”
Stop using abrasive tools immediately. If coating is peeling significantly, consider replacing the basket/crisper plate (many brands sell replacements). Cooking on damaged nonstick surfaces can be frustrating and may affect food release.
FAQ
How often should I clean my Ninja air fryer?
Quick clean after every use (basket/drawer + wipe interior). Deep clean weekly if you use it oftenor anytime you notice smoke, odor, or visible buildup.
Can I put Ninja air fryer parts in the dishwasher?
It depends on the model and the specific part. Some Ninja models allow dishwasher cleaning for baskets and crisper plates; others recommend hand-washing certain drawers/baskets while allowing dishwasher-safe accessories. When in doubt, hand-washing is gentler on nonstick coatings, and top-rack dishwasher placement is typically best if allowed.
Can I use oven cleaner or harsh degreasers?
For most air fryers with nonstick parts, harsh cleaners and abrasives are risky. Stick to dish soap, warm water, and baking soda paste for stubborn grease. If you need something stronger, check your model’s manual and test any method on a small area first.
Is it safe to run the air fryer with water and soap inside to clean it?
Nodon’t do it. Running an air fryer with soapy water inside can damage the appliance and leave behind residue. Clean removable parts in the sink and wipe the interior by hand instead.
Real-Life Cleaning Experiences: The Grease Battles That Taught Me Everything (Bonus 500+ Words)
Let’s talk about the kind of grease you don’t see in the commercials. You know the ads: someone air-fries three polite zucchini chips, wipes the basket once, and smiles like they just solved adulthood. Meanwhile, real life is more like: chicken wings, bacon, reheated pizza, and a “creative” attempt to air-fry a cheesy burrito that erupted like a dairy volcano.
My first big lesson came after wing night. I was feeling confidentmaybe too confidentbecause the wings were perfect: crispy skin, juicy meat, and a sauce situation that made me consider writing poetry. Then I opened the air fryer the next day and realized the inside looked like a crime scene where the culprit was… oil. The basket had that sticky sheen that laughs at your sponge, and the crisper plate was basically wearing a glaze of baked-on grease like it was a fashion statement.
Here’s what worked (and what I wish I’d done sooner): I filled the sink with hot water and degreasing dish soap and let the basket and crisper plate soak while I handled literally anything else. This is the underrated secret of cleaning: soak first, scrub second. After about 20 minutes, the grease stopped acting immortal and started acting negotiable. A soft brush got into the corners, and suddenly the whole thing was manageable.
The second lesson: baking soda paste is the peace treaty you offer when grease refuses diplomacy. I once cooked bacon back-to-back (don’t judge me, judge my breakfast priorities), and the drawer had stubborn brown spots that weren’t “seasoning” and definitely weren’t “patina.” Baking soda paste plus a gentle scrub turned those spots from permanent residents into short-term visitors. The key was patienceletting the paste sit long enough to do its job instead of scrubbing like I was trying to erase my own decisions.
Then there was the time my air fryer started smoking during a totally innocent batch of fries. I had not burned anything. I had not committed culinary sins. And yetsmoke. That’s when I learned the heating element area is the silent drama queen of the appliance. I unplugged the unit, let it cool, and gently brushed off crumbs and residue. A damp cloth wiped the rest, and the smoke problem vanished. Moral: sometimes the mess isn’t in the basket; it’s above it, plotting.
My final “I’m an adult now” habit: the post-cook wipe-down. Not a deep clean, not a spa dayjust a quick wipe of the interior base and a rinse of the basket while everything is still easy to remove. It’s five minutes that saves you twenty later. And it keeps your food tasting like food, not like the ghost of last week’s salmon.
If you want your Ninja air fryer to last and keep cooking like a champ, treat cleaning like brushing your teeth: small, consistent habits beat occasional panic scrubbing. Your future self will thank youand your kitchen will stop smelling like an ancient fryer carnival.
Conclusion
Cleaning a Ninja air fryer doesn’t need to be a weekend project. A quick wash of the basket and crisper plate after each use, plus a weekly deep clean with warm soapy water and (when necessary) baking soda paste, will keep grease from building up where it causes smoke, odors, and sad-tasting leftovers.
Remember the golden rules: unplug and cool first, keep water away from the main unit, be gentle with nonstick surfaces, and ignore risky “just run it with soap” hacks. Do that, and your Ninja air fryer will stay crisp, clean, and ready for its next delicious mission.