Table of Contents >> Show >> Hide
- Why Moss Loves Your Roof (And Why Your Roof Doesn’t Love It Back)
- First: Decide If This Is a DIY Job
- Tools and Supplies You’ll Actually Use
- Safety Setup: The Unsexy Step That Matters Most
- Step-by-Step: How to Clean Moss Off Your Roof (The Gentle Way)
- What NOT to Do (A Short List of Roof-Regret Classics)
- Prevention: How to Keep Moss From Coming Back
- FAQ: Quick Answers Homeowners Actually Need
- Conclusion: Clean, Don’t Destroy
- Real-World Experiences: What Homeowners Learn After Cleaning Roof Moss (Extra )
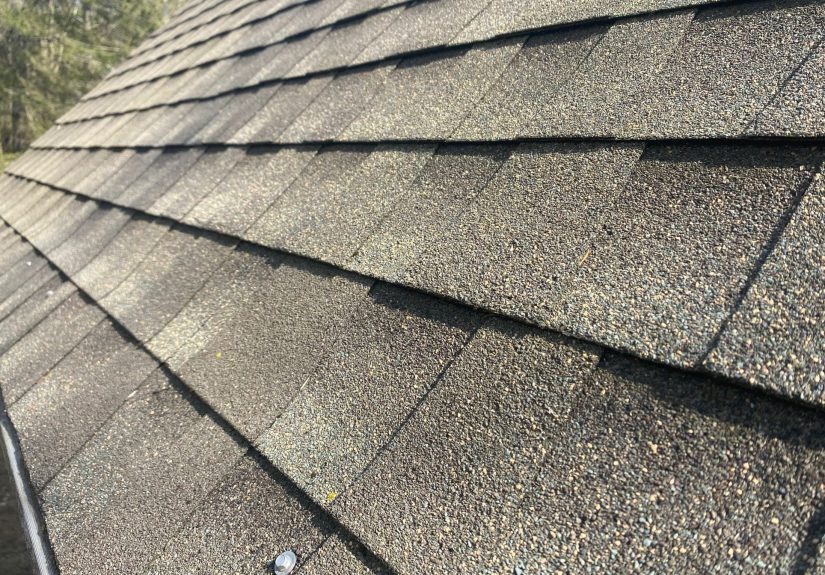
Moss on a roof is like that uninvited houseguest who shows up, makes itself comfortable, and then
starts quietly damaging your stuff. It looks “storybook cottage” for about five minutesuntil you
realize it holds moisture, lifts shingle edges, and turns your roof into a slick green slip-n-slide.
The good news: you can clean moss off your roof safely and effectively without turning your shingles
into confetti (and without auditioning for a stunt show).
This guide breaks down what the Family Handyman-style approach gets right: keep it gentle, keep it
controlled, and think prevention as much as removal. You’ll learn when to DIY, when to call a pro,
what tools actually help, and how to keep moss from coming back for an encore.
Why Moss Loves Your Roof (And Why Your Roof Doesn’t Love It Back)
Moss thrives where moisture lingers and sunlight doesn’t. That usually means north-facing roof slopes,
shaded sections under overhanging trees, and valleys where leaves pile up. Moss doesn’t have deep roots,
but it forms dense mats that hold water against roofing materials. On asphalt shingles, that can accelerate
granule loss, encourage edge lifting, and shorten the life of the roofespecially in cool, damp climates.
It also creates a safety issue. Even a “light fuzz” of moss can make shingles slippery when wet. If your
roof is steep, high, or you’re not comfortable on ladders, there’s no shame in hiring a professional.
The goal is a clean roof, not a dramatic story for your group chat.
First: Decide If This Is a DIY Job
Before you grab a sprayer, do a quick reality check. DIY roof moss removal is reasonable when:
- The roof pitch is walkable (or you can work safely from a ladder with a roof rake/pole tools).
- Moss is moderatepatchy mats rather than thick “carpet.”
- Shingles are in decent shape (not brittle, cracked, or curling everywhere).
- You can protect landscaping and control runoff.
Consider calling a pro if your roof is steep, you have multiple stories, you see significant shingle damage,
or moss is so thick it looks like it pays rent. Pros also have safety gear, better access, and experience
dialing in low-pressure cleaning methods.
Tools and Supplies You’ll Actually Use
Keep it simple. The best roof moss cleaning setups are usually “boring”and boring is good on a roof.
Basic gear
- Extension ladder (proper height and rating), ladder stabilizer if possible
- Non-slip shoes
- Safety glasses and chemical-resistant gloves
- Garden hose with a gentle spray nozzle
- Pump sprayer (the kind used for yard treatments)
- Long-handled, soft-bristle brush or a long-handled push broom (gentle is the point)
- Plastic sheeting/tarps to protect plants, plus extra water for rinsing landscaping
Cleaning options (choose one approach)
- Oxygen bleach-based cleaner (often gentler on landscaping; effective with dwell time and light brushing)
- Diluted chlorine bleach solution (effective, but requires careful plant protection and safe handling)
- Commercial roof moss/algae remover (often “spray and wait” formulas; slower but low-effort)
Avoid high-pressure washing. It can dislodge granules, shorten shingle life, and potentially void warranties.
Think “soft wash,” not “strip the driveway paint off with a jet engine.”
Safety Setup: The Unsexy Step That Matters Most
Moss removal combines three things that don’t naturally belong together: height, slippery surfaces, and chemicals.
Take five minutes to set up smart:
- Pick the right day: Mild temps, no wind, and no rain in the forecast. Avoid blazing heat (solutions can dry too fast).
- Protect your landscaping: Thoroughly water plants first, then cover shrubs and beds with plastic sheeting.
- Control runoff: Close windows, move outdoor furniture, and think about where rinse water will go.
- Ladder basics: Place the ladder on stable ground, set the proper angle, and extend it above the roof edge for safer transitions.
- Never mix chemicals: Especially bleach with ammonia or acidic cleaners. Use one product at a time, in a clearly labeled sprayer.
Step-by-Step: How to Clean Moss Off Your Roof (The Gentle Way)
Step 1: Remove loose debris first
Before you touch the moss, clear leaves and branches from the roof surface and gutters. Debris holds moisture,
feeds moss, and makes cleaning messier. Use a leaf blower from the ground if possible, or a roof rake/pole tool
from a ladder. Keep your weight off questionable areas.
Step 2: Dry-brush the thick stuff (lightly)
Use a long-handled, soft-bristle brush or a push broom to gently lift and loosen thick moss mats. Work
down the roof (from ridge toward eaves), so you’re not forcing material under shingles.
Don’t scrub like you’re angry at itaggressive brushing can damage shingle granules and edges.
If you see shingle edges lifting easily or granules coming off heavily, stop and reconsider your plan.
That’s a sign the roof is fragile, and it may be safer to use a “kill and rinse later” approach rather
than mechanical removal.
Step 3: Apply your cleaning solution with a pump sprayer
Apply the solution evenly to mossy areas. The key is saturation, not force. A pump sprayer lets you control
coverage without blasting water under shingles.
Two common DIY-friendly approaches:
-
Oxygen bleach-based mix: Follow the product label or a roof-safe oxygen bleach cleaner dilution.
Let it sit long enough to work, then gently brush and rinse. -
Manufacturer-style diluted bleach mix: Some roofing guidance uses a diluted bleach-and-water
mixture (sometimes with a small amount of cleaner such as TSP or a phosphate-free substitute) applied with a
garden sprayer, allowed to dwell briefly, then rinsed with low pressure.
Whatever you choose, keep the solution where it belongson the roof. Avoid over-spraying edges and gutters,
and don’t let it dry completely on the surface.
Step 4: Give it dwell time (don’t rush the chemistry)
Moss removal isn’t a speedrun. Let the cleaner sit per label directions or common guidanceoften around
10–20 minutes for faster-acting mixes (or longer for “spray and forget” products). This dwell time helps the
cleaner break down the moss so you don’t need aggressive scrubbing.
Pro tip: If it’s drying too quickly, lightly mist the area (gently) to keep it dampwithout rinsing everything away.
Step 5: Rinse gently from the top down
Rinse with a garden hose using low pressure. Start high and work down. You’re aiming to wash away dead moss
and residue, not pressure-strip the roof. If some moss remains, re-treat the area rather than escalating to
high pressure.
Step 6: Spot-treat stubborn patches
For stubborn areas, do a second application and use a very light touch with a soft brush. If a patch still
refuses to cooperate, it may be embedded in aging shingles or tucked under lifted edgesanother sign you
might need a roofing pro (or at least a more conservative “kill and let weather remove it” approach).
Step 7: Clean up the ground game
Once the roof is rinsed, rinse plants again to dilute any accidental overspray. Remove tarps carefully so
you don’t dump concentrated runoff onto landscaping. Then check gutters and downspoutsmoss chunks love to
form clogs that create water overflow (which then creates more moss later… nature is petty like that).
What NOT to Do (A Short List of Roof-Regret Classics)
- Don’t pressure wash shingles. It can remove granules and shorten roof life.
- Don’t scrub upward. Brushing up-slope can lift shingle edges and push debris underneath.
- Don’t use harsh tools. Wire brushes and metal scrapers are fast routes to damage.
- Don’t ignore safety. Wet roofs are slippery; ladders are unforgiving.
- Don’t freestyle chemical cocktails. Use one cleaner, properly diluted, and never mix bleach with other cleaners.
Prevention: How to Keep Moss From Coming Back
If you only remove moss and don’t fix the conditions that invited it, it’ll be backlike a sequel no one requested.
Use a layered prevention plan:
1) Increase sunlight and airflow
- Trim overhanging branches to reduce shade and drop less debris.
- Keep roof valleys and gutters clear so water doesn’t linger.
2) Consider zinc or copper strips near the ridge
Many homeowners install zinc or copper strips just below the ridge. When it rains, tiny amounts of metal wash down
the roof, creating an environment that discourages moss and some biological growth. This works best on upper roof
areas and gradually weakens farther down the slopeso don’t expect a magical force field at the eaves.
Important nuance: material compatibility matters. If your roof system includes certain metals (like copper components),
you’ll want to choose prevention products carefully so you don’t introduce corrosion issues. When in doubt, match
metals thoughtfully or consult a roofing pro.
3) Use periodic treatments in high-moss climates
In damp regions (think Pacific Northwest vibes), a light maintenance schedule can beat a full moss takeover.
Some homeowners do an annual or biennial treatment with a roof-safe productespecially on shaded slopes.
4) Upgrade smarter when it’s re-roof time
If your roof is nearing end-of-life, consider shingles designed for biological resistance. That won’t stop moss in every
scenario, but it can reduce the “why does my roof look like a science project?” effect over time.
FAQ: Quick Answers Homeowners Actually Need
Will moss ruin my roof?
Moss can shorten roof life by holding moisture, lifting edges, and accelerating wearespecially on asphalt shingles.
The faster you address it, the better.
Is bleach safe for roofs?
Diluted bleach solutions are commonly referenced in roofing cleaning guidance, but they must be used carefully:
protect landscaping, control runoff, and never mix with other cleaners. If you’re worried about plants or sensitive
materials, an oxygen bleach approach or a commercial roof-safe product may be a better fit.
Can I just leave moss and treat it later?
If the roof is too steep or fragile to safely work on, a “treat to kill and let weather loosen it over time” strategy
can be safer than physical removal. You still need to address drainage, shade, and debris.
How long does it take for “spray and forget” products to work?
Many slow-acting outdoor cleaners can take weeks to months depending on growth thickness and rainfall. They’re convenient,
but patience is part of the deal.
Conclusion: Clean, Don’t Destroy
Roof moss removal is a classic DIY trap: it looks like a “quick clean,” but it demands a careful approach. The winning
strategy is gentle mechanical removal, controlled chemical treatment, and low-pressure rinsingfollowed by prevention
so you’re not doing this again next season.
If you remember one thing, let it be this: your roof is not a driveway. Treat it like the protective system it is,
and it’ll protect you right back.
Real-World Experiences: What Homeowners Learn After Cleaning Roof Moss (Extra )
If you ask a dozen homeowners about roof moss, you’ll get a dozen versions of the same story: “It started small…
and then one day I looked up and my roof had a beard.” The most common experience is that moss sneaks in where you
don’t look oftenbehind a chimney, under a tree canopy, or in a roof valley that catches every leaf in the neighborhood.
People usually notice it after a rainy stretch or when the sun hits the roof just right and the green pops like a neon sign.
A frequent lesson is that debris management is half the battle. Homeowners who clean the moss but
leave leaves in the valleys often see moss return faster than expected. In contrast, those who treat the cleaning like
a “roof reset”clear debris, clean, rinse, then clean gutterstend to get longer-lasting results. Many also realize
their gutters were quietly overflowing, keeping the roof edge damp. Once gutters flow correctly again, the roof dries
out faster and moss struggles to reestablish.
Another common experience: the roof gets dramatically slick the moment it’s wet. People often say
they felt confident until they stepped onto a damp section and instantly understood why professionals charge what they
charge. This is why so many successful DIYers do as much as possible from a ladder using extension tools. They work in
smaller sections, stay off questionable areas, and stop immediately if the roof feels unsafe. The smart move isn’t
being braveit’s being boring and cautious.
Homeowners also learn that “more force” rarely equals “better.” The temptation is to scrub hard or crank up water
pressure because it feels productive. But many who try aggressive methods regret it: loosened granules in gutters,
scuffed shingles, and a roof that looks “cleaner” but ages faster afterward. People who get the best outcomes usually
do the opposite: they apply a cleaner, wait, lightly agitate, and re-treat stubborn spots rather than escalating.
Patience ends up being the cheapest tool.
On the chemical side, homeowners often mention two practical lessons. First, plant protection is real.
Even careful sprayers experience drips and runoff. The folks with the best landscaping outcomes are the ones who soak
shrubs with water first, cover them, and rinse again afterward. Second, it’s surprisingly easy to over-apply a solution.
Real-world success tends to come from even coverage, not “white foamy waterfalls.” More product doesn’t necessarily mean
more effectiveness; it can just mean more cleanup and more risk to surrounding areas.
Finally, prevention stories are where the biggest “aha” moments show up. Homeowners who install zinc or copper strips
often report the roof stays cleaner longerespecially on upper roof sectionswhile those who simply clean and move on
frequently end up repeating the same project. The most consistent long-term win combines three small habits:
- Trim shade (even modest branch pruning can help sections dry faster).
- Keep valleys and gutters clear (less moisture retention, fewer moss-friendly pockets).
- Use periodic light treatments in high-moss climates instead of waiting for a full takeover.
In short: the “best” roof moss cleaning experience is the one you don’t have to repeat often. Clean gently, work safely,
and then make the roof a place moss doesn’t want to live.