Table of Contents >> Show >> Hide
- Why cleaning with braces takes a little extra strategy
- Your simple braces-cleaning kit (keep it at home + a mini version for on-the-go)
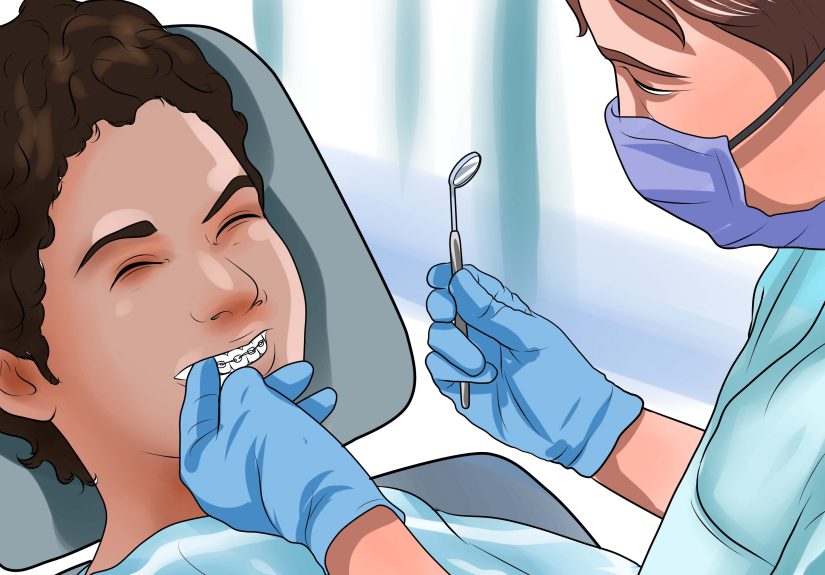
- How to Clean Teeth With Braces: 12 Steps
- Step 1: Start with a quick rinse (the “brace excavator” move)
- Step 2: Check for “problem tenants” (aka visible food)
- Step 3: Brush the gumline first with a 45-degree angle
- Step 4: Brush above the brackets (angle down)
- Step 5: Brush below the brackets (angle up)
- Step 6: Brush the bracket faces and wire path (slow and methodical)
- Step 7: Don’t skip the “normal teeth” surfaces
- Step 8: Brush your tongue (yes, really)
- Step 9: Use an interdental brush for the tight spots around brackets
- Step 10: Floss once a day using a threader, orthodontic floss, or super floss
- Step 11: Consider a water flosser as your backup (or your main flossing ally)
- Step 12: Finish with fluoride, then do a “last look” check
- A realistic daily routine (so this doesn’t take over your life)
- Common mistakes (and the quick fixes)
- Food and habits that keep braces cleaner (without joyless eating)
- When to call your orthodontist or dentist
- Braces-cleaning experiences: what real life is like (and how people make it work)
- Conclusion
- SEO tags (JSON)
Braces are great at straightening teethand also weirdly talented at collecting the exact food you swore you didn’t even eat.
(Looking at you, tiny spinach leaf that has moved into bracket #12 like it pays rent.)
The good news: you don’t need a PhD in Tooth Engineering to keep your smile clean. You just need a smart routine, the right tools,
and a method that doesn’t skip the “boring” spots where plaque loves to throw house parties.
This guide walks you through a braces-friendly cleaning routine in 12 practical steps, plus common mistakes to avoid
and real-life experiences that make the whole thing feel less like a chore and more like a “future me will be grateful” habit.
Why cleaning with braces takes a little extra strategy
Brackets and wires create extra ledges, corners, and tight spaces. That’s not just annoyingit can allow plaque and food debris to linger
longer than they would on bare teeth. Over time, that can increase the risk of cavities, swollen gums, and those chalky “white spot” marks
some people notice after braces come off.
The goal isn’t perfection. The goal is consistent removal of plaque around the brackets, along the gumline, and between teeth
so your orthodontic glow-up doesn’t come with surprise side quests.
Your simple braces-cleaning kit (keep it at home + a mini version for on-the-go)
- Soft-bristled toothbrush (manual or electric)
- Fluoride toothpaste (look for a reputable seal/approval where available)
- Interdental brush (a tiny “bottle brush” for around wires/brackets)
- Floss threader or orthodontic floss/super floss
- Water flosser (optional, but extremely helpful for many people)
- Fluoride rinse (ask your dentist/orthodontist what’s right for you)
- Small mirror (so you can actually see what you missed)
- Travel kit: mini brush + interdental brush + floss picks/threaders
How to Clean Teeth With Braces: 12 Steps
Step 1: Start with a quick rinse (the “brace excavator” move)
Before brushing, swish water for 10–15 seconds. This loosens food bits trapped around brackets and wires so your brush doesn’t have to
do all the heavy lifting. If you’re out of the house, even a water sip + swish is better than nothing.Step 2: Check for “problem tenants” (aka visible food)
Use a mirror and look for obvious debrisespecially after meals like salads, popcorn-adjacent snacks (avoid popcorn if your ortho says so),
or anything stringy. Removing visible bits first prevents you from brushing them deeper into corners.Step 3: Brush the gumline first with a 45-degree angle
Place your toothbrush so the bristles point slightly toward the gumline at about a 45-degree angle. Use small circles or gentle back-and-forth motions.
This is where plaque likes to set up headquarters, braces or not. Spend time here before you get distracted by the shiny metal.Tip: Gentle pressure wins. If your gums are tender, go slower rather than harder.
Step 4: Brush above the brackets (angle down)
Aim the bristles downward to clean the tooth surface above each bracket and along the wire. Think: “sweep the roof of the bracket zone.”
Do a slow pass across the entire top row, then repeat on the bottom row.Step 5: Brush below the brackets (angle up)
Now angle the brush upward to clean below the brackets and along the lower edge of the wire. Many people do Step 4 and forget this one,
which is like vacuuming half your living room and calling it a day.Step 6: Brush the bracket faces and wire path (slow and methodical)
Brush directly over the brackets with short strokes. Focus on the edges where bracket meets tooth.
A good rule: give each tooth a few seconds of attention rather than speed-running the whole mouth.If you use an electric toothbrush, let it do the workguide it slowly around each bracket instead of scrubbing like you’re sanding a deck.
Step 7: Don’t skip the “normal teeth” surfaces
Braces are the main character, but your chewing surfaces and inner tooth surfaces still exist.
Brush the tops of molars (the craters where food goes to retire) and the inside surfaces of all teeth.Step 8: Brush your tongue (yes, really)
Your tongue can hold bacteria and contribute to bad breath. A few gentle strokes from back to front helps.
If gagging is an issue, start slowly and don’t go full deep-clean on Day 1.Step 9: Use an interdental brush for the tight spots around brackets
An interdental brush can slip under the wire and around bracket corners where a regular brush struggles.
Use gentle in-and-out motions. This is especially helpful near the gumline and between brackets.Pro move: Keep a couple sizes. Some spaces are “tiny hallway,” others are “open floor plan.”
Step 10: Floss once a day using a threader, orthodontic floss, or super floss
Flossing with braces takes longer at firstthen your hands learn the route and it becomes oddly automatic.
Use a floss threader (or pre-threaded orthodontic floss) to guide floss under the wire, then clean between teeth.Use a gentle up-and-down motion against each tooth side. Try to “hug” the tooth in a C-shape rather than sawing back and forth.
That’s how you clean plaque off the tooth, not just move it around.If you’re choosing an order: Many dentists suggest flossing before brushing so fluoride toothpaste can reach more surfaces afterward.
But the best order is the one you’ll actually do daily.Step 11: Consider a water flosser as your backup (or your main flossing ally)
Water flossers can be helpful for people with braces, especially if string flossing is difficult.
They’re great at flushing out debris around brackets and under wires. Some people use water flossing plus threader flossing;
others use water flossing consistently and threader flossing when they can.Start with a lower pressure setting if your gums are sensitive and aim along the gumline and around brackets.
Keep it clean and don’t share the device.Step 12: Finish with fluoride, then do a “last look” check
If your dentist or orthodontist recommends it, rinse with a fluoride mouthwash to support enamel.
Then use your mirror and look for lingering gunk around bracket edges.
Spot-clean with your toothbrush or interdental brush as needed.At night, this step matters mostgoing to bed with a clean mouth is like setting your future self up for success while you sleep.
A realistic daily routine (so this doesn’t take over your life)
Morning (2–4 minutes)
- Brush thoroughly (focus on gumline + bracket angles)
- Quick interdental brush if you notice buildup
After lunch (60–90 seconds)
- Swish water
- Brush if you can; if not, swish + interdental brush on obvious spots
Night (5–8 minutes, the “main event”)
- Rinse
- Brush carefully
- Interdental brush
- Floss (threader/super floss) and/or water floss
- Fluoride rinse if recommended
Common mistakes (and the quick fixes)
- Mistake: Brushing only the bracket fronts. Fix: Always angle above and below the wire.
- Mistake: Going too hard. Fix: Use soft bristles and gentle pressure to protect gums and enamel.
- Mistake: Skipping floss because it’s annoying. Fix: Use threaders, super floss, or a water flosserpick the tool you’ll actually use.
- Mistake: “I brushed, so I’m done.” Fix: Add a 10-second mirror check to catch what brushing missed.
- Mistake: Not replacing a worn toothbrush head. Fix: Replace every few months (or sooner if bristles flare).
Food and habits that keep braces cleaner (without joyless eating)
You don’t have to live on yogurt and regret. But you do want to limit foods that easily lodge in brackets or damage appliancesthink sticky candy,
chewing gum, and super-hard crunchy snacks if your orthodontist has warned you about them.
If you do eat something clingy (hello, bagel), follow it with water and a quick brush when possible. The faster you remove debris,
the less time it has to cling and start building plaque.
When to call your orthodontist or dentist
- Gums that bleed heavily or stay very swollen despite consistent gentle cleaning
- New or worsening tooth sensitivity, pain, or visible white/chalky spots
- Broken bracket, poking wire, or anything that makes cleaning difficult
- Persistent bad breath even with a solid routine (sometimes it’s a trapped-food issue you can’t see)
Quick note: mild bleeding can happen when you first improve flossingbecause inflamed gums may react. But if it doesn’t improve,
get professional guidance.
Braces-cleaning experiences: what real life is like (and how people make it work)
Let’s talk about the part no one puts on the cute “braces journey” montage: learning to clean around braces feels clumsy at first.
People commonly describe the first week as “I brush forever and still feel like I missed something.” That’s normalyour hands are learning a new map.
The turning point usually comes when the routine becomes predictable, not when it becomes “fun.”
One common experience is the “lunch problem”. Teens and adults alike report that daytime brushing is the hardest habit to keep
because you’re at school, work, or out living your life like a regular human. What works for many braces-wearers is a travel strategy:
they keep a tiny pouch with a mini toothbrush, a couple interdental brushes, and a mirror. The interdental brush becomes the hero tool
because it’s fast and targetedperfect for removing the obvious stuff after a sandwich without turning the office bathroom into a dental spa.
Another very real moment: the first time someone sees “white fuzz” near a bracket edge in the mirror.
Most people assume it’s food, but it’s often plaque buildup (the sticky film that can look pale when it’s thick). The fix is usually not
“brush harder.” It’s “brush smarter”use the angle-above/angle-below method, slow down, and add an interdental brush pass.
People who adopt the mirror check at night often say it’s the biggest game-changer because it creates instant feedback:
you don’t have to guess if you cleaned wellyou can actually see it.
Adults with braces often mention a different challenge: schedule fatigue. They’re juggling work, kids, commuting,
and then braces add a nightly routine that can feel like assembling furniture with no instructions. The most successful pattern tends to be
a “minimum viable routine” on hard days (brush carefully + water floss) and a “full routine” on normal days (brush + threader floss + fluoride rinse).
Consistency beats heroics. In other words: a routine you do 6 nights a week is better than a perfect routine you do twice and then abandon
like an unfinished treadmill.
People who play sports commonly report the “braces + mouthguard + hygiene” trifecta. They’ll protect their braces during practice,
then later discover the mouthguard can trap odors if it isn’t cleaned too. The simple solution many families use:
rinse the mouthguard after every use, let it dry, and keep it in a ventilated casethen stay consistent with brushing and flossing
so the mouthguard isn’t battling a bacteria buffet.
Finally, there’s the experience almost everyone recognizes: the day you realize your routine is working because your mouth feels clean
even after a long day. That’s the quiet win. Your gums look calmer. Your next orthodontic visit is easier because there’s less buildup.
And you’re not spending the entire appointment thinking, “Please don’t let them find the Great Plaque Colony of Tooth #19.”
If you’re still in the early awkward stage, here’s the most encouraging truth: braces cleaning becomes faster with repetition.
Most people don’t need more willpowerthey need a system: a small kit, a consistent night routine, and the habit of angling above and below
the brackets every single time. The results show up gradually, and then all at once when the braces come off and your teeth look
straight and healthy. That’s the goal.
Conclusion
Cleaning teeth with braces is less about buying fancy gadgets and more about a reliable method:
rinse, brush the gumline, angle above and below brackets, clean tight spots, floss daily with the right tool, and finish with fluoride if recommended.
Do that consistently, and you dramatically reduce the risk of plaque buildup, gum irritation, and white spotsso your braces reveal is
a mic-drop moment for all the right reasons.