Table of Contents >> Show >> Hide
- Why cleaning vinyl matters (besides the obvious “ew” factor)
- Golden rules: how not to ruin your records
- What you actually need (simple, safe, and effective)
- Method 1: Quick daily cleaning (the “two-minute habit”)
- Method 2: Safe wet cleaning by hand (for fingerprints, film, and real-world grime)
- Method 3: Record washer basin (fast deep-cleaning for batches)
- Method 4: Vacuum cleaning (the “serious collector” option)
- Method 5: Ultrasonic cleaning (the “deep groove spa day”)
- Drying and sleeving: where many “clean” records get dirty again
- How often should you clean vinyl records?
- Bonus: keep your stylus clean so it doesn’t undo your hard work
- Troubleshooting: when cleaning doesn’t fix the noise
- Quick recap: the safest record cleaning routine (no heroics required)
- Collector “experience notes” : real-life scenarios and what they teach
- 1) The thrift-store jackpot that sounded like a campfire
- 2) The “new record” that wasn’t actually clean
- 3) The fingerprint incident (a.k.a. “I touched the music”)
- 4) The “I used tap water and now it’s worse” moment
- 5) The record that cleaned up visuallybut still sounded rough
- 6) The “my stylus is dirty again instantly” mystery
- Conclusion
Vinyl is basically a tiny canyon system where music lives. It’s also a magnet for dust, skin oils, smoke residue, and whatever mystery powder your “great deal” used record picked up in someone’s basement between 1997 and now.
The good news: you can clean vinyl records safely at home and make them quieter, clearer, and kinder to your styluswithout turning your favorite album into a modern art project.
This guide walks through what to use, what to avoid, and several cleaning methodsfrom quick daily brushing to deep wet-cleaningso you can clean vinyl records without damaging them (or your sanity).
Why cleaning vinyl matters (besides the obvious “ew” factor)
Dirt in the grooves doesn’t just cause pops and crackle. It can also:
- Increase stylus wear (a dirty groove makes the needle work harder).
- Cause mistracking (especially on loud inner-groove passages).
- Grind debris into the groove wall if you play dirty records repeatedly.
- Build static that attracts even more dust, because vinyl loves drama.
Golden rules: how not to ruin your records
Before we get into the “do,” here’s the “please don’t.” Most damage happens when people use the wrong cleaner or the wrong towel with the confidence of a man washing his car with a kitchen sponge.
Never use these on vinyl records
- Household glass cleaners (ammonia, detergents, additivesbad combo).
- Acetone, bleach, strong solvents (fast track to permanent damage).
- Paper towels (they shed fibers and can create micro-scratches).
- Tap water as your “main ingredient” (minerals can remain in the grooves).
- High-proof alcohol used straight (too aggressive; also risks label damage).
Also avoid these common “well-intentioned” mistakes
- Wiping across the grooves like you’re polishing a dinner plate.
- Scrubbing hard (pressure doesn’t equal cleanfluid + time does).
- Soaking the label (labels and adhesives aren’t fans of spa days).
- Putting a damp record back in a sleeve (hello mildew, my old friend).
What you actually need (simple, safe, and effective)
You can get excellent results with a small kit of the right tools. You don’t need a lab coat, but you do need to stop using that random rag from under the sink.
Basic, budget-friendly essentials
- Anti-static carbon fiber brush (for daily dust removal).
- 2–3 microfiber cloths (clean, lint-free, dedicated to records only).
- Distilled or deionized water (for rinsing and mixing solutions).
- Record cleaning solution (store-bought is easiest and consistent).
- Drying rack (a dish rack works if it’s clean and doesn’t shed).
- New inner sleeves (anti-static sleeves prevent re-contamination).
Nice-to-have upgrades (worth it if you buy used records)
- Record washer basin (Spin-style systems clean many records quickly).
- Vacuum record cleaning machine (deep clean + faster drying).
- Ultrasonic cleaner (excellent for stubborn groove contamination).
- Label protector/clamp (especially for wet methods).
Method 1: Quick daily cleaning (the “two-minute habit”)
If you do only one thing regularly, do this. Daily dry cleaning prevents gunk from becoming “baked in” and reduces static before playback.
Step-by-step: anti-static brush routine
- Place the record on the turntable.
- Start it spinning (33/45either is fine).
- Hold your anti-static brush lightly on the surface, letting the fibers reach into the grooves.
- After a few rotations, gently sweep the brush toward the outer edge to lift dust off.
- Clean the brush itself (most have a little ridge/handle for this) so you’re not redistributing dust next time.
Pro tip: This is “remove loose debris,” not “solve every noise problem.” If the record has fingerprints, haze, smoke film, or thrift-store funk, it’s time for wet cleaning.
Method 2: Safe wet cleaning by hand (for fingerprints, film, and real-world grime)
Wet cleaning works because water plus a surfactant can lift oils and break surface tension so fluid reaches into the groove. Water alone doesn’t dissolve greasy fingerprints wellthis is why purpose-made record fluids exist.
The safest approach: use a dedicated record cleaning solution
If you want the least risk, buy a vinyl record cleaning solution from a reputable audio brand. These are designed to be vinyl-safe, leave minimal residue, and often include anti-static properties.
If you insist on DIY: keep it gentle
DIY mixes are common, but keep them conservative. For most modern LPs, many collectors use distilled water plus a tiny amount of surfactant. Some add a small percentage of isopropyl alcohol, but opinions vary:
some preservation-focused approaches avoid alcohol, while many hobby methods use low concentrations for oily residue. If you go that route, keep it low and never use it on shellac 78s.
Important material note: Do not use alcohol on shellac records (often 78 rpm), lacquer discs, or unknown vintage media. When in doubt, go alcohol-free and gentle.
Step-by-step: hand wet-cleaning (off the turntable)
- Prep a clean workspace. Lay down a clean microfiber towel on a firm surface.
- Place the record down carefully. Handle by the edge and label area only.
- Apply cleaner. Mist or apply a small amount of record cleaning solution to one side. Don’t flood the label.
- Let chemistry do the work. Wait 10–30 seconds so the fluid can loosen grime.
- Wipe with the grooves. Using a microfiber cloth or a record pad, move in gentle concentric circles following the grooves.
- Lift, don’t grind. Use light pressure; make multiple gentle passes instead of one aggressive scrub.
- Rinse (recommended). Lightly mist distilled water and wipe again with a different clean cloth/pad to remove residue.
- Dry completely. Air dry on a clean rack or use a dry microfiber cloth to blot and finish.
- Repeat for side B. Because your record deserves equal treatment.
How to protect the label during wet cleaning
- Use a label protector/clamp if you have one.
- Apply fluid away from the center label and spread outward.
- Work in sections and don’t soak the surface.
- If the label gets damp, blot gentlydo not rub like you’re sanding a table.
Method 3: Record washer basin (fast deep-cleaning for batches)
If you buy used vinyl, a record washer basin is one of the best “value” upgrades. It’s designed to clean grooves with brushes while the record rotates through a bath.
This method is ideal when you have a stack of dusty records and a weekend mood.
Best practices for basin systems
- Use distilled water whenever possible (it reduces mineral residue risk).
- Follow the fluid dosagemore concentrate isn’t “extra clean,” it’s “extra residue.”
- Rotate slowly and evenly; don’t rush like you’re whisking eggs.
- Change water when it gets visibly dirty (yes, it matters).
- Consider a distilled-water rinse after the wash for best residue control.
Method 4: Vacuum cleaning (the “serious collector” option)
Vacuum record cleaning machines apply cleaning fluid, agitate gently with a brush, then vacuum the fluid out of the groove. The vacuum step is a big deal:
it removes suspended grime instead of letting it dry back onto the surface.
Vacuum cleaning tips that prevent damage
- Use a brush designed for records (soft, groove-friendly).
- Don’t over-vacuum (excess rotations can increase static and heat).
- Rinse with distilled water after a surfactant-based cleaner when recommended.
- Keep the vacuum lips/felt clean; dirty pads can re-contaminate clean records.
Method 5: Ultrasonic cleaning (the “deep groove spa day”)
Ultrasonic cleaners use cavitation bubbles to dislodge debris in the grooves. They can be extremely effectiveespecially on records with stubborn contamination.
Most ultrasonic setups still benefit from a rinse and careful drying afterward.
Ultrasonic do’s and don’ts
- Do use distilled or reverse-osmosis water.
- Do use only the recommended low-foaming surfactant, if any.
- Don’t add random soaps that foam heavily (foam reduces cleaning efficiency and can leave residue).
- Don’t skip dryingwater left in grooves can dry into spots or attract dust.
Drying and sleeving: where many “clean” records get dirty again
Cleaning isn’t finished until the record is fully dry and placed into a clean sleeve.
Putting a freshly cleaned record back into a dusty paper sleeve is like showering and then hugging a lint monster.
Drying rules
- Air dry vertically on a clean rack whenever possible.
- Use microfiber to blot or finishavoid paper products.
- Keep records away from heat sources and direct sunlight while drying.
- Wait until the record is completely dry before sleeving (no “it’s probably fine”).
Sleeve upgrades that actually matter
- Replace old paper sleeves that shed fibers or smell musty.
- Use anti-static inner sleeves for cleaner storage and less dust attraction.
- Store records vertically in a stable temperature environment to prevent warps.
How often should you clean vinyl records?
The honest answer: whenever they’re dirty. The practical answer:
- Every play: quick anti-static brushing.
- After purchase (new or used): one thorough wet clean.
- Every 10–20 plays (or when noise returns): deeper cleaning, especially for frequently played albums.
- After obvious contamination: fingerprints, smoke exposure, visible haze, or “I spilled something and panicked.”
Bonus: keep your stylus clean so it doesn’t undo your hard work
A dirty stylus can make clean records sound bad and can also drag debris through grooves. Use a stylus brush or stylus gel, and always brush
back-to-front (the direction the needle travels), never side-to-side like you’re brushing a tiny mustache.
Troubleshooting: when cleaning doesn’t fix the noise
If you still hear pops and crackle…
- Check for scratches. Dirt can be removed; groove damage is forever.
- Check static. Dry environments increase staticanti-static sleeves help.
- Inspect the stylus. Gunk on the tip can create distortion and noise.
- Try a rinse step. Residue from cleaners can sound like “new dirt.”
- Confirm tracking force and alignment. Setup issues can mimic “dirty record” symptoms.
Quick recap: the safest record cleaning routine (no heroics required)
- Brush before each play with an anti-static record brush.
- Wet clean new or used records once before regular rotation.
- Use distilled/deionized water for rinsing and DIY mixing.
- Clean with the grooves using light pressure.
- Dry fully and move into clean anti-static inner sleeves.
- Keep your stylus clean to prevent recontamination.
Collector “experience notes” : real-life scenarios and what they teach
Below are composite experiences based on common situations vinyl collectors run intobecause most of us learn record cleaning the same way we learn cooking:
by making one avoidable mistake and then never shutting up about it.
1) The thrift-store jackpot that sounded like a campfire
A classic: you find a vintage pressing for cheap, the cover looks “well-loved,” and the seller says, “It plays great!” (Translation: they own speakers that hide the evidence.)
You get home, drop the needle, and hear enough crackle to roast marshmallows. The instinct is to scrub harder, but the win usually comes from a gentler approach:
first dry brush to remove loose grit, then a wet clean that has enough surfactant action to lift the oily film. The key lesson collectors repeat: time beats pressure.
Let the fluid sit briefly so it can loosen grime, then wipe with the groove. If a record is truly filthy, one pass rarely does ittwo careful cleans (with a rinse) often does.
2) The “new record” that wasn’t actually clean
New vinyl can still arrive with a faint haze, paper dust, or residue from manufacturing and packaging. Many collectors notice a “whoosh” or light crackle that disappears after a first proper wet clean.
The experience here is sneaky: people assume “new” equals “clean,” then blame the turntable or the cartridge.
The practical takeaway: wet-clean new records once before they join your regular rotation, especially if you hear consistent surface noise.
After that initial deep clean, daily anti-static brushing tends to keep them in good shape.
3) The fingerprint incident (a.k.a. “I touched the music”)
It happens fast: you pull a record out, your thumb slips, and now there’s a visible fingerprint right across the grooves like a crime scene.
Collectors report that dry brushing alone won’t fix the dull sound that fingerprints can cause because oils cling to the groove walls.
The gentle solution is a small amount of record cleaning fluid, light agitation along the grooves, and a distilled-water rinse.
The lesson is twofold: handle by the edges (always), and don’t panic-scrub. Aggressive scrubbing can create micro-scuffs that are far more permanent than the print you were trying to remove.
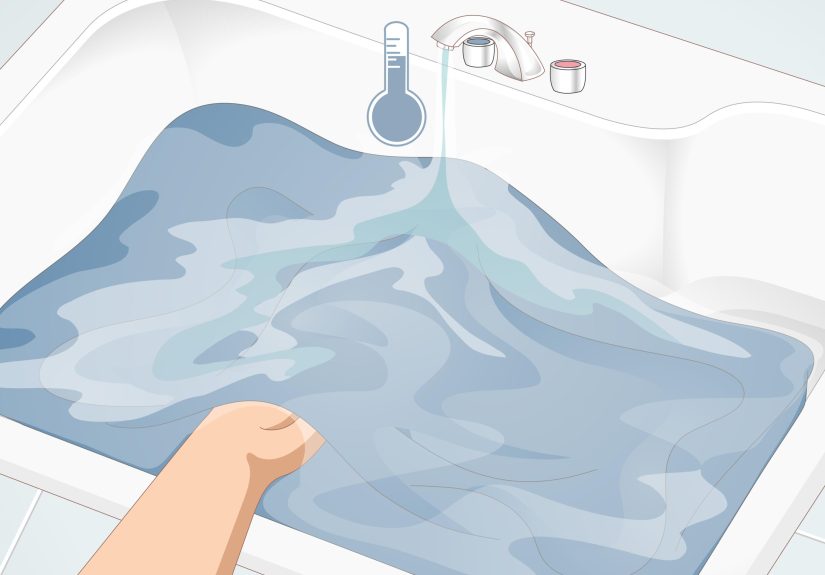
4) The “I used tap water and now it’s worse” moment
One of the most common regret stories is using tap water for a deep clean, then hearing a new kind of noise afterward: a faint gritty texture or sporadic ticks that weren’t there before.
This is often blamed on “bad luck,” but many collectors eventually realize it can be residueminerals or dissolved solids left behind as the water dries.
Switching to distilled water for rinse steps tends to fix this. The takeaway: even if a product says tap water is okay in an emergency, distilled water is the safer long-term move when you want consistent results.
5) The record that cleaned up visuallybut still sounded rough
This one teaches humility. Sometimes a record looks clean after a careful wet clean, but the crackle remains. Collectors often discover it’s not dirtit’s groove wear,
scratches, or damage from past mistracking. Cleaning can’t reverse physical groove damage, but it can help you diagnose it:
if the noise stays in the same spots on every play, it’s likely damage; if it changes or improves after cleaning, it was contamination.
The lesson: cleaning is both a restoration tool and a truth serum. It tells you what’s dirt and what’s permanent.
6) The “my stylus is dirty again instantly” mystery
Some people clean one record, play it, and then notice the stylus picks up gunk by the end of side A. The usual culprit is either (1) residue that wasn’t rinsed,
(2) a record sleeve that re-dusted the record immediately, or (3) a turntable mat and environment that’s feeding static.
The “experience fix” is consistent: rinse after cleaning (when your method calls for it), let the record dry fully, store it in a clean anti-static inner sleeve,
and clean the stylus routinely. Once collectors lock in that loop, the stylus stays cleaner longerand the whole system stays quieter.
If there’s one shared collector wisdom across all these scenarios, it’s this: cleaning is a system, not a single step.
The brush, the fluid, the rinse, the drying, the sleeve, and the stylus all work together. Skip one, and the vinyl gods will collect their taxin pops.
Conclusion
Cleaning vinyl records without damaging them is less about “scrubbing” and more about using the right materials, the right fluid, and a calm, groove-following technique.
Start with daily anti-static brushing, deep-clean new and used records once, rinse when needed, dry completely, and store in clean sleeves.
Do that, and your records will sound better, last longer, and stop impersonating a bowl of Rice Krispies every time the chorus hits.