Table of Contents >> Show >> Hide
- Why a Brick Wall End Grain Board Is Worth the Sawdust
- Materials and Tools
- Design and “Brick Math” Without Tears
- Step-by-Step: Build the Brick Wall End Grain Cutting Board
- Step 1: Let your wood acclimate (yes, wood has moods)
- Step 2: Mill your stock flat, square, and consistent
- Step 3: Rip “brick” strips and “mortar” strips
- Step 4: Dry layout the first glue-up (and take a photo)
- Step 5: First glue-up: make a long-grain panel
- Step 6: Create the brick offset in the panel (two easy options)
- Step 7: Slice the panel into “rows” and rotate to end grain
- Step 8: Dry-fit the brick wall layout (the “no glue” dress rehearsal)
- Step 9: Second glue-up: the end-grain assembly
- Step 10: Flatten the board safely (pick your method)
- Step 11: Trim to final size and soften edges
- Step 12: Sanding schedule that won’t ruin your weekend
- Step 13: Finish with mineral oil and beeswax
- Common Mistakes (and How to Avoid Them)
- Care, Cleaning, and Food Safety
- Conclusion
- Shop Notes & Experiences: What I’d Do Differently Next Time (About )
If you’ve ever seen a brick wall end grain cutting board and thought, “Wow… that’s gorgeous,” and then immediately thought,
“Also, that looks like it requires a wizard license,” good news: it’s not wizardry. It’s mostly just careful layout,
two glue-ups, and a healthy respect for clamps (nature’s way of telling wood who’s in charge).
In this guide, you’ll learn how to build a durable, knife-friendly brick wall end grain cutting board with a clean offset pattern,
crisp glue lines, and a finish that makes the grain pop like it just got promoted. We’ll cover wood selection, design math that won’t melt your brain,
safe milling and cutting, glue-up strategy, flattening options, finishing, and long-term careplus real-world “I learned this the hard way” experience notes at the end.
Why a Brick Wall End Grain Board Is Worth the Sawdust
End grain: the “self-healing” crowd favorite
End grain boards place wood fibers verticallythink of a bundle of straws standing upright. When your knife comes down, it tends to slide between fibers
rather than slicing across them. The result: fewer permanent cut marks, a surface that stays prettier longer, and a board that’s gentler on knives
than many edge-grain boards. (Your chef’s knife will not write you a thank-you note, but you’ll feel it.)
The brick wall pattern: classic, bold, and secretly practical
The “brick wall” look comes from offset blockslike masonryoften with a contrasting “mortar” wood. Done right, it looks architectural and intentional.
Done wrong, it looks like a spreadsheet error. Don’t worry: we’re doing it right.
Materials and Tools
Wood choices that behave in a kitchen
- Best “brick” woods: hard maple, walnut, cherry, beech (closed-grain hardwoods with a long track record for cutting boards).
- Good “mortar” contrast: cherry against maple, maple against walnut, or a thin walnut line for drama.
- Avoid: softwoods (pine, fir), very oily exotics (can interfere with glue and finishing), and composite woods (MDF/particleboard).
Adhesive and finish
- Glue: a waterproof or highly water-resistant PVA wood glue commonly used for cutting boards (e.g., Titebond III-type glue).
- Finish: food-grade mineral oil + beeswax (or a ready-made board conditioner). Avoid cooking oils that can go rancid.
Tools that make life easier
- Table saw with a sharp blade, plus a crosscut sled (highly recommended) and push sticks
- Miter saw or chop saw (optional, for rough cutting)
- Jointer/planer (or a good milling workaround) for flat, square stock
- Clamps: parallel clamps or pipe clamps (more than you thinkthen two more)
- Flattening method: drum sander, wide-belt access, router sled, or careful sanding strategy
- Random orbit sander and sandpaper (80–220+ grit)
- Scraper (card scraper) and/or sharp hand plane for finesse work
- Optional: round-over bit or chamfer bit; rubber feet; handles; non-slip mat
Design and “Brick Math” Without Tears
Pick your final board size
A practical “do-everything” size is around 12" × 18" and 1.75"–2.25" thick.
Thicker boards feel premium and resist warping, but they also weigh moreso plan accordingly unless you enjoy deadlifting breakfast prep.
Choose brick and mortar dimensions
Here’s a beginner-friendly layout that looks sharp without requiring a PhD in Pattern Alignment:
- Brick width (across the board): 1.25"–1.75"
- Brick length (along the board): 2× brick width (classic brick proportions)
- Mortar thickness: 1/8"–1/4" strips (thin lines look crisp and modern)
How the brick offset is actually made
The trick is not carving tiny half-bricks later like a wood-themed jigsaw puzzle. Instead, you create the offset during the
first glue-up by including a partial-width strip on one side (or by building two panels that start/end differently),
so that when you slice and rotate to end grain, your “rows” naturally shift like bricks.
Translation: we’re building the pattern with planning, not panic.
Step-by-Step: Build the Brick Wall End Grain Cutting Board
Step 1: Let your wood acclimate (yes, wood has moods)
Bring your lumber into the shop and let it sit at least a few days, ideally a week, especially if it came from a very different temperature/humidity.
Wood moves. Wood always moves. Your goal is to let it do most of its moving before you glue it into an expensive wooden sandwich.
Step 2: Mill your stock flat, square, and consistent
Brick patterns look best when your strips are the same thickness and your glue lines are tight. Joint one face, joint one edge,
plane to thickness, then rip to width. If you don’t have a jointer/planer, use a sled method or buy pre-milled S4S hardwood
not cheating, just outsourcing your suffering.
Step 3: Rip “brick” strips and “mortar” strips
Example: You want bricks 1.5" wide and mortar 0.25" thick. Rip your primary wood strips at 1.5", and your contrast wood at 0.25".
Keep them in labeled stacks so you don’t accidentally invent a new pattern called “Confused Zebra.”
Step 4: Dry layout the first glue-up (and take a photo)
Lay the strips out in your intended order. Decide where the mortar goes: between every brick strip, or only between certain “rows” for a subtler look.
Once you like it, take a quick photo. This is your emergency “what was I doing?” reference after the glue gets involved.
Step 5: First glue-up: make a long-grain panel
Spread glue evenly on mating faces (a small roller or silicone brush helps). Clamp firmly but don’t go full Herculestoo much pressure can squeeze out
too much glue and cause “glue starvation” (weak joints). Use cauls (straight boards wrapped in packing tape) if needed to keep things aligned.
- Wipe squeeze-out lightly with a damp cloth (or let it gel and scrape lateroften cleaner).
- Let the panel cure fully per your glue’s instructions. Rushing here is how people end up with “modern art” instead of “cutting board.”
Step 6: Create the brick offset in the panel (two easy options)
Option A: Partial-width starter strip (simple and efficient)
During the first glue-up, make one edge start with a half-width “brick” strip (or any partial width that equals your offset).
When you later slice the panel into segments and rotate them, alternating rows will naturally shift.
This method reduces waste and keeps your brick pattern consistent.
Option B: Two panels with different starts (for very crisp symmetry)
Build two similar long-grain panels: one begins with a full brick strip, the other begins with a half strip.
After slicing and rotating, you alternate rows from each panel to create the offset. Slightly more work, very predictable results.
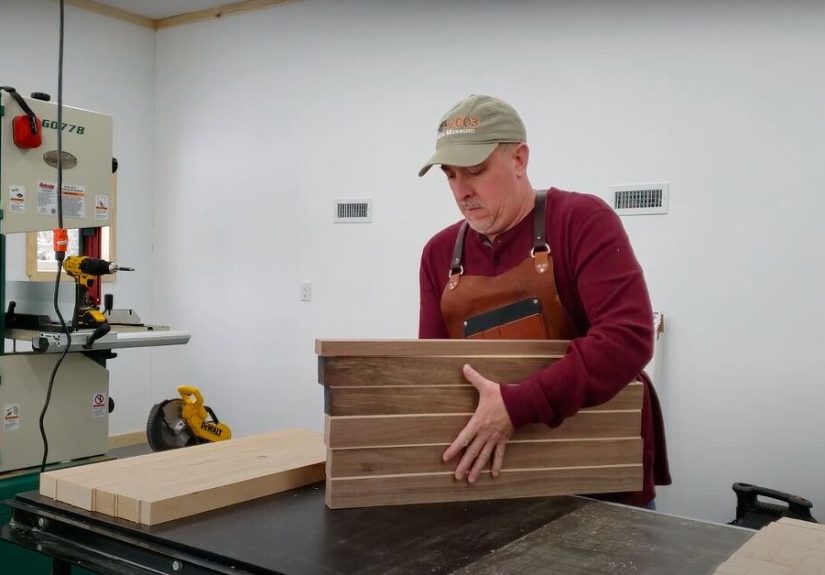
Step 7: Slice the panel into “rows” and rotate to end grain
Now crosscut the long-grain panel into equal-thickness slices. These slices become your end-grain “rows” once rotated 90 degrees.
This is where a crosscut sled shines: it’s safer and more accurate than trying to crosscut thick glued panels against a fence.
Typical row thickness is 1.5"–2.25" (often matching your final board thickness). If your final board will be 2" thick,
cut slices slightly oversized to allow for flattening.
Step 8: Dry-fit the brick wall layout (the “no glue” dress rehearsal)
Rotate slices so the end grain faces up. Arrange them like bricks: row 1 aligned, row 2 shifted by half a brick, row 3 aligned again, etc.
Look for continuity in mortar lines and color balance. Flip or rotate individual slices if needed to improve the pattern.
Step 9: Second glue-up: the end-grain assembly
End grain drinks glue like it just ran a marathon. Apply glue generously and evenly, but don’t puddle it. Work in sections so you’re not racing the clock.
Clamp across the width, then add a couple of clamps lengthwise if needed to keep rows seated.
- Use cauls to keep the top surface roughly aligned.
- Check for row drift every few minutes during clamping; nudge back into place if needed.
- Let it cure fully. End grain boards are not a “two hours and done” situation.
Step 10: Flatten the board safely (pick your method)
Flattening is the part where end grain boards separate the calm craftspeople from the folks who start Googling “therapy near me.”
Choose a method based on your tools:
- Best: drum sander or wide-belt sander (fast, controlled, minimal tear-out).
- Very good: router sled flattening (slow, dusty, effective).
- Possible but risky: thickness planer (end grain can tear out or explode at the exit; use extreme caution and light passes if attempted).
- Budget method: aggressive sanding (start coarse, keep it flat, take breaks, hydrateboth you and the board).
Whatever you do, don’t “spot sand” like you’re polishing a single scratch on a car. Keep the surface flat by using a sanding block,
a hard pad, or a reliable flattening strategy. A card scraper can also help clean up glue and minor high spots.
Step 11: Trim to final size and soften edges
Square the board on the table saw or with a track saw. Add a small chamfer or round-over on the top edges to prevent splintering.
For the bottom edges, a slightly larger chamfer helps prevent chipping if the board gets slid around.
Optional upgrades:
- Rubber feet: keeps the board stable and lets air circulate underneath.
- Finger grips/handles: routed slots or simple handholds.
- Juice groove: looks pro, but consider leaving it off for a true “both sides usable” board.
Step 12: Sanding schedule that won’t ruin your weekend
A practical sanding progression is 80 → 120 → 180 → 220. End grain can look fuzzy; going to 220 usually gives a smooth feel
without making the surface too polished to absorb finish. Vacuum between grits. Wipe with a slightly damp cloth to raise grain, let dry,
then do a final pass at 220 for a silky surface.
Step 13: Finish with mineral oil and beeswax
Flood the board with food-grade mineral oil and let it soak. End grain is thirsty, so don’t be shy. Apply multiple coats until the board stops absorbing quickly.
Then add a beeswax/mineral oil conditioner to seal and buff to a soft sheen.
- Apply oil to all sides (top, bottom, edges) to help equalize moisture movement.
- Wipe off excess and let it rest before heavy use.
- Reapply oil when the board looks dry or feels rough.
Common Mistakes (and How to Avoid Them)
1) Uneven strips = chaotic glue lines
If your strips vary even a little, the pattern won’t line up and gaps appear. Mill carefully and keep thickness consistent.
When in doubt, re-plane before gluing. It’s faster than “gap-filling regrets” later.
2) Rushing cure time
Cutting, flattening, or sanding before the glue has fully cured can weaken joints. Let it cure properlyespecially after the second glue-up.
Your board will be around for years; it can wait overnight.
3) Misalignment during clamping
End grain rows can drift while you tighten clamps. Tighten gradually, alternating clamps, and check alignment often.
Cauls reduce the “row skate” effect.
4) Over-sanding one area
Spot sanding makes dips. Use consistent pressure and a flat reference. If you’re removing a lot of material, a router sled or sander access
is usually smarter than trying to sand your way through a mountain.
5) Using the wrong finish
Avoid finishes that can get sticky, smell odd, or go rancid. Mineral oil + beeswax is popular because it’s easy to refresh and doesn’t polymerize into a brittle film.
(Also, it makes the board look like it just got its passport stamped.)
Care, Cleaning, and Food Safety
Daily cleaning
- Hand wash with warm water and mild dish soap.
- Don’t soak. Don’t dishwasher. (Dishwashers are basically wood’s villain origin story.)
- Dry immediately with a towel, then stand it on edge to air dry fully.
Sanitizing after raw meat
If you use the board for raw meat, sanitize it after washing. A commonly cited kitchen-safe method is a diluted unscented bleach solution
(for example, about 1 tablespoon per gallon of water). Apply, let sit briefly, then rinse and dry.
If you prefer separate boards for meat and produce, that’s also a great plan.
Oiling schedule
End grain boards benefit from regular conditioning. A simple rule: oil it when it looks dry. Many people land around once a month,
more often in dry climates or heavy-use kitchens.
Conclusion
A brick wall end grain cutting board is the perfect blend of function and flex: it’s durable, knife-friendly, and looks like something you’d see in a boutique kitchen store
with lighting that makes tomatoes look like movie stars. The secret is not exotic toolsit’s consistent milling, smart pattern planning, patient glue-ups,
and a flattening method that doesn’t pick a fight with end grain.
Build it carefully, finish it well, maintain it like you’re the board’s personal trainer, and you’ll end up with a showpiece that’s also a workhorse.
That’s the best kind of “stunning.”
Shop Notes & Experiences: What I’d Do Differently Next Time (About )
The first time you build a brick wall end grain cutting board, you’ll discover a universal truth: wood is an adorable liar.
It looks calm and cooperative right up until glue hits the surfacethen it becomes a slippery toddler covered in maple syrup.
My biggest takeaway? The pattern doesn’t fail in the cutting stage; it fails in the “I thought I could eyeball it” stage.
Experience lesson #1: take the dry-fit seriously. I used to treat dry-fitting like the preview at a movie theater:
mildly interesting, but I’m here for the main event. Wrong. Dry-fitting is where you catch the “mortar line that vanishes,” the color stripe that
accidentally forms a giant arrow, and the one row that’s flipped so the offset turns into “modern confusion.”
Now I dry-fit on a flat surface, step back, and look at it like I’m judging a cooking show: “This is… bold. But is it intentional?”
Experience lesson #2: label your slices. Once the first panel is cut into sections, everything looks the sameespecially once you rotate to end grain.
A simple pencil mark system (A1, A2, A3…) saved me from accidentally rearranging the pattern into what I can only describe as “brick wall after mild earthquake.”
Pencil marks sand off. Regret lasts forever.
Experience lesson #3: clamp in stages. If you crank down hard on one clamp immediately, the rows slide.
If you tighten gradually, alternating clamps like you’re tuning a drum, things stay aligned.
I also learned to keep a small mallet and a scrap block nearby to nudge rows back into place while the glue is still workable.
Think of it as traffic control for tiny wooden rectangles.
Experience lesson #4: plan flattening before you glue. If your only flattening option is “aggressive sanding,” make the glue-up as clean and flat as possible.
Use cauls. Check with a straightedge. Because sanding end grain is like trying to pet a porcupine into submission: possible, but you’ll question your life choices.
The time I finally used a router sled, the board went from “wavy lake surface” to “chef-worthy flat” with way less dramajust more dust.
(Wear a respirator. Your lungs did not sign up for walnut confetti.)
Experience lesson #5: finishing is not a single coat moment. End grain is thirsty. The first oil coat disappears like it owes someone money.
I now oil the board several times over a day, wiping off excess between coats. Then I wax, buff, and pretend I’m on a luxury car detailing channel.
The payoff is huge: the contrast gets richer, the grain looks deeper, and the board feels like a professional piece rather than a “weekend experiment.”
Finally, the most practical experience note: add feet. I resisted for a while because “pure aesthetic.”
But feet improve airflow underneath, reduce wobble, and make the board easier to pick up.
Also, they make your board look like it has tiny boots, which is either adorable or unsettlingdepending on your relationship with kitchen tools.