Table of Contents >> Show >> Hide
- Why a Living Picture Frame Works (and Why It Sometimes Flops)
- Supplies You’ll Need
- Step-by-Step: Create Succulent Wall Art with a Picture Frame
- Step 1: Pick the right frame (depth is your friend)
- Step 2: Build or reinforce the “shadow box”
- Step 3: Attach the wire mesh (the “keep everything inside” layer)
- Step 4: Add fabric to hold soil (the “no dirt confetti” layer)
- Step 5: Install the backing board (the “actual wall art” part)
- Step 6: Mix your soil (fast-draining or bust)
- Step 7: Fill the frame tightly
- Step 8: Plan your design before you plant
- Step 9: Prep your succulents (tiny detail, big payoff)
- Step 10: Plant through the mesh
- Step 11: Water lightly, then let it root while flat
- Step 12: Gradually tilt, then hang securely
- Choosing the Best Succulents for a Vertical Frame
- Care and Maintenance: Keep Your Succulent Wall Art Thriving
- Troubleshooting: Common Problems (and Fixes That Actually Work)
- Design Variations (Because One Frame Is Never Enough)
- Hands-On Experiences and Lessons People Commonly Learn the Hard Way (So You Don’t Have To)
- Conclusion
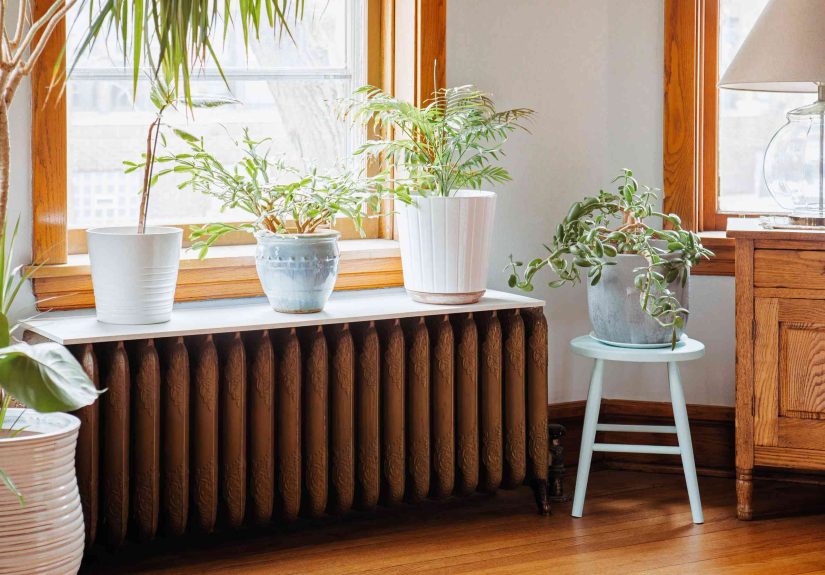
Somewhere in your home, there’s probably a lonely picture frame holding either (a) a faded photo from 2011 or (b) absolutely nothing, because you swore you’d “find the perfect print for it” and then… life happened.
Good news: that frame is about to become a living, growing piece of decoraka succulent wall artwithout you needing a greenhouse, a woodworking degree, or a daily motivational speech for your plants.
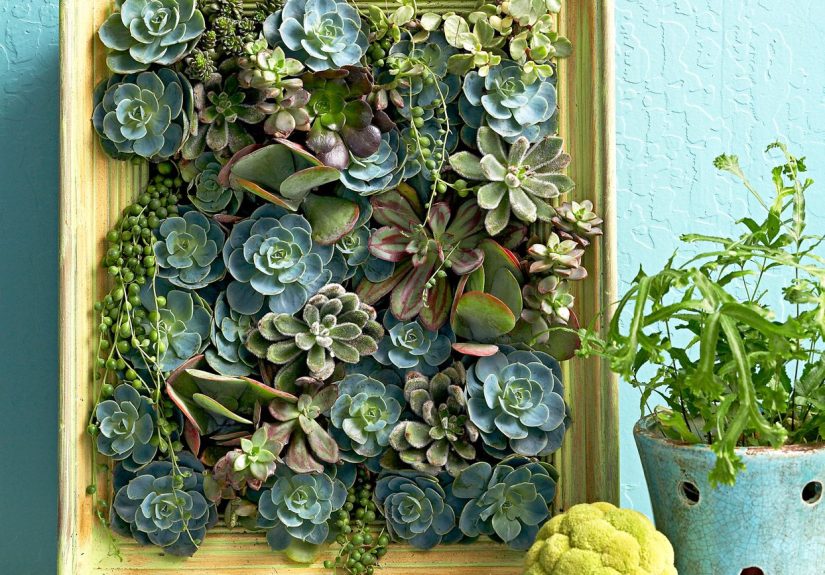
A “living picture frame” (also called a vertical succulent garden or succulent wall planter) is basically a shallow box frame packed with a well-draining growing medium and planted with succulents that root in place.
The result is part art, part houseplant, part “waitthose are real?!”
Why a Living Picture Frame Works (and Why It Sometimes Flops)
Succulents are excellent candidates for wall art because they store water in their leaves and stems, tolerate drying out, and can thrive in shallow containersif you respect their biggest rule: drainage matters.
Vertical projects can fail when the frame stays too wet, the soil is too dense, the plants never get a chance to root before hanging, or the whole thing is placed in a dim corner like a misunderstood painting.
The “secret sauce” is a combination of:
(1) a shallow but sturdy frame, (2) mesh and backing that hold everything in, (3) a gritty, fast-draining mix, and (4) a rooting period while the frame lies flat.
Think of it as giving your plants time to settle in before you ask them to perform gravity-defying stunts.
Supplies You’ll Need
The frame setup
- Old picture frame (ideally a deep frame or shadow box, 2–4 inches deep)
- Wood strips (optional, if you need to build depth like a shadow box)
- Hardware cloth or wire mesh (keeps soil and plants in place)
- Staple gun and staples (or small screws + washers)
- Backing board (thin plywood works well for a sturdy back)
- Landscape fabric (or burlap/coconut coir liner) to keep soil from spilling through mesh
- Wood glue or screws (if building up the frame)
Planting materials
- Cactus/succulent potting mix (or DIY mixsee below)
- Drainage amendments like perlite or pumice (highly recommended)
- Sphagnum moss (optional, helps stabilize and reduce soil loss)
- Succulent cuttings or small plants (2-inch pots and cuttings are easiest)
- Chopsticks or a pencil (for making planting holes)
- Pruners/scissors
Hanging and protection
- Heavy-duty wall anchors or (better) screws into studs
- French cleat or D-rings rated for the finished weight
- Plastic sheet (optional) as a moisture barrier between frame and wall
- Drop cloth (because soil has no respect for your floors)
Step-by-Step: Create Succulent Wall Art with a Picture Frame
Step 1: Pick the right frame (depth is your friend)
A shallow, flat frame can work, but a shadow box–style frame makes the whole project easier and sturdier because it has room for soil and roots.
If your frame is thin, you can attach wood strips to the back to create a box.
Aim for 2–4 inches of depth so the roots have enough space to settle in.
Step 2: Build or reinforce the “shadow box”
If the frame is already deep, inspect it for wobble. If it’s loose, tighten corners with screws or wood glue.
If you’re building depth, attach wood strips to the back edge of the frame so you create a shallow tray.
This is not the moment for “good enough.” Once filled, your frame becomes surprisingly heavylike a decorative brick with a botany hobby.
Step 3: Attach the wire mesh (the “keep everything inside” layer)
Cut hardware cloth or wire mesh to fit inside the frame opening.
Secure it firmly to the inside face of the frame using staples every couple inches (or screws and washers).
This mesh is what holds your soil and plants in place when the frame is vertical, so attach it like you mean it.
Step 4: Add fabric to hold soil (the “no dirt confetti” layer)
Lay landscape fabric (or burlap/coir liner) over the mesh on the inside.
This keeps soil from pouring out while still allowing water to drain and air to reach roots.
For extra hold, you can tuck a thin layer of sphagnum moss against the fabricthink of it as rebar for your soil.
Step 5: Install the backing board (the “actual wall art” part)
Cut a backing board (thin plywood is common) to match the outer back dimensions of the frame box.
Attach it securely with nails or screws.
If you want to protect your wall, you can also add a plastic moisture barrier over the backing or on the wall side when you hang it.
Step 6: Mix your soil (fast-draining or bust)
Succulents want a gritty, airy mix.
If you’re using a bagged cactus/succulent mix, you can improve it by adding extra perlite or pumice for drainage.
A simple DIY blend is:
- 2 parts potting soil (no moisture-retaining additives if possible)
- 1 part perlite or pumice
- 1 part coarse sand or fine gravel
The goal is a mix that drains quickly and doesn’t stay soggybecause soggy + succulent = sadness.
Step 7: Fill the frame tightly
Place the frame face down on a protected surface so the mesh side is facing up.
Add soil gradually and press it in firmly, especially around corners.
You want the interior packed enough to support plants, but not so compressed that water can’t move through.
If soil settles after a gentle shake, add more and press again.
Step 8: Plan your design before you plant
This is where you go from “container gardening” to “living artwork.”
Lay your succulents on top of the soil (still flat) to test arrangements.
A few easy layout ideas:
- Ombre gradient: greens to pinks to purples
- Focal rosette + trailing edges: big center echeveria with sedum spilling down
- Textural mix: spiky, round, fuzzy, and trailing in balanced clusters
- Geometric blocks: group similar types into shapes (triangles, stripes)
Step 9: Prep your succulents (tiny detail, big payoff)
If you’re using cuttings, let cut ends callus for a day or two before planting.
This helps reduce the chance of rot when the cutting meets soil.
If you’re using small potted succulents, gently remove them and loosen the roots.
Step 10: Plant through the mesh
Use a pencil or chopstick to create a hole through the mesh/fabric into the soil.
Insert the plant or cutting and firm soil around it.
For rosettes, nestle them snugly so they don’t wobble.
For trailing types, aim them toward the bottom edge (future “down” direction) so they cascade naturally once hung.
Step 11: Water lightly, then let it root while flat
After planting, give a light watering to settle soil (not a flood).
Then keep the frame lying flat for a rooting periodcommonly 1–4 weeks, depending on plant size, temperature, and light.
During this time, roots anchor into the mix so the plants won’t tumble out when you hang the frame.
Once the plants resist a gentle wiggle, they’re “stuck” enough to go vertical.
Step 12: Gradually tilt, then hang securely
Don’t go from flat to vertical overnight like a plant-themed roller coaster.
Tilt the frame a little more each day (or every couple days), watching for soil shifting.
When it’s stable, hang it using secure hardware rated for the weight.
If possible, mount into studs or use a French cleat for confidence (and fewer heart palpitations).
Choosing the Best Succulents for a Vertical Frame
Top picks that behave well in wall art
Not every succulent loves life sideways. Look for varieties that root easily, stay relatively compact, and tolerate shallow soil:
- Sedum (many types trail beautifully and root readily)
- Echeveria (rosette focal points; choose smaller varieties for frames)
- Sempervivum (great for outdoor frames in suitable climates)
- Crassula (jade relatives; some stay compact and branch nicely)
- Graptopetalum and Graptoveria (often hardy, colorful rosettes)
A simple “recipe” for a balanced layout
- 2–3 rosettes as focal points (center or rule-of-thirds placement)
- 3–5 medium fillers (texture + color support)
- 3–6 trailing plants along the bottom edge for movement
Example palette: a lavender-toned rosette (center), lime sedum (edges), and dusty blue-green fillers for contrast.
If you want drama, add a darker aeonium or deep purple rosette as a “shadow” accentlike eyeliner for plants.
Care and Maintenance: Keep Your Succulent Wall Art Thriving
Light
Most succulents do best with bright lightoften several hours of sun or strong indirect light.
Indoors, place your living picture frame near a bright window.
Outdoors, morning sun with some afternoon protection can reduce stress in hot climates.
If your succulents start stretching (long stems, spaced leaves), they want more light.
Watering (the part everyone overthinks)
The safest approach is the classic succulent method: soak, then dry.
Water only when the mix is dry, and then water thoroughly enough that moisture moves through the root zone.
For a wall frame, that can look like:
- Flat-watering: take the frame down, lay it flat, water gently, let it drain, then hang again
- Controlled pour: use a narrow-spout watering can or squeeze bottle to target soil pockets
- Bottom soaking (sometimes): set the frame in a shallow tray briefly if the design allows and the backing is protected
Avoid frequent misting. It can keep surfaces damp and invite rot or fungus, especially indoors.
If you’re unsure, under-watering is usually safer than “just a little more.”
Feeding
Succulents in frames don’t need much fertilizer.
If growth stalls for months during active season, a diluted, low-nitrogen fertilizer once or twice can help.
Skip feeding during winter or low-light periods when growth slows.
Rotation and grooming
If your frame gets directional light, rotate it occasionally so one side doesn’t hog the spotlight.
Trim leggy growth and replant cuttings to keep the design full.
Removing dead leaves also helps airflow and reduces pest hiding spots.
Troubleshooting: Common Problems (and Fixes That Actually Work)
Problem: Plants keep falling out
- Cause: not enough rooting time, soil not packed firmly, holes too large
- Fix: keep frame flat longer, add soil and press firmly, use floral pins or bent wire as temporary “staples”
Problem: Mushy leaves or rot
- Cause: soil too dense, too much water, low light, poor drainage
- Fix: switch to a grittier mix, reduce watering, increase light, remove affected plants and replant healthy cuttings
Problem: Stretching and pale color
- Cause: insufficient light
- Fix: move to brighter exposure or add a grow light; prune and replant compact rosettes
Problem: Soil keeps leaking
- Cause: fabric liner too loose or torn; mix too fine
- Fix: double-layer fabric, add a moss layer, use a chunkier mix
Design Variations (Because One Frame Is Never Enough)
- Seasonal swap: build two framesone for bright summer growth, one for cozy winter indoor display
- Monochrome look: all-blue/gray succulents for a modern, sculptural vibe
- Wild texture: mix rosettes with trailing sedum and a few “spiky” accents
- Mini gallery wall: three small frames grouped together like a living triptych
- Outdoor hardy frame: use cold-tolerant succulents (like some sempervivum) where climate allows
Hands-On Experiences and Lessons People Commonly Learn the Hard Way (So You Don’t Have To)
If you’ve never built a living succulent picture frame before, expect the first week to feel like you’re babysitting a tiny plant mattress.
That’s normal. The most common “experience” people report is thinking, “It looks done!” and then hanging it immediatelyonly to watch a few plants slowly slide like they’re auditioning for a soap opera.
The fix is almost always the same: give it time to root. A frame that rests flat for a couple of weeks often behaves dramatically better once it’s vertical.
Another frequent surprise is weight. Soil + wood + moisture adds up fast, especially in larger frames.
Many DIYers start with lightweight hanging hardware and then upgrade after the first “this seems… heavier than expected” moment.
A French cleat or solid stud mounting tends to make people sleep better at night.
(Because nothing says “relaxing home” like worrying your wall art might become floor art.)
Watering is where the biggest learning curve happens.
People who love their plants a little too enthusiastically may water on a schedulethen wonder why leaves turn translucent or mushy.
In most real-world setups, the frame does best when you water based on dryness, not dates.
The easiest routine many settle into is: take it down, lay it flat, water gently, let it drain, and hang it back up.
Yes, it’s one extra step. But it’s also the difference between “thriving succulent wall art” and “mysterious compost painting.”
Design-wise, first-time builders often pack plants evenly across the whole frame (which looks great on day one) but forget that succulents grow at different speeds.
After a month or two, fast growers like some sedums can dominate, while slow rosettes sit politely in the background.
A practical trick is to treat your frame like a living arrangement: trim and replant.
Cuttings from the fast growers become free “filler” later, and the slow growers stay visible instead of being swallowed by a green tidal wave.
Finally, people are often surprised by how much light affects the look.
In bright light, many succulents color uppinks deepen, purples intensify, edges blush.
In low light, the same plants may stretch and fade.
The “experience” here is simple: if the frame looks less like a jewel box and more like a stretched-out salad, move it brighter.
Your plants are basically saying, “We love you, but we need better lighting.”
Conclusion
Turning an old frame into succulent wall art is one of those rare DIY wins: it looks high-end, it’s customizable, and it’s genuinely fun to maintain once it’s established.
Build a sturdy frame box, use mesh and fabric to hold a gritty mix, plant with a designer’s eye, andmost importantlylet everything root before you hang it.
Do that, and you’ll have a living picture frame that makes guests stare a little too long (in the best way).