Table of Contents >> Show >> Hide
- The Quick-Glance Order (So You Don’t End Up Re-Doing Everything)
- Before You Start: Pick a Vibe, Not a Panic
- Step 1: Set Up the Tree Like You Want It to Survive the Season
- Step 2: Add Lights (The Glow Is Your Foundation)
- Step 3: Ribbon and Garland (The Layer That Makes It Look Styled)
- Step 4: OrnamentsStart Big, Then Fill In
- Step 5: Picks, Sprays, and “Filler” (The Secret Sauce)
- Step 6: Tree Topper and Base (Finish Strong)
- Troubleshooting: Fix the “Something’s Off” Feeling
- Christmas Tree Decorating Ideas (Style Recipes You Can Copy)
- Safety & Maintenance (Pretty AND Practical)
- Conclusion: Your Tree, Your Rules (Just Use the Right Order)
- Real-World Decorating Experiences ( of “Yep, That Happens”)
Decorating a Christmas tree is basically interior design… but with more glitter, more snacks, and at least one person saying, “Waitwhy does it look crooked from THIS angle?” The good news: a beautiful tree isn’t about having a designer budget or an ornament collection that could qualify for its own insurance policy. It’s about a smart order of operations, a little layering, and a willingness to step back and squint like you’re judging a pie at a county fair.
Below is a step-by-step approach used by decorators and home design prossimple enough for beginners, detailed enough for the family member who treats “tree night” like an Olympic event.
The Quick-Glance Order (So You Don’t End Up Re-Doing Everything)
- Prep the tree (fluff, shape, secure, and place it safely)
- Add lights (even if it’s pre-lit, you may want more)
- Ribbon and/or garland (the “big movement” layer)
- Big statement ornaments (anchors and focal points)
- Medium + small ornaments (fill, balance, sparkle)
- Picks, sprays, and texture (depth and drama)
- Topper + base (skirt/collar, cord hiding, final polish)
Before You Start: Pick a Vibe, Not a Panic
Your tree will look more “wow” when it has a plan. You don’t need a strict theme, but you do want a clear direction: color story, texture, and mood. Think of it like getting dressed: if you start with a neon hat, plaid pants, and polka-dot shoes, you’ll either look like a fashion icon… or a confused clown. (Sometimes those are the same thing, but let’s not gamble.)
Easy theme formulas
- Classic: red + green + gold accents
- Modern: white lights + neutrals + one metal (gold or silver)
- Playful: multicolor lights + candy colors + whimsical ornaments
- Nature-inspired: warm lights + wood + pinecones + dried citrus
- Memory lane: family ornaments + vintage-inspired garland
What you’ll want nearby (save your knees)
- Step stool or small ladder
- Extension cord / power strip (rated for your setup)
- Ornament hooks (more than you think)
- Floral wire or ornament wire (for stubborn ribbon/garland)
- Storage bin or tray (to keep ornaments from rolling away like tiny, shiny escape artists)
Step 1: Set Up the Tree Like You Want It to Survive the Season
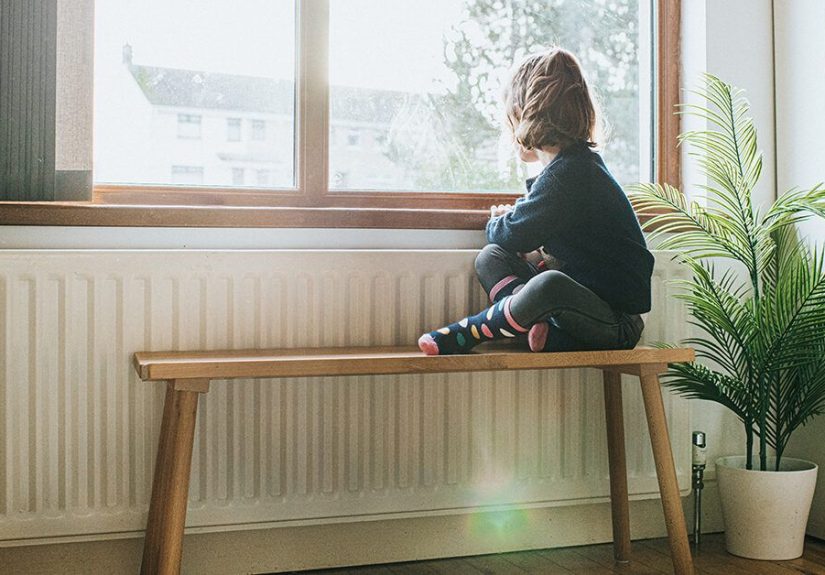
A gorgeous tree that tips over is not “festive.” It’s a holiday jump-scare. Start by placing the tree where it can shine without becoming a hazard. For real trees, keep it away from heat sources (fireplaces, radiators, space heaters), and give it room so branches aren’t constantly brushed by traffic. For artificial trees, placement still mattersespecially if you’re trying to hide a cord.
If it’s a real tree
- Get it into water fast: the trunk should sit in water as soon as possible.
- Make a fresh cut: trimming a small slice off the trunk can improve water uptake.
- Water daily: a hydrated tree is safer and holds needles longer.
If it’s an artificial tree
- Fluff thoroughly: open each branch and separate tips so it looks full, not “fresh out of a box.”
- Shape with intention: angle branches consistently (upswept or downswept) based on the tree’s style.
- Secure the base: tighten the stand and consider anchoring if you have pets or toddlers.
Pro tip: fluffing takes longer than people expect. Put on a playlist, assign someone “branch duty,” and accept that the first 10 minutes may feel like wrestling a very polite porcupine.
Step 2: Add Lights (The Glow Is Your Foundation)
Lights are the underpainting of your tree. When lights are well-distributed, everything looks better. When lights are patchy, even the prettiest ornaments can look like they’re floating in darkness.
LED vs. incandescent (quick reality check)
- LED: cooler, efficient, long-lasting, great for safety and all-night sparkle (though you still shouldn’t leave them on unattended).
- Incandescent: warm glow, nostalgic vibe, but produces more heat and typically draws more power.
How many lights do you need?
The “right” amount depends on how bright you want the tree. Many U.S. decorating guides suggest rules of thumb like around 100 mini lights per 1.5 feet of tree height, with the option to double for extra glow. As another approach, some guides recommend about 100 mini lights per vertical foot and scaling up for a fuller, denser look. If you’re aiming for a softer tree where ornaments do the talking, use fewer. If you want that “magical storefront window” sparkle, use more.
Two easy ways to string lights
- Spiral method (fast): start at the top and wrap around, going down in an even pattern. Push lights deeper into the branches occasionally so the glow comes from within.
- In-and-out method (designer look): work around the tree, weaving lights inward toward the trunk and outward to branch tips. This takes longer, but the depth is worth it.
If your tree is pre-lit but looks “meh,” it’s totally normal to add an extra strand or twoespecially if you like a brighter tree or your ornaments are darker in color.
Step 3: Ribbon and Garland (The Layer That Makes It Look Styled)
Ribbon and garland create movement and connect the whole design. Think of them as the “swoosh” layerwhat makes the tree feel intentional instead of “we hung stuff and hoped for the best.”
Ribbon tips that instantly upgrade your tree
- Use wired ribbon if you can; it holds shape and creates plush loops.
- Cut into manageable lengths (instead of wrestling one endless boa constrictor of ribbon).
- Tuck it deeper into branches so it billows and fills gaps, rather than sitting flat on the surface.
- Layer textures: velvet + satin, or sheer + metallic, for depth without chaos.
Three ribbon/garland styles (choose your adventure)
- Classic spiral: start at the top and drape down with consistent spacing. Easy, tidy, dependable.
- Vertical cascades: anchor at the top and let ribbon fall in varying lengths around the tree for a modern, airy look.
- Tucked loops (pro look): create loose loops and tuck every 12–18 inches so it “puffs” across the tree. This is the method people compliment like you hired help.
Garland options (choose one or mix carefully): bead garland for shine, felt garland for cozy, greenery garland for a natural look, or ribbon garland when you want drama without tinsel everywhere.
Step 4: OrnamentsStart Big, Then Fill In
Ornaments are where your personality shows up. The trick is scale and placement. Many decorating guides recommend placing larger statement ornaments first, then working down to smaller ones. This creates balance and avoids the “all the good ornaments ended up on one side” phenomenon.
Placement rules that work
- Put some ornaments deeper inside the tree to create depth and make it look fuller.
- Use clusters (2–3 similar ornaments together) for a styled, curated effect.
- Repeat key colors around the tree so it feels cohesive from every angle.
- Vary finishes: matte, shiny, glitter, metallictexture reads as “expensive.”
If you have kids or pets
Put sentimental, breakable ornaments higher up, and use shatter-resistant ornaments lower down. This isn’t giving up it’s strategic holiday peacekeeping.
Step 5: Picks, Sprays, and “Filler” (The Secret Sauce)
If you’ve ever looked at a magazine-perfect tree and thought, “Mine doesn’t have that full look,” this is why. Picks and sprays add volume and shape without needing a million ornaments.
What to add
- Greenery picks: eucalyptus, cedar, frosted stems
- Berry sprays: classic red berries or icy metallics
- Florals: poinsettias, magnolias, or velvet roses for a luxe look
- Natural texture: pinecones, dried orange slices, cinnamon sticks (bonus: they smell amazing)
Add picks in layers: some deep near the trunk, some mid-level, some on the outer branches. That’s how you get dimension instead of a “stuck-on” look.
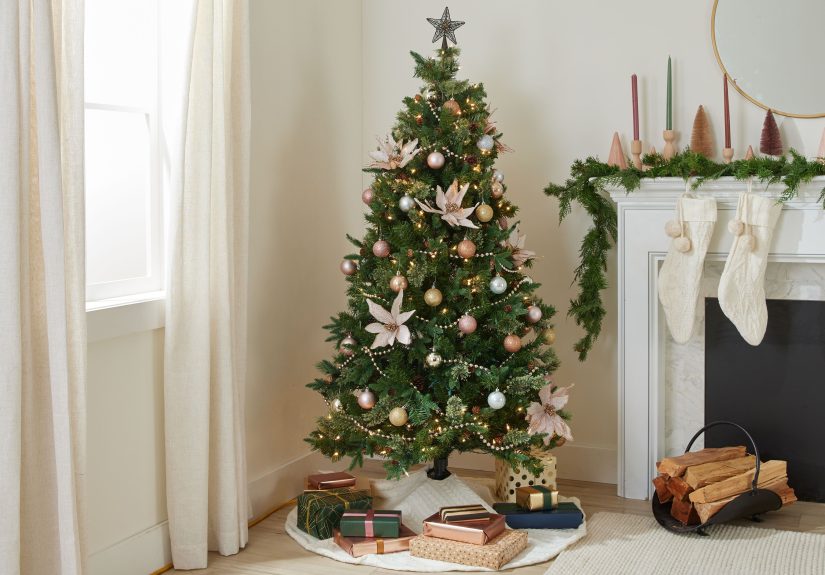
Step 6: Tree Topper and Base (Finish Strong)
A topper is the exclamation point. A skirt or collar is the “we meant to do this” finishing touch. And yespeople notice the base, especially in photos.
Topper ideas
- Star or angel: timeless and easy
- Oversized bow: soft, modern, and surprisingly photogenic
- Cluster topper: a few stems/picks gathered at the top for a designer look
Base options
- Tree skirt: traditional, cozy, hides the stand
- Tree collar: sleek, modern, great for minimal rooms
- Basket cover: warm and casual; looks great with natural themes
Hide cords by running them down the back of the tree and tucking them under the skirt/collar. If you use a timer or smart plug, you’ll also save yourself from daily “who’s turning the lights off?” negotiations.
Troubleshooting: Fix the “Something’s Off” Feeling
Problem: Bald spots
- Fluff more than you think you need.
- Add ribbon loops or picks to fill gaps.
- Place a few larger ornaments deeper inside to create fullness.
Problem: Too much going on
- Remove one category (extra garland, too many colors, or a busy ribbon pattern).
- Create “resting zones” where lights and greenery show through.
Problem: The tree looks flat
- Mix ornament sizes and finishes.
- Add depth by hanging some ornaments closer to the trunk.
- Use sprays/picks that extend slightly beyond branch tips.
Christmas Tree Decorating Ideas (Style Recipes You Can Copy)
1) Classic Cozy
Warm white lights, red ornaments, gold accents, and a traditional topper. Add a plaid ribbon for that “Hallmark movie” energyminus the surprise small-town bakery contest.
2) Modern Neutral
White lights, champagne or ivory ribbon, wood and metal ornaments, and a simple star. Keep the palette tight and let textures do the work.
3) Candy Shop Fun
Multicolor lights, bright ornaments, playful shapes (lollipops, gingerbread, quirky characters), and a big bow topper. Warning: may cause spontaneous hot cocoa cravings.
4) Nature-Inspired
Warm lights, dried orange slices, pinecones, cinnamon sticks, and earthy ribbon. Perfect if you want a tree that looks like it went on a wholesome hike and came back with accessories.
5) Sentimental & Vintage
Mix family ornaments with a few vintage-style elements (tinsel accents, nostalgic shapes, retro color pops). The tree becomes a timelineone ornament per memory.
Safety & Maintenance (Pretty AND Practical)
- Turn off lights when you leave or go to bed. Your tree should not be the one staying up all night.
- Use listed/certified lights and replace damaged strands.
- Follow manufacturer limits for how many strands you can connect.
- Keep real trees watered daily and away from heat sources.
- Watch for warning signs: warm plugs, flickering, or brittle needles on a real tree.
If your household is busy, a timer can be a great “set it and forget it” safety upgradeyour tree gets its spotlight hours, then clocks out responsibly.
Conclusion: Your Tree, Your Rules (Just Use the Right Order)
The secret to a beautiful Christmas tree isn’t a secretit’s layering in the right order. Start with a well-prepped, well-lit foundation. Add ribbon/garland for movement. Place big ornaments for balance, then fill in with smaller pieces. Finish with picks for depth, then lock in the topper and base for a polished look.
And remember: if you love it, it’s perfect. Even if your ribbon tried to start a small argument on the left side of the tree.
Real-World Decorating Experiences ( of “Yep, That Happens”)
Most people don’t struggle with the idea of decorating a Christmas treethey struggle with the reality of it. The reality includes tangled lights that form a knot scientists could study, a ladder that’s always two inches shorter than you need, and one ornament that refuses to hang straight no matter how politely you ask.
One common experience: the “I’ll just add lights quickly” optimism. It starts strong. Five minutes later, you’re holding a glowing spaghetti ball and realizing that time is not real in December. The best fix is also the least fun: test lights first, loosely coil them when storing, and build in time to weave them in-and-out. That depth lighting feels slower, but it saves you from the mid-process meltdown where you rip everything off and start over.
Then there’s the ribbon moment. Ribbon can be stunning… and also slightly dramatic. People often try to wrap one long piece around the tree, only to discover it behaves like a stubborn scarf in a wind tunnel. In real homes, the easiest ribbon win is cutting it into manageable sections and tucking loops into the branches. This gives you control and lets you “edit” the tree as you go. If one section looks weird, you move it. If the whole thing looks weird, you blame the lighting and take a snack break. (Both are valid.)
Another familiar scenario: the tree looks great from the couch… but questionable from the hallway. That’s usually because ornaments drift to the front. A practical, real-life trick is to decorate in rounds: place a few ornaments, then walk around the tree and fill the back and sides. Some people even do a quick phone video loop around the tree because cameras are brutally honest. If you spot a bald area, don’t panicadd a ribbon loop, a pick, or a larger ornament deeper inside to create fullness fast.
Households with pets and kids develop their own “tree wisdom.” Breakables migrate up high. Shatterproof ornaments take the lower branches. And if you have a cat, you learn that dangling, sparkly ornaments are basically an invitation to audition for a circus. The workaround is choosing sturdier ornaments near the bottom, securing special pieces with wire, and using picks that don’t wiggle like prey.
Finally, there’s the emotional part: the ornaments with stories. People often worry their tree won’t look “cohesive” if they include every quirky memory. But a tree that’s perfectly styled and completely impersonal can feel like a hotel lobby. Many families find the sweet spot by creating a simple foundation (lights + ribbon/garland in a tight palette), then layering sentimental ornaments on top. The result is balanced and meaningfullike a well-dressed tree that still knows how to have fun.