Table of Contents >> Show >> Hide
- Before You Open Anything, Start with the Easy Wins
- How to Fix PS3 Controller Buttons
- How to Fix a PS3 Controller Analogue Stick
- How to Fix PS3 Controller Charging and Battery Problems
- How to Open a PS3 Controller Safely
- Common PS3 Controller Problems and the Most Likely Fix
- Repair or Replace? Here’s the Honest Answer
- Final Thoughts
- Practical Experience: What Usually Happens When People Try to Fix a PS3 Controller
- SEO Tags
If your PS3 controller is acting like it has a mind of its own, welcome to one of gaming’s oldest side quests. Maybe the buttons feel sticky. Maybe the analog stick drifts like it’s trying to speedrun your game without you. Maybe the controller charges only when it feels emotionally supported. The good news is that many DualShock 3 problems are fixable with a little patience, a careful cleaning, and the willingness to remove a few tiny screws without launching them into another dimension.
This guide breaks down how to fix a PS3 controller step by step, including button problems, analog stick issues, charging trouble, connection glitches, and the classic “this thing worked yesterday, I swear” mystery. You do not need to be a repair wizard to handle the basic fixes. In many cases, the solution is simple: reset it, clean it, reseat a part, or replace an inexpensive component. For the bigger jobs, such as a worn joystick module, I’ll tell you exactly when you can still DIY and when it makes more sense to tap out and call in a repair shop.
Before You Open Anything, Start with the Easy Wins
Most people jump straight to surgery. Don’t. A surprising number of PS3 controller issues come from grime, a flaky connection, a tired battery, or a controller that simply needs a reset. Start with the fixes that cost almost nothing and require zero heroics.
1. Reset the controller
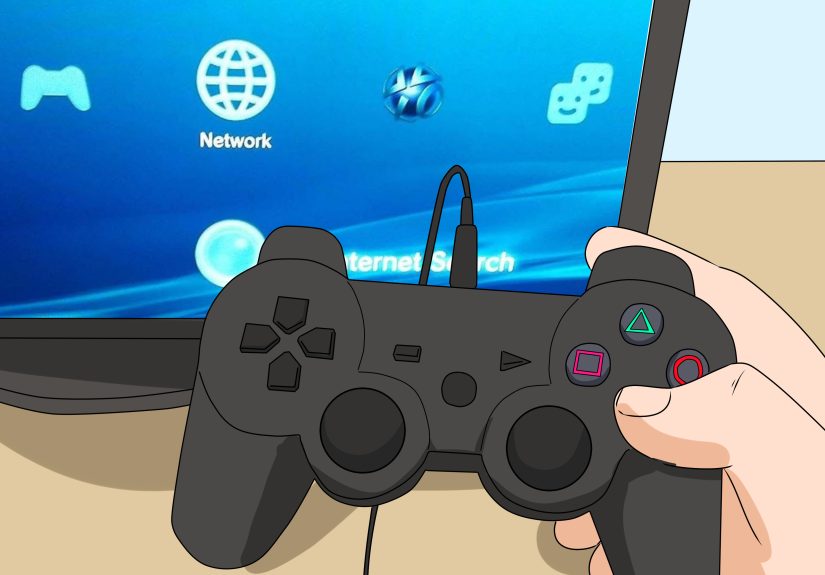
Flip the controller over and look for the tiny reset button on the back. Use a paper clip, pin, or similar thin tool to press it. This is one of the fastest ways to fix a controller that won’t pair, behaves oddly, or refuses to respond correctly. After resetting, reconnect the controller to the PS3 with a USB cable and press the PS button.
2. Check the USB cable and charging connection
If the controller will not sync or charge, do not assume the controller is dead right away. A bad USB cable is often the sneaky villain. Try another known-good cable and a different USB port on the console. If your controller only powers on while plugged in, the battery may be worn out, but rule out the cable first because it is the easiest and cheapest fix in the room.
3. Clean the outside before blaming the inside
Dust, snack crumbs, and mystery gunk love to collect around buttons and thumbsticks. Use a dry microfiber cloth first. Then use compressed air around the button edges and the base of each stick. If that still is not enough, use a cotton swab with a very small amount of isopropyl alcohol. The key word is small. You are cleaning a controller, not marinating it.
How to Fix PS3 Controller Buttons
Button problems usually fall into three groups: sticky buttons, unresponsive buttons, or random button presses. Each has a slightly different personality, and each usually points to a different repair path.
Sticky buttons
If a face button sticks, feels mushy, or does not pop back normally, the issue is often dirt around the button shaft or dried residue under the plastic button cap. Start by cleaning around the problem button with compressed air and a cotton swab lightly dampened with isopropyl alcohol. Press the button repeatedly as you clean so the alcohol can loosen grime around the edges.
If the button still sticks, you may need to open the controller and clean the button housing from the inside. Once opened, remove the button pad carefully, wipe away debris, and check that the rubber membrane is not torn or folded. A damaged rubber membrane can make a button feel dead, soft, or inconsistent.
Buttons not responding
If one or more buttons stop registering, the problem is often deeper than surface dirt. Inside a DualShock 3, button input depends on clean contact surfaces and proper pressure between the contact film and the board. If those parts are dirty, misaligned, or not seated firmly, buttons can stop working even though the plastic caps themselves are perfectly fine.
A common real-world example: the X, O, triangle, and square buttons may all act up at once while the shell looks fine. That usually suggests a contact issue rather than four separate button failures. In that situation, open the controller, inspect the flexible contact layer, clean the contact areas gently, and make sure everything is reassembled with proper alignment. Be patient here. This repair is more about careful seating than brute force.
Trigger buttons and shoulder buttons
If the L1, R1, L2, or R2 buttons feel loose or unreliable, inspect the button mechanism and springs after opening the controller. Shoulder buttons can slip out of position during drops or after rough use. Triggers may also wear down or lose their proper resting position. If the part is cracked, replace it. If it is only misaligned, reseating it may be enough.
How to Fix a PS3 Controller Analogue Stick
Nothing ruins a game faster than an analog stick that drifts, pulls left for no reason, or keeps rotating the camera like it is filming a low-budget action movie. Stick issues usually come from dirt, worn thumbstick covers, or a failing joystick module.
Clean around the stick first
Before you assume the controller is doomed, clean around the base of the analog stick. Use compressed air in short bursts while moving the stick in full circles. Then clean around the base with a cotton swab and a tiny amount of isopropyl alcohol. Let it dry completely before testing again.
This works because dirt often collects where the stick meets the housing. That debris can interfere with movement and create drift-like symptoms. Not every drift problem is true hardware wear. Sometimes your controller is just carrying around a year’s worth of pocket lint and pizza dust.
Replace worn stick caps
If the top rubber on the stick is torn, bald, slippery, or split, replace the analog stick cover. This will not fix electrical drift, but it does improve control and comfort. It is one of the easier cosmetic repairs and can make an old controller feel dramatically better in your hands.
When the joystick module is the real problem
If cleaning does not solve the issue and the stick still pulls, jitters, or fails to center properly, the joystick module itself may be worn. At that point, the repair becomes more advanced because the electronic joystick assembly is soldered to the board. That means replacing it is not just a matter of popping in a new plastic part. You will need soldering skill, the correct replacement part, and a steady hand.
For many people, this is the dividing line between a fun DIY project and a Saturday ruined by molten regret. If you are comfortable soldering, go for it. If not, a repair shop may be the smarter move.
How to Fix PS3 Controller Charging and Battery Problems
If your PS3 controller dies quickly, only works while plugged in, or refuses to hold a charge, the battery is the main suspect. DualShock 3 batteries do not last forever, and a controller from the PS3 era has already had a very respectable run.
Signs the battery needs replacement
- The controller powers off quickly after charging
- It only works with the USB cable connected
- Charging seems inconsistent even with a good cable
- The controller pairs, then dies almost immediately
Replacing the battery is one of the more approachable internal repairs. Once you remove the rear cover, the battery is accessible and can be disconnected and swapped. Just be gentle with the connector and avoid pulling on wires. If your controller otherwise works fine, a new battery can bring it back from the dead faster than you can say “one more match.”
How to Open a PS3 Controller Safely
If you need to go inside, slow down and set up a clean workspace. The DualShock 3 is not impossible to open, but it is absolutely the kind of device that punishes impatience.
Basic opening tips
- Power the controller off and disconnect it first
- Remove the rear screws carefully and keep them organized
- Lift the rear cover slowly from the lower edge near the analog sticks
- Watch for the battery and internal parts before separating the shell fully
- Take a quick photo before removing parts so reassembly is easier
That last tip saves lives. Or at least saves 45 minutes of staring at a spring and wondering where on earth it came from.
Common PS3 Controller Problems and the Most Likely Fix
Controller will not connect
Reset the controller, try a different USB cable, use another USB port, and reconnect to the console. If it still refuses to pair, test with another controller if possible to rule out a console-side issue.
Buttons work randomly
Clean the controller, then inspect the internal contact layers and button membranes. Random input can come from dirty contacts, poor internal pressure, or physical wear.
Analog stick drift
Clean around the stick first. If the issue remains, the joystick module may be worn and need replacement.
Controller will not hold a charge
Try a different cable first. If the problem continues, replace the battery.
One trigger or shoulder button feels wrong
Open the controller and inspect for a misaligned or broken trigger piece, spring, or mounting point.
Repair or Replace? Here’s the Honest Answer
If your PS3 controller only needs cleaning, a reset, a new battery, or replacement button parts, repair is usually worth it. These fixes are inexpensive and can extend the life of a controller you already know and like. If the joystick module is worn out, several internal parts are broken, or the board itself has damage, the math changes. At that point, the time, tools, and parts may cost more than picking up another working controller or using a professional repair service.
In other words, do the simple fixes first. Save the soldering iron for the problems that truly deserve it. Not every drifting stick needs a full transplant, and not every sticky button means the controller is headed for the electronics graveyard.
Final Thoughts
Fixing a PS3 controller is usually less dramatic than it sounds. Start with the easy stuff: reset, re-pair, clean, and test with a different cable. Move on to opening the controller only when the symptoms point to internal wear or misalignment. Sticky buttons and battery issues are usually manageable for beginners. Analog stick module replacement is more advanced, but still possible if you have the tools and skill.
The biggest mistake people make is assuming the controller is completely dead when it is really just dirty, badly connected, or suffering from one worn part. The second biggest mistake is opening it like a raccoon opening a trash can. Go slow, stay organized, and your chances of success go way up.
And if all else fails, at least you can say you fought bravely in the tiny-screw arena.
Practical Experience: What Usually Happens When People Try to Fix a PS3 Controller
In practical repair scenarios, the most successful PS3 controller fixes are almost never the flashy ones. People often start the process convinced the controller has a catastrophic internal failure, but the first real win usually comes from something simple. A controller that seems dead turns out to need a reset. A stick that looks permanently broken improves after a careful cleaning around the base. A button that feels ruined comes back to life once old grime is cleared away. That pattern shows up again and again: the easiest fix is often the one people try last.
Another common experience is that button issues feel worse than they actually are. When one face button sticks, it is annoying. When several buttons fail together, it feels like the controller is finished. But once the shell is opened, the problem often looks much more ordinary than expected. A rubber membrane may be out of place. A contact surface may be dirty. A piece may not be seated correctly after a drop. That is why slow, careful disassembly matters so much. Many people do not fail because the repair is too hard; they fail because they rush, mix up screws, or forget how the parts were arranged before they started.
Analog stick problems are where expectations usually collide with reality. People hope every case of drift can be fixed with a wipe and a prayer. Sometimes that works, especially when dust and debris are the real cause. But when the joystick module is worn, cleaning becomes a temporary bandage instead of a cure. That moment matters because it separates maintenance from actual component repair. Plenty of people are comfortable cleaning a controller. Far fewer are ready to desolder a worn joystick and install a new one without damaging the board. Knowing where your own skill line is can save both money and frustration.
Battery replacement is one of the most satisfying fixes because the before-and-after result is obvious. A controller that only works while plugged in suddenly becomes usable again. That kind of repair feels rewarding because the symptoms are clear, the part is accessible, and the improvement is immediate. In contrast, intermittent button issues can be tricky because the controller may seem fixed during one test and act up again later. That is why experienced tinkerers test every function before fully closing the shell. It is much better to discover a problem before the last screw goes back in.
The broader lesson from PS3 controller repair is simple: diagnose before you dramatize. Match the symptom to the most likely cause. Start with cleaning, resetting, and cable checks. Move up to internal inspection only when the easy fixes fail. And treat advanced stick replacement as a real electronics repair, not a casual five-minute tune-up. When people follow that order, they usually get better results, spend less money, and avoid turning a repairable controller into a bag of parts and regret.