Table of Contents >> Show >> Hide
- Before You Start: Measure, Prep, and Save Yourself From “Almost Fits”
- Tools and Materials Checklist
- 14 Steps to Install a Storm Door
- Step 1: Confirm the Door Frame Is Solid, Square-ish, and Clean
- Step 2: Measure the Opening (Yes, Again) and Verify the Kit Size
- Step 3: Decide the Hinge Side and Door Handing
- Step 4: Lay Out the Parts and Identify the Rails
- Step 5: Dry-Fit the Hinge Rail and Mark the Placeholder Screw
- Step 6: Prep the Door Panel: Attach the Hinge Rail to the Door
- Step 7: Install the Sweep and Bottom Expander (Loosely at First)
- Step 8: Hang the Door on the Placeholder Screw
- Step 9: Plumb the Hinge Rail, Shim If Needed, and Fully Fasten It
- Step 10: Install the Rail Extender Weatherstrip (If Your Kit Has It)
- Step 11: Install the Drip Cap (Rain Cap) at the Top
- Step 12: Set the Latch-Side Rail for an Even Gap (No Rubbing Allowed)
- Step 13: Install the Handle, Latch, and Strike Plate
- Step 14: Adjust the Expander and Install the Closer(s), Then Tune Everything
- Troubleshooting: Fix the Usual Storm Door Drama
- Maintenance Tips (So Your Door Stays Nice)
- Real-World Experiences and “Wish-I-Knew” Lessons (Extra 500+ Words)
- Conclusion
A storm door is basically your front door’s best friend: it takes the wind, rain, bugs, and random pollen attacks so your main door can live a calmer life.
Installed correctly, it can improve comfort, protect your entry door, and give you that satisfying “I did a real home project” feelingwithout needing a full construction crew.
This guide walks you through a practical, brand-agnostic process that matches how most modern storm door kits are designed (hinge rail + latch rail + drip cap + closer + expander/sweep).
Expect about 1–3 hours depending on your doorway’s mood and how often you stop to admire your level bubble.
Before You Start: Measure, Prep, and Save Yourself From “Almost Fits”
Storm doors don’t like surprises. If your opening is out of square, your door will either rub, not latch, or close like it’s mad at you.
Spend 10 minutes measuring and prepping now, and you’ll avoid 60 minutes of “why won’t you just close?!” later.
Quick measuring rules (the ones that actually matter)
- Measure width inside the mounting surface (often the brickmold/trim) at top, middle, bottom. Use the smallest number.
- Measure height from the threshold/sill to the top mounting surface in a couple spots. Use the smallest number.
- Check squareness: measure diagonals. If they’re close (typically within about 1/8 inch), you’re in good shape; if not, plan to shim.
- Confirm mounting surface: most kits want a flat area wide/deep enough to fasten rails securely.
Safety note (especially if you’re new to tools)
Wear safety glasses when drilling. Metal shavings are tiny, sharp, and have zero respect for eyeballs.
If you’re under 18 or not comfortable with drills/knives, have a parent/guardian or experienced adult supervise the cutting and drilling steps.
Tools and Materials Checklist
- Tape measure, pencil
- Level (at least 8 inches; longer is even better)
- Drill/driver + drill bits (often 1/8 inch is used for pilot holes)
- #2 Phillips screwdriver bit
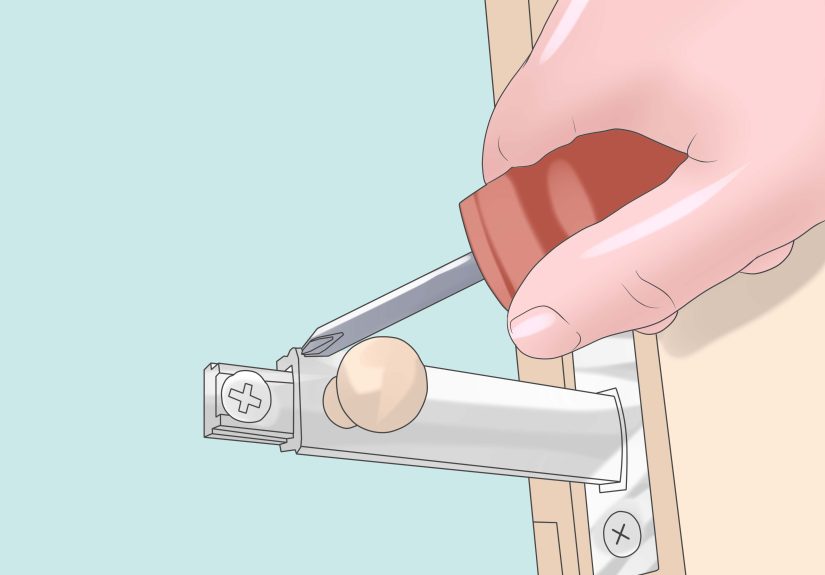
- Utility knife or scissors (for weatherstripping/sweep trimming)
- Hacksaw (only if your kit requires trimming rails for height or sill angle)
- Shims (composite or wood)
- Caulk + caulk gun (optional but helpful around drip cap and gaps)
- Storm door kit (door panel, hinge rail, latch rail, drip cap/rain cap, handle set, closer(s), expander/sweep)
14 Steps to Install a Storm Door
Step 1: Confirm the Door Frame Is Solid, Square-ish, and Clean
Check that the exterior trim/brickmold is secure (not rotten, not wiggly). Tighten loose trim and scrape off old caulk blobs where rails need to sit flat.
Storm door rails need a clean, stable mounting surfacebecause gravity and wind will absolutely test your work.
Step 2: Measure the Opening (Yes, Again) and Verify the Kit Size
Measure width at the top/middle/bottom and height in multiple spots. Use the smallest numbers when matching your door size.
This is also the time to notice issues like a threshold that slopes or a frame that’s not perfectly squareboth are normal, and both are manageable.
Step 3: Decide the Hinge Side and Door Handing
Most storm doors hinge on the same side as your main entry door (viewed from outside), but not always.
Open your main door and check for things that could interfere: handles, doorbell trim, sidelights, railings, or a wall that blocks the storm door swing.
Choose the hinge side that avoids collisionsbecause a storm door should not have daily arguments with your front door hardware.
Step 4: Lay Out the Parts and Identify the Rails
Unbox everything and find the hinge rail, latch rail, drip cap (rain cap), closer(s), and the bottom expander/sweep.
Many kits include rail extenders that slide down to meet the silldon’t toss those thinking they’re “extra trim.” They’re not.
Step 5: Dry-Fit the Hinge Rail and Mark the Placeholder Screw
Hold the hinge rail against the hinge-side mounting surface with the top aligned where your instructions specify (often flush to the top).
Use your level to make sure the rail is plumb, then mark the top hole location.
Install a placeholder screw and leave about 1/8 inch sticking out so the hinge rail can hang on it.
This tiny screw is basically your third handand it never complains.
Step 6: Prep the Door Panel: Attach the Hinge Rail to the Door
Place the door panel on a soft surface (like sawhorses) with the interior side facing up, so you don’t scratch the finish.
Fasten the hinge rail to the door using the included screws and any locator holes/templates provided.
If your door has a handle mortise on both sides, install the mortise cover on the side you’re not using.
Step 7: Install the Sweep and Bottom Expander (Loosely at First)
Slide the sweep into the bottom expander channel (a little dish soap can help it glide if it’s stubborn).
Then slide the expander onto the bottom of the door panelbut don’t fully tighten it yet.
Leaving it adjustable helps you fine-tune the seal against the threshold later.
Step 8: Hang the Door on the Placeholder Screw
With a helper supporting the weight, hang the hinge rail onto the placeholder screw.
Many kits are designed so the door “settles” slightly once hangingso don’t panic if it drops a hair.
Bring the hinge rail tight to the mounting surface and tighten the placeholder screw to lock the top position.
Step 9: Plumb the Hinge Rail, Shim If Needed, and Fully Fasten It
Check the hinge rail with your level. If the frame is out of square, shims behind the hinge rail are your best friend.
Once plumb, pre-drill pilot holes (if required by your kit/material) and install the remaining hinge-rail screws.
Tight is good. Over-tight is how you strip holes and invent new words.
Step 10: Install the Rail Extender Weatherstrip (If Your Kit Has It)
If the hinge rail uses a bottom extender that slides down to meet the sill, adjust it so it reaches cleanly.
Cut the provided weatherstripping to length and apply it to the extender.
This small piece does big work: it helps stop drafts and keeps water from sneaking in at the bottom corner.
Step 11: Install the Drip Cap (Rain Cap) at the Top
Position the drip cap across the top of the opening, aligned with the outer edge of the hinge rail.
Close the door to confirm an even gap between door frame and drip cap, then mark, pre-drill, and fasten.
Add a small bead of exterior-grade sealant if your instructions recommend it or if your entry sees heavy weather.
Step 12: Set the Latch-Side Rail for an Even Gap (No Rubbing Allowed)
Hold the latch-side rail tight to the underside of the drip cap, align its outside edge with the drip cap edge, and make sure the door swings freely.
Many kits use spacer pads to create a consistent gapuse them. They keep the latch rail from being installed too tight (rubbing) or too loose (drafty).
Pre-drill as needed, fasten the latch rail from top to bottom, and add weatherstrip to any rail extender.
Step 13: Install the Handle, Latch, and Strike Plate
Follow the handle template provided with your kit. Typical steps include drilling the latch holes, installing the latch mechanism, attaching interior/exterior handles,
and mounting the strike plate on the latch rail.
Test the latch before fully tightening everythingbecause re-drilling is a pain, and we’re trying to keep this a fun DIY story.
Step 14: Adjust the Expander and Install the Closer(s), Then Tune Everything
Close the door and adjust the bottom expander so the sweep just touches the thresholdenough to seal, not enough to drag like it’s cleaning your porch.
Then install the closer(s) according to your kit instructions (some doors use one closer, many use two).
Finally, adjust closing speed using the closer’s screw/valve. Aim for “smooth and controlled,” not “door slams like it pays rent.”
Troubleshooting: Fix the Usual Storm Door Drama
The door rubs the frame
- Re-check plumb on the hinge rail. A tiny tilt can cause a big rub.
- Loosen a few screws, shim behind the rail where needed, then re-tighten.
- Confirm the latch rail isn’t installed too tight against the door.
The door won’t latch
- Make sure the strike plate aligns with the latch. Slight adjustments usually fix it.
- Check that the door is fully closingif the closer is too slow or too fast, it may not seat properly.
- Verify the bottom expander isn’t set too low and dragging on the threshold.
There’s a draft or visible gap
- Confirm weatherstripping is installed where your kit specifies (rails and extenders).
- Adjust the expander so the sweep contacts the threshold evenly.
- If the opening is out of square, strategic shimming behind rails is often the real fix.
Maintenance Tips (So Your Door Stays Nice)
- Check closer screws seasonallytemperature swings can loosen hardware.
- Clean the threshold and sweep area so grit doesn’t chew up the sweep.
- If the door starts slamming, fine-tune the closer speed (small turns, big difference).
Real-World Experiences and “Wish-I-Knew” Lessons (Extra 500+ Words)
The internet makes storm door installation look like a calm, cinematic montage: measure, drill, screw, donecue triumphant music and a gentle breeze.
Real life is more like: you measure once, measure again, discover your opening is a tiny bit out of square, and then you learn what shims are really for.
The good news? Almost every “storm door problem” is fixable with patient alignment and small adjustments.
One of the most common DIY “aha” moments is realizing that the hinge rail is the boss of the whole project.
If that rail is plumb and firmly mounted, the rest of the door behaves.
If it’s offeven slightlyyou’ll spend the rest of the install chasing symptoms: rubbing at the top, uneven gaps, latch misalignment, or a door that closes but refuses to latch.
That’s why experienced installers treat Step 9 (plumb + shim + fasten the hinge rail) like the foundation of the house. It basically is.
Another lesson people share a lot: don’t skip the “dry-fit and check swing clearance” step.
Storm doors are polite until you mount them on the wrong side and discover your main door handle blocks the storm door from opening more than six inches.
Suddenly, your “new storm door” becomes a high-end decorative panel.
A 30-second testopening the main door, visualizing the storm door swing, checking railings and wallsprevents that kind of heartbreak.
Weatherstripping and the bottom expander are also sneakily important.
DIYers often tighten the expander too early or set it too low trying to create a “perfect seal.”
The result is a door that drags, feels heavy, and sometimes bounces back open instead of latching.
The best approach is to adjust in tiny increments: set the sweep so it just kisses the threshold, then test the door several times.
If you hear scraping or feel resistance, back it off a bit.
Storm doors should close smoothly; if yours sounds like it’s sanding the threshold, that’s your cue to readjust.
Then there’s the closer. Closers are basically the door’s cruise control: set them right, and everything feels premium.
Set them wrong, and the door either slams like it’s offended or creeps shut so slowly you start aging in real time while waiting.
The trick most DIYers learn is that closer adjustments are sensitivesmall turns matter.
Adjust, test, adjust again. Also: temperature affects closer speed, so what feels perfect in mild weather may change when it’s very hot or cold.
It’s normal to tweak it seasonally (and it’s way easier the second time).
Lastly, the “wish-I-knew” MVP tip: keep a vacuum or brush nearby for metal shavings.
When you drill through aluminum rails, tiny shavings drop everywhere.
If they sit on paint or glass, they can stain or scratch.
A quick cleanup as you go makes the finished door look sharper and prevents that gritty crunch under your sweep later.
Combine that with a final checkopen/close cycles, latch test, even gapsand you end up with a storm door that looks professionally installed,
even if you did it in socks and confidence.
Conclusion
Installing a storm door is mostly about alignment: measure carefully, keep the hinge rail plumb, set even gaps, and adjust the expander and closer with patience.
Do that, and your door will swing smoothly, seal tightly, and make your entry feel more comfortablewithout the daily soundtrack of rubbing, slamming, or rattling.
Take your time, test often, and remember: if you need a shim, you’re not failing. You’re joining the long, proud tradition of “doors are never perfectly square.”