Table of Contents >> Show >> Hide
- First: Should You Put Carpet in a Basement at All?
- Tools and Materials You’ll Likely Need
- Step 1: Moisture Testing (AKA “Trust, but Verify”)
- Step 2: Prep the Concrete (Clean, Flat, and Not Crumbly)
- Step 3: Choose the Best Installation Method for Your Basement
- Step 4 (Stretch-in Method): Install Tack Strips on Concrete
- Step 5: Moisture Strategy (Vapor Barriers, Sealers, and “Breathing Room”)
- Step 6 (Stretch-in Method): Install Carpet Padding on Concrete
- Step 7: Install Carpet Tiles on Concrete (Tile Method)
- Step 8 (Stretch-in Method): Cut, Seam, and Lay Broadloom Carpet
- Step 9 (Stretch-in Method): Stretch, Hook, Trim, and Tuck
- Basement-Proofing Tips: Make Carpet Last Down Here
- Common Mistakes (So You Don’t Learn the Hard Way)
- What If the Basement Gets Wet Later?
- Real-World Basement Carpet Experiences (Extra 500+ Words)
- Experience #1: “The Basement Was Dry… Until It Wasn’t.”
- Experience #2: Carpet Tiles + Kids + Snacks = Surprisingly Peaceful
- Experience #3: The “Cold Concrete” Problem (Solved the Right Way)
- Experience #4: The “DIY Knee Kicker Only” Regret
- Experience #5: Choosing the Right Carpet Fiber Actually Matters
- Wrap-Up
- SEO Tags
Installing carpet on a concrete basement floor is basically the home-improvement version of adopting a puppy: it can make your life warmer and cozier… but only if you handle the “accidents” part responsibly. Concrete is cold, can hold moisture, and loves to humble overconfident DIYers. The good news? With the right prep, the right padding, and the right installation method, basement carpet can feel fantastic and last.
This guide walks you through the full processmoisture testing, concrete prep, choosing the best installation system (stretch-in, carpet tiles, or raised subfloor), and finishing detailsso your basement ends up feeling like a living space, not a slightly warmer cave.
First: Should You Put Carpet in a Basement at All?
Carpet can work in basements, but it’s not a “close your eyes and believe” project. If your basement has a history of flooding, active leaks, or persistent damp smells, start there. Carpet is not a waterproofing system. It’s a floor covering. If water wins downstairs, carpet loses upstairs.
A quick “go / no-go” checklist
- Go: Basement stays dry year-round, humidity is controlled, no signs of recurring seepage.
- Proceed with a plan: Slight dampness riskuse a raised/dimpled underlayment system or removable carpet tiles.
- No-go: Seasonal water entry, frequent wet spots, or you can’t keep humidity under control.
Tools and Materials You’ll Likely Need
Exact materials depend on your installation method, but here’s the common lineup. Think of it as your basement carpet “cast of characters.”
- Shop vacuum, broom, degreaser (concrete must be clean)
- Concrete patch/leveler, putty knife or trowel
- Moisture test supplies (clear plastic sheet + tape; optional professional test kit)
- Carpet padding suitable for concrete (often closed-cell foam or moisture-barrier cushion)
- Carpet (broadloom) or carpet tiles
- Tack strips rated for concrete (if doing stretch-in)
- Masonry nails or concrete screws, hammer drill (if fastening tack strips mechanically)
- Carpet knife + extra blades, straightedge, chalk line, measuring tape
- Seam tape + seaming iron (if seaming broadloom carpet)
- Knee kicker (minimum), power stretcher (best)
- Carpet tuck tool, wall trimmer (optional but very satisfying)
- Transition strips for doorways
- Dehumidifier (not “optional” in many basements)
Step 1: Moisture Testing (AKA “Trust, but Verify”)
Concrete can look dry and still release moisture vapor. If you install carpet over a damp slab, you may end up with odors, mold risk, adhesive failure (for tiles), or a squishy pad that feels like it’s storing secrets. Testing helps you choose the right system before you spend money and effort.
DIY plastic-sheet test (fast, cheap, helpful)
- Choose a few spots on the slab (especially exterior walls and low points).
- Tape a square of clear plastic tightly to the concrete, sealing all edges.
- Wait 24–48 hours.
- Check for condensation under the plastic or darkened concrete.
If you see moisture, treat that as a warning sign. It doesn’t automatically mean “no carpet,” but it means you should avoid trapping moisture with the wrong underlayment and strongly consider a raised/dimpled system or carpet tiles you can remove if needed.
More precise options (best for “I want this to last”)
For a more definitive answer, pros often use either a calcium-chloride test (measures moisture vapor emission rate) or in-slab relative humidity testing. These methods are common in flooring standards because they help predict whether adhesives and floor coverings will behave long-term.
Fix moisture at the source
- Extend downspouts away from the foundation.
- Improve grading so water drains away from the house.
- Seal cracks and address wall seepage.
- Run a dehumidifier and aim for stable indoor humidity.
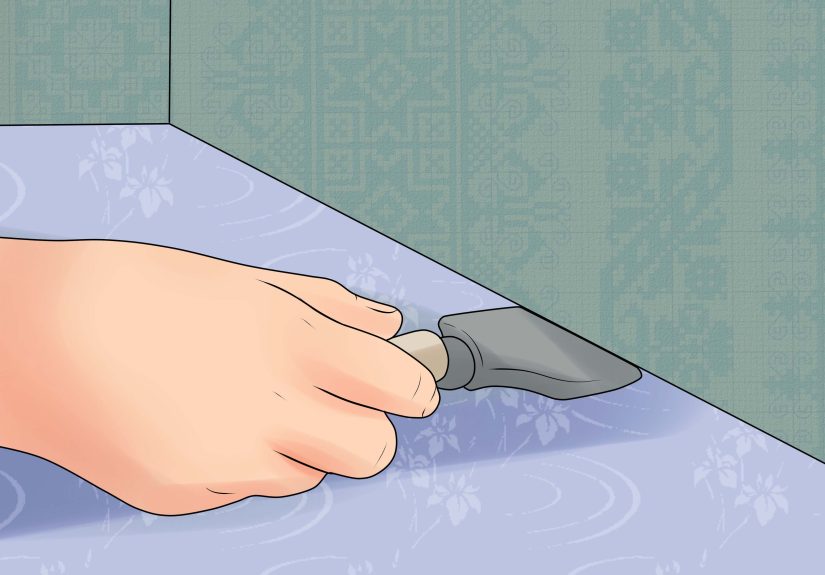
Step 2: Prep the Concrete (Clean, Flat, and Not Crumbly)
Carpet is forgiving… but only on top. Underneath, concrete needs to be clean and reasonably flat. High spots telegraph through pad and carpet. Cracks can create uneven wear and squeaks. Dust can prevent adhesives or tapes from sticking (important for carpet tiles and some pad installs).
Concrete prep checklist
- Remove everything and pull baseboards if you want a cleaner tuck.
- Vacuum thoroughly (fine concrete dust is a stealth saboteur).
- Degrease any oily spots; rinse and let dry completely.
- Patch cracks and divots with a concrete patch product.
- Level low areas with a self-leveling underlayment if needed.
- Scrape old adhesive or paint overspray that could interfere with bonding.
Safety note: grinding concrete can create silica dust. Use proper dust control and respiratory protection if you sand or grind.
Step 3: Choose the Best Installation Method for Your Basement
There’s more than one right way to install carpet on a basement slab. The “best” method depends on moisture risk, how finished you want it to look, and whether you want the ability to remove sections later.
Option A: Stretch-in broadloom carpet over pad (traditional “upstairs” feel)
This is the classic wall-to-wall carpet installation using tack strips around the perimeter, pad in the middle, and carpet stretched tight. It feels great underfoot and looks seamless when done well.
- Best for: Basements that stay dry and are truly “finished living space.”
- Watch-outs: Needs good moisture management and proper stretching tools.
Option B: Carpet tiles (DIY-friendly and basement-smart)
Carpet tiles are popular in basements because they’re modular. If a section gets damaged, stained, or (ugh) wet, you can replace a few tiles instead of ripping out the whole floor.
- Best for: DIY installs, rooms with kids/pets, and basements where you want “repairability.”
- Watch-outs: Adhesives and tapes require clean, dry concrete and careful layout.
Option C: Raised/dimpled underlayment + subfloor + carpet
If your basement is cold or has mild moisture risk (not active water entry), a dimpled membrane or modular subfloor panels can create an air gap. That helps separate carpet from direct concrete contact and can make the floor warmer and more comfortable. Many homeowners choose this route because it’s “insurance” against minor vapor issues and it improves comfort dramatically.
- Best for: Comfort upgrades and extra protection in below-grade spaces.
- Watch-outs: More cost and height; watch doors and stairs clearance.
Step 4 (Stretch-in Method): Install Tack Strips on Concrete
Tack strips hold the carpet edges so the field can be stretched tight. On wood subfloors they’re nailed. On concrete, you typically fasten them with masonry nails, concrete screws, or strong construction adhesive (depending on the product and slab condition).
How to place tack strips correctly
- Snap a chalk line around the perimeter about 1/4 inch from the wall (this gap helps with tucking).
- Cut tack strips to fit walls, leaving small gaps at corners for easier turning.
- Angle the pins toward the wall (most tack strips are manufactured that waydon’t flip them).
How to fasten them to concrete
- Masonry nails: Fast, common, works if the slab is solid and not brittle.
- Concrete screws + predrilling: More secure on questionable concrete; slower but sturdy.
- Construction adhesive: Useful if you can’t drill, but it can be messy and makes removal harder.
Keep tack strips out of doorways where transition strips will go. And yes, watch your handstack strip pins have the personality of a cactus.
Step 5: Moisture Strategy (Vapor Barriers, Sealers, and “Breathing Room”)
This is the most misunderstood part of carpeting over concrete. A “vapor barrier” can help, but the wrong barrier in the wrong situation can trap moisture where you don’t want it.
Common approaches
- Penetrating concrete sealer: Reduces dust and can help limit moisture vapor (follow product directions and dry times).
- Moisture-barrier carpet cushion: Some pads include built-in barriers and channels to help manage minor moisture.
- Dimpled membrane systems: Creates an air space so small amounts of vapor can dissipate rather than getting trapped under padding.
- Plastic sheeting under pad: Sometimes used, but be cautiousif moisture is coming up through the slab, you may trap it.
Practical basement rule: if your tests show moisture, favor systems that manage vapor (like air-gap membranes and moisture-rated cushions) and prioritize fixing the moisture source, rather than simply sealing moisture in and hoping it behaves.
Step 6 (Stretch-in Method): Install Carpet Padding on Concrete
Padding matters more in a basement than upstairs because it affects warmth, comfort, and moisture behavior. Traditional rebond pad can work in dry basements, but in below-grade spaces many installers prefer moisture-resistant options like closed-cell foam or rubber cushions designed to resist absorption.
Padding guidelines that keep you out of trouble
- Choose pad that’s compatible with your carpet type (loop/berber often wants firmer, thinner pad).
- Avoid overly thick “pillow” padtoo much cushion can cause carpet to wear faster and feel unstable.
- In basements, prioritize moisture resistance and low odor materials.
- Look for low-emission certifications when possible if indoor air quality matters to your household.
How to attach pad to concrete
- Lay pad inside the tack strip perimeter (do not cover tack strips).
- Trim pad so it ends just short of the tack stripsclean edges make a cleaner tuck.
- Join seams with pad tape or approved seam tape.
- On concrete, use a manufacturer-approved adhesive, double-sided tape, or spot-bond method (staples are for wood).
Step 7: Install Carpet Tiles on Concrete (Tile Method)
If you’re going with carpet tiles, your biggest wins are: clean concrete, careful layout, and not getting “creative” with adhesives unless you love redoing projects.
Layout that looks professional
- Find the room’s center by measuring and snapping perpendicular chalk lines.
- Dry-lay a row in both directions to see how cuts land at the walls.
- Aim for balanced cuts (skinny slivers at one wall scream “DIY, but emotionally”).
Install tiles
- Peel-and-stick: Press firmly and use a roller if recommended.
- Pressure-sensitive adhesive: Follow open time; tiles go down after adhesive becomes tacky.
- Tape tabs: Useful for some tile systems; keeps tiles stable while remaining more removable.
Pay attention to arrow directions on tile backsmany tiles are designed for quarter-turn patterns to hide seams and create subtle texture.
Step 8 (Stretch-in Method): Cut, Seam, and Lay Broadloom Carpet
Broadloom carpet typically comes in 12-foot (sometimes 15-foot) widths. If your room is wider than the roll, you’ll need seams. Seams are not scary; they’re just picky.
Best practices for seams
- Keep seams out of high-traffic “runways” when possible.
- Match pile direction (carpet reflects light differently depending on direction).
- Use proper seam tape and a seaming iron; don’t “wing it” with random glue.
- Trim edges cleanly with a straightedge and sharp blade.
Step 9 (Stretch-in Method): Stretch, Hook, Trim, and Tuck
Stretching is the difference between carpet that looks great for years and carpet that develops wrinkles like a sad bedsheet. A knee kicker is the bare minimum; a power stretcher is what pros use because it creates consistent tension across the room.
Stretching sequence (simple version)
- Hook one wall first (usually the longest, straightest wall).
- Stretch toward the opposite wall and hook it onto tack strips.
- Repeat for side walls, keeping tension even.
- Trim excess carpet, leaving enough to tuck into the gap by the wall.
- Tuck edges neatly using a stair tool or carpet tucker.
Transitions and finishing details
- Install transition strips at doorways for a clean edge and to protect carpet ends.
- Reinstall baseboards (they hide edges and make everything look intentional).
- Vacuum thoroughly to lift pile and remove debris.
Basement-Proofing Tips: Make Carpet Last Down Here
- Control humidity: A dehumidifier can be the difference between “cozy” and “musty.”
- Choose smart fiber: Synthetics like nylon, polyester, or triexta tend to be more basement-friendly than moisture-sensitive materials.
- Pick lower pile: Low-pile or loop styles can be easier to dry and maintain.
- Plan for the worst: If you’ve ever had water, consider carpet tiles or a system you can lift.
- Airflow matters: Keep vents open and avoid sealing dampness under non-breathing layers.
Common Mistakes (So You Don’t Learn the Hard Way)
- Skipping moisture testing: The slab doesn’t care about your optimism.
- Using the wrong pad: Basement comfort is good; basement sponge is not.
- Not stretching enough: Wrinkles and bubbles show up later, usually when guests arrive.
- Installing over dirty concrete: Dust breaks bonds and creates odor pockets.
- Forgetting clearance: Raised subfloors can change door swing and stair height transitions.
What If the Basement Gets Wet Later?
If water happens, speed matters. Pull up a corner, assess the pad, and dry aggressively with fans and a dehumidifier. If pad is soaked and stays wet, replacement is often the safest option. Carpet tiles may allow you to remove and replace only damaged sections.
Real-World Basement Carpet Experiences (Extra 500+ Words)
Let’s talk about what this project looks like in real lifebecause basements are where “normal rules” go to retire. Here are a few common basement carpet scenarios and what people typically learn after living with the results.
Experience #1: “The Basement Was Dry… Until It Wasn’t.”
A homeowner finishes a basement family room with stretch-in carpet and a thick, comfy pad. For two years, it’s perfect: warm feet, quieter space, movie nights, the works. Then a spring storm hits, gutters overflow, and a small amount of water sneaks in near the foundation wall. The carpet looks fine at firstbecause carpet can hide moisture like a professional poker player. But the pad underneath holds water, and a week later there’s a smell.
The lesson: basements reward “layers that forgive.” If your area is prone to heavy rain or you’ve ever seen dampness, consider a moisture-rated cushion, a raised underlayment that creates airflow, or carpet tiles that can be lifted. Carpet isn’t the villain heretrapped moisture is. Plan for drying and access, not just day-one comfort.
Experience #2: Carpet Tiles + Kids + Snacks = Surprisingly Peaceful
Another basement becomes a playroom. The owners choose carpet tiles with a simple quarter-turn pattern. Installation takes a weekend: clean slab, snap chalk lines, start from the center, and work out. A month later, there’s a juice spill. Later, a craft-glue incident (because children love adhesives the way raccoons love shiny objects). Instead of panic, they pull up a few tiles, clean them, replace one that’s beyond saving, and move on with their lives.
The lesson: carpet tiles can be a basement superpower. They aren’t always as plush as broadloom, but the ability to replace small areas is huge. For multipurpose basementsgym + storage + hangout spacetiles often strike the best balance between comfort and practicality.
Experience #3: The “Cold Concrete” Problem (Solved the Right Way)
Many basements aren’t wet; they’re just cold. Concrete is a thermal sponge. In one remodel, the owners first tried adding thicker padding under carpet, hoping it would feel warmer. It improved comfort slightly, but the floor still felt chilly because the cold slab was still directly underneath. They later redid it using a dimpled membrane plus subfloor panels, then pad and carpet on top. The difference was immediate: warmer surface temperature, less of that “winter sock sadness,” and a more finished-room feel.
The lesson: when your main issue is comfort (not active water), separating carpet from concrete with an air-gap underlayment is often more effective than simply increasing padding thickness. It also gives moisture vapor a place to go, which can reduce musty odors over time.
Experience #4: The “DIY Knee Kicker Only” Regret
A very motivated DIYer installs broadloom carpet using only a knee kicker. It looks okay on day one. Two months later, slight ripples appear. After a year, the wrinkles are more noticeableespecially when sunlight hits at an angle (sunlight is a brutally honest critic). The fix usually involves re-stretching with a power stretcher.
The lesson: if you’re doing stretch-in carpet in a basement, rent the power stretcher. It’s not just a “pro flex.” It’s the difference between carpet that stays tight and carpet that slowly develops waves like it’s auditioning for a beach vacation.
Experience #5: Choosing the Right Carpet Fiber Actually Matters
Basements can amplify odors and humidity. Homeowners who picked basement-friendly synthetic carpet (and kept humidity controlled) generally reported easier maintenance and fewer lingering smells. Those who chose higher-absorption materials or installed over questionable dampness often fought the “mysterious basement funk” battle.
The lesson: choose moisture-tolerant materials, keep humidity stable, and you’ll enjoy the cozy benefits without the “why does my basement smell like a gym bag?” subplot.
Wrap-Up
Installing carpet on a concrete basement floor can be absolutely worth itwarmer feet, quieter rooms, and a space that feels genuinely finished. The success formula is simple: test for moisture, prep the slab, choose the right system for your basement’s reality, and install with the right tools (especially if you’re stretching broadloom). Do that, and your basement won’t just be “the downstairs.” It’ll be a room you actually want to use.