Table of Contents >> Show >> Hide
- What Exactly Is Crown Molding Lighting?
- Plan First (Because Drywall Repair Is a Hobby Nobody Wants)
- Tools and Materials Checklist
- Step-by-Step: Installing Crown Molding With LED Cove Lighting
- Step 1: Measure the room and map your plan
- Step 2: Decide the crown “drop” and the light setback
- Step 3: Locate studs and snap your reference lines
- Step 4: Create a ledge for the lights (if your crown doesn’t provide one)
- Step 5: Plan and run wiring (low voltage)
- Step 6: Cut crown molding pieces and dry-fit the room
- Step 7: Install the crown molding
- Step 8: Mount the LED strip lighting
- Step 9: Connect, test, and troubleshoot
- Step 10: Finish like you meant it
- Design Choices That Make Your Cove Lighting Look Expensive
- Common Mistakes (So You Can Skip Them)
- Quick Troubleshooting Guide
- When You Should Call a Pro
- Wrap-Up: A Room Upgrade That Pays You Back Every Night
- Real-World Experiences: What It’s Actually Like to Install Crown Molding Lighting (And What I’d Do Differently Next Time)
Crown molding already makes a room look “finished.” Add hidden LED lighting behind it, and suddenly your ceiling has a glow-up
so dramatic it should come with a red carpet. This project is usually called cove lighting or indirect crown molding lighting:
the LEDs shine up onto the ceiling, the ceiling reflects the light back down, and your room gets that soft, expensive-looking ambience
without a single chandelier screaming, “Look at me!”
This guide walks you through planning, materials, cutting, mounting, wiring basics, and finishingplus the little design choices that
separate “wow” from “why does my ceiling look like a UFO landing zone?”
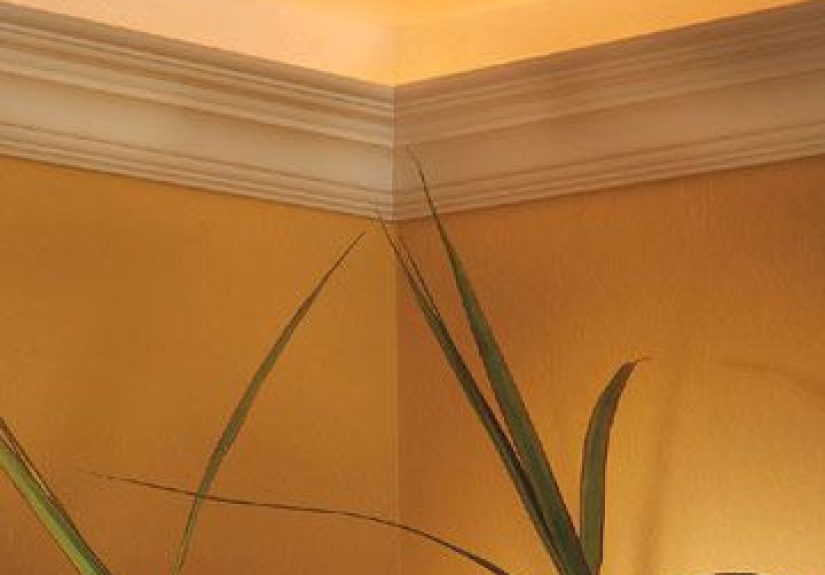
What Exactly Is Crown Molding Lighting?
Crown molding lighting hides a light source (almost always LED strip lighting these days) in a ledge or “cove” near the ceiling.
Instead of shining directly into the room, the LEDs aim upward (or upward-and-inward), bouncing light off the ceiling and upper walls.
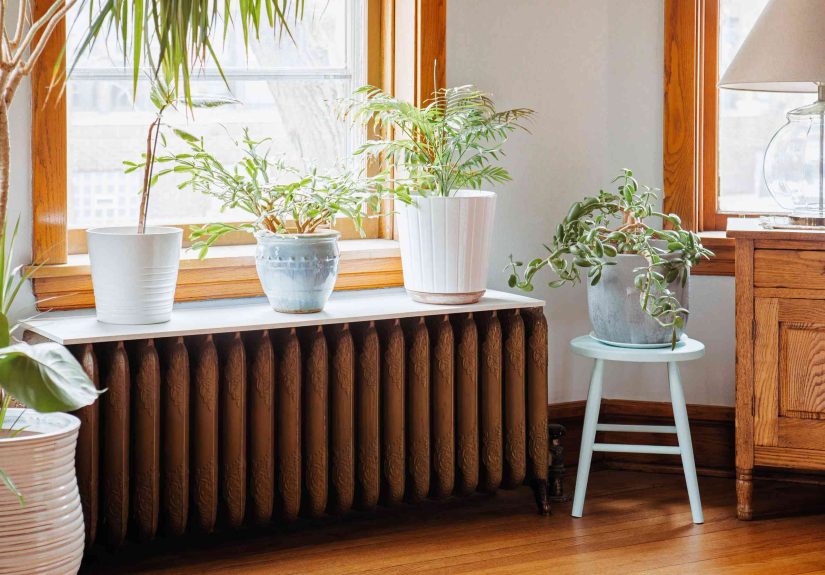
The result is a gentle, shadow-softening glow that works beautifully in living rooms, bedrooms, hallways, and home theaters.
Why people love it
- Ambience on demand: perfect for relaxing, entertaining, or pretending you live in a boutique hotel.
- Flattering light: indirect light is kinder to faces, walls, and your “I swear I sleep” illusion.
- Modern controls: dimmers, remotes, and smart apps make it easy to tune brightness and color temperature.
Plan First (Because Drywall Repair Is a Hobby Nobody Wants)
1) Decide: retrofit or new build
- Retrofit: You already have crown molding, and you’re adding LEDs. This can be simple if there’s a hidden flat surface
to stick a strip onto. If there isn’t, you may need an added ledge (a small cleat) or an LED channel. - New build: You’re installing new crown molding specifically to create a cove for lighting. This is the cleanest look and
gives you the most control over angles, setbacks, and wire routing.
2) Choose your “glow style”
Before buying anything, decide how you want the light to behave:
- Soft halo: warm white (often around 2700–3000K) with moderate brightness for cozy rooms.
- Crisp modern wash: neutral white (often around 3500–4100K) for kitchens, offices, and “I mean business” spaces.
- Color-changing: RGB or RGBW strips for parties, holidays, or your teenager’s “galaxy room” era.
3) Think through power and controls
Most LED strip systems use a driver/power supply that converts household power to low voltage (commonly 12V or 24V).
You’ll also choose a control method:
- Wall switch: simplest if you’re feeding the driver from a switched circuit (often best handled by a licensed electrician).
- Plug-in driver: easy if you have an outlet (inside a cabinet, closet, or near the room) you can use.
- Remote/app controller: great for dimming and scenes; just make sure it’s compatible with your strip voltage and type.
4) Safety and “do I need an electrician?”
Low-voltage LED strips are generally DIY-friendly. The part that can become “not a YouTube moment” is connecting anything to line voltage
(120V). If you’re adding a new junction box, tapping an existing circuit, or wiring into a switch, it’s smartand often requiredto bring in
a licensed electrician. Also, always follow local electrical code and product instructions.
Tools and Materials Checklist
Tools
- Tape measure, pencil, and a notebook (or a notepad app you won’t drop from a ladder)
- Stud finder
- Level or laser level
- Miter saw (compound miter saw strongly recommended)
- Coping saw (optional but very helpful for inside corners)
- Finish nailer + compressor (or hammer + finish nails, if you like forearm workouts)
- Caulk gun
- Sandpaper/spackle/wood filler
- Wire cutters/strippers (for low-voltage connections)
- Safety gear: glasses, hearing protection, dust mask
Materials
- Crown molding: wood, MDF, polyurethane, or PVC (choose based on budget, paint plans, and moisture exposure)
- LED strip lights: white, tunable white, RGB, or RGBW; choose a reputable brand with consistent output
- LED driver/power supply: properly rated wattage with some headroom
- Controller/dimmer: compatible with your strip type (and ideally your smart home system, if you use one)
- Mounting surface or LED channel: optional but recommended for a cleaner, more even look
- 18–22 AWG low-voltage wire (or as specified by your LED system)
- Paintable caulk + wood filler
- Primer and paint (or stain/clear coat if using natural wood)
Step-by-Step: Installing Crown Molding With LED Cove Lighting
Step 1: Measure the room and map your plan
Measure each wall and add them up for your crown molding total. Then add 10–15% extra for waste, mistakes, and that one corner that’s
somehow both 89° and 93° at the same time. (Old houses are charming like that.)
For LED strips, measure the perimeter where the strip will run. If you’ll stop at doorways or skip a wall (for example, behind a tall built-in),
plan that too. Sketch your room and mark where the driver will live and how wires will travel to the cove.
Step 2: Decide the crown “drop” and the light setback
The magic of crown molding lighting is that you don’t see the LEDsyou see the glow. Two choices matter most:
- Drop: how far down the wall the crown sits.
- Setback: how far from the wall/ceiling edge the LED strip is placed.
A good starting point is to position the LED strip so the light grazes the ceiling evenly without hot spots. If you’re using an LED channel
(diffuser), you can often get a smoother wash with less fuss.
Step 3: Locate studs and snap your reference lines
Use a stud finder and mark studs around the room near the ceiling. Then use a level (or laser) to mark:
- The line where the bottom edge of the crown will sit
- The line where the top edge will sit (if helpful for your profile)
These lines help you keep the crown straight and give you a “trusty map” when you’re holding a long piece over your head wondering
why gravity is so emotionally invested in your failure.
Step 4: Create a ledge for the lights (if your crown doesn’t provide one)
Some crown profiles naturally create a flat area behind them where you can mount LEDs. If yours doesn’t, you have two common options:
- Add a cleat/ledger: A small strip of wood fastened to studs that gives you a stable mounting surface.
This can also help the crown seat more firmly. - Use an LED aluminum channel: A slim track with a diffuser that mounts to the wall/ceiling or onto a cleat.
It improves heat management and makes the light look more “continuous.”
Step 5: Plan and run wiring (low voltage)
Place the driver somewhere accessible and ventilated (not buried inside a wall). Many DIYers locate it in a closet, cabinet, or near an outlet.
Run low-voltage wire from the driver location to where the LED strip will start. If your room is large or your strip run is long, you may need
power injection points or multiple runsthis depends on the LED system and voltage.
Important: If you’re tying into household wiring or installing a new switched feed, stop here and call a licensed electrician.
Step 6: Cut crown molding pieces and dry-fit the room
Cut your crown molding with a compound miter saw. Most people work their way around the room, testing each piece before nailing.
For inside corners, many pros prefer coped joints because they can fit tighter even when corners aren’t perfectly square.
For outside corners, miter joints are standard.
Step 7: Install the crown molding
- Start in a corner you’ll notice the least (not because you plan to mess it up, but because you’re a realist).
- Nail into studs when possible. Use finish nails along top and bottom edges.
- Use scarf joints on long walls (angled overlaps) and place seams over studs for strength.
- Check level/straightness as you go. Tiny adjustments early prevent big gaps later.
Step 8: Mount the LED strip lighting
Before sticking anything permanently, do a quick test. Plug the driver/controller in and verify the strip works, dims properly, and matches your
desired color temperature.
- Clean the mounting surface: Dust and paint residue are the enemies of adhesive backing.
- Use clips if needed: Adhesive is convenient, but clips or channels offer more long-term security.
- Avoid sharp bends: LED strips don’t like being kinked at corners. Use corner connectors or gentle curves as designed.
- Hide sightlines: Stand at different spots in the roomif you can see individual LEDs, adjust placement or add a diffuser.
Step 9: Connect, test, and troubleshoot
Connect the strip to the controller and driver per manufacturer instructions. Turn the system on and walk the perimeter:
- Any dim sections? Check voltage drop or connectors.
- Flicker? Verify compatibility between dimmer/controller and driver.
- Uneven glow? Adjust strip angle/setback or consider a diffuser channel.
Step 10: Finish like you meant it
Fill nail holes with wood filler. Caulk the top and bottom edges (paintable caulk) for a seamless look. Sand lightly where needed.
Prime and paint the crown (or touch up). Pro tip: paint the inside of the cove area a matte white to help bounce light evenlyunless
you want a moodier, dimmer effect, in which case a darker paint can intentionally reduce reflectivity.
Design Choices That Make Your Cove Lighting Look Expensive
Pick the right strip type
- White-only: simplest and often the cleanest for classic interiors.
- Tunable white: lets you shift from warm to cool whitegreat for rooms that do “work mode” and “wine mode.”
- RGBW: best if you want color but still want true, pleasant whites.
Don’t under-buy the power supply
Calculate LED wattage: (watts per foot) × (total feet) = total watts. Then choose a driver with extra capacity (headroom) so it runs cooler
and lasts longer. This also gives you room to expand laterbecause you will absolutely start looking at other rooms and thinking,
“What if the hallway had an aura too?”
Use diffusion when the ceiling tells on you
Perfectly smooth ceilings are rare. Diffuser channels help blend LED points into a continuous line of light. They also protect the strip and
often improve adhesion longevity.
Common Mistakes (So You Can Skip Them)
- Mounting LEDs where you can see them: the goal is glow, not “airport runway chic.”
- Ignoring voltage drop: long runs may dim at the far end. Plan injection points or multiple runs.
- Hiding the driver in an inaccessible spot: electronics fail; future-you deserves access.
- Skipping corner strategy: decide early whether you’re coping inside corners or mitering everything.
- Rushing caulk and paint: crown molding looks “pro” because it’s finished like a pro.
Quick Troubleshooting Guide
Dim at one end
- Check for loose connectors
- Shorten the run or add power injection
- Consider 24V strips for longer distances
Flickering
- Confirm driver and controller compatibility
- Check that connections are secure and polarity is correct
- If using a wall dimmer, verify it’s rated for the LED driver type
Hot spots on the ceiling
- Increase setback distance
- Add a diffuser channel
- Angle the strip more toward the ceiling rather than straight up
When You Should Call a Pro
- You need to tie into a new or existing 120V circuit or add a new switch leg
- Your home has tricky conditions (old wiring, plaster, unusual ceiling angles)
- You want perfectly seamless corners and built-up trim details
Wrap-Up: A Room Upgrade That Pays You Back Every Night
Installing crown molding lighting is part finish carpentry, part lighting design, and part “why is this wall not square?” therapy session.
But when it’s done, the payoff is huge: a clean architectural detail by day and a soft, luxurious glow by night.
Measure carefully, plan your power, take your time on corners, and test your lighting before committing. Your ceiling will thank you.
Your guests will ask who did it. You can decide whether to tell them the truth.
Real-World Experiences: What It’s Actually Like to Install Crown Molding Lighting (And What I’d Do Differently Next Time)
The first surprise most people have is that crown molding lighting is less about “installing lights” and more about “installing shadows.”
You’re shaping where the light doesn’t go as much as where it does. The quickest way to learn this is to temporarily tape up a short
test section of LED strip near the ceiling and turn it on at night. You’ll immediately notice whether the glow feels soft and high-end
or harsh and spotlight-y. That 10-minute test can save you a full weekend of re-mounting strips later.
Corner behavior is the second big lesson. On paper, corners are 90 degrees. In real houses, corners are “90-ish.” That’s why coping
inside corners often feels like a cheat code: instead of relying on two perfect angles meeting perfectly, you’re shaping one profile to fit
against another. The first coped corner can be slow and a little humbling, but by the third one you start to feel like you’ve unlocked
an ancient carpenter secret. (You also start judging rooms by their corners, which is a weird but harmless hobby.)
Adhesive backing on LED strips is another reality check. It’s either too weak (falls down at 2 a.m. like a sad birthday streamer) or so strong
it threatens to peel paint if you ever need to reposition. The best experience is when you treat the adhesive as a “helper,” not the hero:
clean the surface well, use channels or clips where you can, and don’t assume a dusty, slightly textured wall will hold a long strip forever.
If your installation is in a room that gets warmtop floors, sunny exposures, or near HVAC ventsmechanical support becomes even more
important because heat can soften adhesives over time.
Brightness surprises people too. It’s tempting to buy the brightest LED strip because “more light is better,” but cove lighting is supposed to be
flattering, not interrogational. A good approach is to prioritize dimming. A dimmable system lets you run brighter for cleaning or
daytime, then dial down for evenings. If you can, test the strip at full brightness in the dark before final mounting. If it feels like a spaceship
launch, you can still return it. Once it’s installed, your only “fix” may be adding diffusion, changing placement, or living with the glow like
it’s a bold design statement.
Lastly, driver placement is one of those decisions you only appreciate later. The best experience is when the driver lives somewhere accessible
(closet shelf, cabinet, utility area) and has airflow. The worst experience is when it’s hidden behind something heavy, wedged into a cramped
spot, or installed where you can’t reach it without minor demolition. Electronics are reliable, but they’re not immortal. Future-you will be
incredibly grateful if you plan a location that’s easy to access, easy to replace, and doesn’t require yoga poses on a ladder.
The overall takeaway: take time on layout and testing, be kinder to yourself about corners, and treat diffusion and dimming as your secret
weapons. When it’s finished, you’ll get that soft, architectural glow every single nightand it’ll feel like your room got an upgrade that
quietly shows off without being obnoxious. Which is basically the dream, right?