Table of Contents >> Show >> Hide
- Why Outboard Motor Maintenance Matters
- Step 1: Read the Owner’s Manual Like It Knows Your Motor Better Than the Internet
- Step 2: Do a Quick Pre-Trip Inspection Every Time
- Step 3: Flush the Engine After Running in Salt, Silty, or Dirty Water
- Step 4: Watch the Tell-Tale Stream and Cooling System Performance
- Step 5: Change Engine Oil and the Oil Filter on Schedule
- Step 6: Replace Lower Unit Gear Lube and Check for Water Intrusion
- Step 7: Inspect the Propeller, Propshaft, and Hub
- Step 8: Inspect Fuel Lines, Filters, and the Fuel System
- Step 9: Grease Moving Parts and Protect Against Corrosion
- Step 10: Check Sacrificial Anodes Before They Disappear for a Good Cause
- Step 11: Service the Battery, Electrical Connections, and Spark Plugs
- Step 12: Prepare the Motor Properly for Seasonal Storage
- Common Outboard Maintenance Mistakes to Avoid
- Real-World Experiences: What Maintaining an Outboard Motor Actually Feels Like
- Conclusion
- SEO Tags
Outboard motors are a lot like good fishing buddies: reliable, useful, and occasionally dramatic when ignored too long. Treat yours well, and it can reward you with easier starts, better fuel efficiency, fewer mid-lake tantrums, and a much longer service life. Neglect it, and your “quick Saturday run” can become an expensive floating lesson in regret.
The good news is that outboard motor maintenance is not mysterious. It is mostly a series of smart, repeatable habits: flushing, checking, lubricating, inspecting, and replacing wear items before they turn into “why is there smoke?” moments. Whether you own a small portable kicker or a larger four-stroke on a family fishing boat, the basics are surprisingly consistent.
This guide breaks the process into 12 practical steps, with clear explanations for what to do, why it matters, and where owners often slip up. You should always follow your engine owner’s manual for exact service intervals, fluids, and procedures, because every model has its own little personality. But these steps will give you a strong, real-world maintenance routine that keeps your outboard cleaner, safer, and ready for the next launch.
Why Outboard Motor Maintenance Matters
Routine outboard maintenance helps prevent corrosion, overheating, fuel-system problems, hard starting, gearcase damage, and premature wear. It also protects resale value. A motor that has clean oil, healthy anodes, a clean prop shaft, and service records is a lot more attractive than one that looks like it has been living a rough double life behind the boathouse.
Better still, regular maintenance lets you catch small issues early. A weak tell-tale stream, milky gear lube, cracked fuel hose, or fishing line wrapped around the prop shaft may not seem dramatic today, but each one can become a very expensive plot twist later. That is why the best maintenance plan is not heroic. It is consistent.
Step 1: Read the Owner’s Manual Like It Knows Your Motor Better Than the Internet
Because it does. Before you do anything else, review the owner’s manual for your specific outboard. Maintenance intervals vary by brand, horsepower, and whether the engine is a two-stroke or four-stroke. Some items are daily checks, some are every 50 or 100 hours, and some are annual or seasonal tasks.
Your manual will tell you the correct oil type, gear lube specification, spark plug gap, flushing instructions, grease points, and storage recommendations. This matters because “my neighbor says this is fine” has launched many a marine repair invoice. Use general advice as a roadmap, but treat the manual as the final authority.
Step 2: Do a Quick Pre-Trip Inspection Every Time
Before every outing, give your outboard a fast visual check. This takes only a few minutes and can save your day on the water. Look for loose fasteners, cracked hoses, damaged wiring, oil leaks, fuel leaks, and obvious corrosion. Check the cowl latches and inspect the engine mounting bolts. Make sure the propeller looks clean and undamaged.
If you have a four-stroke outboard, check the engine oil level and condition. If the oil looks milky, that can indicate water contamination and should not be ignored. Also inspect the fuel line connections, primer bulb, and fuel tank fittings if your setup uses portable fuel.
Think of this step as the marine version of checking whether your shoes are tied before sprinting downhill. Technically optional, practically essential.
Step 3: Flush the Engine After Running in Salt, Silty, or Dirty Water
Freshwater flushing is one of the simplest and most effective ways to maintain an outboard motor. Salt, sand, silt, and other debris can build up in the cooling passages and contribute to corrosion or restricted water flow. If you boat in saltwater, flushing should be a non-negotiable habit. If you run in muddy or sandy freshwater, it is still a very smart move.
Depending on your engine, you may use flushing muffs over the water intakes or connect a garden hose directly to a built-in flush port. Follow the manufacturer’s instructions carefully. Some motors can be flushed without running the engine; others require a different procedure. In general, the goal is to run clean fresh water through the cooling system long enough to remove contaminants.
After flushing, store the motor in the proper down position so water can drain completely from the cooling system. Leaving the motor tilted up for long periods can trap water where you do not want it.
Step 4: Watch the Tell-Tale Stream and Cooling System Performance
That little stream of water coming out of the outboard is small, but it tells a big story. A strong, steady tell-tale stream usually means cooling water is moving through the system as intended. A weak stream, intermittent dribble, or no stream at all can point to a clog, a failing impeller, or another cooling issue.
Any sign of overheating deserves attention right away. Do not keep running the motor and hope for emotional growth. Shut it down and investigate. Sometimes debris can block the outlet and can be cleared carefully. Other times the issue is deeper in the cooling system, especially if the water pump impeller is worn or damaged.
Checking cooling performance is one of the easiest ways to catch trouble early, especially at the start of the season or after running in shallow, sandy water.
Step 5: Change Engine Oil and the Oil Filter on Schedule
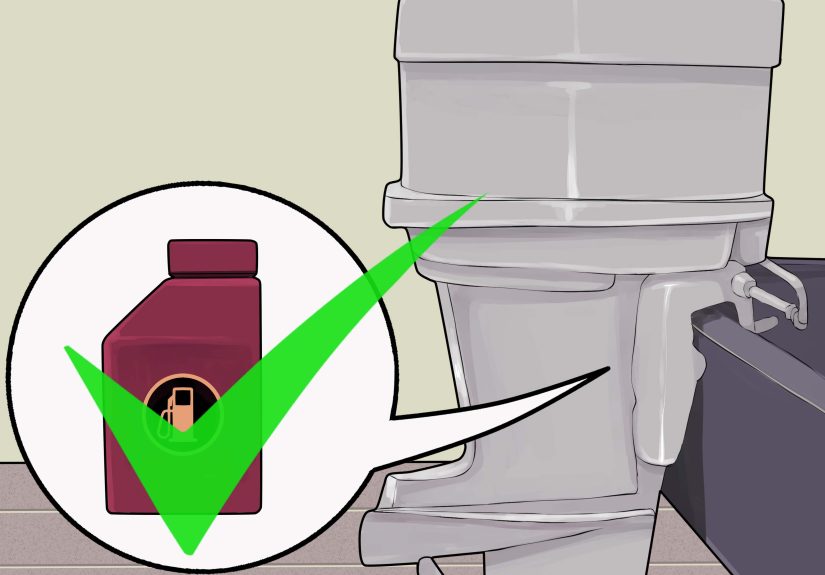
This step applies to four-stroke outboards. Engine oil is the lifeblood of the powerhead, and old oil carries contaminants that can increase wear and corrosion. Many outboard owners treat oil service as an annual task or a 100-hour service item, but your manual should set the exact interval.
Warm the engine first so the oil drains more easily. Then change the oil and replace the filter using the correct marine-grade products for your engine. After refilling, run the motor briefly and recheck the level. Also inspect for leaks around the filter and drain point.
If you own a two-stroke outboard, you will not usually perform crankcase oil changes, but you should still inspect the oil injection system if equipped, keep the reservoir full with the correct oil, and follow the maintenance schedule for that engine type.
Step 6: Replace Lower Unit Gear Lube and Check for Water Intrusion
The lower unit handles a tough job, and its lubricant deserves regular attention. Gear lube protects gears, bearings, and seals inside the gearcase. Many manufacturers recommend changing it annually or every 100 hours, whichever comes first, though exact intervals vary.
When you drain the old lube, inspect its appearance. Clean used lube is one thing. Milky lube is another. Milky gear oil often suggests water intrusion through a bad seal or damaged gasket, which needs to be addressed before bigger damage occurs.
When refilling, use the proper gear lube and replace drain-plug gaskets if required. Pump from the bottom fill hole upward until lube appears at the upper vent. It is not glamorous, but neither is paying for a destroyed gearcase because a ten-dollar seal got ignored.
Step 7: Inspect the Propeller, Propshaft, and Hub
The propeller deserves more than a casual glance. Remove it periodically and inspect the blades for dings, bends, cracks, and fishing-line damage. Even modest prop damage can reduce performance, increase vibration, and place extra stress on drivetrain components.
More importantly, check the propshaft for fishing line wrapped behind the prop. That sneaky little mess can cut into seals and lead to water entering the lower unit. Clean the shaft, inspect for damage, and apply the correct marine grease to the shaft splines before reinstalling the prop. Reinstall the hardware exactly as specified, including the cotter pin or locking device if used.
This is one of those maintenance steps that feels optional until it saves you from a repair bill that makes your wallet breathe into a paper bag.
Step 8: Inspect Fuel Lines, Filters, and the Fuel System
Modern fuel can create trouble if it sits too long or absorbs moisture. Ethanol-blended gasoline is especially notorious for causing headaches in marine engines if fuel management is poor. To maintain your outboard motor properly, inspect fuel hoses for softness, brittleness, swelling, or cracks. Check primer bulbs and fittings for leaks or age-related wear.
Replace fuel filters and fuel-water separators at the intervals recommended by your manufacturer, or sooner if contamination is suspected. If you get a bad tank of fuel, do not wait around for a second opinion from the carburetors or injectors. Address it promptly.
Use fresh fuel when possible, avoid stale gasoline, and treat storage fuel with a marine-grade stabilizer. A healthy fuel system makes starting easier, keeps performance smoother, and reduces the odds of varnish, gum deposits, or injector issues.
Step 9: Grease Moving Parts and Protect Against Corrosion
An outboard has several moving parts that need periodic lubrication, including pivot points, steering components, and other grease fittings specified by the manufacturer. Marine grease helps prevent wear and keeps components moving as they should, especially in corrosive environments.
Corrosion prevention also deserves its own spotlight. Rinse external surfaces, wipe the engine down, and use an appropriate corrosion inhibitor where recommended. Saltwater is especially hard on metal parts, but freshwater motors are not immune. Corrosion can also be accelerated by stray electrical current around docks and marinas.
If you notice corrosion on trim rams, brackets, or external hardware, clean and treat it early. Small surface issues are far easier to handle than a seized part that now behaves like a rusty sculpture.
Step 10: Check Sacrificial Anodes Before They Disappear for a Good Cause
Sacrificial anodes are designed to corrode so your outboard does not. In other words, they are the noble side characters of the marine world. Inspect them regularly, especially if you boat in saltwater or brackish water. If anodes are heavily depleted, replace them with the correct type recommended for your motor and operating conditions.
Do not paint anodes, and do not ignore them just because they look dull and unglamorous. That dull gray appearance is normal. What matters is how much material is left. A common rule of thumb is to replace them when they are about half gone, but again, your engine manual should guide you.
Healthy anodes are cheap insurance against expensive corrosion damage on the lower unit, bracket, and other underwater metal components.
Step 11: Service the Battery, Electrical Connections, and Spark Plugs
Outboard reliability depends on more than fuel and oil. A weak battery or corroded terminal can leave you with a motor that clicks dramatically and does absolutely nothing useful. Inspect battery terminals for corrosion, clean them as needed, and make sure all connections are tight. Check charging performance and keep the battery fully charged, especially during storage periods.
Spark plugs should also be inspected and replaced according to the maintenance schedule. Fouled or worn plugs can cause hard starting, rough idle, poor acceleration, and reduced fuel economy. If your motor starts acting moody for no obvious reason, spark plugs are often a smart place to look.
While you are at it, inspect visible wiring for damage, chafe, or loose connections. Electrical problems on boats love moisture almost as much as they love terrible timing.
Step 12: Prepare the Motor Properly for Seasonal Storage
If your outboard will sit unused for weeks or months, storage prep matters. Start with fresh, stabilized fuel and run the engine long enough to circulate it through the system. On four-strokes, change engine oil and the filter before storage if service is due. Change lower unit gear lube, flush the cooling passages, grease lubrication points, and inspect the propeller and shaft.
Depending on your engine type and manufacturer instructions, fogging may be recommended to protect internal engine components during off-season storage. Battery maintenance is also part of the routine: charge the battery, disconnect it if appropriate, and store it properly if the boat will be laid up for a long period.
Most importantly, store the outboard in the down position so water drains from the cooling system. If you skip this and temperatures drop below freezing, you may create next season’s least fun surprise.
Common Outboard Maintenance Mistakes to Avoid
- Ignoring the owner’s manual and using “universal” advice for a very specific engine
- Skipping freshwater flushing after saltwater use
- Forgetting to inspect the propshaft for fishing line
- Waiting too long to replace fuel filters, spark plugs, or worn anodes
- Running with contaminated gear lube or milky oil
- Storing the motor tilted up instead of in the drain-down position
- Assuming a weak tell-tale stream is “probably fine”
Real-World Experiences: What Maintaining an Outboard Motor Actually Feels Like
On paper, outboard maintenance looks neat and organized. In real life, it usually happens in a driveway, at a dock box, or in a garage while you balance a flashlight in your mouth and wonder where that tiny drain-plug gasket rolled off to. That is part of the charm. Or at least that is what boat owners tell themselves.
One of the biggest lessons people learn after owning an outboard for a season or two is that maintenance is less about giant repair sessions and more about building habits. The owners who have the fewest problems are usually not the ones doing exotic mechanical wizardry. They are the ones who flush the motor after every salty run, keep a small log of service dates, glance at the tell-tale every launch, and notice when something feels different. They hear a change in idle, spot a weaker water stream, or feel a new vibration in the prop before the problem grows teeth.
Another common experience is discovering how many little issues can hide in plain sight. A boat may run “fine” until someone finally removes the prop and finds fishing line wound tightly around the shaft. Or the engine starts normally for months, then suddenly becomes difficult, and the culprit turns out to be stale fuel or a neglected fuel-water separator. Many owners also learn the hard way that corrosion is patient. It does not always announce itself with drama. Sometimes it just quietly turns a simple adjustment into a seized part six months later.
Seasonal storage is where experience really sharpens judgment. First-time owners sometimes think they can park the boat, toss on a cover, and call it winterized. Then spring arrives, and the battery is weak, the fuel smells like a chemistry experiment, and the motor is acting like it has never met them before. More experienced owners know the payoff of doing the boring things on time. Stabilize the fuel. Flush the cooling passages. Change the oils. Store the motor down. Grease what needs grease. Suddenly spring startup becomes much less theatrical.
There is also a confidence factor that comes with learning outboard care. At first, even basic maintenance can feel intimidating. Then you do your first oil change, your first gear lube service, your first prop inspection, and you realize the motor is not a mystery box. It is a machine with a logic to it. That confidence changes the whole ownership experience. Instead of hoping everything is okay, you begin to know what “okay” looks like.
Perhaps the most relatable experience of all is realizing that maintenance buys freedom. A well-kept outboard starts faster, runs smoother, and lets you focus on the trip instead of the engine. You spend more time fishing, cruising, towing the kids, or chasing sunset photos and less time apologizing at the ramp while everyone waits behind you. In the end, that is why these 12 steps matter. Outboard maintenance is not just about protecting an engine. It is about protecting your time on the water, your budget, and your peace of mind. Also, let’s be honest, it is nice when your motor sounds healthy enough to make you look like you know exactly what you are doing.
Conclusion
If you want your outboard motor to stay dependable, efficient, and ready for the next trip, maintenance has to be part of the routine, not an emergency-only hobby. Start with the owner’s manual, build simple habits, and stay ahead of wear items like oil, gear lube, fuel filters, spark plugs, impellers, and anodes. Flush after dirty or saltwater use, inspect the prop shaft, protect against corrosion, and prepare the motor correctly for storage.
None of this is especially glamorous, but neither is a breakdown at the wrong end of the lake. Follow these 12 steps consistently, and your outboard is far more likely to reward you with easier starts, smoother running, and a much longer life on the transom.