Table of Contents >> Show >> Hide
- Why a Tassel Bookmark Is Worth the Tiny Effort
- Materials You’ll Need (Plus Easy Substitutions)
- Pick Your Tassel Size (Without Guesswork)
- How to Make a Bookmark Tassel at Home (Classic Loop Style)
- How to Attach the Tassel to Your Bookmark
- Easy Variations (Same Skill, Different Vibes)
- Troubleshooting: When Your Tassel Misbehaves
- FAQ: Bookmark Tassels, Answered Like a Helpful Craft Gremlin
- Conclusion: A Tiny Project With Big “I Made This” Energy
- Experiences From the Craft Table ( of Real-World Tips You’ll Actually Use)
A bookmark tassel is basically a tiny, stylish flag that screams, “My place is right here!” without you having to
fold a page corner like a medieval barbarian. The best part: you can make a DIY bookmark tassel at home in about
the time it takes to argue with yourself over which color to choose (so… anywhere from 2 minutes to 45).
This tutorial walks you through a classic tassel (the kind you see on store-bought bookmarks), plus a few fun
variations like a paperclip tassel bookmark and a beaded tassel version. You’ll get specific measurements, trimming
tricks, and fixes for the most common “Why does mine look like a stressed-out jellyfish?” problems.
Why a Tassel Bookmark Is Worth the Tiny Effort
A tassel does more than look cute. It makes a bookmark easier to spot in a bag, easier to pull out of a book, and
less likely to slip out and vanish into the void between couch cushions. A thicker tassel (or one with a bead)
adds a bit of weight, which can help it hang neatly and feel more “finished.” And if you like gifting books, a
handmade tassel bookmark is a low-cost add-on that feels surprisingly thoughtfullike wrapping paper, but useful.
Materials You’ll Need (Plus Easy Substitutions)
- Thread for the tassel: embroidery floss, crochet thread, cotton string, baker’s twine, or yarn
- Scissors: sharper is better (dull scissors = frayed ends and quiet disappointment)
- Measuring tool: ruler or tape measure
- Wrapping “form”: a piece of cardboard, a small book, a ruler, or even your fingers
- Optional: needle (for threading), clear tape, a bead or two, a jump ring, glue (for securing ends)
- Bookmark base: cardstock bookmark, store-bought blank bookmark, ribbon, or a hole-punched tag
Quick note on embroidery floss: it’s usually made of multiple strands twisted together. If you want a
finer, silkier tassel, you can separate strands before wrapping. If you want a fuller tassel, wrap more times or
combine colors.
Pick Your Tassel Size (Without Guesswork)
Tassel length is easiest to control when you wrap around something with a known height (like a piece of cardboard).
The height of your wrapping form becomes the tassel length after you cut the loops.
| Desired tassel length | Cardboard height to cut | Wrap count (embroidery floss) |
|---|---|---|
| 2.5 inches (mini) | 2.5 inches | 18–30 wraps |
| 3.5 inches (classic) | 3.5 inches | 25–45 wraps |
| 5 inches (dramatic) | 5 inches | 35–60 wraps |
Those wrap counts aren’t laws of physicsthey’re just a reliable starting point. Thin thread usually needs more wraps.
Chunky yarn needs fewer wraps unless you’re going for “luxury mop” vibes (which is valid).
How to Make a Bookmark Tassel at Home (Classic Loop Style)
This is the most common DIY tassel method because it’s fast, adjustable, and doesn’t require special tools. You’ll
end up with a tassel that has a loop at the top so you can attach it to a bookmark hole.
Step 1: Cut a Cardboard Template
Cut a rectangle of cardboard the same height as your desired tassel length. For example, if you want a
3.5-inch tassel, cut the cardboard to 3.5 inches tall. The width can be 1.5–3 incheswhatever feels comfortable to hold.
Step 2: Wrap the Thread
Hold the end of your embroidery floss against the cardboard and start wrapping around the height of the rectangle,
keeping the wraps fairly even. You don’t need extreme tensionjust consistent tension. If you pull too tight, your
cardboard bends and your tassel becomes… interpretive art.
Color trick: For a two-tone tassel, wrap 15–20 times in color A, then 15–20 times in color B without
cutting in between. When you cut the bottom loops, you’ll get a subtle blended look.
Step 3: Add the Hanging Loop (The Part That Makes It a Bookmark Tassel)
Cut a separate piece of floss about 10–14 inches long. Slide it under the wrapped bundle at the top edge of the cardboard.
Tie it tightly with a double knot. This becomes your hanging loop.
If you want the loop to be extra secure, tie a square knot (right over left, left over right). Your tassel deserves stability.
Step 4: Slide Off the Bundle and Tie the “Neck”
Carefully slide the wrapped bundle off the cardboard, keeping your top loop knot in place. Now cut another 10–12 inch piece
of floss. Wrap it around the bundle about 1/4 to 1/2 inch down from the top knot to form the tassel “neck.”
Wrap snugly 8–12 times, then tie a tight knot. For a cleaner look, tuck the ends under the wraps using a needle or the tip
of your scissors (gentlyno one wants a thread-related injury). If you like a super polished finish, a tiny dot of clear-drying
craft glue can help lock the end in placejust keep it minimal so it doesn’t stiffen the tassel.
Step 5: Cut the Bottom Loops
Use scissors to cut straight across the bottom loops. Shake the tassel gently to let strands fall naturally.
Step 6: Trim for That “Store-Bought” Look
Lay the tassel on a flat surface and comb it with your fingers. Then trim the ends little by little. The secret is not
one giant confidence cut. The secret is several small cuts while pretending you’re a calm person.
Fix for uneven strands: fold the tassel in half lengthwise and snip the longest bits first. This helps you
keep symmetry without obsessing over each strand like it’s a separate life decision.
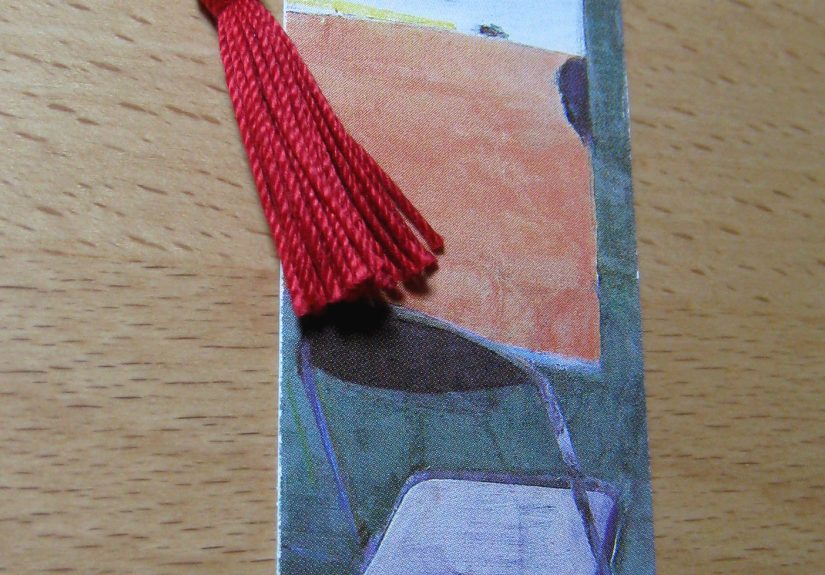
How to Attach the Tassel to Your Bookmark
If your bookmark has a hole at the top (or you can punch one), attaching is easy:
- Push the tassel loop through the bookmark hole.
- Pull the loop through just enough to create an opening.
- Feed the tassel body through that opening.
- Pull gently to tighten and seat the loop against the bookmark.
This creates a snug “lark’s head” style attachment that holds well and looks tidy. If you prefer hardware, you can also
attach a tassel to a jump ring and thread that ring through an eyelet or hole (especially nice for beaded or charm bookmarks).
Easy Variations (Same Skill, Different Vibes)
1) Paperclip Tassel Bookmark (No Hole Punch Needed)
Want something that clips onto a page stack? Make a small tassel and attach it to a large paperclip. You can either tie
the loop directly through the paperclip or use a jump ring for a smoother swivel. This style is great for planners and
textbooks where bookmarks get bullied.
2) Beaded Tassel Bookmark (Looks Fancy, Costs Very Little)
Thread a few beads onto a sturdy cord (hemp cord or waxed cotton works well), then attach a tassel beneath the beads.
The beads add weight so the tassel hangs neatly and gives the bookmark a more “giftable” finish.
3) Ombré or Color-Blocked Tassel
Wrap two or three floss colors in sections (for color blocking), or blend from dark to light by alternating wraps (for ombré).
The trimming step makes the colors look even more intentionallike you planned it from the start and didn’t just
impulsively buy floss because the labels were pretty.
Troubleshooting: When Your Tassel Misbehaves
Problem: My tassel is lopsided
Usually this happens when wraps slide around on the cardboard. Next time, use a tiny piece of tape to anchor the first
inch of floss before wrapping. For the current tassel, trim slowly and straighten strands by lightly misting with water
and letting it dry hanging freely.
Problem: The “neck” keeps slipping
Wrap tighter, tie a square knot, and tuck the ends under the wraps. If you’re using slick thread, a tiny dot of glue can
helpjust make sure it dries clear and doesn’t spread onto the hanging strands.
Problem: My ends look fuzzy
Use sharper scissors and cut in one clean snip when possible. If you’re using yarn, fuzz is normallean into it or switch
to embroidery floss for a sleeker tassel bookmark finish.
FAQ: Bookmark Tassels, Answered Like a Helpful Craft Gremlin
How many wraps do I need?
Enough that it looks full when you fold it and tie it. For embroidery floss, 25–45 wraps usually makes a nice classic
tassel. For yarn, 15–30 wraps often works because yarn is thicker.
Can I make a tassel without cardboard?
Yeswrap around a small book, a ruler, or your fingers. Cardboard just makes the length more consistent, especially if
you’re making multiple tassels for gifts or party favors.
What’s the best thread for a bookmark tassel?
Embroidery floss and crochet thread are popular because they’re smooth, colorful, and easy to trim neatly. Yarn is softer
and fluffier. Twine looks rustic. Choose based on the style you want and how “swishy” you want the tassel to feel.
Conclusion: A Tiny Project With Big “I Made This” Energy
Making a bookmark tassel at home is one of those deceptively satisfying crafts: minimal supplies, maximum payoff.
Once you learn the basic wrap–tie–cut–trim rhythm, you can create DIY tassels in any color scheme, size, or style
from minimalist single-color bookmarks to beaded tassel bookmarks that look like boutique gifts.
If you only remember one tip: trim slowly. Your tassel can always get shorter. It cannot, sadly,
un-get shorter. (If it does, please notify science.)
Experiences From the Craft Table ( of Real-World Tips You’ll Actually Use)
Most people’s first bookmark tassel looks fine from a distance and slightly chaotic up closekind of like a new haircut.
That’s normal, and it’s usually caused by two things: uneven wrapping tension and overconfident trimming. The good news
is that tassels are forgiving. You can adjust the shape, re-tie the neck, and trim again without starting from scratch.
One common “aha” moment happens when you realize how much the wrapping step controls everything. If your wraps drift up
and down the cardboard, the final tassel will have strands of slightly different lengths before you even pick up scissors.
A tiny piece of tape on the first wrap (or simply pinching the bundle firmly with your thumb) keeps the wraps stacked neatly.
When people switch from wrapping on fingers to wrapping on cardboard, they often notice the tassels immediately look more
consistentespecially if they’re making a set for gifts, book club favors, or classroom crafts.
Another experience you’ll probably recognize: the tassel “neck” is either too loose (and slides) or too tight (and squishes
the strands so the tassel flares strangely). The sweet spot is snug enough to hold the bundle without strangling it.
A helpful trick is to wrap the neck thread slowly while keeping the tassel hanging downward; gravity naturally aligns the
strands, which makes the head look cleaner. If the end of your wrapping thread pops out and looks messy, don’t panicuse a
needle, toothpick, or the tip of small scissors to tuck it under the wraps. It’s a two-second fix that instantly makes the
tassel look more “professional.”
Trimming is where people either fall in love with tassel-making or swear it off forever. The easiest way to keep your cool
is to trim in stages: first snip the obvious long pieces, then shake the tassel and trim again. Many crafters notice that
strands settle after you cut the loopsso if you trim immediately and aggressively, you can accidentally create a blunt,
uneven edge. Let the tassel relax, then do your finishing trim. If you want that crisp, boutique look, lay the tassel flat
on a table and trim the bottom like you’re giving it a tiny haircutshort, careful snips rather than one dramatic chop.
Finally, attachment style changes how the tassel behaves in a book. A simple loop-through-hole attachment is slim and
flexible, great for paper bookmarks. But if you use a heavier tassel (like yarn plus beads), a jump ring or eyelet can
reduce friction and help it hang straight. Once people experiment with a couple variationspaperclip tassel bookmark for
planners, classic loop tassel for novels, beaded tassel for giftingthey usually find a favorite “default” style. That’s
when this becomes the kind of craft you can do on autopilot while watching a show, producing a suspicious number of
adorable bookmarks like you’ve joined a secret society of organized readers.