Table of Contents >> Show >> Hide
- Why a Wine Bottle Fountain Works So Well
- Pick Your Style: 4 Designs That Actually Work
- Tools and Materials
- Plan the Build Like a Pro (Before You Touch the Pump)
- Step-by-Step: Build a Wine Bottle Fountain (Works for Most Styles)
- How to Drill a Wine Bottle Safely (So It Doesn’t Crack)
- Make It Look Boutique (Without Paying Boutique Prices)
- Maintenance: Keep It Clean, Clear, and Not a Mosquito Resort
- Troubleshooting (Because Water Has Opinions)
- FAQ
- Conclusion
- Experiences You’ll Have While Building a Wine Bottle Fountain (and Why They’re Normal)
- SEO Tags
Empty wine bottles are basically the craft world’s version of “I can fix him.” You see them and think,
this could be art. And you’re rightbecause with a small pump, a hidden reservoir, and a little
DIY swagger, those bottles can become a soothing, conversation-starting water fountain that makes your patio
feel like a tiny spa (minus the cucumber water you forgot to refill).
This guide walks you through several build stylesfrom a no-drill setup that’s beginner-friendly to a clean,
“How is the water doing that?” look that uses a drilled bottle. You’ll also get pump-sizing tips, safety notes,
and maintenance habits so your fountain stays charming instead of turning into a science project.
Why a Wine Bottle Fountain Works So Well
Wine bottles check all the right boxes for a creative water feature: they’re durable, weather-friendly,
easy to dress up (lights! stones! moss!), and they come in shapes that naturally guide water into a satisfying
pour. The best part is the soundwater hitting glass or river rock creates a gentle, “I totally have my life together”
vibe that pairs nicely with, say, ignoring your inbox.
Pick Your Style: 4 Designs That Actually Work
1) No-Drill “Bottle Mouth” Fountain (Beginner-Friendly)
Water is pumped up through clear tubing that runs into the bottle’s neck. It rises inside the bottle and spills
out of the mouth into your basin. No drilling. No diamond bits. Less chance of dramatically whispering, “Why did I do this?”
while sweeping up glass.
2) Drilled-Bottle “Clean Look” Fountain (Hidden Tubing)
You drill a small hole near the bottle’s base (or on the back side) so the tubing enters discreetly. This makes the
fountain look polishedlike a boutique garden shop would sell it for three times the cost and call it
“Tuscan Tranquility No. 7.”
3) Multi-Bottle Cascade (More Drama, More Delight)
Use two or three bottles at different heights so water pours from bottle to bottle. It’s visually impressive,
sounds fantastic, and gives you bonus “wow” points without needing advanced plumbing skills.
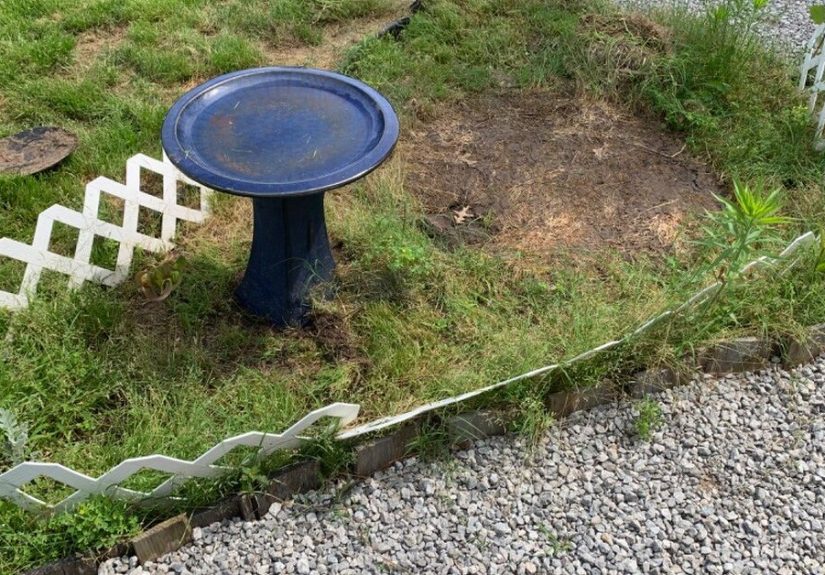
4) Solar-Powered Patio Version (For Spots Without an Outlet)
If your fountain will sit in a sunny area, a small solar pump can power a gentle flow. It’s great for small basins
and bird-bath-style setups. The tradeoff: shade and cloudy weather reduce output, so expect a calmer trickle sometimes.
Tools and Materials
You can keep this project simple or go full “yard sculpture.” Here’s a reliable shopping/build list that works for most setups:
Core Supplies (All Designs)
- Old wine bottles (1–3+). Remove labels for a cleaner look, or keep them for personality.
- Submersible fountain/pond pump with adjustable flow (tabletop: ~70–140 GPH; larger basin: ~200–300 GPH).
- Flexible vinyl tubing (often 1/4″ ID for small fountains; match your pump outlet size).
- Water reservoir/basin: a glazed planter, plastic tub inside a planter, metal bowl, or a pondless basin hidden under rocks.
- River rocks/pebbles to hide the pump and steady the bottle base.
- Bottle support: driftwood, a wine bottle holder, a small stand, stacked bricks, or a crate.
- Silicone sealant (outdoor/water-safe) for securing parts and reducing wobble.
- Optional flow control: inline valve or adjustable pump dial to tame splashing.
If You’re Drilling Glass
- Diamond drill bit or diamond hole saw sized for your tubing/grommet.
- Painter’s tape (helps prevent wandering bits).
- Safety glasses + gloves and a mask (tiny glass dust is not a fun souvenir).
- Water source (spray bottle, drip from sponge, or a shallow tray) to keep the bit and glass cool.
- Rubber grommet (optional but recommended) to protect tubing from sharp edges.
Plan the Build Like a Pro (Before You Touch the Pump)
The secret to a fountain that looks intentional is not luckit’s a five-minute plan. Decide these three things first:
- Location: Outdoor? Indoor? Sunny? Shady? Near an outlet? Visible from your favorite chair?
- Height and splash zone: Higher drops sound nicer but splash more. Keep the first test run gentle.
- How you’ll hide the reservoir: Exposed bowl (easy) or “pondless” hidden basin under stones (sleek).
A quick rule of thumb: the bigger your basin, the less often you’ll refill. Small fountains evaporate faster, especially in heat or wind.
Step-by-Step: Build a Wine Bottle Fountain (Works for Most Styles)
Step 1: Clean and Prep the Bottles
Rinse bottles thoroughly. If removing labels, soak them in warm water and peel. Any leftover adhesive can usually be rubbed off with
cooking oil and a scrubby sponge. Let bottles dry completely.
Step 2: Build (or Hide) Your Reservoir
For a simple build, use a watertight bowl or planter with no drainage hole. For a “pondless” look, place a plastic tub inside a larger
planter and cover it with stones or a grate so water disappears under the surface.
Make sure the pump can sit flat and stay submerged. If your basin is deep, you can raise the pump slightly on a flat brick so it doesn’t
suck up sediment at the bottom.
Step 3: Position the Pump and Run the Tubing
Connect tubing to the pump’s outlet (use an adapter if the outlet is larger than your tubing). Run tubing toward where the bottle will sit.
Leave extra length so you can adjust later. You can trim after the first successful test run.
Step 4: Create a Stable Bottle “Stage”
Stability matters. A fountain that wobbles is a fountain that eventually dumps water where it shouldn’t. Choose one:
- Driftwood support: Secure the bottle against a piece of driftwood for a rustic look.
- Wine holder angle: Use a simple holder so the bottle “pours” outward.
- Rock cradle: Nest the bottle base into a ring of heavier stones and lock it in place.
- Tiered crates/bricks: Great for a multi-bottle cascade.
If you’re building a cascade, place the highest bottle first, then position lower bottles so the flow lands inside the next mouth cleanly.
This is the “move it two inches, test, move it two inches, test” phase. Embrace it.
Step 5: Choose Your Water Path
Option A: No-Drill Bottle Mouth Setup
Feed the tubing up through the bottle neck. If the tubing is too stiff or wants to kink, warm it in hot tap water for 30–60 seconds,
then gently shape it. The tubing should end near the bottom of the bottle so it fills from below and rises naturally.
To make the water pour outward (instead of just bubbling inside), angle the bottle so the mouth points toward the basin.
You can also add a small, clear elbow fitting near the top to guide the stream.
Option B: Hidden-Tube Drilled Setup
Drill a hole where the tubing can enter discreetly (often low on the “back” side). Insert a rubber grommet if you have one,
feed the tubing through, then seal around it with silicone. (See the drilling section below for safe technique.)
Step 6: Hide the Mechanics Without Hiding the Magic
Arrange river rocks around the pump and tubing. Keep the pump’s intake area clearrocks should conceal it, not smother it.
If your pump has a flow adjuster, make sure you can still reach it without excavating your whole fountain like an archaeologist.
Step 7: Fill, Prime, Test, Adjust
Fill the reservoir with clean water until the pump is fully submerged. Plug the pump in and start on the lowest flow.
Watch for splash, leaks, and wobble. Then adjust:
- If water splashes out: lower the flow, change the pour angle, or add rocks where water lands to soften impact.
- If flow is weak: check for kinks, confirm the pump intake is clear, and ensure tubing isn’t too narrow for the pump outlet.
- If it gurgles loudly: you’re likely pulling airadd water to the reservoir so the pump stays submerged.
How to Drill a Wine Bottle Safely (So It Doesn’t Crack)
Drilling glass isn’t hard, but it’s picky. The goal is to keep heat down, pressure light, and patience up.
Drilling Steps
- Mark the spot and apply painter’s tape over it (the tape helps keep the bit from skating).
- Stabilize the bottle on a towel or in a padded box so it can’t roll.
- Keep it wet: spray water continuously or drill in a shallow tray with water covering the drilling area.
- Start at a slight angle to “score” a groove, then slowly bring the drill upright.
- Use low speed + light pressure. Let the diamond bit grindpushing harder increases cracking risk.
- Pause often to cool the glass and bit. If you see steam, that’s your sign to slow down and add water.
- Finish gently: when you’re almost through, reduce pressure even more to prevent chipping on the exit side.
- Smooth the hole with fine sandpaper or a deburring stone, then add a grommet if possible.
Tip: Practice on a “test bottle” first if you’ve never drilled glass. One sacrificial bottle can save you from turning your favorite label into a tragedy.
Make It Look Boutique (Without Paying Boutique Prices)
Design upgrades that add instant polish
- Use a color story: all green bottles, all clear, or a gradient from amber to green.
- Add soft lighting: waterproof LED fairy lights in the basin can make the water sparkle at night.
- Go label-free (or intentionally labeled): clean glass looks modern; vintage labels feel rustic and playful.
- Layer stones: larger river rocks on top, smaller pebbles below for stability and texture.
- Include one “hero” accent: a chunk of driftwood, a piece of slate, or a small metal garden sculpture.
Maintenance: Keep It Clean, Clear, and Not a Mosquito Resort
A fountain is happiest when the water is moving, the pump is clean, and the basin isn’t baking in full sun all day.
Here’s an easy routine that keeps your water feature pleasant and low-maintenance.
Weekly (Fast)
- Top off water (evaporation happens fast in heat and wind).
- Rinse debris from the pump intake sponge/filter if your pump has one.
- Change water at least once a week if mosquitoes are a concern.
Monthly (A Little Deeper)
- Unplug the pump and rinse it. Clear any grit from the intake.
- Scrub rocks and basin sides with a brush if algae starts to cling.
- Check tubing for mineral buildup or kinks.
Algae and Water Clarity Tips
- Shade helps: less sun = slower algae growth.
- Gentle cleaning beats harsh chemicals: a scrub brush and mild solution (like diluted vinegar) often does the job.
- Keep water moving: stagnant water is what gets funky fast.
Safety note: if the fountain is outdoors, use a GFCI-protected outlet and keep connections protected from rain.
Water features and electricity can coexistjust not casually.
Troubleshooting (Because Water Has Opinions)
Problem: The flow is too strong and splashes everywhere
- Turn down the pump flow or add an inline valve.
- Lower the drop height between bottles or add rocks where water lands.
- Angle the bottle mouth slightly inward so water falls into the basin, not over it.
Problem: The pump is loud
- Make sure the pump is fully submergedlow water makes pumps noisy.
- Set the pump on a flat stone or rubber pad to reduce vibration noise.
- Clean the intake; clogged pumps work harder and get louder.
Problem: Water isn’t reaching the top
- Confirm your pump’s head height is enough for your fountain’s height.
- Shorten tubing or reduce sharp bends that restrict flow.
- Step up to a slightly stronger pump if needed.
FAQ
What pump size should I buy?
For a small tabletop/bowl fountain, a low-flow pump is usually enough. For a larger basin or a multi-bottle cascade,
you’ll typically want more flowespecially if you’re lifting water higher. If you can, choose a pump with an adjustable dial,
because it’s much easier to reduce splash than to magically create more power.
Can I do this indoors?
Yeschoose a stable, wide basin, keep splash low, and place the fountain on a waterproof tray or mat. Indoor fountains
often look best with softer flow and subtle lighting.
Do I have to drill the bottle?
Not at all. The no-drill bottle-mouth method is beginner-friendly and still looks great. Drilling simply gives you a cleaner,
more “professional” look by hiding the tubing.
Conclusion
A wine bottle fountain is one of those projects that feels fancy, sounds relaxing, and secretly isn’t complicated once you understand
the three building blocks: a hidden reservoir, a submersible pump, and a controlled water path.
Start with a simple one-bottle build. Thenwhen you catch yourself saving every bottle “for future fountains” like a person with a plan
(and absolutely not a new hobby obsession)graduate to a cascade. Your patio will thank you. Your recycling bin will, too.
Experiences You’ll Have While Building a Wine Bottle Fountain (and Why They’re Normal)
The first experience is optimism. It shows up right after you rinse the bottle and think, “This will take an hour.”
That’s adorable. In reality, most of your time goes into tiny adjustments that nobody sees but everybody feelslike shifting a bottle
half an inch so the pour lands cleanly, or rearranging stones until the pump disappears but still has breathing room.
Next comes the “flow personality test.” Pumps don’t just pump; they judge your setup. If your tubing is slightly kinked,
the water will sputter like it’s trying to complain. If your bottle angle is too upright, the water will politely stay inside
and refuse to do the dramatic pour you imagined. The good news is that these moments are fixable with small tweaks: straighten the line,
shorten the tubing, or rotate the bottle a few degrees.
You’ll also have a brief but meaningful relationship with splashing. On your first test run, you’ll likely set the pump to “medium”
because you want that satisfying sound. Then you’ll watch water ricochet off glass, bounce off a rock, and land exactly on the one surface
you did not protect. This is why adjustable pumps are the real MVP. Start low, dial up slowly, and use rocks like a sound-and-splash buffer.
Flat stones soften impact; rounded river rocks break up the stream; a small pile right where water lands can turn “splash chaos” into a gentle trickle.
If you choose to drill a bottle, you’ll experience the weird calm of going very, very slowly. Drilling glass rewards patience in a way
almost nothing else does. You’ll learn to let the bit grind instead of forcing it, to keep everything cool with water, and to stop when you feel
yourself getting impatient (because impatience is how bottles turn into confetti). When you finally break through cleanly, it feels like you just
unlocked a new DIY skill tree.
Then comes the surprisingly satisfying “hide the mechanics” phase. There’s something magical about placing the last layer of stones and watching
your fountain transform from “pump in a bowl” to “intentional garden feature.” This is also where creativity shows up: maybe you add a driftwood piece,
maybe you lean into a wine theme with a few vintage corks, or maybe you keep it minimal and modern with clear glass and a simple slate base.
Finally, you’ll experience the moment that makes the whole project worth it: you sit down, the water starts circulating, and the space feels calmer.
It’s not just the soundalthough that helpsit’s the fact that you built something functional and beautiful out of “nothing.” And yes, you will
immediately start spotting future fountain materials everywhere. This is normal. Welcome.