Table of Contents >> Show >> Hide
- What Makes an Ariel Costume Read as “Ariel” (Even If It’s DIY)
- Before You Start: Pick Your Tail Style
- Materials & Tools (Choose Your Difficulty Level)
- Step-by-Step: Make the Ariel Mermaid Tail (Walkable Skirt Version)
- Step-by-Step: Make the Purple Seashell Top
- Hair: How to Get Ariel’s Red “Main Character” Volume
- Accessories & Makeup That Sell the Character
- Fit, Comfort, and “How Do I Sit Down?”
- Budget Breakdown (So Your Costume Doesn’t Eat Your Rent)
- Safety Notes (Unsexy, But Important)
- Final Checklist: The “Do I Look Like Ariel Yet?” Test
- Experience Notes: What It’s Really Like Wearing an Ariel Mermaid Costume (500-ish Words of Truth)
Want to go full “under the sea” without looking like you got tangled in a fishing net on the way to the party?
Making an Ariel-inspired mermaid costume is one of those projects that can be as simple as “cute skirt + shells”
or as extra as “hand-painted scales + custom fins + wig that could win an Olympic medal.”
This guide gives you both lanesbecause sometimes you have time for couture, and sometimes you have time for hot glue.
We’ll build the costume in three iconic Ariel ingredients:
a green mermaid tail, a purple seashell top, and big red hair energy.
Then we’ll layer on the details that make people say, “Okay, wow… you DID that.”
What Makes an Ariel Costume Read as “Ariel” (Even If It’s DIY)
Ariel’s look is basically a color-and-silhouette cheat code. Nail these and you’re instantly recognizable:
- Tail: green, scaled texture (sparkle is encouraged), fitted through the legs, flaring at the fin.
- Top: purple seashell bra/top (or shell-shaped bodice if you prefer more coverage).
- Hair: bright red, voluminous, slightly wavylike it has its own fan club.
- Accessories: sea treasurespearls, starfish, shells, “found objects” (yes, the fork counts).
Before You Start: Pick Your Tail Style
Mermaid costumes have one eternal problem: mermaids don’t have feet. So you have two practical options:
Option A: Walkable Mermaid Tail Skirt (Best for Parties, Halloween, Cons)
This is the easiest and most wearable route: a fitted skirt that tapers at the knees/ankles, plus a fin that flares out behind you.
You can still walk, climb stairs, and accept compliments without needing a forklift.
Option B: Swimmable Tail (Only If You Truly Know What You’re Doing)
A real swim tail typically uses a monofin for structure and specialized stretch materials.
It’s a different engineering project with very real safety considerations. If you’re making one, treat it like water gearnot a fashion piece.
Materials & Tools (Choose Your Difficulty Level)
Fabric + Notions (Tail/Skirt)
- Stretch fabric: green spandex, holographic scale knit, or sequin scale fabric (2–3 yards for most adults; more if you’re tall or want dramatic fins).
- Lining (optional): lightweight stretch lining for comfort and to reduce itch from sequins.
- Elastic: 3/4″ to 1″ non-roll elastic for the waistband.
- Thread: polyester thread (stronger stretch performance than cotton).
- Needles: stretch needle (your sewing machine will thank you).
- Fin structure (optional): felt layers, mesh, chiffon/tulle overlays, or foam inserts.
Top (Seashell Bra)
- Base: an old bikini top, strapless bra, or sturdy bralette (the “foundation garment” does the heavy lifting).
- Shell shape: EVA foam (2–6mm), craft foam, or pre-made shells (craft shells can work, but foam is lighter).
- Adhesive: hot glue (quick), E6000/contact cement (stronger; use safely), or fabric glue for trims.
- Paint + seal: acrylic paint + clear sealer (matte/satin) so it survives sweat and hugs.
- Embellishments: pearls, rhinestones, tiny shells, gold paint for highlights.
Hair + Accessories
- Red wig (preferably heat-resistant fiber), wig cap, detangling comb, hairspray.
- Starfish hair clip, pearl bracelets, shell necklace, “dinglehopper” (a forkAriel’s iconic “hairbrush”).
- Makeup: bronzy shimmer, coral blush, highlighter, waterproof mascara/liner.
Step-by-Step: Make the Ariel Mermaid Tail (Walkable Skirt Version)
1) Take Measurements (Yes, You Need Them)
Measure:
waist, high hip, full hip, knee circumference,
and waist-to-ankle length.
Mermaid silhouettes look best when they’re fitted at the hips and start tapering around mid-thigh to knee.
2) Draft a Simple Tail Skirt Pattern
You can draft by modifying a pencil skirt pattern or tracing a skirt you already like.
The key is the taper: wide enough to walk, narrow enough to look mermaid-ish.
- Cut two mirrored pieces (front + back) with stretch running around the body for comfort.
- Add seam allowance (about 1/2″).
- Mark where your fin will attach: usually around mid-calf to ankle.
3) Sew the Main Skirt
Stitch the side seams. Use a zigzag stitch or stretch stitch so the seams can move with you.
If your fabric has sequins, go slow and consider a lining to avoid turning your legs into a craft store battlefield.
Pro tip: Some spandex and sequin knits can skip stitches; a stretch needle can make a huge difference.
4) Add a Waistband That Won’t Quit
Create a casing at the waist, insert elastic cut slightly smaller than your waist measurement, and stitch it securely.
If you want a cleaner finish, add a yoga-style waistband panel with spandex.
5) Build the Fin (The Part People Will Remember)
A fin is basically two fabric “leaves” that flare out behind you. You can make it as dramatic as your personality.
- Cut two fin shapes from your main fabric (or contrast fabric for dimension).
- For structure, sandwich a layer of felt or mesh inside.
- Sew around the edges, turn right-side out, then topstitch.
- Optional: add chiffon or tulle streamers along the edge for floaty movement.
Attach the fin to the bottom back of the skirt. You can sew it permanently or make it removable with snaps/Velcro
so you can sit down like a normal human when needed.
6) Add “Scale” Texture Without Sewing 9,000 Individual Scales
The fastest way: buy scale-print fabric. The “looks expensive” way: add dimension.
- Layered scallops: cut half-circle “scales” from stretch fabric scraps and overlap them near the waistband.
- Shading: lightly sponge darker green along side seams and fin base, then seal (test on scraps first).
- Highlights: a tiny amount of metallic fabric paint on raised areas = instant ocean magic.
Step-by-Step: Make the Purple Seashell Top
There are two main approaches: quick-and-cute, or cosplay-level sculpted shells. Choose your destiny.
Option A: The Fast No-Sew Seashell Top (Beginner-Friendly)
- Start with a purple bikini top or strapless bra you can safely glue onto.
- Create shell shapes using craft foam, lightweight plastic shells, or even layered felt cut into scallops.
- Glue shells in place and add pearls/rhinestones along the seams for “Disney sparkle logic.”
- Paint details (a little shading makes it look less flat), then seal.
If you’re gluing, let it cure fully before wearing. Costume malfunctions are not part of the fairytale.
Option B: Sculpted EVA Foam Shells (More Realistic, More Durable)
EVA foam is lightweight and can be heat-shaped into curves. That means you can make shells that actually look like shells,
not like two purple potato chips stuck to a bra.
- Create a paper template for the shell shape (two mirrored pieces).
- Cut the shapes in EVA foam. Add carved grooves with a craft knife for ridges.
- Heat-form the foam (heat gun) and curve it to fit your body.
- Glue shells onto the bra base using a strong adhesive (ventilate if using contact cement).
- Prime (optional), paint with acrylics, and seal.
Option C: Worbla Overlay (Cosplay Upgrade)
Want shells that feel like armor but still look like ocean glamour? Thermoplastics like Worbla can add a rigid, sculptural finish.
It’s heat-activated and can be molded over foam forms, then painted.
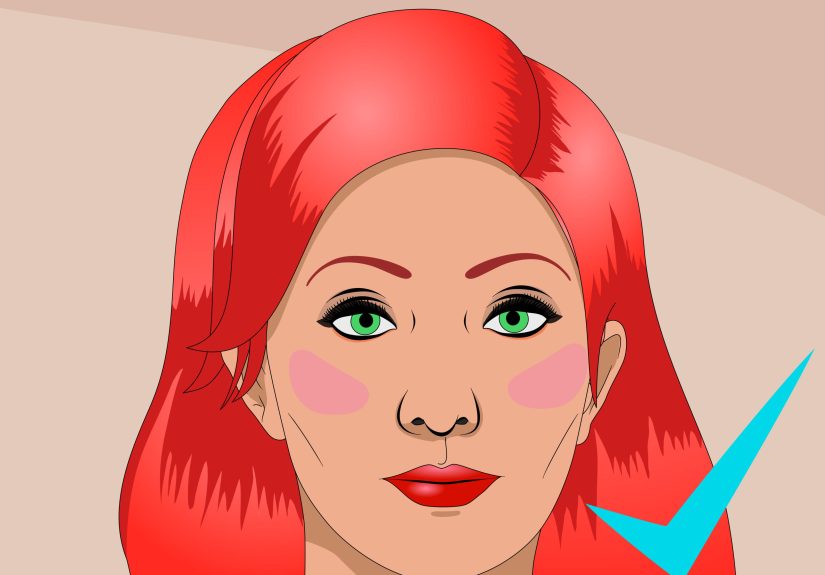
Hair: How to Get Ariel’s Red “Main Character” Volume
Wig vs. Natural Hair
If your hair is already red and longcongrats, you’re living the dream. For everyone else, a wig is easiest.
Look for a heat-resistant synthetic wig so you can shape waves and tame flyaways.
Quick Wig Styling Routine
- Detangle gently from ends to roots.
- Add volume: tease sections lightly at the crown for that animated bounce.
- Create waves: braid overnight or use low-to-medium heat tools (follow your wig fiber’s heat guidance).
- Finish: a light mist of wig-safe hairspray, then finger-comb the surface so it stays soft, not crunchy.
Heat note: Many wig makers recommend staying in moderate temperature ranges for styling tools to avoid damaging fibers.
If your wig is labeled heat-friendly, still test on a hidden strand first.
Accessories & Makeup That Sell the Character
Accessories
- Starfish hair clip: instant “I belong in a musical number.”
- Pearl bracelet stack: like you raided a treasure chest (politely).
- Shell necklace: keep it simpleAriel’s vibe is curious and bright, not heavy and gothic.
- Dinglehopper: carry a fork as a wink to the movie. Bonus: it’s also useful at snacks.
Makeup (Ariel, But Make It Real-Life)
- Skin: glowy base + subtle highlight (cheekbones, nose, inner corners).
- Blush: coral/peach (Ariel is basically sunshine that learned to swim).
- Eyes: warm browns, copper shimmer, waterproof liner/mascara.
- Lips: rosy red or coralkeep it lively, not vampy.
- Extra: tiny shimmer on shoulders/collarbone = “just emerged from the sea” effect.
Fit, Comfort, and “How Do I Sit Down?”
The secret to loving your costume is engineering it for real life.
- Walking: if the skirt is too tight at the ankles, add a hidden slit in the back seam (fin will cover it).
- Bathroom plan: make the fin removable or keep the skirt as a pull-on with stretch so you’re not trapped in a mermaid prison.
- Anti-itch: line sequin fabric or wear nude biker shorts underneath.
- Emergency kit: bobby pins, mini hot glue sticks, fashion tape, and a tiny brush/comb.
Budget Breakdown (So Your Costume Doesn’t Eat Your Rent)
Budget ($25–$50)
- Scale-print fabric remnant + elastic waistband
- Purple bikini top + foam shells
- Simple red wig or temporary hair color spray
Midrange ($60–$120)
- Higher-quality stretch fabric + lining
- Heat-shaped EVA foam shells + sealed paint
- Heat-resistant wig + styling tools
Extra ($150+)
- Custom fin structure + layered fabrics
- Thermoplastic shell build + professional paint finish
- Styled wig with added wefts and long-lasting set
Safety Notes (Unsexy, But Important)
- Trip hazards: make sure kids can take normal steps; avoid overly long fins for trick-or-treating.
- Adhesives: strong glues can have fumeswork in a ventilated space and follow label instructions.
- Heat tools: heat guns and styling tools are hot enough to burn skin and melt materials. Slow and careful wins.
- Swimming tails: treat as water equipment and use proper supervision. Fashion should never be a drowning hazard.
Final Checklist: The “Do I Look Like Ariel Yet?” Test
- Green tail that fits and moves
- Purple shell top that stays put
- Red hair with volume
- One or two sea-themed accessories
- Comfort tweaks (slit, lining, removable fin)
That’s it. You’re ready to flip your metaphorical fins and strut into the room like you’ve got your own soundtrack.
And if anyone asks where you bought it? Smile politely. Then enjoy the moment where you get to say:
“Oh, I made it.”
Experience Notes: What It’s Really Like Wearing an Ariel Mermaid Costume (500-ish Words of Truth)
Making the costume is one kind of fun. Wearing it is a whole different species of adventure.
Here are the most common “I wish someone told me” experiences people run intoso your first outing feels magical instead of mildly chaotic.
You will become a walking photo-op (and it’s surprisingly delightful)
Ariel is instantly recognizable, and the mermaid silhouette reads from across a room. Even a simple DIY version can pull a crowd.
The funny part? People rarely ask “Who are you?” They skip straight to “Can I get a picture?”
If you’re introverted, build a costume that’s comfortable enough to stay in while you’re being perceived.
(That means: soft lining, stable top, and a skirt you can walk in without crab-walking like you’re in a nature documentary.)
Movement is the entire game
A tail skirt changes how you walkshorter steps, more sway, and an accidental “I have arrived” energy that honestly suits Ariel.
The trick is not making it so tight that you can’t navigate curbs or stairs. The best real-world hack is a hidden back slit
or a stretch panel that’s disguised under the fin. It keeps the silhouette, but your legs still function.
You’ll also learn quickly that sitting is… a skill. Practice at home. Find your angles.
The fin might need to flip to one side like a dramatic cape. You’re not strugglingyou’re styling.
Wigs are wonderful until they aren’t
Red wigs look incredible in photos, but they can tangle if you’re hugging people, dancing, or existing near velcro.
Bring a small comb and do a gentle detangle halfway through the event. Also: bobby pins are not optional.
Pin the wig at the temples and nape so it doesn’t slide back like it’s trying to leave early.
If you styled waves with heat, avoid over-spraying; crunchy hair reads less “Ariel” and more “I got caught in sea foam cement.”
The top is where DIY costumes either shineor betray you
A seashell top looks cute right up until gravity starts negotiating.
If you’re doing a quick build, make sure the base garment fits snugly and supports you.
Reinforce straps, consider adding a clear strap for security, and test it by moving your arms like you’re waving at sailors.
(This is science.) If you built foam shells, sealing is hugepaint that isn’t sealed can crack or rub off, especially in humid weather.
The best feeling is realizing you can hug people and move without doing a constant “top check.”
The “little” details get the biggest reactions
People love the tiny story bits: a starfish clip, a pearl bracelet, a shell necklace, or carrying a fork like it’s priceless treasure.
Those accessories don’t cost much, but they make the costume feel intentional and character-driven.
It’s also fun to have a line ready when someone notices: “This is my dinglehopper.”
Congratulationsyou’re now part costume maker, part improv performer.
If you build for comfort and movement first, the rest falls into place. And once you’ve worn it once,
you’ll immediately see what you want to upgrade: maybe richer scale texture, a more dramatic fin, or a better wig.
That’s the mermaid costume lifecycle. One does not simply make a tail and stop there.