Table of Contents >> Show >> Hide
- Why Make a Gift Box from a Greeting Card?
- What You’ll Need
- Pick the Right Greeting Card (Yes, It Matters)
- The Easiest Method: The “Cut Squares, Fold Up Sides” Box
- How to Make a Matching Lid That Actually Fits
- Make It Look Store-Bought: Finishing Touches
- Common Problems (and How to Fix Them)
- What Fits in a Greeting-Card Gift Box? Real Examples
- Storage and Batch-Making Tips
- Wrap-Up: Small Craft, Big Impact
- of Real-World “Been There” Experiences (So Your Box Comes Out Great)
Raise your hand if you have a drawer full of gorgeous greeting cards you can’t throw away because (1) they’re too pretty, (2) someone wrote something sweet, or (3) you’re convinced they’ll be “useful someday.” Good news: today is someday.
Turning a greeting card into a small gift box is one of those crafts that feels like a magic trick. You start with a flat rectangle. You do a little measuring, a little folding, a little “please don’t cut the table” energy… and suddenly you have a sturdy, adorable box that looks boutique-level fancy.
This guide walks you through a reliable, beginner-friendly method (plus a lid option), with real-world tips for clean corners, snug fits, and “why is my box doing that?” troubleshooting. Let’s turn sentimental paper into packaging greatness.
Why Make a Gift Box from a Greeting Card?
Besides the obvious (it’s cute), greeting-card gift boxes are practical:
- They’re upcycled: You reuse something you already have instead of buying new packaging.
- They’re sturdy: Greeting cards are typically thicker than regular paper, so the box holds its shape well.
- They’re meaningful: Holiday cards, birthday cards, thank-you cardsturning them into boxes keeps the memory alive without storing stacks forever.
- They look custom: The artwork becomes instant “gift wrap,” no wrapping paper wrestling required.
What You’ll Need
Keep it simple. You can make a box with basic supplies, then level up if you want sharper folds and cleaner edges.
Essentials
- 1–2 greeting cards (more on that in a moment)
- Scissors (or a craft knife + cutting mat)
- Ruler
- Pencil (light marks; we’re not autographing the box)
- Glue stick or tacky glue (double-sided tape also works)
Nice-to-Haves for a Pro Finish
- Bone folder (or the back of a spoon) for crisp creases
- Binder clips or clothespins to hold corners while glue sets
- Clear tape for reinforcement (especially if the card is glossy)
- Washi tape, ribbon, or labels for decorating
Pick the Right Greeting Card (Yes, It Matters)
Not all greeting cards behave the same. Here’s what to look for so your box ends up “handmade chic” instead of “collapsed sad taco.”
Size
Bigger card = bigger box. Standard folded cards (often around 5×7 inches when folded) are great for small gifts like jewelry, gift cards, mini candles, socks, or trinkets.
Thickness
Thicker cardstock makes sturdier boxes. Very thin cards can still work, but you may want to reinforce the corners with tape or add a paper liner inside.
Glossy vs. Matte
Glossy cards look gorgeous, but glue sometimes has trouble grabbing slick surfaces. If your card is shiny, use double-sided tape, tacky glue, or lightly rough up the glue area with a clean nail file (gentlythis is crafting, not carpentry).
The Easiest Method: The “Cut Squares, Fold Up Sides” Box
This method creates a classic open-top box (like a tray). Make a second one slightly larger and you’ll have a lid too.
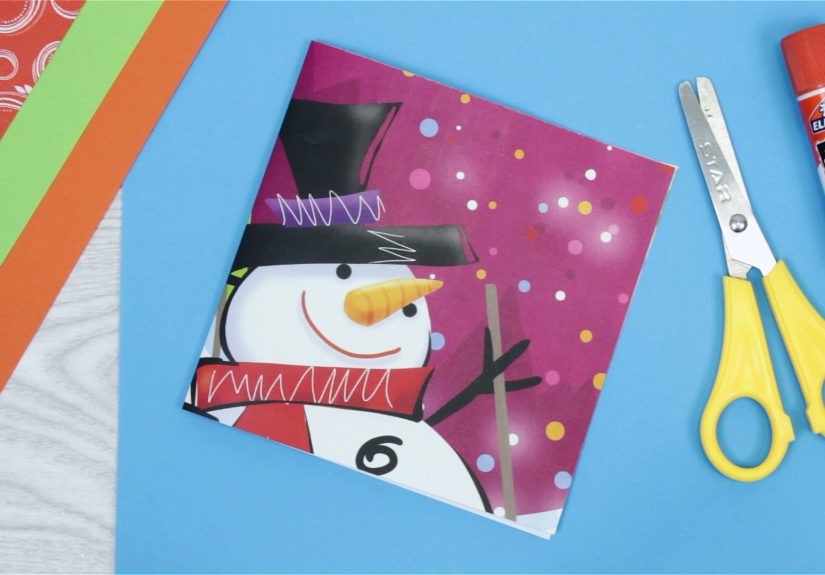
Step 1: Separate the Card (If It’s Folded)
If you’re using a folded greeting card, cut along the fold so you have two flat rectangles:
- Card front: Usually the pretty artwork (perfect for the lid).
- Card back: Plainer (great for the base).
You can also use just one piece to make a lidless boxhandy for party favors or desk organizers.
Step 2: Decide Your Box Height
Your “box height” is how tall the sides will be. For a greeting-card box, a height between 3/4 inch and 1 1/4 inches tends to work well.
Rule of thumb: Taller sides mean less floor space inside the box. If you choose 1 inch sides, you’ll lose 2 inches of width and 2 inches of length from the card’s original size.
Step 3: Mark Squares in Each Corner
On the back side of your card piece (so pencil marks stay hidden), use your ruler to mark a square of the chosen height in each corner.
- If your box height is 1 inch, draw a 1×1 inch square in all four corners.
- Use light pencil linesthink “whisper,” not “permanent evidence.”
Step 4: Cut Out the Corner Squares
Cut along the lines to remove the four corner squares. You now have a plus-sign shape (a rectangle with notches in every corner).
Step 5: Score (Optional) and Fold the Sides Up
Fold along the lines you drew to bring the sides up. If you have a bone folder, score first for a sharper crease; otherwise, fold carefully and press firmly along each fold.
Step 6: Make Tabs for Neat Corners
This is the part that makes the box look finished instead of “I folded a thing and hoped for the best.”
On two opposite sides, cut a small slit along the fold line up to where the corner square used to be. This creates little flaps (tabs) that can tuck inside the adjacent sides.
Quick guide:
- Pick two opposite sides to be your “tab sides.”
- On each tab side, make a short cut along the fold at both ends (four cuts total).
- When you fold up the sides, these tabs will overlap inside the corners for gluing.
Step 7: Glue (or Tape) the Corners
Fold the sides up. Tuck the tabs inside the neighboring walls. Add glue to the tabs and press them firmly into place. Use binder clips or clothespins to hold each corner while it sets.
Tip: If the inside of the card is glossy, a glue stick may slip. Use tacky glue, strong double-sided tape, or reinforce the inside corners with a small strip of clear tape.
How to Make a Matching Lid That Actually Fits
A lid is just another boxslightly largerso it can slide over the base. There are two easy ways to get that “just right” fit without doing advanced geometry.
Option A: Use Two Card Pieces and Adjust the Box Height
This method is great when both card pieces are the same size (like the front and back of one card).
- Base: Use a slightly larger corner square (example: 1 1/8 inch).
- Lid: Use a slightly smaller corner square (example: 1 inch).
Because the base uses larger corner cutouts, its final footprint becomes a bit smallermaking it easier for the lid to slide over it.
Option B: Trim the Base Piece Slightly Smaller
If you prefer using the same box height for both, trim the base piece down by about 1/8 inch on each side before you start. That tiny reduction makes a big difference in fit, especially with thicker cardstock.
Pro tip: Test-fit before gluing. Dry-fold both pieces, gently nest them together, and adjust if needed (a hairline trim beats a heartbreak re-do).
Make It Look Store-Bought: Finishing Touches
Your box is functional now. Let’s make it look like it came from a fancy little shop where everything smells like candles and optimism.
Reinforce the Corners
- Add a thin strip of tape inside each corner for extra strength (especially for heavier gifts).
- If the card is thin, glue a scrap of cardstock inside the base as a “floor liner.”
Hide Pencil Marks and Add a Liner
Cut a rectangle of tissue paper, scrapbook paper, or plain cardstock and glue it flat into the bottom. It hides marks and makes the inside feel finished.
Add a Ribbon Pull (Tiny Detail, Big Wow)
Before you glue in a liner, tape or glue a short piece of ribbon so it sticks out like a little pull tab. This makes the lid easier to lift and gives “presentation energy.”
Label It Like a Fancy Bakery
A small tag or sticker can turn a recycled-card box into an intentional design choice. Write a note, add a wax seal, or slap on a label that says “Open me” (because suspense is a gift too).
Common Problems (and How to Fix Them)
“My sides won’t stand straight.”
- Score folds before folding.
- Use a ruler edge to press creases sharply.
- Check that your corner squares are the same sizeuneven corners cause leaning walls.
“The corners pop open.”
- Use stronger adhesive (tacky glue or double-sided tape).
- Hold corners with clips for a few minutes.
- Add a small piece of tape inside the corner for reinforcement.
“My lid doesn’t fit.”
- If the lid is too tight, trim the base slightly smaller or reduce the base’s inside height by a tiny amount.
- If the lid is too loose, increase the lid’s corner square size slightly next time (or add a liner inside the lid walls to snug it up).
“The card is too glossy and glue slides around.”
- Use double-sided tape or tacky glue.
- Lightly rough the glue area on the inside (gentle scuffing helps grip).
- Reinforce with discreet tape strips inside the seams.
What Fits in a Greeting-Card Gift Box? Real Examples
These boxes shine with small, thoughtful gifts. Here are ideas that fit the vibe and the space:
- Gift cards + a note: Add tissue paper and a ribbon pull tab so it feels like an event.
- Jewelry: Earrings, bracelets, necklaces (wrap in tissue or a small pouch first).
- Cash gifts: Fold bills into a simple shape or tuck into a mini envelope inside the box.
- Mini treats: Individually wrapped candy or cookies (use a food-safe liner like a small baggie).
- Small self-care items: Lip balm, travel lotion, bath bomb crumbs contained in tissue.
- Party favors: Stickers, keychains, tiny toys, confetti (the harmless kind, not the forever kind).
Storage and Batch-Making Tips
If you’re making several boxes (holiday season, craft fairs, party favors), efficiency is everything.
- Make a cardboard “corner square” template so every box height is consistent.
- Assembly line it: mark all cards, cut all corners, fold all sides, then glue.
- Store flat: If you use tape instead of glue in some designs, you can keep pieces flat and assemble later.
- Keep a “card box” bin: Save especially sturdy or beautiful cards for future projects.
Wrap-Up: Small Craft, Big Impact
Making a gift box out of a greeting card is the kind of DIY that checks every box (pun extremely intended): it’s low-cost, beginner-friendly, eco-conscious, and genuinely impressive. Once you make one, you’ll start eyeing every card like, “You… could be a box.”
Take your time on the measuring and folds, pick adhesives based on the card finish, and don’t be afraid to test-fit before committing. Your future self (and your corners) will thank you.
of Real-World “Been There” Experiences (So Your Box Comes Out Great)
Most people’s first greeting-card box experience goes something like this: excitement, confidence, one slightly crooked cut, and then a dramatic pause where you wonder if you’ve invented a new modern art style called “Asymmetrical Panic.” Totally normal. The funny part is that this craft has a very fast learning curveusually by box two, you’re making clean corners like you’ve been recruited by a luxury packaging company.
One common “aha” moment is realizing that scoring matters more than you’d think. People often skip it because it sounds like an extra step, but crisp folds are what turn a flimsy-looking project into a box that stands tall and looks intentional. Even if you don’t have a bone folder, pressing the fold firmly with the back of a spoon (or a fingernail, carefully) can make the difference between “cute” and “wow.”
Another experience nearly everyone has: glossy cards are gorgeous… and occasionally rebellious. If you’ve ever held a corner together and felt it slowly slide apart like it’s trying to escape, you’ve met glossy stock. The fix is simpleuse stronger adhesive (double-sided tape or tacky glue), clamp the corner briefly, and consider adding a hidden tape strip inside the seam. Many crafters end up preferring tape for speed and reliability when mass-producing boxes.
Then there’s the lid fitarguably the most “science fair” part of the process. If your lid is too tight, it’s not personal; it’s math. Tiny differences in thickness and fold angles add up. A lot of people learn to do a quick dry-run: fold both pieces without gluing and test the fit. That little habit saves time and prevents the classic “I made a perfect lid for a base that does not exist” situation. Adjusting the corner-square size by as little as 1/8 inch can fix the problem instantly.
People also tend to discover creative uses they didn’t plan on. These boxes become holiday table favors, jewelry organizers, small keepsake holders, or even a safe spot for earbuds in a backpack. And if you’re crafting with kids or a group, it’s surprisingly satisfying to see everyone’s boxes look completely differentsame steps, totally unique results based on card designs and decorating choices.
The biggest takeaway most makers share: don’t overthink perfection. Handmade charm is part of the appeal. If one corner is slightly wonky, add a bow and pretend it was a design decision. (This works in crafting and, honestly, in life.) By the time you’ve made a handful, you’ll have your own preferred “signature style”maybe you always add a liner, maybe you always do ribbon pulls, or maybe you become the person who turns every birthday card into packaging like a crafty superhero with a recycling mission.