Table of Contents >> Show >> Hide
- The “Quick Disinfectant” Truth No One Puts on the Label
- What Not to Pour on Your Cut (Even If Your Uncle Swears by It)
- The Fastest Safe Option: Soap + Running Water
- DIY “Quick Disinfectant” You Can Actually Make: A Clean Saline Wound Rinse
- If You Want an Antiseptic Step (Without DIY Chemistry)
- The “Do This Every Time” Wound-Care Routine
- When a “Minor” Cut Isn’t Minor Anymore
- Don’t Forget the Tetanus Question
- “Quick Disinfectant” Travel Kit: What to Pack So You Don’t Have to Improvise
- Quick Examples: What This Looks Like in Real Life
- FAQ: Quick Answers Without the Drama
- +: Real Experiences and Lessons from the Cut-and-Scrape Universe
Important note: This article is about minor cuts and scrapesthe kind you get from paper, kitchen mishaps, skateboards, or your dog’s leash doing parkour. If a wound is deep, gaping, won’t stop bleeding, is from an animal/human bite, has something stuck in it, or you feel faint looking at it (no judgment), skip the DIY and get medical care.
The “Quick Disinfectant” Truth No One Puts on the Label
Let’s clear up a sneaky little language problem: a true disinfectant is usually meant for counters, not bodies. Your skin is not a granite countertop, even if it sometimes feels like one in winter. For minor cuts and abrasions, the best infection prevention usually starts with:
- Mechanical cleaning (rinsing away germs and debris)
- Gentle washing (soap around the wound, not packed inside it)
- Smart coverage (keeping it protected while it heals)
So if you’re searching for “quick disinfectant,” what you often actually need is a quick antiseptic approach that’s safe for living tissue. The goal is to reduce germs without turning your skin’s healing cells into collateral damage.
What Not to Pour on Your Cut (Even If Your Uncle Swears by It)
When you’re hurt, people love to recommend “the thing that stings the most,” as if pain is proof of cleanliness. Spoiler: stinging is not a scientific measurement.
Avoid these for routine minor wound cleaning
- Hydrogen peroxide (often irritating and can slow healing when used on wounds)
- Rubbing alcohol poured into the wound (can damage healing tissue)
- Household bleach (absolutely not for skinever)
- Vinegar, essential oils, or “kitchen chemistry” mixes (irritating, inconsistent, and risky)
If you remember one thing: cleaning a wound is mostly about rinsing and gentle soap, not “nuking it from orbit.”
The Fastest Safe Option: Soap + Running Water
If you have access to clean running water, you already have the MVP of minor wound care. Rinsing lowers the germ load and physically removes dirt. Think of it as escorting bacteria off the premises instead of trying to win a cage match with them.
Quick method (2–3 minutes)
- Wash your hands first (yes, even if the cut is on your handwork around it).
- Stop the bleeding with gentle, steady pressure using clean gauze or cloth.
- Rinse the wound under running water. Aim for a gentle stream, not pressure-washer vibes.
- Wash around the wound with mild soap. Try not to scrub soap into the open tissue.
- Pat dry with clean gauze or a fresh towel (not the one that has seen your entire gym life).
For many small cuts and scrapes, that’s enough. If you want an added antiseptic step, keep readingbecause you can do it without torching your skin.
DIY “Quick Disinfectant” You Can Actually Make: A Clean Saline Wound Rinse
Saline isn’t a high-powered disinfectant, but it’s a safe, practical wound rinse when you need something quick. It helps flush out debris and reduces the “gross stuff” factorscientifically known as why is there sidewalk in my knee?
Best choice: store-bought sterile wound wash or sterile saline if you have it. But if you don’t, here’s a careful DIY method for a short-term rinse.
DIY saline rinse (small batch)
- Water: 2 cups (about 500 mL) clean tap water
- Salt: 1 teaspoon table salt
Steps
- Put the water in a clean pot and bring it to a gentle boil (lid on if possible).
- Let it boil for about 15 minutes to reduce contamination.
- Turn off heat and let it cool to room temperature. (Never rinse a wound with hot water unless you enjoy regret.)
- Stir in the salt until fully dissolved.
- Pour into a clean glass jar with a lid.
- Use within 24 hours, then discard and make fresh if needed.
How to use it: Pour gently over the scrape/cut to rinse away dirt. You can also soak a piece of clean gauze and dab. Don’t “reuse” the same rinse cup back into the jar.
Saline safety rules (because germs love loopholes)
- Use clean tap water; avoid well water unless you’re certain it’s safe.
- Make it fresh. Old homemade liquids become science projects.
- Use it for minor wounds onlynot deep punctures, big burns, or serious injuries.
If You Want an Antiseptic Step (Without DIY Chemistry)
If you’re dealing with a small abrasion that got dirtylike a scrape from a trail or a fall on asphaltyou may want an antiseptic after rinsing. Here are safe, common options that don’t require mixing mystery liquids in your kitchen:
1) Antiseptic wipes (single-use)
These are convenient, portable, and hard to mess up. Use as directed and avoid scrubbing aggressively.
2) Povidone-iodine swabs (as directed)
Some first-aid kits include iodine swabs. Follow package directions and avoid if you have an iodine allergy or sensitivity. If you’re unsure, stick to soap-and-water plus proper coverage.
3) Chlorhexidine-based antiseptic (as directed)
Common in clinical settings and sometimes in consumer products. Again: use as directed, and avoid eyes/ears and sensitive areas unless the product is labeled for that use.
Bottom line: If you don’t have a labeled antiseptic product, don’t panic. A thorough rinse and gentle cleaning is the big win.
The “Do This Every Time” Wound-Care Routine
Here’s a reliable process you can use for most minor cuts and abrasions. It’s simple enough to remember even while you’re dramatically announcing, “I’m fine!” to everyone nearby.
Step 1: Stop bleeding (if needed)
Apply steady pressure with clean gauze or cloth. Elevate the area if practical. If bleeding won’t stop after continuous pressure, get medical help.
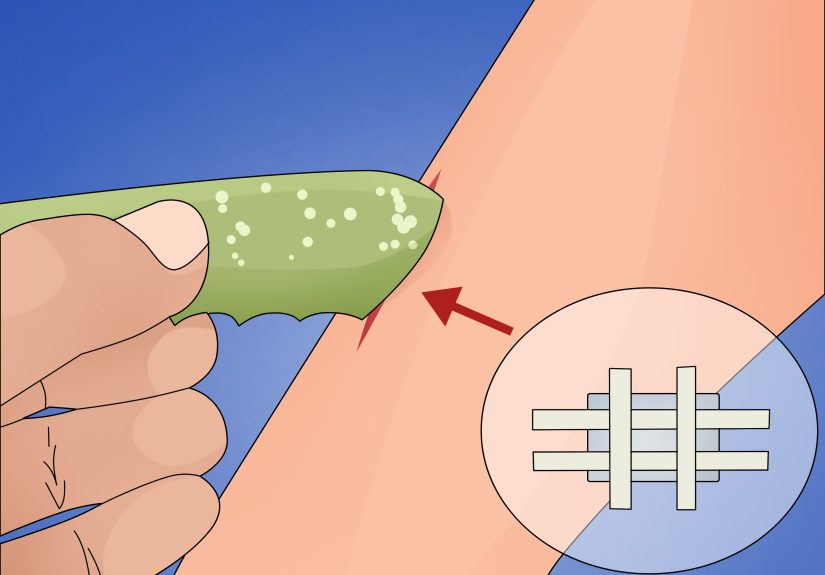
Step 2: Rinse thoroughly
Use running water, or your cooled homemade saline rinse. The goal is to remove dirt, not prove your toughness.
Step 3: Clean around (not inside) with mild soap
Wash the skin around the cut/scrape. Avoid grinding soap into open tissue. Rinse again.
Step 4: Decide on ointment vs. plain petroleum jelly
There are two common, reasonable approaches for minor wounds:
- Petroleum jelly to keep the wound moist and support healing
- Antibiotic ointment for certain higher-risk situations (deeper scrapes, very dirty wounds) if you tolerate it
If you’ve ever gotten a rash from antibiotic ointment, don’t “power through.” Use petroleum jelly instead and keep it clean and covered.
Step 5: Cover it like you mean it
Use a sterile bandage or non-stick dressing. Change it daily (or sooner if wet/dirty). Covered wounds are protected from friction, dirt, and you absentmindedly bumping it on literally everything.
Step 6: Re-check daily
Gently clean once a day with mild soap and water, reapply petroleum jelly (or ointment if appropriate), and re-cover.
When a “Minor” Cut Isn’t Minor Anymore
Some wounds need professional care even if they don’t look dramatic in the moment. Seek medical care if:
- The cut is deep, gaping, or the edges won’t stay together
- Bleeding won’t stop after steady pressure
- It’s a puncture wound (like stepping on a nail)
- There’s debris you can’t remove easily
- It’s on the face, hands, genitals, or over a joint and movement keeps reopening it
- It’s from an animal or human bite
Watch for infection signs
Call a healthcare professional if you notice increasing pain, warmth, swelling, redness spreading outward, drainage/pus, red streaking, or fever.
Don’t Forget the Tetanus Question
Tetanus prevention isn’t just for action movies. If a wound is deep or dirty and it’s been a while since your last tetanus shot, you may need a booster. If you’re unsure when you last had one, it’s worth asking a clinicianespecially after puncture wounds, wounds contaminated with dirt/soil, or bites.
“Quick Disinfectant” Travel Kit: What to Pack So You Don’t Have to Improvise
If you like being prepared (or you’ve learned the hard way that sidewalks are aggressive), keep a small kit with:
- Travel-size mild soap or soap sheets
- Sealed sterile gauze pads
- Assorted bandages (including larger ones for scrapes)
- Non-stick dressings + medical tape
- Single-use antiseptic wipes (labeled for skin)
- Small tube of petroleum jelly
- Tweezers (for debrisclean before use)
- Hand sanitizer (for your hands, not for deep wounds)
Quick Examples: What This Looks Like in Real Life
Example 1: The classic knee scrape
You trip, you slide, you stand up like nothing happened, and then you notice your knee is now “asphalt-themed.” Rinse with running water, wash around with mild soap, rinse again, pat dry, apply petroleum jelly, cover with a non-stick dressing. Change daily.
Example 2: The kitchen paper cut that won’t quit
Rinse, mild soap, pat dry. If it’s tiny and clean, you may not need antisepticjust keep it clean and protected if it keeps reopening.
Example 3: A small but dirty abrasion while hiking
Rinse thoroughly. If you can’t get to clean running water, use your cooled DIY saline rinse. Cover it well to keep trail grit out. Re-clean once you’re back at real water.
FAQ: Quick Answers Without the Drama
Does “air drying” help?
Some very small scrapes can be left uncovered, but many wounds heal better when protected and kept appropriately moist (not soggy). If a wound keeps getting bumped or dirty, cover it.
Should I use antibiotic ointment every time?
Not necessarily. Many minor wounds do fine with daily cleaning and petroleum jelly. Antibiotic ointments can cause irritation for some people, so use them thoughtfully.
Is it normal if it stings when I rinse?
Yesespecially with abrasions. Rinsing can sting because nerve endings are irritated. That doesn’t mean it’s “working better.” It just means your skin has opinions.
What about “natural disinfectants”?
Many “natural” substances are irritating, unpredictable, or not meant for open wounds. Stick with proven basics: rinse, mild soap around the wound, appropriate coverage, and an antiseptic product labeled for skin if you need one.
+: Real Experiences and Lessons from the Cut-and-Scrape Universe
Most people learn wound care the same way they learn taxes: suddenly, under pressure, and with a vague feeling that they should’ve paid attention earlier. The truth is, minor injuries are so common that you don’t notice your routine until you’re stuck without supplieslike when you scrape your knuckle on a trunk latch or your heel gets shredded by a new pair of shoes that “just needs breaking in” (a phrase invented by footwear to avoid accountability).
One of the most practical lessons is that speed matters less than cleanliness. The best “quick disinfectant” experience I can describe is the moment you realize you don’t need to pour anything harsh into a wound to do a good job. In day-to-day life, the biggest improvements usually come from doing the boring steps well: rinse longer than you think you need to, wash around the wound with mild soap, and then actually cover it so it doesn’t keep getting contaminated. People often skip coverage because it feels like “extra,” but then the wound rubs on clothing, collects lint, and gets reopened. That’s not toughnessit’s just giving your injury extra shifts at a job it didn’t apply for.
Another common experience: someone reaches for hydrogen peroxide because it’s sitting in the medicine cabinet looking official. It bubbles, it fizzes, it makes you feel like you’re conducting a tiny science experiment. But bubbling isn’t a badge of effectiveness for healing. Many people later notice the area stays irritated or feels “raw” longer than expected. Switching to a rinse-and-cover routineplus petroleum jelly to keep the wound from drying outoften feels less dramatic but works more smoothly in practice.
Then there’s the “outside factor” lesson: your environment decides how careful you need to be. A paper cut at home is one thing. A scrape after falling on a basketball court, playground mulch, or a trail is another. The dirtier the situation, the more valuable a thorough rinse becomes. If you’ve ever tried to clean grit out of a scrape, you know it’s not a one-second splash-and-go. The real-world trick is to rinse gently but persistently, like you’re negotiating with the wound: “Okay, you can keep your dignity, but the gravel has to move out.”
People also learn quickly that the first 24–48 hours are the pivot point. That’s when daily cleaning and a fresh bandage make a big difference. If you ignore it, the wound tends to get crusty, irritated, and more likely to ooze. If you keep it clean, lightly protected, and not dried out, it often calms down faster. And yes, you may have to resist the urge to “check it” every ten minutes. Healing is not a microwave; repeatedly peeling off bandages is basically interrupting the process to ask, “Are we there yet?”
Finally, the most universal experience: the moment you realize that being prepared beats improvising. Keeping a couple of antiseptic wipes, gauze, and bandages in a bag or car feels a little extrauntil the day it isn’t. When you can clean a scrape properly right away, you spend less time later dealing with tenderness, sticking bandages, or the slow-motion annoyance of a wound that keeps reopening. In other words: the best “quick disinfectant” might be the one you don’t have to invent mid-crisis.