Table of Contents >> Show >> Hide
- Before You Start: What Makes a Butter Cookie a Butter Cookie?
- The 11 Steps to Perfect Butter Cookies
- Step 1) Choose Your Cookie Style (Piped, Cut-Out, or Slice-and-Bake)
- Step 2) Get Butter and Eggs to the Right Temperature
- Step 3) Measure Like You Want Consistent Cookies
- Step 4) Cream Butter and Sugar Until It Looks “Fluffy, Not Grainy”
- Step 5) Add Egg (or Yolks) and Flavorings, Then Mix Just Until Smooth
- Step 6) Whisk Dry Ingredients Separately
- Step 7) Combine Wet + Dry Gently (Don’t Summon the Gluten)
- Step 8) Adjust Dough Consistency the Smart Way
- Step 9) Chill Strategically for Better Shape and Cleaner Edges
- Step 10) Bake at the Right Temperature, on the Right Pan, for the Right Color
- Step 11) Cool, Store, and (Optionally) Dress Them Up
- Butter Cookie Variations That Actually Work
- Troubleshooting: Fix the Most Common Butter Cookie Problems
- Serving Ideas: Because Butter Cookies Deserve Friends
- Final Thoughts
- Extra: of Real-World Butter Cookie Experience (a.k.a. What I Learned the Messy Way)
Butter cookies are the overachievers of the cookie world: crisp at the edges, tender in the middle, and rich enough to make you feel like you should be wearing a cardigan even if it’s 92°F outside. They’re also wildly flexible: pipe them like classic Danish butter cookies, roll and cut shapes, or slice-and-bake them into tidy little rounds.
This guide walks you through an easy butter cookie recipe in 11 practical steps, with the “why it works” baked in (pun fully intended). You’ll learn how to control spread, get cleaner edges, avoid tough cookies, and choose the right method for your vibe: pretty swirls, sharp cut-outs, or no-drama rounds.
Before You Start: What Makes a Butter Cookie a Butter Cookie?
A classic homemade butter cookie is built on a simple ratio: plenty of butter, enough sugar for sweetness and structure, eggs or yolks for richness, and flour for shape. Unlike chewy cookies that rely on brown sugar, extra moisture, or lots of leavening, butter cookies aim for a clean snap and a melt-in-your-mouth bite. The secret is not “more ingredients.” It’s better technique.
Quick Ingredient Snapshot (Classic Base)
- Butter: the headline act. Use good-quality butter for big flavor.
- Sugar: granulated for crispness; powdered/confectioners’ sugar for extra tenderness and a finer crumb.
- Egg or yolks: yolks add richness and help create a tender, short texture.
- Flour: all-purpose is standard; measure carefully to avoid dryness.
- Salt + vanilla: non-negotiable flavor boosters.
The 11 Steps to Perfect Butter Cookies
Step 1) Choose Your Cookie Style (Piped, Cut-Out, or Slice-and-Bake)
Decide what you want before mixing, because the best dough texture depends on the endgame.
- Piped (Danish/spritz-style): soft enough to squeeze through a star tip, firm enough to hold ridges.
- Cut-out: slightly sturdier dough that rolls cleanly and keeps sharp edges.
- Slice-and-bake: dough logs chilled until firm, then sliced for neat rounds.
If you’re new, slice-and-bake is the friendliest. If you’re feeling fancy, piped cookies deliver maximum “bakery case” energy with minimum effortassuming your butter is the right temperature (we’ll get there).
Step 2) Get Butter and Eggs to the Right Temperature
“Room temperature” doesn’t mean “butter that’s been sunbathing for three hours.” Ideally, your butter should be soft enough to press a finger into it, but still cool and structured. Eggs mix more smoothly when they aren’t fridge-cold.
Why this matters: proper temperature helps butter and sugar cream evenly, traps air for a lighter texture, and prevents greasy dough that spreads into cookie puddles.
Step 3) Measure Like You Want Consistent Cookies
Butter cookie dough is simple, so small measurement mistakes show up loudly. Too much flour makes dry, crumbly dough; too little flour makes cookies spread and lose definition.
- Best practice: spoon flour into your measuring cup and level it off, or use a kitchen scale.
- Salt check: if using unsalted butter, you’ll typically need a bit more salt for flavor balance.
Step 4) Cream Butter and Sugar Until It Looks “Fluffy, Not Grainy”
This is the step that separates “nice cookie” from “why is everyone hovering around the cooling rack?” Beat butter and sugar until it lightens in color and looks airy. Scrape the bowl once or twice so everything mixes evenly.
Why this matters: creaming traps tiny air pockets that help structure and texture. Uneven creaming can lead to cookies baking inconsistentlysome thin, some thick, some mysteriously dramatic.
Step 5) Add Egg (or Yolks) and Flavorings, Then Mix Just Until Smooth
Add egg or yolks and mix until incorporated. Then add vanilla (and optionally almond extract for that classic “Danish butter cookie tin” aroma). Stop once the mixture looks cohesive.
Over-mixing here can make the dough greasy or overly aerated, which sounds harmless until your piped ridges vanish in the oven.
Step 6) Whisk Dry Ingredients Separately
In a separate bowl, whisk flour with salt (and if your chosen style uses it, a small amount of baking powder or cornstarch). Whisking distributes salt evenly so you don’t bite into a random salty meteor.
For a tender crumb, many butter cookie styles keep leavening minimal or skip it entirely. The goal is a clean, buttery snap, not a cakey lift.
Step 7) Combine Wet + Dry Gently (Don’t Summon the Gluten)
Add dry ingredients to the butter mixture in stages. Mix on low or fold by hand until you no longer see dry flour. The moment the dough comes together, stop.
Why this matters: vigorous mixing develops gluten, and gluten makes cookies tough. Butter cookies should be tender, not auditioning for “World’s Chewiest Bagel.”
Step 8) Adjust Dough Consistency the Smart Way
The dough should be workable, not sticky like wet paint. If it’s too soft to shape, it likely needs chilling. If it’s too stiff to pipe, it may be a touch coldor slightly over-floured.
- Too soft: chill 20–30 minutes, then reassess.
- Too stiff to pipe: let it sit 5–10 minutes at room temp, or warm the bowl briefly with your hands.
- Crumbly: you may have added too much flour; a teaspoon or two of milk can help, but add cautiously.
Step 9) Chill Strategically for Better Shape and Cleaner Edges
Chilling is not just for patience practice. Cold dough spreads less, holds ridges better (for piped cookies), and gives you sharper cut-outs. For piped cookies, you can pipe first, then chill the tray.
If your goal is crisp definitionstars that look like starschilling is your best friend.
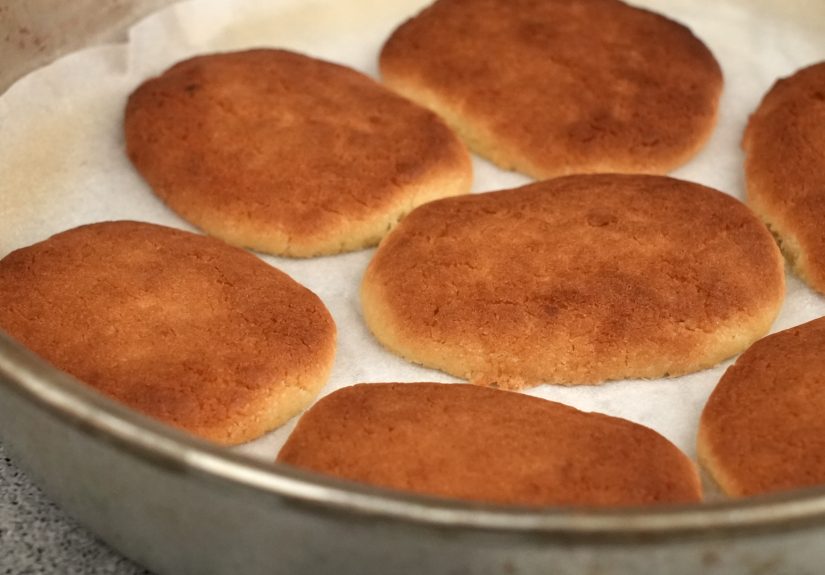
Step 10) Bake at the Right Temperature, on the Right Pan, for the Right Color
Most butter cookies bake beautifully around 350°F. Use a light-colored metal sheet pan for even browning, and line with parchment for easy release. Bake until edges are just turning golden.
Pro tip: butter cookies can go from “pale and shy” to “overbrowned and bitter” quickly. Pull them when the edges show a hint of color; they’ll firm as they cool.
Step 11) Cool, Store, and (Optionally) Dress Them Up
Let cookies cool on the pan for a few minutes, then transfer to a rack. This prevents breakage while the structure sets. Store airtight at room temperature for several days, or freeze for longer storage.
Want to level up? Dip half in melted chocolate, add sprinkles, or sandwich with jam. Butter cookies are basically the little black dress of baking: they look good with everything.
Butter Cookie Variations That Actually Work
1) Classic Vanilla-Almond
Add a small splash of almond extract along with vanilla. It reads “holiday tin cookie” in the best way.
2) Slice-and-Bake with Sparkly Edges
Roll dough into logs, chill until firm, brush with a little egg wash or water, and roll in coarse sugar. Slice and bake for cookies with crunchy, sparkling edges.
3) Chocolate-Dipped Piped Cookies
Pipe swirls or logs, bake, cool, then dip the ends in melted chocolate. It’s the easiest way to make cookies look like they came from a boutique bakery (without boutique bakery prices).
Troubleshooting: Fix the Most Common Butter Cookie Problems
| Problem | Likely Cause | Fix |
|---|---|---|
| Cookies spread too much | Butter too warm, dough not chilled, pan too hot | Chill dough/tray, use cooler butter, avoid dark pans |
| Cookies are dry/crumbly | Too much flour, overbaked | Measure flour carefully; bake until edges just turn golden |
| Piped ridges disappear | Dough too warm or too aerated | Chill piped cookies; don’t over-cream; use a sturdy star tip |
| Cookies are tough | Overmixed after flour added | Mix only until combined; fold gently |
| Uneven browning in the same batch | Inconsistent mixing or uneven scoops | Scrape bowl during creaming; portion consistently |
Serving Ideas: Because Butter Cookies Deserve Friends
- Pair with coffee, black tea, or hot cocoa (classic for a reason).
- Build a cookie box with chocolate-dipped, jam-sandwiched, and plain versions for variety.
- Crumble over ice cream or yogurt for an instant “I planned dessert” illusion.
Final Thoughts
Making butter cookies isn’t hardit’s just detail-oriented in a way that rewards you immediately. Treat temperature like a real ingredient, cream with intention, mix flour gently, and chill when shape matters. Do that, and you’ll get buttery, crisp-tender cookies that look as good as they taste.
Extra: of Real-World Butter Cookie Experience (a.k.a. What I Learned the Messy Way)
The first time I made butter cookies, I assumed “softened butter” meant “butter that has achieved inner peace on the counter.” It was so warm it practically introduced itself as a liquid. I piped gorgeous swirls, slid the tray into the oven, and watched them slowly relax into buttery commas. Delicious commas, yesbut not the crisp little stars I had promised my ego. That was lesson one: butter cookies are sweet, but they are not forgiving.
Lesson two came from impatience. I skipped chilling because “it’ll be fine.” It was fine in the way a toddler with a permanent marker is finetechnically manageable, emotionally expensive. The cookies baked up thinner, edges browned fast, and the centers felt a little fragile. The next batch got a quick 25-minute chill after piping, and suddenly the ridges stayed sharp and the texture improved. It wasn’t magic. It was physics. Cold fat melts slower. Slower melt means less spread. Less spread means cookies that look like you meant it.
Then there was the over-mixing phase. I used to “make sure it’s combined” by mixing the flour until the dough looked extra smooth. That’s how you accidentally train gluten like it’s preparing for a marathon. The cookies tasted finebut the bite was a little tougher than the delicate snap you want. The fix was embarrassingly simple: once flour goes in, mix on low, stop early, and finish with a gentle fold. Butter cookie dough should look cohesive, not whipped into submission.
The biggest quality jump, though, came from something unsexy: scraping the bowl. I used to scrape once at the end and call it a day. But creaming can leave streaks of butter and sugar clinging to the sides, which means parts of the dough are effectively “different recipes.” Some cookies brown faster, some spread more, and you end up blaming the oven like it personally wronged you. Scraping during creaming and after adding egg made my batches noticeably more consistent.
And finally, my favorite butter cookie “flex”: the slice-and-bake log in the freezer. When you roll dough into a log, wrap it well, and freeze it, you’ve basically given Future You a gift. Surprise guests? Slice. Bake. Hero status. Late-night snack emergency? Slice. Bake. Solve problems with butter. It’s not just a cookie; it’s a plan.