Table of Contents >> Show >> Hide
- Hydrangea Propagation at a Glance
- Before You Start: Tools, Timing, and Setup
- Technique 1: Softwood Cuttings (Fast & Rewarding)
- Technique 2: Layering (Effortless, Ultra-Reliable)
- Technique 3: Division (For Clumping or Suckering Types)
- Aftercare: Setting Your New Hydrangeas Up for Success
- Troubleshooting Common Propagation Problems
- Quick Reference: Which Method Should I Use?
- SEO Notes & Helpful FAQs
- Conclusion
- Real-World Experience: Extra Tips from the Bench (≈)
Want more hydrangeas without buying more hydrangeas? Same. The good news is that these shrubs are ridiculously generousgive them a clean cut, a little patience, and the right conditions, and they’ll repay you with clones that look just like the parent. In this guide, you’ll learn three proven methods used by home gardeners and nursery pros alike: softwood cuttings, layering, and division. We’ll cover the best timing, step-by-step instructions, success-boosting tips, and aftercareso you can turn one gorgeous hydrangea into a small hedge (or a giftable parade of potted beauties).
Hydrangea Propagation at a Glance
- Softwood cuttings: Best for fast results in late spring to early summer; roots form in 2–6 weeks with humidity and steady warmth.
- Layering: Easiest, least fussy; root a low branch while it’s still attached to the plantgreat for bigleaf and panicle types.
- Division: Works on multi-stem clumps (especially smooth hydrangea); best done in early spring before leaf-out.
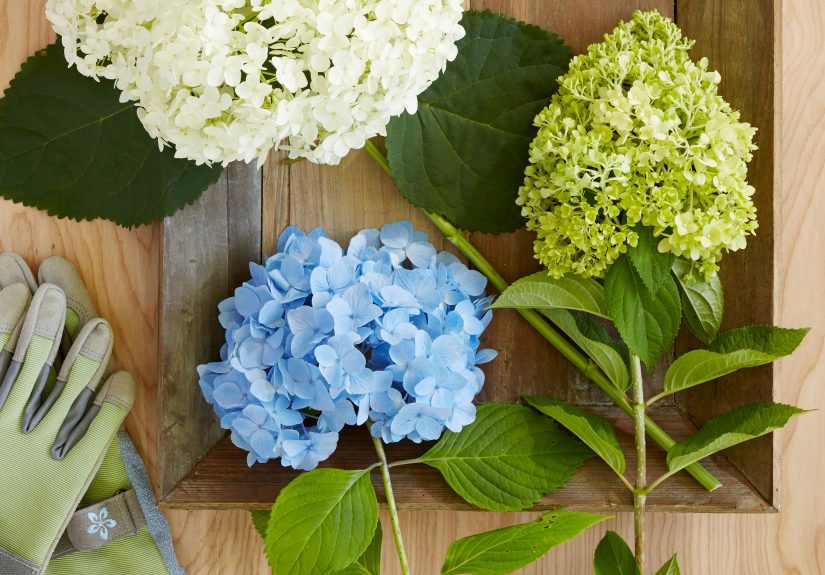
Hydrangeas aren’t all the same, either. As a quick refresher: bigleaf (H. macrophylla) and mountain (H. serrata) have mophead/lacecap blooms; panicle (H. paniculata) and smooth (H. arborescens) bloom on new wood; oakleaf (H. quercifolia) brings those gorgeous lobed leaves. All five can be propagated by the methods below, though smooth and panicle are famously cooperative.
Before You Start: Tools, Timing, and Setup
Tools & Supplies
- Sharp bypass pruners or a sterile knife (wipe blades with 70% isopropyl alcohol).
- Rooting hormone (IBA or NAA powder or liquid) for higher, more uniform success.
- Propagation medium: a soilless blend such as 1:1 perlite and peat/coir, or a high-drainage seed-starting mix.
- Small pots or a tray with drainage, humidity dome or clear bag, and plant labels.
- Optional: bottom-heat mat (aim for ~70–75°F at the root zone).
Best Timing
Softwood cuttings: late spring through early summer when new stems are firming up but still pliable (often May–July). Layering: spring through midsummer. Division: early spring before leaf-out.
Technique 1: Softwood Cuttings (Fast & Rewarding)
Softwood cuttings are the go-to for nurseries because they root quickly. You’ll take a piece of this season’s growth, remove lower leaves, treat with hormone, and keep it humid until it makes roots.
Step-by-Step
- Choose the stem: Select a healthy, non-flowering shoot from the current season’s growth. Morning is best when stems are turgid.
- Make the cutting: Snip a 4–6 inch piece just below a node. Remove leaves on the lower half; keep two small leaves at the top (halve large leaves to reduce transpiration).
- Dip in hormone: Quick-dip the basal end in IBA or dust with powder; tap off excess. Hormone increases rooting speed and uniformity.
- Stick the cutting: Insert the basal node about 1–1.5 inches into pre-moistened soilless mix. Firm gently.
- Create humidity: Cover with a clear dome or bag (supported so leaves don’t touch plastic) to keep humidity high but allow air exchange.
- Provide ideal conditions: Bright indirect light (no harsh sun) and warm media (65–75°F). Keep evenly moist, never soggy.
- Wait & test: Roots often form in 2–6 weeks. Tug gently; resistance means rooting. Acclimate by venting the cover more each day for a week, then pot-up.
Pro Tips for Cuttings
- Non-flowering wood roots best. If your favorite stem has a bud, pinch it off so energy goes to roots.
- Clean blades = fewer problems. Dirty or dull tools bruise tissue and can introduce disease.
- Medium matters. Regular potting soil holds too much water; use a sterile, airy mix to prevent rot and encourage oxygen around forming roots.
- Heat helps. A modestly warm root zone often speeds callusing and root initiation.
Species Notes (Cuttings)
- H. arborescens (smooth): roots very readily with softwood cuttings; 1,000 ppm IBA is common in production.
- H. paniculata (panicle) & H. quercifolia (oakleaf): slightly woodier; still good candidates for softwood cuttings taken earlier in the season.
- H. macrophylla (bigleaf): responsive to IBA; keep humidity steady to prevent leaf wilt.
Technique 2: Layering (Effortless, Ultra-Reliable)
Layering lets a branch make roots while still attached to the mother plantso it’s fed and watered by the original root system during the rooting process. This is especially easy with bigleaf and panicle hydrangeas that have flexible lower shoots.
Step-by-Step Ground Layering
- Pick a low branch that can bend to the soil without snapping.
- Shallow trench: Loosen a 2–3 inch-deep strip of soil where the stem will touch down.
- Wound the underside: Lightly scratch or remove a thin ring of bark at the contact point, then dust with rooting hormone (optional but helpful).
- Pin & cover: Pin the wounded section into the trench with a landscape staple or rock and cover with soil, leaving 6–12 inches of leafy tip exposed.
- Water & wait: Keep the area evenly moist. In one season (often by late summer to fall), you’ll see new roots; detach from the parent and transplant.
Why Gardeners Love Layering
- Almost foolproof: The mother plant supports the branch during rooting, so cuttings don’t wilt out.
- Minimal gear: No humidity domes or heat mats necessary.
- Scalable: You can layer multiple shoots around one shrub in a season.
Technique 3: Division (For Clumping or Suckering Types)
Division creates instant, transplant-ready plants by splitting a mature clump into smaller pieces. It pairs especially well with H. arborescens (smooth hydrangea), which often forms offsets/suckers. Aim for early spring before vigorous new growth.
Step-by-Step Division
- Prep the plant: Water well the day before. In early spring, gently dig up the clump or expose suckers.
- Divide: Use a sharp spade or pruning saw to separate sections with several healthy shoots and a good root mass. For suckers, trace back to the parent crown and snip cleanly where roots are present.
- Replant promptly: Set divisions at the same depth as before, backfill, water to settle, and mulch lightly.
- Baby them: Keep soil consistently moist while new roots establish.
When to Choose Division
- Your shrub has outgrown its spot and needs downsizing anyway.
- You want instant structurea division looks like a small shrub on day one.
- You’re working with smooth hydrangea or another clumping species that produces offsets.
Aftercare: Setting Your New Hydrangeas Up for Success
- Acclimate gradually: For cuttings, wean off high humidity over 5–7 days once you see new growth.
- Right light: Bright, indirect light for young plants; avoid harsh midday sun for the first few weeks.
- Watering: Keep evenly moist but never soggy. New roots need water and oxygen.
- First pruning: Don’t prune bigleaf or mountain hydrangeas hard their first year; protect next year’s buds. Panicle and smooth bloom on new wood and are more forgiving.
Troubleshooting Common Propagation Problems
- Wilting cuttings: Leaves too big or humidity too low. Reduce leaf area and cover with a clear dome or bag.
- Stem rot (blackened base): Medium stayed too wet or tools weren’t clean. Start with sterile media and disinfect blades.
- No roots after 6–8 weeks: Cutting was too woody or taken too late. Try earlier in the season, switch to semi-ripe wood, or use layering for near-certain results.
- Floppy layered branch: Re-pin it and add a handful of perlite to the trench for drainage; keep evenly moist.
Quick Reference: Which Method Should I Use?
| Hydrangea Type | Best Method | Notes |
|---|---|---|
| Smooth (H. arborescens) | Softwood cuttings or division | Roots readily; divisions establish quickly. |
| Panicle (H. paniculata) | Layering or softwood cuttings | Layering is nearly foolproof on flexible lower branches. |
| Bigleaf (H. macrophylla) | Softwood cuttings or layering | Mind humidity; IBA helps rooting. |
| Oakleaf (H. quercifolia) | Layering | Woody, but flexible shoots respond well to ground layering. |
SEO Notes & Helpful FAQs
What’s the difference between softwood, semi-ripe, and hardwood cuttings?
Softwood (late spring–early summer) is fast and high-success for hydrangeas. Semi-ripe (late summer) has a slightly woody base and can be more rot-resistant. Hardwood (late fall–winter) is slower and trickier for home gardeners, but it’s possible with patience.
Do I really need rooting hormone?
You can root hydrangeas without it, but horticultural studies and industry practice show that auxin products (IBA/NAA) generally improve speed, uniformity, and root numberespecially with woodier material.
How long until I can plant out?
Cuttings usually need 6–12 weeks from sticking to a sturdy transplant in a quart-size pot. Layered shoots can be severed once you see a strong root balloften by late seasonand planted out early fall or the following spring in colder zones.
Conclusion
Hydrangea propagation doesn’t require a greenhouse or wizard hatjust a clean cut, a humidity “tent,” and a smidge of patience. Use softwood cuttings for speed, layering when you want near-guaranteed success with minimal fuss, and division when your clump is ready to share the love. With these three methods, you can multiply your favorite shrubs, fill in bare spots, or create giftable clones that’ll make you the most popular neighbor on the block.
sapo: Want more hydrangeas for free? This in-depth guide shows you three proven DIY methodssoftwood cuttings, layering, and divisionplus timing, tools, step-by-steps, and aftercare. Whether you’re new to propagation or ready to scale up your shrub game, you’ll get practical, nursery-tested techniques to turn one hydrangea into many without stress or special equipment.
Real-World Experience: Extra Tips from the Bench (≈)
Dial in your humidity, then back it off. The most common failure I see with new propagators is either bone-dry air or permanently soggy leaves. Your goal is a glistening film of moisture inside the dome or bagnot drips. If you see water beading heavily and leaves touching plastic, prop the cover up with chopsticks or a nursery stake, and vent a corner for 30–60 minutes a day. As soon as you get a gentle “tug-back” from roots, start lengthening the vent time daily. This gradual wean pays off with sturdier, less shock-prone cuttings.
Leaf management is not optional. Bigleaf hydrangeas earn their name, which is precisely why newbies struggle with wilt. If your top two leaves are each bigger than your palm, cut them in half across the midrib. Yes, it looks odd, but you reduce transpiration massively while keeping photosynthesis rolling. For panicles and oakleafs (which often have thicker cuticles), you can leave a bit more leaf area, but still avoid “sail” leaves that wick water away faster than an unrooted stem can supply.
Play the numbers gameeconomically. Instead of sticking one or two cuttings and hoping, take eight to twelve. Use 4-packs or a small tray so you’re not burning a pile of mix. A $10 bottle of hormone treats hundreds of cuttings and will repay you by collapsing your failure rate. If a few sulk, no problem; you’ll still net a lush handful of keepers.
Bottom heat is cheating (in a good way). A simple propagation mat under your tray can shave days off rooting time, especially on cool nights or in air-conditioned homes. Set it on a smart plug and cycle 12–14 hours on if your space gets warm by day. The root zone is what matters; don’t cook the foliage.
Water quality matters more than you think. If your tap water is very hard or chloraminated and you’ve seen leaf scorch on seedlings before, try filtered or overnight-rested tap for misting. Avoid foliar fertilizers on unrooted cuttingsthey raise leaf burn risk and don’t help until roots can uptake nutrients.
Try a semi-ripe window. If you missed the late-spring softwood moment, a late-summer “semi-ripe” stage can be surprisingly forgiving: the base has started to lignify (less rot), but the tip is still flexible enough to push buds. You’ll often see slightly slower rootingbut better survival. If in doubt, layer a branch at the same time to hedge your bets.
Label everything. Hydrangea collections get confusing fast: mophead vs. lacecap, white panicles that blush pink, oakleafs that go burgundy in fall. A simple pencil on a plastic tag with date and method (“June 10, ‘Limelight’, cutting/IBA”) saves you from mystery shrubs next spring.
Site the graduates smartly. Once your new plants are potted up, give them a month in bright shade to bulk up roots. Then harden off to more sun if the cultivar tolerates it (panicles are sun-tough; bigleafs appreciate protection in hot climates). Keep the first summer boringly consistenteven moisture, a light mulch, and hold the high-nitrogen fertilizer until growth is steady. The payoff is a fuller canopy and better bud set the following year.
Share and compare. Propagation is half science, half joyful tinkering. Trade a rooted cutting with a neighbor who’s layering an oakleaf. Keep notes, tweak hormone strength, try a perlite-heavy batch next time, and you’ll develop a “house style” that works in your microclimate. Before long, you’ll be the person neighbors text when they want that exact blue mophead by the mailboxbecause you’ve got three clones ready to go.