Table of Contents >> Show >> Hide
- Why Puffy Paint Still Works
- What You Need Before You Start
- How to Puffy Paint a Shirt in 11 Steps
- Step 1: Pick the Right Shirt
- Step 2: Prewash and Dry the Shirt
- Step 3: Set Up Your Work Surface
- Step 4: Plan Your Design
- Step 5: Test the Paint First
- Step 6: Start with the Outline
- Step 7: Fill In the Design Carefully
- Step 8: Add Extra Texture and Details
- Step 9: Let the Shirt Dry Flat
- Step 10: Activate the Puff if Needed
- Step 11: Cure, Wash, and Wear It the Right Way
- Best Tips for a Puffy Paint Shirt That Looks Good
- Common Mistakes to Avoid
- Creative Design Ideas for Puffy Paint Shirts
- Experience: What It’s Really Like to Puffy Paint a Shirt
- Conclusion
- SEO Tags
If your T-shirt drawer is looking a little too “same shirt, different day,” puffy paint is here to rescue it with all the subtlety of a glitter cannon. This classic craft supply has been making plain shirts more fun for decades, and honestly, it still deserves a standing ovation. Puffy paint adds texture, color, personality, and just enough retro charm to make your shirt look handmade on purpose.
The best part? You do not need to be a professional artist, fashion designer, or mysterious craft wizard who owns twelve kinds of scissors. You just need the right shirt, the right setup, and a little patience while the paint dries. In this guide, you will learn exactly how to puffy paint a shirt in 11 easy steps, plus smart tips for avoiding common mistakes, making your design last longer, and turning a plain tee into something people will actually ask about.
Whether you are making a birthday shirt, a team shirt, a holiday top, a kids’ craft project, or just a gloriously goofy weekend masterpiece, this step-by-step method will help you get clean lines, bold dimension, and a finished result you will want to wear again.
Why Puffy Paint Still Works
Puffy paint is basically the extrovert of the fabric-decorating world. It sits on top of the shirt instead of soaking completely into the fibers, which gives designs a raised, dimensional look. That means names, doodles, stars, flowers, smiley faces, and chunky lettering all get extra visual pop without requiring advanced tools.
It is also beginner-friendly. Unlike some shirt-decorating methods that need cutting machines, heat presses, or enough precision to make your eye twitch, puffy paint is direct and forgiving. Squeeze, draw, let dry, admire your work, and try not to brag too hard.
What You Need Before You Start
- A clean T-shirt, ideally cotton or a cotton-rich blend
- Puffy paint or dimensional fabric paint
- Cardboard, a T-shirt form, or freezer paper
- Pencil, chalk, or washable fabric marker for sketching
- Painter’s tape or stencils if you want cleaner shapes
- Paper towels or scrap paper
- A flat, protected workspace
- An iron if your paint brand recommends steam or heat activation
A light-colored, smooth shirt is usually the easiest place to start. White, pastel, or solid cotton tees give you a clean canvas and make the paint colors stand out nicely. Dark shirts can look amazing too, but they often need brighter paint shades and a little extra planning.
How to Puffy Paint a Shirt in 11 Steps
Step 1: Pick the Right Shirt
Start with a shirt that is comfortable, smooth, and not overly stretchy. A 100% cotton T-shirt is usually the easiest option because it offers a stable surface and tends to play nicely with fabric decoration. Cotton blends can work too, especially if you already have a favorite tee lying around, but super slick or highly stretchy fabrics can make your design harder to control.
If this is your first attempt, skip the fancy satin, slippery performance fabric, or shirt that costs more than your monthly coffee budget. Practice on a simple basic tee first.
Step 2: Prewash and Dry the Shirt
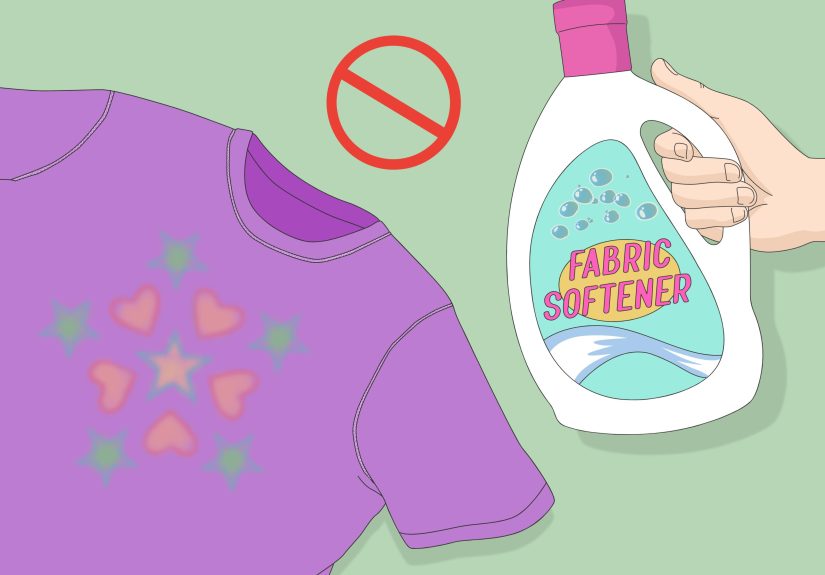
This step sounds boring, which is exactly why people skip it and then wonder why their masterpiece acts weird. Wash the shirt first to remove factory finishes, dust, or residue that can interfere with paint adhesion. Do not use fabric softener. Fabric softener can leave behind a coating that makes the surface less paint-friendly.
Once the shirt is clean, dry it completely. If it comes out wrinkled, iron it smooth. Puffy paint and wrinkles have the kind of relationship that ends in regret.
Step 3: Set Up Your Work Surface
Find a flat table with good lighting and cover it with scrap paper, plastic, or an old tablecloth you do not mind sacrificing to the craft gods. Then slide a piece of cardboard inside the shirt so the paint does not bleed through to the back. This also gives you a firmer surface to work on, which helps your lines stay steadier.
If you want even more control, use freezer paper inside the shirt. It can help stabilize the fabric and keep things from shifting around while you paint.
Step 4: Plan Your Design
Before you squeeze paint onto the shirt like a person possessed by inspiration, decide what you are actually making. A name? A heart? A row of stars? A giant daisy with suspiciously confident petals? Sketch it lightly with pencil, tailor’s chalk, or a washable fabric marker.
Keep your design simple if you are new to puffy paint. Bold shapes, bubble letters, outlined graphics, and cartoon-style drawings work especially well. Tiny details can get muddy fast because puffy paint is dimensional and not known for whisper-thin lines.
Step 5: Test the Paint First
Always test the paint on scrap fabric or paper before touching the shirt. This lets you check the color, flow, and pressure. Some bottles come out smoothly. Some act like they are emotionally unavailable until you shake them, uncap them properly, and persuade them to cooperate.
Shake the bottle well if the label says to do so. Then test a few dots, lines, and curves. You want to know whether the paint is flowing cleanly or coming out in unpredictable blobs with chaotic energy.
Step 6: Start with the Outline
When you are ready to paint, begin by outlining your design. Use steady pressure and move slowly. Let the bottle do the work instead of squeezing like you are trying to win a grip-strength contest. A consistent squeeze helps create smoother, more even lines.
If you are making letters, go a little larger than you think you need. Puffy paint expands visually because of its raised texture, so bold lettering almost always looks better than delicate script.
Step 7: Fill In the Design Carefully
After the outline is done, start filling in larger areas. Work in sections and keep the paint layer reasonably even. Too little paint can look patchy. Too much can create thick puddles that take forever to dry and may crack later.
For hearts, flowers, clouds, stars, and playful shapes, a lightly raised fill usually looks best. For names, slogans, or outlines, many people prefer leaving the design as line art with a dimensional border. Either option works. This is your shirt, not a court filing.
Step 8: Add Extra Texture and Details
Once your base design is down, you can add dots, swirls, borders, little spark accents, or layered shapes. Puffy paint loves details that feel cheerful and a bit dramatic. Think polka-dot centers on flowers, tiny stars around a name, or a dotted border around block letters.
That said, do not overdecorate the shirt into total visual panic. Give the main design some breathing room. A little dimension is fun. A shirt that looks like every paint bottle in the county exploded on it is a different aesthetic entirely.
Step 9: Let the Shirt Dry Flat
This is the part where patience enters the chat. Leave the shirt flat and untouched while the paint dries. Do not pick it up to “just check.” Do not fold it. Do not drape it over a chair like a damp flag of bad decisions. Let it rest on a flat surface until the paint has set according to the product directions.
Drying time varies by brand, thickness, humidity, and how ambitious you got with the paint. Thin lines may dry faster, while thick dimensional sections can take much longer. If you want to speed things along slightly, gentle airflow can help, but do not blast it with intense heat unless the brand specifically says that is okay.
Step 10: Activate the Puff if Needed
Some puffy paints stay dimensional as they dry. Others become more dramatically raised when activated with heat or steam according to the brand instructions. If your product says to puff the finish with steam, follow that exact method rather than improvising with random kitchen appliances and optimism.
In general, this step should happen only after the paint is dry enough for the manufacturer’s recommended process. Read the label. It is not being bossy; it is trying to protect your shirt from becoming a textured cautionary tale.
Step 11: Cure, Wash, and Wear It the Right Way
Even after the shirt looks dry, it may still need extra curing time before washing. Give it the full wait recommended on the bottle. Then, when it is finally laundry-safe, turn the shirt inside out and wash it on a gentle cycle with mild detergent. Air drying is often the safest choice if you want the design to last longer.
Once it is cured, washed correctly, and ready to wear, congratulations: you now own a custom puffy paint shirt that nobody else has. Unless your best friend copies it, in which case you should take that as a compliment and maybe a minor act of artistic theft.
Best Tips for a Puffy Paint Shirt That Looks Good
- Use simple shapes first. Puffy paint shines in bold, playful designs.
- Keep the shirt flat while working. Shifting fabric leads to wobbly lines.
- Do not rush drying time. Smudges happen fast and always at the worst moment.
- Pick colors with contrast. Bright paint on a light or dark shirt reads more clearly.
- Work with a light hand. Too much paint can crack, blob, or look uneven.
- Read the label. Every paint brand has its own drying, puffing, and wash-care instructions.
Common Mistakes to Avoid
One of the biggest mistakes is painting on an unwashed shirt. Another is skipping the cardboard insert and accidentally gluing the front and back of the shirt together with decorative enthusiasm. People also tend to rush into super detailed artwork before they have learned how the paint flows.
Another frequent issue is washing the shirt too soon. A design may look dry on the surface but still need more time to cure. And finally, do not assume every dimensional paint behaves exactly the same. Some are softer, some are thicker, and some need steam or heat to reach their full puffed-up glory.
Creative Design Ideas for Puffy Paint Shirts
- Birthday shirts with names and ages
- Camp or team shirts with bright bubble letters
- Holiday tees with pumpkins, hearts, stars, or snowflakes
- Kids’ art shirts with handprints, smiley faces, and doodles
- Retro-inspired shirts with flowers, peace signs, and wavy lettering
- Personalized sleep shirts, club shirts, or family reunion tops
Puffy paint works especially well when you lean into fun. It is not trying to look factory-made. It is trying to look cheerful, handmade, and full of personality. Let it do its thing.
Experience: What It’s Really Like to Puffy Paint a Shirt
The first time you puffy paint a shirt, it feels oddly high stakes for something involving a bottle of squishy paint and a T-shirt that may or may not have been hiding in the back of your closet since last summer. You set everything up with big artistic dreams. You wash the shirt, flatten it out, slide cardboard inside like a very serious textile engineer, and then suddenly realize the hardest part is deciding what to paint. A name? A flower? A lightning bolt? Something charmingly retro? This is usually the moment when you learn that creativity is fun right up until it asks you to make a decision.
Then comes the first squeeze. That first line tells you everything. If the paint comes out smooth, you feel invincible. If it blobs, you immediately become humble. Very humble. But that is part of the experience. Puffy paint teaches you fast: go slower, use less pressure, breathe, and do not expect your hand to behave like a machine. Once you settle into the rhythm, it becomes surprisingly relaxing. You trace letters, add dots, thicken lines, and start to see the shirt become something personal instead of just another plain tee.
There is also a weirdly satisfying moment when the design starts looking intentionally dimensional. A flat shirt suddenly has texture and attitude. It is not just decorated; it has presence. Even simple shapes like stars, flowers, hearts, or chunky initials look more playful because they physically sit up on the fabric. That raised finish is the whole charm. It says, “Yes, this was made by hand, and yes, I had fun doing it.”
Of course, the drying stage requires emotional maturity. Once the design is finished, your brain immediately wants to touch it. Do not. This is where patience becomes a craft supply. Letting the shirt dry undisturbed is hard, especially if it turned out better than expected and you want to hold it up dramatically for inspection. But when you leave it alone, come back later, and see the design fully set, it feels genuinely rewarding.
Wearing the finished shirt for the first time is even better. People notice. They ask where you got it. You get to casually say, “I made it,” which is one of the most satisfying sentences in the English language. Even if your lines are not perfect, the shirt has character. In fact, tiny imperfections usually make it better. They make it feel real, homemade, and original. That is the magic of puffy painting a shirt: it is simple, inexpensive, creative, and just messy enough to be memorable.
Conclusion
Learning how to puffy paint a shirt is one of those wonderfully low-pressure DIY projects that delivers a high-fun payoff. With the right prep, a simple design, and enough drying time, you can turn an ordinary shirt into a custom piece that feels playful, personal, and refreshingly not mass-produced. Start simple, trust the process, and remember that puffy paint is supposed to be fun. A little texture, a little color, and a little patience can go a long way.