Table of Contents >> Show >> Hide
- Why Paint Particleboard Furniture Instead of Replacing It?
- What Makes Particleboard Tricky to Paint?
- Tools and Materials You Will Need
- How to Refurbish Particleboard Furniture With Paint: Step by Step
- Best Paint Colors and Finishes for Particleboard Furniture
- Common Mistakes to Avoid
- When Refurbishing Particleboard Furniture Is Absolutely Worth It
- Real-World Experiences and Lessons From Painting Particleboard Furniture
- Final Thoughts
Note: This is a body-only HTML block in standard American English, ready to copy into your site and publish after styling to match your theme.
Particleboard furniture does not exactly walk into a room with great self-esteem. It is usually the budget-friendly bookcase, the tired side table, or the dresser that has survived three moves, one spilled iced coffee, and at least one regrettable decorating phase. But here is the good news: if the structure is still solid, you can absolutely refurbish particleboard furniture with paint and make it look dramatically better.
The secret is not fancy tools or miracle paint. It is prep. Particleboard and laminate surfaces can be a little stubborn because they are often slick, compressed, and not especially forgiving. If you rush the process, the finish may chip, peel, bubble, or start looking sad before your victory lap is complete. If you prep it properly, however, painted particleboard furniture can look clean, modern, and surprisingly polished.
In this guide, you will learn how to paint particleboard furniture the right way, what supplies actually matter, how to handle chipped edges and swollen spots, and how to get a finish that lasts longer than a weekend burst of motivation.
Why Paint Particleboard Furniture Instead of Replacing It?
Refinishing particleboard furniture is often worth it when the piece is functional, fits your space, and just looks worn out or outdated. A basic bookshelf, desk, nightstand, media console, or storage cabinet can get a second life with primer, paint, and a little patience.
Painting is especially smart when:
- The furniture is structurally stable but cosmetically rough.
- The finish is scratched, faded, or dated.
- You want to match the piece to your room.
- You need a low-cost furniture makeover.
- You enjoy the kind of project that makes you say, “Wow, I did that,” every time you walk by.
That said, not every piece deserves a heroic comeback. If the particleboard is badly swollen from water damage, crumbling at the corners, or bowing under weight, paint will not magically turn it into heirloom furniture. Paint is powerful, but it is not a licensed structural engineer.
What Makes Particleboard Tricky to Paint?
Particleboard is made from wood particles and resin pressed into sheets. Some pieces have a raw surface, but many are covered in laminate, melamine, or a thin veneer. That top layer looks smooth and finished, but it also makes paint adhesion more difficult.
The biggest challenges usually include:
- Slick surfaces: Paint needs grip, and shiny laminate offers very little of it.
- Fragile edges: Corners and edges can chip more easily than solid wood.
- Moisture damage: Particleboard swells when it gets wet, and swollen spots do not sand back into perfection very easily.
- Over-sanding risk: Sand too aggressively and you can damage the thin outer layer or chew up the board underneath.
This is why the best approach is gentle sanding, thorough cleaning, good primer, and thin, even coats of paint.
Tools and Materials You Will Need
- Drop cloth or old sheet
- Screwdriver for removing hardware
- Mild cleaner or degreaser
- Microfiber cloths or tack cloth
- 120- to 220-grit sandpaper or sanding sponge
- Wood filler or spackling compound
- Putty knife
- Bonding primer or stain-blocking primer
- Interior furniture paint, cabinet paint, acrylic latex paint, or enamel paint
- Foam roller or mini roller
- Angled brush for corners and trim
- Optional clear topcoat or polyurethane for extra durability
- Painter’s tape if needed
How to Refurbish Particleboard Furniture With Paint: Step by Step
1. Inspect the Piece Before You Start
Before you open a paint can and start feeling productive, inspect the furniture carefully. Tighten loose screws, check wobbly legs, look for peeling laminate, and examine corners for swelling or crumbling. If a drawer front is hanging on by hope alone, fix that first.
If the piece has severe water damage, deep structural weakness, or sagging shelves that resemble a hammock, it may not be worth refinishing. For everything else, proceed with confidence.
2. Remove Hardware and Clean Everything
Take off knobs, pulls, hinges, removable shelves, and drawers if possible. Label hardware in a small bag so you do not spend an hour later wondering which mysterious screw belonged where.
Then clean the entire surface thoroughly. Dust, wax, oil, and grime are the sworn enemies of good paint adhesion. Use a mild degreaser or a damp cloth with gentle cleaner. In high-touch areas such as drawer fronts, desk edges, and cabinet doors, be extra thorough. Let the furniture dry completely before moving on.
3. Repair Chips, Dents, and Puffy Edges
If the particleboard edges are chipped, apply wood filler with a putty knife and smooth it as evenly as possible. Let it dry fully, then sand it smooth. For slightly swollen areas caused by moisture, sand gently to knock down the raised fibers. If the area is badly puffed up, fill and reshape it rather than trying to sand it into submission like you are negotiating with a rock.
Also check for peeling laminate. Small loose sections can sometimes be glued back down. If the laminate is lifting everywhere, the finish may fail later no matter how nice the paint looks on day one.
4. Sand Lightly, Not Aggressively
This step matters more than many people think. Light sanding helps dull the surface so primer can bond. On laminate or melamine, the goal is not to remove the finish. You just want to scuff it enough to create tooth.
Use 120- to 220-grit sandpaper and work with a gentle hand. Pay special attention to flat surfaces, edges, and areas that get frequent contact. If the piece is raw particleboard instead of laminate-coated, smooth it carefully without grinding into the board.
After sanding, remove every bit of dust with a microfiber cloth, tack cloth, or slightly damp rag. Leftover dust can create a gritty finish faster than you can say, “Why does this look like I painted it during a sandstorm?”
5. Prime Like You Mean It
If you remember only one thing from this article, let it be this: do not skip primer. A quality bonding primer or stain-blocking primer is what helps paint stick to slick particleboard and laminate surfaces. It also improves coverage, seals repaired spots, and creates a more even base color.
Use a roller for broad surfaces and a brush for corners, grooves, and edges. Apply a thin, even coat rather than a gloopy one. If you are painting a dark piece a much lighter color, or if repairs are visible, a second coat of primer may be a smart move.
Let the primer dry fully according to the product instructions. Then lightly sand with fine-grit sandpaper if needed and remove the dust again.
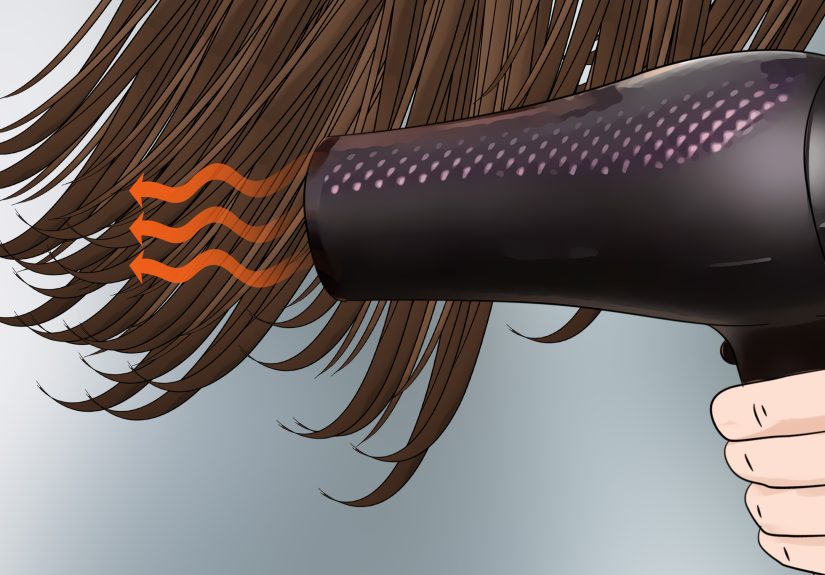
6. Apply Thin Coats of Paint
Now for the satisfying part. Use furniture paint, cabinet paint, acrylic latex enamel, or another durable interior paint designed for trim, cabinetry, or furniture. These products typically level better and hold up better than basic wall paint.
Apply the first coat in a thin, even layer using a foam roller or mini roller for smooth areas. Use an angled brush where the roller cannot reach. Do not try to get full coverage in one coat unless your personal style is “unnecessary regrets.” Two or three thin coats nearly always look better and last longer than one thick coat.
Let each coat dry fully before adding the next. If the surface feels rough between coats, sand lightly with very fine sandpaper and wipe away the dust before repainting.
7. Consider a Protective Topcoat
For lightly used furniture, your paint alone may be enough. For desks, dining chairs, side tables, toy storage, bathroom cabinets, or anything that gets frequent wiping and contact, a clear topcoat can add valuable protection.
Choose a compatible water-based polyurethane or furniture sealer if you want extra durability. Apply it in thin coats and follow the label directions carefully. A bad topcoat can cloud, streak, or yellow if it is the wrong product for the paint beneath it.
8. Let It Cure Before Heavy Use
Dry and cured are not the same thing. A piece may feel dry to the touch in a day, but many finishes need several more days to harden properly. That means no dragging lamps across the top, no stacking books immediately, and no shoving the dresser back into action like it is a contestant on a home makeover show.
Give the finish time to cure so it resists dents, sticking, and peeling more effectively.
Best Paint Colors and Finishes for Particleboard Furniture
If you want your refinished furniture to look more expensive than it is, color and sheen matter almost as much as prep.
Great color choices
- Soft white: Clean, bright, and versatile for nearly any room.
- Greige or warm beige: Ideal for a subtle designer look.
- Charcoal or black: Bold and modern, especially on bookcases and media units.
- Muted green or dusty blue: Stylish without shouting for attention.
- Navy: A classic choice that makes budget furniture look more substantial.
Best finish options
- Satin: A favorite for furniture because it balances durability and softness.
- Semi-gloss: Good for pieces that need easier cleaning.
- Matte: Beautiful, but often less forgiving in high-use areas unless sealed well.
Common Mistakes to Avoid
- Skipping primer: The top reason paint fails on laminate and particleboard.
- Over-sanding: Too much pressure can damage the surface layer.
- Painting over dirt: Grease and dust sabotage adhesion.
- Applying thick coats: Thick paint drips more and cures worse.
- Ignoring damaged edges: Chipped corners need filler and smoothing first.
- Using the piece too soon: Cure time matters for a durable finish.
When Refurbishing Particleboard Furniture Is Absolutely Worth It
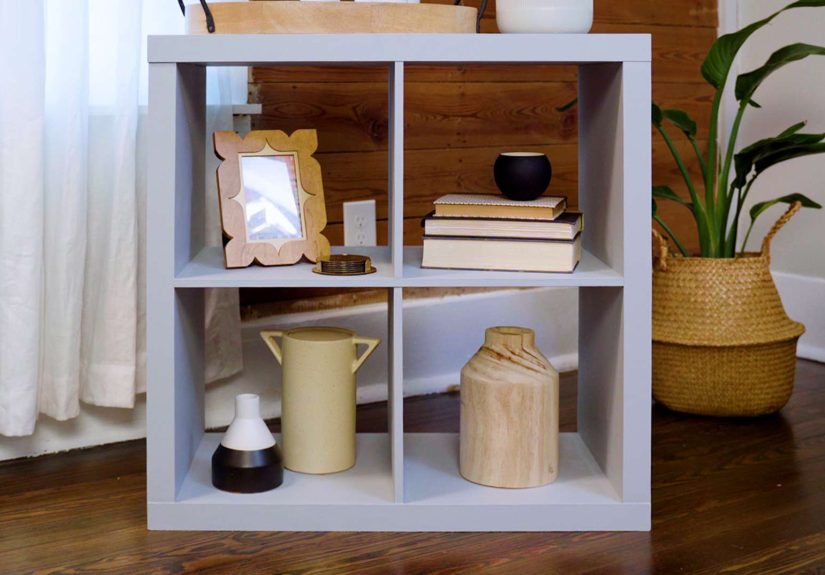
This project makes the most sense when the furniture is useful, stable, and visually tired rather than structurally doomed. A painted particleboard dresser in a guest room, a bookcase in a home office, or a media console in a family room can look far more intentional after refinishing.
It is also a great solution for renters, first apartments, dorm upgrades, kids’ room storage, and anyone who enjoys a budget-friendly home improvement project. You are not trying to turn particleboard into antique walnut. You are trying to make ordinary furniture look fresh, clean, and customized. That is a very achievable goal.
Real-World Experiences and Lessons From Painting Particleboard Furniture
The most useful lessons about refurbishing particleboard furniture usually show up after the first project, when enthusiasm meets reality. On paper, painting a cheap bookcase sounds almost suspiciously easy. In real life, the difference between “Wow, this looks great” and “Why is this peeling near the drawer pull already?” often comes down to little decisions made during prep.
One common experience is underestimating how dirty furniture really is. A dresser can look perfectly fine until you wipe it down and discover years of body oil, dust, furniture polish, and mystery residue. Many people think their primer or paint failed, when in fact the surface was just not properly cleaned. That lesson tends to stick immediately, unlike badly applied paint.
Another frequent surprise is how much better a piece looks after basic repairs. Small chips, dented corners, and ragged edges can make a painted project look homemade in the wrong way. But once those flaws are filled, sanded, and primed, the whole piece starts looking more intentional. Even budget furniture can feel crisp and modern when the surface is smooth and the lines are clean.
People also learn quickly that laminate-coated particleboard requires a lighter touch than solid wood. Beginners sometimes sand too hard because they assume more sanding equals better adhesion. Unfortunately, that can damage the thin outer layer and create rough patches that are harder to hide later. The smarter approach is gentle scuff-sanding. Think “convince the surface to cooperate,” not “attack it until it changes its personality.”
Paint selection is another real-world turning point. Standard wall paint might look good for a week, but furniture deals with hands, bags, books, toys, coffee mugs, and constant contact. A tougher cabinet or furniture paint usually performs better, especially on desks, shelves, and nightstands. Many DIYers only become true believers in durable paint after learning this the annoying way.
Dry time versus cure time is another lesson that almost everyone learns once. A piece can feel dry by the next day, so it is tempting to put drawers back in, stack decor on top, and declare victory. Then something sticks, dents, or leaves a print in the finish. Waiting a little longer can feel boring, but it often protects hours of work. Refinishing success is sometimes just patience wearing work clothes.
There is also an emotional side to these projects that people do not always mention. Refurbishing particleboard furniture can be satisfying because the transformation is so visible. The before-and-after difference is dramatic. A faded brown shelf becomes a clean white storage piece. A scuffed desk turns into a sleek black workstation. An awkward hand-me-down starts looking like it was chosen on purpose. That kind of upgrade feels good because it is practical, affordable, and creative at the same time.
Perhaps the best experience-related takeaway is this: the goal is improvement, not perfection. A refinished particleboard piece does not need to fool a museum curator. It just needs to look fresh, function well, and hold up to daily life. If you focus on prep, use the right primer, apply thin coats, and let the finish cure, you can get results that look remarkably polished. And every time someone asks where you bought it, you get the deeply satisfying pleasure of saying, “Actually, I saved it.”
Final Thoughts
If you have been wondering how to refurbish particleboard furniture with paint, the answer is simple: prep thoroughly, repair damage, use the right primer, paint in thin coats, and be patient with drying and curing. That is the formula.
Particleboard furniture may not begin life as the star of the room, but it does not have to stay dull, chipped, or outdated. With the right process, you can turn a worn piece into a cleaner, smarter-looking version of itself without spending a fortune. And honestly, giving budget furniture a second chance is one of the more satisfying forms of domestic revenge.