Table of Contents >> Show >> Hide
- Before You Start: A 30-Second Safety Check
- Why Baking Soda Might Help “Draw Out” a Splinter
- What You’ll Need
- How to Remove a Splinter with Baking Soda: 10 Steps
- Step 1: Wash Your Hands Like You Mean It
- Step 2: Clean the Splinter Area
- Step 3: Take a Good Look (No Guessing, No Digging)
- Step 4: Mix a Thick Baking Soda Paste
- Step 5: Apply the Paste Over and Around the Splinter
- Step 6: Cover It with a Sterile Bandage
- Step 7: Wait (Usually About 24 Hours)
- Step 8: Remove the Bandage and Check for Progress
- Step 9: Sterilize Tweezers (And Be Nice to Your Skin)
- Step 10: Pull the Splinter Out in the Same Direction It Went In
- Aftercare: Keep It Clean, Calm, and Covered
- When a Splinter Is More Than “Just a Splinter”
- Common Mistakes (AKA How Splinter Removal Becomes a Side Quest)
- FAQ: Quick Answers You’ll Actually Use
- Real-World Experiences: What People Learn After the “Ouch” Moment (500+ Words)
- Wrap-Up
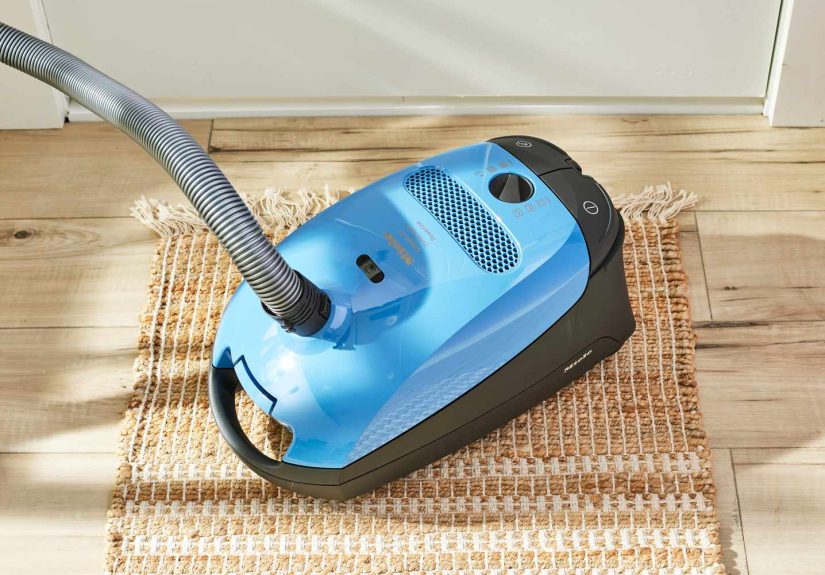
Splinters are tiny, rude houseguests. They show up uninvited, dig into your skin like they pay rent,
and then act shocked when you try to evict them. If you’ve got a stubborn splinter (especially a teeny wood one)
and you’d rather not go full “archaeological excavation” with a needle, the baking soda method is a popular
at-home trick that may help coax it closer to the surface.
Important reality check: baking soda isn’t a magic vacuum. This method works best for small splinters and can take
time (think hours, not seconds). And if your splinter is deep, near your eye, under a nail, looks infected, or
won’t budge after a reasonable attempt, a healthcare professional is the MVP.
Before You Start: A 30-Second Safety Check
Skip the DIY route and get medical help if any of these apply:
- Near the eye (or in the eyelid) don’t gamble with vision.
- Under a fingernail/toenail or embedded vertically in a way that’s hard to grab.
- Signs of infection: spreading redness, warmth, swelling, worsening pain, pus/white-yellow discharge, fever.
- Deep, large, broken, or you can’t see it clearly (glass and some materials can be hard to spot).
- You’ve tried for 10–15 minutes and it’s not coming out (time to stop poking and start protecting skin).
- You may need a tetanus booster because the wound is a puncture/dirty and you’re not up to date.
Why Baking Soda Might Help “Draw Out” a Splinter
The idea is simple: a baking soda paste under a bandage can change the moisture balance at the skin’s surface.
That can cause mild swelling/softening that may help push the splinter closer to the top where tweezers can grab it.
This isn’t the best-studied thing in controlled trials, but it’s a widely used home approach that’s generally low-risk
when done gently and cleanly.
What You’ll Need
- Soap and clean running water
- Clean towel or paper towel
- Baking soda (yes, the same box living behind the cereal)
- Small bowl or your clean palm (the “minimal dishes” method)
- Bandage or sterile gauze + tape (enough to cover the area)
- Tweezers
- Rubbing alcohol (isopropyl alcohol) for tool sterilizing
- Antibiotic ointment or petroleum jelly (optional but helpful for aftercare)
- Good lighting + magnifying glass (optional, but makes you feel like a splinter detective)
How to Remove a Splinter with Baking Soda: 10 Steps
Step 1: Wash Your Hands Like You Mean It
Use soap and water. Your goal is to avoid introducing bacteria while you’re trying to remove a tiny piece of
“nature’s toothpick.” Clean hands are non-negotiable.
Step 2: Clean the Splinter Area
Gently wash the skin around the splinter with soap and water, then pat dry. If you’ve been gardening, woodworking,
or having an intense relationship with a rose bush, take the cleaning step seriously.
Step 3: Take a Good Look (No Guessing, No Digging)
Use bright light. A magnifying glass helps. Figure out:
Is any part sticking out? Is it shallow or deep? Is it wood, thorn, or something else?
If it’s glass/metal and hard to see, or if it looks deep, consider medical help instead of a home experiment.
Step 4: Mix a Thick Baking Soda Paste
Combine about 1/4 teaspoon baking soda with a few drops of water. You want a paste that’s spreadable,
not soup. Think “toothpaste texture,” not “pancake batter.”
Step 5: Apply the Paste Over and Around the Splinter
Spread the paste directly on the spot and slightly beyond it. Don’t press hard. You’re not frosting a cupcake;
you’re creating a gentle environment to help the splinter edge upward.
Step 6: Cover It with a Sterile Bandage
Place a bandage over the paste. The covering keeps the paste in place and helps maintain moisture and contact.
Make it snug, but not tourniquet-tight. Your finger should not turn into an eggplant.
Step 7: Wait (Usually About 24 Hours)
This is the hardest step because it involves patience, which nobody asked for. Leave the bandage on for
roughly 24 hours. During this time, the skin may soften or swell slightly.
Step 8: Remove the Bandage and Check for Progress
After 24 hours, remove the bandage and gently wipe off the paste. Often, the splinter may be closer to the surface
or even sticking out more. If you still don’t see it, you can repeat the paste-and-bandage cycle once more.
Don’t keep doing this for days if pain or redness is increasingupgrade to professional help.
Step 9: Sterilize Tweezers (And Be Nice to Your Skin)
Clean tweezers with rubbing alcohol (or another reliable sterilizing method). This reduces infection risk.
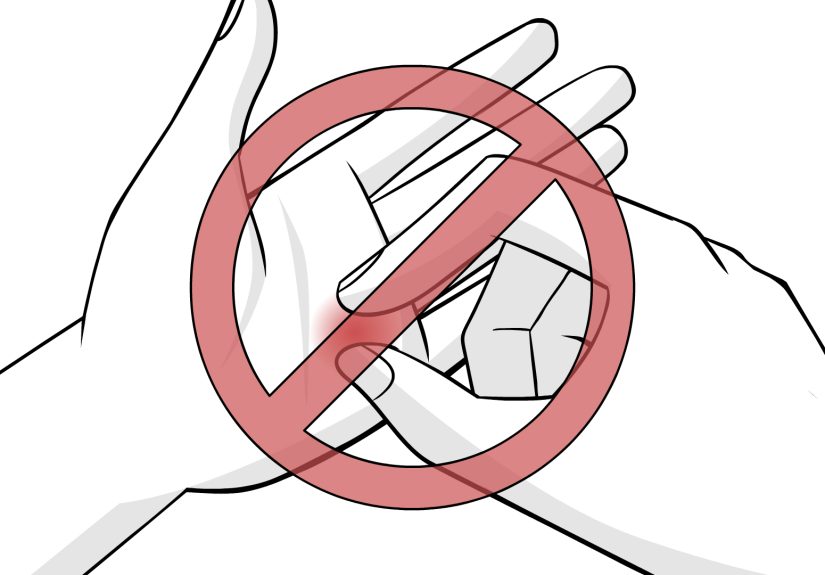
Avoid squeezing/pinching the skin around the splinter, which can make it break into fragments and become harder to remove.
Step 10: Pull the Splinter Out in the Same Direction It Went In
Grab the exposed end with tweezers and pull slowly and steadily along the angle it entered.
If it resists, don’t crank harder like you’re starting a lawnmower. Stop, reassess, and consider medical helpespecially if it breaks.
Aftercare: Keep It Clean, Calm, and Covered
Once the splinter is out, wash the area again with soap and water. Then:
- Apply a small amount of antibiotic ointment or petroleum jelly.
- Cover with a clean bandage for a day (or until it stops feeling tender and looks sealed).
- Watch for infection: increasing redness, warmth, swelling, drainage, or escalating pain.
When a Splinter Is More Than “Just a Splinter”
Splinters that stay in the skin can cause inflammation, infection, and sometimes granulomas (your body’s
“fine, I’ll build a wall around it” response). Organic material like wood and thorns can be especially irritating.
If the area keeps getting angrier instead of better, don’t keep trying new kitchen remediesget it evaluated.
Common Mistakes (AKA How Splinter Removal Becomes a Side Quest)
- Digging blindly: If you can’t see it, don’t excavate.
- Skipping tool cleaning: Unsterilized tweezers are a shortcut to infection.
- Squeezing the skin: Pressure can splinter the splinter (yes, that’s as annoying as it sounds).
- Ignoring red flags: Pus, spreading redness, or severe pain aren’t “normal healing.”
- Forgetting tetanus protection: Puncture wounds and dirty injuries can be a reason to ask about a booster.
FAQ: Quick Answers You’ll Actually Use
Does baking soda work on every splinter?
No. It’s most likely to help with small splintersespecially woodwhere mild swelling/softening can bring it closer to the surface.
Glass, metal, or deep fragments may not cooperate.
Can I speed it up by leaving the paste on longer than 24 hours?
Longer isn’t automatically better. Too much moisture under a bandage can irritate skin. If 24 hours didn’t help and it’s painful,
consider a second try oncethen escalate to professional care rather than running a week-long baking soda residency program.
Should I soak the area first?
A brief warm-water soak can make skin more pliable for some people, but soaking can also make certain splinters harder to remove in one piece.
If you do soak, keep it short and gentle.
Do I need antibiotic ointment?
Many clinicians recommend a thin layer after removal to reduce infection risk and keep the area protected. It’s optional for tiny, clean wounds,
but it’s a reasonable step if the skin is irritated.
What about tetanus?
If the injury is a puncture wound, contaminated, or you’re unsure about your vaccine status, it’s smart to ask a healthcare provider
whether you need a tetanus booster. Prevention is dramatically easier than treatment.
Real-World Experiences: What People Learn After the “Ouch” Moment (500+ Words)
If splinters had a personality, they’d be that one coworker who “just has a quick question” at 4:59 p.m. They’re small,
inconvenient, and strangely committed to ruining your day. Here are some real-life-style experiences (and the practical lessons
that tend to come with them) that make the baking soda method feel like a calm, civilized option.
1) The Weekend Woodworking Splinter (aka “I Will Not Be Defeated by a 2-Millimeter Stick”)
It usually starts with confidence: sanding a board, building a shelf, fixing something heroic. Thenzapa wood splinter slides into your fingertip
and vanishes like it knows witness protection. The first instinct is to squeeze the skin and “milk it out.” That’s the trap.
Squeezing often drives the splinter deeper or snaps it. People who do best tend to pause, wash up, and choose a method that reduces skin trauma.
Baking soda paste under a bandage is popular here because it feels like you’re doing something without turning your finger into a pin cushion.
The next day, the splinter is often closer to the surface, and tweezers can grab it with less drama.
Lesson learned: If you’re already irritated, your skin will be too. Go gentle. Clean tools. Slow removal beats frantic digging.
2) The Playground Splinter (aka “Why Is This Tiny Piece of Mulch So Powerful?”)
With kids, the challenge is half medical and half emotional negotiations. Tweezers can look terrifying, and once a child decides you’re “going to stab me,”
the mission becomes impossible. A lot of parents end up using lower-drama approaches first: tape for very shallow splinters, or a baking soda paste when the
splinter is small but stubborn. The bandage becomes a “special splinter sticker,” and the waiting game is easier when the process doesn’t involve sharp tools
right away. The next day, if the splinter is peeking out, the tweezer step is quicksometimes over before the child can fully protest.
Lesson learned: For kids (and honestly, many adults), the best splinter method is the one that avoids panic and prevents a wrestling match.
3) The Gardener’s Thorn (aka “I Barely Touched the Plant!”)
Garden splinters and thorns are the overachievers of the splinter world. They can cause more inflammation because the material is organic and often not smooth.
People commonly report that these feel “sore” longer than a simple wood splinter from a board. Baking soda paste can be a decent first attempt if the thorn is small,
but gardeners also learn quickly to watch for infectionespecially if soil is involved. If redness spreads, warmth increases, or you see drainage, that’s not a
“keep trying home remedies” moment. It’s a “get assessed” moment.
Lesson learned: Soil + puncture wounds deserve extra respect. Clean thoroughly and pay attention to worsening symptoms.
4) The Under-the-Nail Situation (aka “This Is a Special Circle of Pain”)
Under-nail splinters are notoriously difficult. Even when they’re tiny, they can feel enormous. Many people try baking soda and bandaging, but if the splinter is
trapped under the nail plate, it may not migrate outward in a helpful way. This is where knowing when to stop is a superpower. If it’s under the nail, deep, or you
can’t safely access it, professional tools and technique are often the cleanest solution (and can prevent breaking it into fragments).
Lesson learned: “I can’t get a good angle” is your cue to step back. You’re allowed to let a pro handle it.
Overall, the baking soda method shines when the splinter is small, you want a low-drama approach, and you’re willing to give it a day to do its thing.
The best outcomes usually come from the unglamorous basics: clean hands, clean tools, minimal squeezing, and a willingness to call it quits when your skin
starts losing the argument.
Wrap-Up
Baking soda paste won’t win a speed competition, but it can be a practical, gentle way to help a stubborn splinter edge toward the surface.
Keep it clean, keep it patient, and keep your “when to see a doctor” radar turned on. Your skin’s job is to protect youhelp it out by being kind to it.