Table of Contents >> Show >> Hide
- Start by Diagnosing the Problem
- Tools and Materials You May Need
- How to Fix Sagging or Flattened Seat Cushions
- How to Restuff Loose Back Cushions
- How to Repair Cushion Covers
- How to Recover a Cushion With New Fabric
- Cleaning Matters More Than Most People Think
- When to DIY and When to Call a Pro
- Maintenance Tips That Help Repairs Last Longer
- Repair Experiences and Real-World Lessons From Cushion Projects
- Conclusion
- SEO Tags
If your sofa cushions look tired, lumpy, flat, or one potato-chip sit away from total collapse, take heart: you probably do not need to replace the whole piece of furniture. In many cases, repairing upholstery cushions and covers is far cheaper, far faster, and a lot less dramatic than sending your couch to the curb like it betrayed you personally. A good repair can restore shape, comfort, and appearance without turning your living room into a full-blown upholstery laboratory.
The trick is knowing what is actually broken. Sometimes the problem is the foam insert. Sometimes it is the batting wrap. Sometimes the cover is stretched, the zipper has failed, or a seam has opened up after years of movie nights, naps, pets, kids, and the occasional mysterious snack crumb avalanche. Once you identify the real issue, the repair gets much easier.
In this guide, you will learn how to repair upholstery cushions and covers step by step, including how to fix sagging seat cushions, restuff back cushions, repair tears and seams, patch holes, replace foam, and recover a worn cover. You will also learn when a DIY fix makes sense and when it is smarter to call a pro before your “tiny project” becomes a three-week relationship with a staple remover.
Start by Diagnosing the Problem
Before you buy fabric, foam, batting, thread, or a heroic amount of optimism, inspect the cushion carefully. Remove the cushion from the furniture if possible. Unzip the cover if it has a zipper, and look at the insert. If the foam has lost height, crumbles when squeezed, or stays compressed, it is time to replace it. If the foam is still mostly sound but the cushion looks baggy, adding a new layer of upholstery foam or fresh batting may be enough.
Also inspect the cover itself. A torn seam is usually the easiest repair. A worn panel, frayed zipper area, or stretched boxing strip takes more work but is still manageable for many DIYers. If you see a small hole or rip, repair it early. Upholstery damage loves to spread the moment you decide to “deal with it later.”
Finally, check the furniture frame and support under the cushions. A cushion can look bad even when the real culprit is a sagging deck, broken spring support, or weak platform underneath. If the frame is in rough shape, even a beautiful new cushion will feel like a fancy hat on a bad haircut.
Tools and Materials You May Need
- Seam ripper
- Heavy-duty hand-sewing needle
- Matching upholstery thread or strong nylon thread
- Sewing machine with zipper foot
- Fabric scissors
- Pins or clips
- Upholstery foam
- Polyester batting or Dacron wrap
- Spray adhesive made for foam or fabric
- Replacement zipper
- Measuring tape
- Marker or chalk
- Electric carving knife or foam-cutting tool
- Patch fabric or fusible bonding web for small tears
- Staple remover and staple gun for attached cushions
You do not need every item for every repair. A simple seam fix might only require a needle, matching thread, and patience. A full cushion rebuild, however, is a different beast and deserves proper materials from the start.
How to Fix Sagging or Flattened Seat Cushions
1. Remove the cover
If your cushion has a zipper, unzip it and remove the insert. Turn the cover inside out if needed to work the old foam out more easily. If there is no zipper, look along the underside for a hidden seam you can carefully open with a seam ripper. On attached cushions, you may need to access the stuffing by opening a hidden seam or temporarily lifting upholstery from the underside of the furniture.
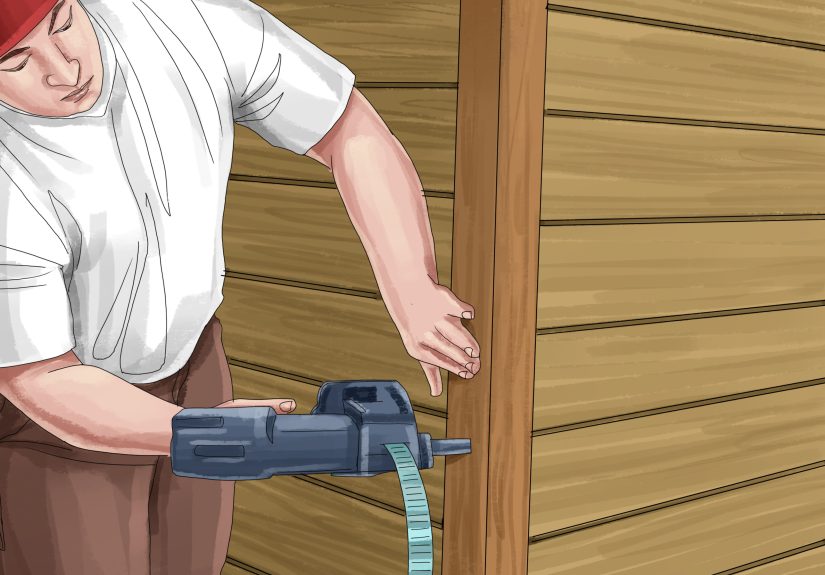
2. Measure the cushion accurately
Measure the width, length, and depth of the insert or the inside of the cover. If the shape is unusual, such as a T-cushion or L-shape, draw a simple diagram and label all dimensions. This is not overkill. This is how you avoid cutting foam into an expensive abstract sculpture.
3. Decide whether to replace or build up the foam
If the existing foam is permanently squashed, replace it entirely. If it is only slightly flattened, you can often improve the cushion by adding a thinner layer of foam to the top and wrapping the whole insert in batting. This is one of the fastest ways to revive a cushion that looks tired but is not totally defeated.
4. Cut the foam cleanly
Use an electric carving knife or foam cutter for the cleanest results. Start carefully, make shallow guiding cuts, and work steadily rather than hacking through the foam like you are opening a frozen pizza box in a rage. Smooth, even cuts help the finished cushion look professional and fill the cover properly.
5. Wrap with batting
Fresh batting gives the cushion a fuller, softer, more finished appearance. It also helps round the edges and reduce that harsh, squared-off look. Cut batting large enough to wrap the foam smoothly, and secure it with spray adhesive if needed. Leave the zipper side clear so the batting does not catch in the zipper teeth later. That tiny step saves a lot of muttered regret.
6. Reinsert the cushion
Slide the repaired or rebuilt insert back into the cover slowly. This is easier with a second pair of hands, especially on thick cushions. Work the corners into place, zip the cover closed, and fluff the cushion. If it still looks loose, remove it and add more batting. If it looks overstuffed and strained, trim the wrap slightly and try again.
How to Restuff Loose Back Cushions
Back cushions often flatten differently from seat cushions because they may be filled with polyester fiber, feather blends, or a softer insert. If the cushion has removable stuffing, open it and redistribute the fill first. Sometimes the problem is not a lack of filling but a migration problem, where the stuffing has shifted into corners or collapsed at the bottom.
If the fill is tired, add fresh polyester fiberfill in small amounts, working evenly across the cushion rather than stuffing one giant handful into the middle and hoping for magic. Feather-filled cushions can sometimes be refreshed, but many homeowners find foam or down-wrapped foam inserts provide more reliable long-term support. If the original fill no longer holds shape, replacement inserts are often the best solution.
How to Repair Cushion Covers
Fixing an open seam
A split seam is the most forgiving upholstery repair. Turn the cover inside out, line up the original seam, and sew from several inches before the damaged area to several inches past it. Use a straight stitch by machine if possible. If the area takes a lot of stress, reinforce it with a second pass. Hand sewing works too, as long as your stitches are small, close, and sturdy.
Repairing a small tear
For a short rip in fabric, remove the cover if possible, turn it inside out, and stitch carefully with matching thread. Start slightly before the tear and continue slightly beyond it. For larger tears, place fusible bonding material on the inside first to stabilize the damage, then stitch the tear closed. This keeps the fabric from spreading apart while you sew.
Patching a hole
If the fabric has an actual hole, trim loose threads and place a matching patch behind the damaged area. The patch should extend at least an inch beyond the hole on all sides. Pin it in place, then sew around the damaged area with a tight zigzag stitch or careful hand stitching. This method works especially well on removable slipcovers and non-pattern-matched areas.
Replacing a zipper
If the zipper is broken, replace it rather than fighting with a stubborn one every day like it owes you rent. Remove the old zipper with a seam ripper, pin the new zipper in place, and sew with a zipper foot so you can stitch close to the teeth. Many upholstery cushions use a zipper plaque, which places the zipper on the boxing or seam area to allow easy removal of the insert for cleaning or replacement. If you are rebuilding the cover entirely, this is usually the cleanest style to copy.
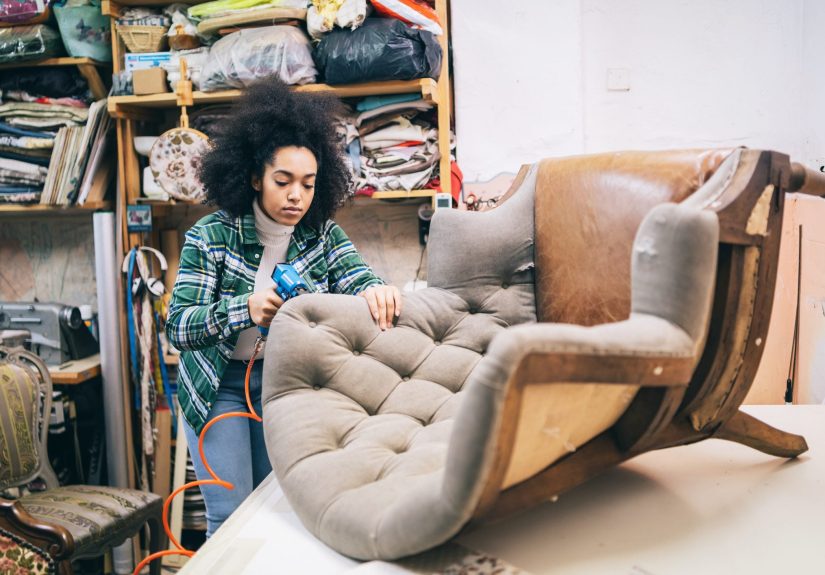
How to Recover a Cushion With New Fabric
If the cover is too worn, stained, stretched, or outdated to save, recovering it may be the best repair. The easiest path is to use the old cover as your pattern. Carefully disassemble the old pieces at the seams and label each part: top plate, bottom plate, boxing, zipper section, piping, and front edge if needed. This keeps your new pieces aligned and prevents the classic DIY mystery of “Why do I have one long strip left and nowhere for it to go?”
Choose a fabric that suits the furniture’s real life, not its fantasy life. In a formal room, a delicate fabric may work. In a family room with pets, kids, snacks, and gravity, choose something durable and easier to clean. Upholstery fabric should be appropriate for the amount of wear the piece gets and should be manageable for sewing if you are doing the work yourself.
Cut the new fabric carefully, transfer markings, and sew in the same order as the original cover. For a simple rectangular or square cushion, the basic structure is usually a top plate, a bottom plate, a zipper section, and side boxing. If you are new to upholstery sewing, a straight box cushion is far easier than a shaped cushion with curves, tucks, or piping.
Cleaning Matters More Than Most People Think
Not every “repair” starts with a needle. Sometimes a dingy cushion only needs proper cleaning to stop looking sad. Before cleaning upholstery, check the care code on the tag. W means water-based cleaner, S means solvent-based cleaner, WS means either can be used, and X means vacuum only or professional cleaning. This matters. Using the wrong cleaner can shrink covers, damage fibers, or leave you with a stain that somehow looks more committed than before.
Removable cushion covers are much easier to clean, but always follow the care instructions. If machine washing is allowed, cold water and a delicate cycle are safer bets, and air-drying helps avoid shrinkage. For regular upkeep, vacuum the fabric, seams, deck, and folds with an upholstery attachment. Blot spills quickly rather than rubbing them deeper into the fabric. Your couch notices everything.
When to DIY and When to Call a Pro
DIY upholstery cushion repair makes sense when the project involves removable cushions, straightforward seams, a simple zipper, foam replacement, batting refresh, or a basic cover swap. These are realistic weekend jobs for a patient beginner.
Call a professional if the furniture has attached tufting, leather damage, major panel replacement on a visible patterned fabric, broken spring support, extensive structural issues, or sentimental value that makes failure feel emotionally expensive. Professional help also makes sense if the sofa itself is worth preserving. On lower-end mass-market furniture, however, a small repair or replacement insert may be smarter than a full reupholstery job.
Maintenance Tips That Help Repairs Last Longer
- Flip and rotate cushions regularly so wear stays even.
- Fluff back cushions monthly or quarterly.
- Vacuum upholstery and under the cushions on a regular schedule.
- Clean spills immediately by blotting, not rubbing.
- Avoid high heat when washing removable covers because shrinkage can make reassembly miserable.
- Replace worn batting before it compresses beyond rescue.
- Fix small seam breaks early before they become full tears.
A little maintenance keeps cushions from reaching the tragic stage where one side looks like a throne and the other looks like a tired pancake.
Repair Experiences and Real-World Lessons From Cushion Projects
One of the most common experiences people report when repairing upholstery cushions is being shocked by how much better a couch looks after a very small fix. A seat cushion that seemed “ruined” often turns out to need nothing more than fresh batting and a slightly firmer foam layer. Once the insert fills the cover again, the entire sofa looks younger, cleaner, and more expensive. It is the furniture equivalent of drinking water, getting eight hours of sleep, and suddenly remembering your posture.
Another common lesson is that cushion covers tell the truth. Many homeowners assume the foam is the only problem, but once the cover comes off, the real issues become obvious: flattened wrap, uneven stuffing, stretched fabric, broken zipper teeth, or seams that have slowly separated over time. In practice, cushion repair is often less about one dramatic fix and more about stacking several modest improvements that work together. New foam without new batting can still look harsh. A repaired seam without better support inside can still look sloppy. The best results usually come from treating the cushion as a system, not as a single part.
People also learn quickly that measuring matters more than confidence. A cushion that is even slightly oversized can be nearly impossible to force into a finished cover. One that is undersized may slide around, wrinkle, or look permanently baggy. That is why experienced DIYers often make a simple sketch, label every dimension, and mark orientation before cutting anything. It feels fussy at first, but it saves time, money, and several highly creative vocabulary words later.
There is also a big difference between repairing a casual family-room cushion and restoring a decorative piece. Everyday furniture benefits from practical choices: durable fabric, easy zipper access, washable covers when possible, and a shape that can be maintained without constant fuss. Decorative furniture may call for pattern matching, piping, special seams, or shaped cushions that require more patience. Beginners usually have a better experience starting with a plain box cushion rather than a curved or tufted one.
Many people who try cushion repair for the first time also discover that the project feels far less intimidating once they break it into stages. Remove the cover. Inspect the insert. Replace or build up the foam. Wrap with batting. Test the fit. Repair the cover. Reassemble. That order keeps the process manageable and turns a messy-looking job into a sequence of small wins. By the time the final zipper closes, the repair often feels less like upholstery and more like solving a puzzle with fabric, foam, and just enough stubbornness to be useful.
Perhaps the most satisfying part of repairing upholstery cushions and covers is that the result is immediately noticeable. You do not need to wait six months to know whether the project worked. You sit down, the cushion supports you, the cover lies smoother, and the whole room looks more put together. That kind of instant payoff is rare in home improvement, which is probably why so many people go into a cushion repair thinking, “I’ll just patch this one seam,” and come out wondering what else in the house they can revive next.
Conclusion
Learning how to repair upholstery cushions and covers can save furniture that still has plenty of life left. Whether you are replacing sagging foam, wrapping inserts with fresh batting, repairing a split seam, patching a hole, or sewing an entirely new cover, the biggest secret is simple: fix the actual cause, not just the visible symptom. A fuller insert, a stronger seam, a better zipper, and the right fabric can transform a tired cushion from slouchy to sharp.
You do not need to be a master upholsterer to get good results. Start with an honest inspection, choose the right repair, and work carefully. With a little patience, your cushions can go from flattened and frumpy to comfortable, supportive, and pleasantly respectable again. Your couch may never write you a thank-you note, but it will absolutely stop looking like it needs one.