Table of Contents >> Show >> Hide
- Quick Snapshot: Time, Cost, and Difficulty
- What a Toilet Flange Does (and Why Yours Is Causing Drama)
- Replace vs. Repair vs. Raise: A 60-Second Decision Guide
- Tools and Materials Checklist
- Step-by-Step: How to Replace a Toilet Flange
- Step 0: Prep the Room (and Your Sanity)
- Step 1: Shut Off Water and Empty the Toilet
- Step 2: Disconnect Supply Line and Remove the Toilet
- Step 3: Block the Drain and Remove Old Wax
- Step 4: Identify Your Flange Type (This Determines Everything)
- Step 5: Remove the Old Flange
- Step 6: Fix the Floor First (If Needed)
- Step 7: Set Correct Flange Height and Orientation
- Step 8: Install the New Flange (Choose the Right Method)
- Step 9: Anchor the Flange Like You Mean It
- Step 10: Install New Closet Bolts
- Step 11: Reset the Toilet with a New Seal
- Step 12: Level, Reconnect Water, and Test
- Step 13: Caulk the Base (But Leave a “Tell”)
- Special Situations (Because Houses Love Plot Twists)
- Common Mistakes That Cause “Why Is It Still Leaking?!”
- When to Call a Professional Plumber
- FAQ
- Experience Notes: The Stuff You Only Learn While Kneeling on Tile (Extra )
- Conclusion
If your toilet rocks, leaks at the base, or occasionally perfumes the bathroom with Eau de Sewer (delightful!),
you may be staring down the unsung hero of bathroom plumbing: the toilet flange (aka the “closet flange”).
It’s the ring that anchors the toilet to the floor and connects the toilet outlet to the drainpipe. When it cracks,
corrodes, sits too low, or comes loose, your wax seal can failand water and sewer gas will happily audition for a
starring role in your life.
The good news: replacing a toilet flange is doable for many homeowners with basic tools, patience, and a willingness
to kneel on the world’s least forgiving tile. The key is doing it correctly: the flange must be set at the right
height, secured to solid structure, and paired with a fresh seal when you reset the toilet.
Quick Snapshot: Time, Cost, and Difficulty
- Time: 2–4 hours for most DIYers (longer if subfloor repair is needed)
- Cost: Typically $20–$80 in parts (more if tools or subfloor repairs are required)
- Difficulty: Moderateheavy lifting + careful alignment + mess management
What a Toilet Flange Does (and Why Yours Is Causing Drama)
Think of the flange as the toilet’s “mounting bracket” and “drain adapter” in one. It:
- Secures the toilet to the floor with closet bolts
- Creates the sealing surface for a wax ring (or wax-free seal)
- Connects the toilet outlet to the drainpipe
Common failure modes include cracked rings (often from overtightening), corroded metal, loose screws, and bad flange
heightespecially after new flooring gets installed and the flange ends up sitting below the finished floor.
Replace vs. Repair vs. Raise: A 60-Second Decision Guide
Before you commit to full flange replacement, confirm what’s actually wrong. Many “replace the flange” situations can
be solved with a repair ring or a flange extender.
Repair it (fastest) if:
- The pipe connection is solid, but the metal ring is cracked or the bolt slots are damaged
- The flange is still at a reasonable height and doesn’t wobble
Repair rings can reinforce a damaged flange ring without rebuilding the drain connection.
Raise it if:
- The flange sits below the finished floor after tile/vinyl/LVP installation
- You have recurring wax-ring leaks even though the toilet is tight and level
The target flange height is typically about 1/4 inch above the finished floor, which helps the seal compress properly.
Replace it (this guide) if:
- The flange is badly corroded, broken, or not secure
- The connection to the pipe is compromised
- The subfloor around it is damaged and needs rebuilding anyway
Tools and Materials Checklist
Tools
- Adjustable wrench or socket set
- Putty knife (stiff blade) for scraping wax
- Utility knife
- Sponge / shop vac / small bucket
- Screwdriver or drill/driver
- Measuring tape + marker
- Level + plastic toilet shims
- Hacksaw or reciprocating saw (sometimes needed)
- Gloves + eye protection
- If cast iron: hammer + cold chisel, wire brush
- If concrete slab: hammer drill + masonry bit + concrete anchors
Materials
- New toilet flange (match your pipe: PVC/ABS/cast iron)
- New closet bolts + nuts + washers (don’t reuse bent/rusty ones)
- New wax ring (or wax-free seal) always use a fresh seal
- Corrosion-resistant screws (stainless preferred)
- Rag or test plug (to block sewer gas while the toilet is off)
- Optional: flange extender/spacer kit if height is borderline
- Optional: primer + solvent cement for PVC/ABS (if solvent-welding)
- Bathroom caulk (mildew-resistant)
Step-by-Step: How to Replace a Toilet Flange
Step 0: Prep the Room (and Your Sanity)
- Open a window or run the exhaust fan.
- Lay down a drop cloth or old towels.
- Set a small trash bag nearby for wax scraps (wax loves rugs, socks, and your future).
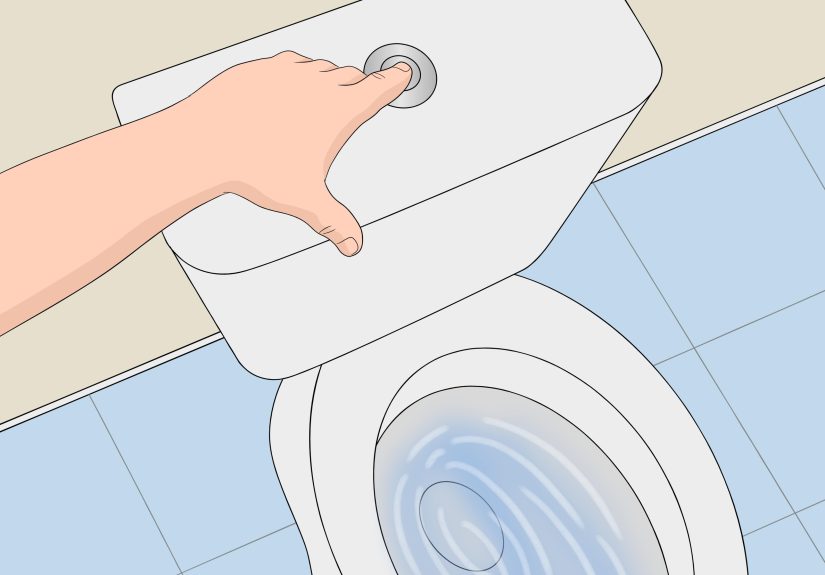
Step 1: Shut Off Water and Empty the Toilet
- Turn the shutoff valve behind the toilet clockwise.
- Flush and hold the handle down to drain as much as possible.
- Sponge or shop-vac the remaining water from tank and bowl.
Step 2: Disconnect Supply Line and Remove the Toilet
- Disconnect the supply line at the toilet fill valve (have a towel ready).
- Pry off bolt caps at the base and remove nuts from closet bolts.
- Rock the toilet gently to break the wax seal, then lift straight up and set it on a towel.
Pro tip: Toilets are awkward, not just heavy. If you can recruit a helper, do it. Your back will send a thank-you card.
Step 3: Block the Drain and Remove Old Wax
- Stuff a rag into the drain opening to block sewer gas (and prevent dropped hardware from entering the void).
- Use a stiff putty knife to scrape all old wax off the flange and surrounding area.
- Inspect for water damage: soft subfloor, dark stains, loose tile, or spongy spots.
Step 4: Identify Your Flange Type (This Determines Everything)
Look at the pipe and how the flange attaches:
- PVC (white) or ABS (black): Often solvent-welded (glued) to the pipe or fits inside it.
- Cast iron: Often a metal flange, sometimes lead/oakum joints in older homes, sometimes a compression/insert repair style.
- Concrete slab installs: The flange may be anchored into concrete; removal may involve masonry anchors and careful chiseling.
If you can’t tell what you’re looking at, take a clear photo before disassembly. “Mystery pipe” is how weekend projects become week-long hobbies.
Step 5: Remove the Old Flange
If the flange is simply screwed down and intact at the pipe connection:
- Remove the screws holding the flange to the floor.
- Lift the flange and inspect how it connects to the pipe (you may still need to cut or pry depending on style).
If it’s PVC/ABS and glued:
Glued flanges don’t “unscrew” from pipesbecause physics. You’ll usually do one of these:
- Cut the pipe and rebuild: Cut below the flange, then use a coupling and new pipe section to reach the correct height.
- Use an inside-pipe flange: If the pipe opening is accessible and sized correctly, an inside-fit flange may glue inside (or use a gasket, depending on product).
- Use a specialty removal tool: Some tools cut out the old hub from the inside without opening the floor (handy, but not mandatory).
If it’s cast iron:
Cast iron often requires more persuasion. You may need a hammer and cold chisel to break away corroded flange remnants,
then clean the pipe interior thoroughly.
Stop and call a pro if you discover a lead-and-oakum joint you’re not comfortable rebuilding, or if removing the flange risks cracking
a cast iron elbow under the floor. That’s not “DIY character building”that’s “emergency plumbing appointment.”
Step 6: Fix the Floor First (If Needed)
A flange must be anchored to something solid. If the subfloor is rotten or delaminated, replacing the flange without repairing the floor is like
installing a new front door into a wet cardboard wall.
- Cut out damaged subfloor to sound material.
- Add blocking between joists if needed to give screws something to bite into.
- Replace subfloor patch flush and secure it firmly.
Step 7: Set Correct Flange Height and Orientation
This is the make-or-break moment. The general goal: the flange sits on top of the finished floor, with the top surface about 1/4 inch above the floor.
Also align the closet bolt slots so the bolts land roughly at the 9 o’clock and 3 o’clock positionsthis makes toilet alignment easier.
Step 8: Install the New Flange (Choose the Right Method)
Option A: New PVC/ABS flange (solvent-weld)
- Dry-fit first: Confirm the flange sits at the right height and the toilet bolt slots are correctly oriented.
- Prep pipe: Cut to height; deburr/chamfer the edge so it seats well.
- Prime and cement: Apply primer and solvent cement per product instructions, then push the flange fully onto/into the pipe.
- Hold it steady: Don’t let it twist out of alignment while the cement grabs.
Important: match flange material to pipe material (PVC-to-PVC, ABS-to-ABS). If you must transition, use the correct approved transition cement.
Option B: Inside-pipe compression/expanding flange (common for repairs)
These flanges insert into the pipe and seal with a rubber gasket that expands or compresses as you tighten screws/bolts.
They’re popular when you can’t (or don’t want to) cut and rebuild the pipe.
- Clean the inside of the pipe thoroughly (wax, debris, rust scale).
- Insert the flange to the correct height and align bolt slots.
- Tighten gradually and evenly to expand the seal (don’t crank one side to the moon).
Option C: Cast iron replacement/repair flange
After removing the old flange material and cleaning the pipe, many cast iron situations are solved with a compression-style repair flange that seals
inside the pipe. The critical steps are cleanliness, even tightening, and solid anchoring to the floor.
Step 9: Anchor the Flange Like You Mean It
The flange should be fastened securely through the flange holes into the subfloornot just into tile. A “floating” flange can move under the toilet’s weight
and break the seal.
- Wood subfloor: use corrosion-resistant screws (stainless is great)
- Concrete slab: drill pilot holes with a masonry bit and use proper concrete anchors
Step 10: Install New Closet Bolts
- Slide closet bolts into the flange slots.
- Use washers/nuts (if your bolt kit includes them) to hold bolts upright so they don’t tip while you set the toilet.
Step 11: Reset the Toilet with a New Seal
Use a new wax ring or wax-free seal every time you remove a toileteven if the old wax ring looks “fine.” It isn’t.
- Remove the rag from the drain.
- Place the wax ring on the flange (or press it to the toilet outleteither method can work).
- Lower the toilet straight down over the boltsavoid twisting or sliding, which can smear the seal.
- Press down firmly to compress the seal.
- Add washers and nuts; tighten evenly, alternating sides.
Don’t overtighten. Cranking down like you’re tightening lug nuts can crack a flange or the toilet base. Tighten just until snug and stable,
then stop.
Step 12: Level, Reconnect Water, and Test
- If the toilet rocks, use plastic shims to stabilize it before final tightening.
- Reconnect the supply line.
- Turn water back on and let the tank fill.
- Flush multiple times while inspecting the base and supply connection for leaks.
Step 13: Caulk the Base (But Leave a “Tell”)
A neat bead of caulk around the base helps keep mop water out and reduces funk. Consider leaving a small uncaulked gap at the back so a future leak has a place
to show itself instead of hiding under the toilet like a sneaky villain.
Special Situations (Because Houses Love Plot Twists)
If the flange is too low
If your flange sits below finished floor height, don’t just stack wax rings like pancakes and hope for the best. Use a flange extender/spacer system
to bring the sealing surface up closer to the correct height.
If the toilet rocks even with a new flange
- Check that the flange is firmly anchored.
- Shim the toilet level before final tightening.
- Confirm the floor isn’t uneven or the tile isn’t tented.
If you’re on a concrete slab
Use a hammer drill and proper anchors. Be gentle during removalchipping concrete is easy; un-chipping it is not a thing.
If it’s cast iron and heavily corroded
Plan extra time. Removal may require chiseling out remnants and thoroughly cleaning the pipe interior for a proper seal.
Common Mistakes That Cause “Why Is It Still Leaking?!”
- Reusing the wax ring: it’s a one-and-done item.
- Wrong flange height: too low = poor compression; too high can prevent the toilet from seating.
- Not anchoring the flange: movement breaks seals.
- Overtightening nuts: cracks flanges and porcelain.
- Leaving wax/debris behind: a dirty surface sabotages the seal.
- Skipping subfloor repair: a solid flange on mushy wood is still a mushy problem.
When to Call a Professional Plumber
- You find significant rot/structural damage around the toilet
- You have a lead-and-oakum joint or fragile cast iron under the floor
- The drain pipe is cracked, misaligned, or inaccessible without major demolition
- Leaks persist after a correct reset (could indicate a drain/vent issue or hidden damage)
FAQ
Can I replace just the metal ring part of the flange?
Often, yes. If the pipe connection is fine but the ring is cracked, a repair ring can reinforce the flange and restore bolt slots without rebuilding the drain connection.
What’s the “right” flange height again?
A common best-practice target is about 1/4 inch above the finished floor.
Do I put the wax ring on the toilet or the flange?
Either can work. Many DIYers place it on the flange to reduce handling, while others press it onto the toilet outlet for easier centering. The real rule is:
set the toilet straight down and avoid twisting the seal.
Experience Notes: The Stuff You Only Learn While Kneeling on Tile (Extra )
Let’s talk about the part of flange replacement no instruction sheet warns you about: the “real bathroom” variables.
On paper, replacing a toilet flange is clean, linear, and vaguely satisfyinglike building furniture from a Swedish
diagram. In reality, it’s more like adopting a raccoon: you’ll love it when it’s done, but there will be confusion,
unexpected noises, and at least one moment where you ask, “Why is this sticky?”
First, wax. Wax is not a liquid, not a solid, and not your friend. It has a unique ability to teleport from the flange
to your glove to your sleeve to your hairline, all while you swear it never touched you. The trick that saves sanity:
scrape in one direction with a stiff putty knife, immediately drop scrapings into a bag, and keep paper towels within
arm’s reach. If you try to “wipe it later,” you’ll just spread it into a thin film that looks like you buttered the floor.
Next, flange height surprises. A lot of flange failures are really “flooring timeline” failures. Someone installed the
flange, then later added tile or thicker vinyl, and now the flange is sitting low like it’s hiding from responsibility.
That’s when you see recurring leaks even after replacing the wax ring. A proper extender/spacer feels almost too easy
and that’s the point. Fix the geometry instead of bullying the wax into doing gymnastics.
Third: the “rocking toilet” illusion. Many people assume a rocking toilet means “tighten the nuts harder.” That’s how
flanges crack and porcelain bases get stressed. In the real world, rocking usually means an uneven floor, compressed
tile, or a toilet base that needs shimming. The best move is to dry-set the toilet (no wax) to identify wobble, shim it
stable, then remove it and do the final set with the seal. It feels like an extra step because it isbut it prevents the
heartbreak of doing the whole job twice.
Cast iron is its own adventure. Sometimes it’s solid and dignified, like a vintage truck. Sometimes it’s flaky and
dramatic, like a croissant that’s been through a breakup. If the old flange is corroded, chiseling it out can reveal
a pipe interior that’s rough with rust scale. That roughness is the enemy of compression gaskets, which need a clean
surface to seal. A wire brush on a drill can be a hero herejust go slow, wear eye protection, and vacuum debris so it
doesn’t fall deeper into the line.
Finally, the emotional moment: setting the toilet back down. This is where patience pays rent. Lower it straight down
over the bolts, don’t “scoot” it into place, and tighten evenly. When you flush the first time and see no leaks, it’s a
tiny domestic victorylike parallel parking, but with plumbing. Reward yourself accordingly. Preferably with something
that isn’t stored in the bathroom cabinet.
Conclusion
Replacing a toilet flange is one of those home repairs that looks intimidating until you break it into steps:
remove the toilet, clean and inspect, set the correct flange height, secure everything to solid structure, and reset
the toilet with a fresh seal. Do it right and you’ll eliminate leaks, prevent subfloor damage, and stop that mysterious
“bathroom swamp” smell before it becomes part of your personal brand.