Table of Contents >> Show >> Hide
- What Does “Staining” a Poster Board Actually Mean?
- Supplies You’ll Need
- Before You Start: Prep & Safety
- Method 1: Coffee or Tea Stain (Beginner-Friendly)
- Method 2: Water-Based Wood Stain Wash (For Richer Color)
- How to Seal and Protect Your Stained Poster Board
- Troubleshooting Common Poster Board Stain Problems
- Creative Ways to Use a Stained Poster Board
- Real-World Experiences & Extra Tips for Staining Poster Board
- Lesson 1: Don’t rush the drying step (even if you’re excited)
- Lesson 2: Practice on quarter-sheets first
- Lesson 3: Layering media makes it look professional
- Lesson 4: Different sides of the board behave differently
- Lesson 5: Use “mist and blot” for a subtle aged look
- Lesson 6: Sealing is worth the extra 10 minutes
- Conclusion: From Plain Board to Vintage Showpiece
If you’ve ever looked at a plain white poster board and thought, “Wow, this looks like a middle school science fair,” you’re not alone. The good news: with a little stain, coffee, or tea, you can turn that boring board into something that looks vintage, artistic, and surprisingly expensive.
Whether you’re recreating an old treasure map, making a faux wood sign, or designing a backdrop for photos or school projects, learning how to stain a poster board is a quick, budget-friendly upgrade. The key is understanding which products are safe for paper, how to control warping, and how to seal your work so it actually survives being handled.
In this guide, inspired by classic eHow-style tutorials and real-world crafter tips, we’ll walk through step-by-step methods using coffee or tea as stain, plus a more advanced option using diluted water-based wood stain. We’ll also talk about sealing, troubleshooting, and clever ways to use your beautifully stained board.
What Does “Staining” a Poster Board Actually Mean?
When people say they want to stain a poster board, they usually mean one of two things:
- Give the board an aged, parchment-style look with uneven browns and tans.
- Mimic the look of wood or a darker, richer background for lettering and art.
Unlike wood, poster board is just heavy paper with a smooth finish. That means traditional oil-based stains can be too harsh, soak through, or cause major warping. For most home projects, you’ll get the best results with:
- Strong coffee or tea for a soft, vintage effect.
- Water-based wood stain, thinned with water, for deeper color and a faux-wood look.
Also note that not all poster boards are the same. Some have a slick, coated surface that resists liquids; others are more porous. If your board has a very shiny side, it may accept stain better on the matte side. Always do a small test patch in a corner before committing to the whole sheet.
Supplies You’ll Need
You don’t need a fancy craft room for thisjust a table you don’t mind splashing on and a few basic supplies:
Basic materials
- 1–2 sheets of poster board (white or light color, at least one extra for practice)
- Strong coffee or tea (for Method 1)
- Water-based wood stain (optional, for Method 2)
- Clean water for thinning and rinsing
Application tools
- Wide foam brush or soft paintbrush
- Old rags or paper towels
- Shallow tray, baking pan, or plastic bin for soaking
- Spray bottle (optional, for light misting effects)
Protection and finishing
- Protective table cover (trash bag, old tablecloth, or kraft paper)
- Nitrile gloves to avoid stained hands
- Wax paper or parchment for drying
- Mod Podge, clear acrylic sealer spray, or similar product for sealing
- Heavy books or boards for flattening once dry
Before You Start: Prep & Safety
Even though staining a poster board sounds simple, there are a few prep and safety tips that make a huge difference:
- Work in a ventilated area. Coffee and tea are mild, but wood stain and sealers can have fumes.
- Protect your surfaces. Once coffee or stain hits fabric or raw wood, it’s basically there forever.
- Test first. Use a small scrap of poster board or a corner to see how fast it absorbs and how much it warps.
- Go light first. It’s easier to make the board darker with more layers than to make it lighter.
If you eventually dabble with oil-based stains, be extra careful with used ragsthose can be a fire hazard if bunched up when drying. For poster board crafts, it’s usually best to stick to water-based products and natural stains whenever possible.
Method 1: Coffee or Tea Stain (Beginner-Friendly)
If you want that “old map found in a pirate trunk” vibe, this is your go-to method. It’s inexpensive, smells nice, and is very forgiving.
Step 1: Brew a strong stain
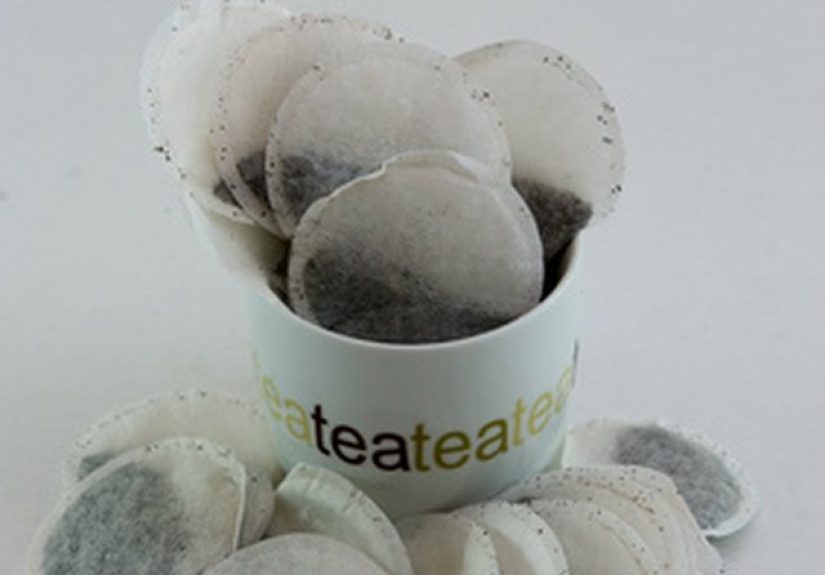
- Brew a pot of extra-strong coffee or tea. Use about twice the amount of grounds or tea bags you’d normally use for drinking.
- Let it cool slightly so it’s warm but not boilingyou don’t want to burn your fingers or warp the board instantly.
- Pour the coffee or tea into a shallow tray or baking pan. If you don’t have one, you can use a large brush and a bowl instead.
The stronger the brew, the deeper your stain will be. You can always dilute with a little water if it looks too dark.
Step 2: Pre-wet and soak the board
- Place your poster board on a protected surface or lay it right into the tray (if the tray is large enough).
- Use a brush or sponge to apply the coffee or tea in long, overlapping strokes. Don’t panic if it looks streakythis often dries into a nice, natural texture.
- If your tray fits the board, you can gently soak the poster board for 30–90 seconds for a more dramatic look. Longer soak = darker color, but also more warping.
Avoid scrubbing; that can rough up the surface and cause little fuzzies to appear. Think “gentle spa treatment,” not “aggressive car wash.”
Step 3: Add character with splatters and granules
This is where you make it look intentional and cool, not like someone spilled their latte.
- Sprinkle instant coffee granules onto the wet surface to create darker speckles.
- Use a spoon or brush to drip or flick extra stain where you want “aged” patches or darker corners.
- For a vignette effect, concentrate more stain and granules around the edges and keep the center just a bit lighter for text or artwork.
Let the granules sit for a few minutes before brushing them off. They’ll leave behind beautifully irregular spots that scream “vintage.”
Step 4: Dry flat and control warping
- Carefully lift the board and place it on clean wax paper or parchment, stained side up.
- Blot any obvious puddles with a paper towelthis helps prevent dark rings and weird blooms.
- Let it air-dry completely. To speed things up, you can use a hair dryer on a low setting, holding it at a distance and moving constantly.
Once the board is dry, it may curl a bitthat’s normal. Stack a clean sheet of paper on top, then add heavy books and let it sit overnight. It should flatten nicely without losing the stained effect.
Method 2: Water-Based Wood Stain Wash (For Richer Color)
If you want something deeper, more uniform, or more “wood-like,” a diluted water-based wood stain can work beautifully on poster boardif you’re careful.
Step 1: Thin the stain
- Choose a water-based stain in a shade like walnut, oak, or gray.
- In a disposable cup, mix about 1 part stain to 2–3 parts water. You want a very translucent wash, not a thick coat.
- Stir thoroughly until it looks even. If it still looks heavy and opaque, add a little more water.
Starting with a thin wash lets you build color gradually without saturating and destroying the board.
Step 2: Apply light, even coats
- Lay the poster board flat on a protected surface.
- Using a foam brush or wide soft brush, brush the wash in long strokes across the board. Work quickly; water-based products dry fast.
- Immediately use a clean, slightly damp rag or paper towel to gently even out any streaks or pools.
- Let the first coat dry completelyusually 15–30 minutes depending on humidity.
If you want a deeper color, repeat with another thin coat rather than trying to do it all at once. Thin layers reduce warping and give you more control over the final tone.
Step 3: Layer for special effects
Once you have a base color, you can get fancy:
- Faux wood grain: Drag a slightly drier brush in one direction to mimic “grain” lines.
- Distressed edges: Add a little extra stain along the edges and blend inward for a vignette effect.
- Mixed media: Once fully dry and sealed, you can layer paint, ink, or vinyl lettering on top.
As with coffee staining, let the board dry completely and flatten under books if needed.
How to Seal and Protect Your Stained Poster Board
If your project will hang on a wall and never be touched, you might skip sealing. But if you’re using it for a game board, sign, or school project that will be handled and transported, a sealer is a smart move.
Option 1: Mod Podge (brush-on sealer)
- Choose a matte formula if you want to keep the aged look, or gloss for a slightly shiny, finished surface.
- Use a wide brush to apply a very thin coat in one direction.
- Let dry completely, then add a second thin coat if needed.
Mod Podge doubles as both a glue and a sealer, so it’s great if you plan to decoupage photos, labels, or other paper onto the stained board.
Option 2: Clear acrylic spray sealer
- Take the poster board outside or to a very well-ventilated area.
- Shake the can well, then spray light, sweeping coats, 8–12 inches away from the surface.
- Let each coat dry before adding another. Two or three thin coats usually do the job.
Spray sealers are especially helpful when you don’t want to re-wet the stained paper with a brush-on product. They lock in the color while minimizing extra moisture.
Option 3: Lamination and sleeves
For posters you want to last for yearsclassroom charts, game boards, reusable signsconsider:
- Running the finished piece through a laminator, or
- Sliding it into a self-sealing laminate sleeve or clear poster protector.
This adds a layer of plastic protection that’s fingerprint-proof and smudge-resistant while still showing off your stained effect.
Troubleshooting Common Poster Board Stain Problems
Problem: The board is curling like a potato chip
Warping is almost guaranteed when you get paper wet. To minimize it:
- Use thinner coats of stain instead of soaking the board repeatedly.
- Dry on a flat surface and avoid hanging it while still damp.
- Once dry, sandwich it between clean sheets of paper and press under heavy books overnight.
Problem: Blotchy, uneven color
Some unevenness actually looks great and natural, but if it’s too patchy:
- Apply a light second wash of coffee, tea, or diluted stain to blend the tones.
- Avoid puddlesalways blot excess liquid.
- Work quickly so one area doesn’t dry completely before you’ve covered the rest.
Problem: The surface feels fuzzy or damaged
This usually means the paper got overworked. To prevent it:
- Don’t scrub the surface; dab and brush gently instead.
- Let each layer dry fully before adding more stain or sealer.
- Use softer brushes and avoid abrasives.
Problem: The sealer made the colors run
If your coffee or tea stain wasn’t fully dry, a wet sealer can reactivate it.
- Always allow at least a few hours of drying time; overnight is ideal.
- When in doubt, start with a spray sealer in very light passes before brushing on anything thicker.
Creative Ways to Use a Stained Poster Board
Once you know how to stain a poster board, you’ll start seeing possibilities everywhere. Here are some fun uses:
- Vintage maps and fantasy worlds: Perfect for kids’ rooms, D&D campaigns, or school geography projects.
- Rustic party signs: “Welcome,” “Cards & Gifts,” “Photo Booth,” or table numbers for weddings and events.
- Photo backdrops: Use smaller boards behind products for online shop photos, or larger boards as zoom-call backgrounds.
- Vision boards and mood boards: The aged background adds instant character to collages and inspiration boards.
- Classroom displays: Give history projects, timelines, and literature boards a more immersive, old-world feel.
Because poster board is inexpensive, you can experiment with several designs and pick your favorite, without feeling guilty about the rejects.
Real-World Experiences & Extra Tips for Staining Poster Board
After you’ve done this once or twice, you start developing your own little tricks. Here are some “experience-based” lessons from crafters and DIY-ers that can save you a lot of frustration.
Lesson 1: Don’t rush the drying step (even if you’re excited)
The number one mistake people make? They stain the board, love how it looks, and then immediately start drawing, gluing, or sealing. That’s when ink feathers, stickers peel up, or the sealer drags color around.
A good rule of thumb is: if you can still feel any coolness or dampness when you touch the back of the poster board, it’s not dry enough. Walk away, make some tea, scroll your phone, start another projectanything. Letting the board dry fully gives you crisper lines, neater glue edges, and fewer “why is this smearing?!” moments.
Lesson 2: Practice on quarter-sheets first
Full-size poster boards are big, and it can be intimidating to experiment on your only piece. A smart trick is to cut one board into quarters and use those as practice panels. Try different strengths of coffee, different teas (black, green, chai), or varying amounts of water in your wood stain wash.
By the time you’ve done two or three test pieces, you’ll have a favorite lookand that’s the one you use on your “real” board. Plus, the practice sheets are often pretty enough to use as bookmarks, journal covers, or small signs.
Lesson 3: Layering media makes it look professional
A stained poster board looks nice on its own, but it looks amazing when you layer other media on top. Once sealed and dry, try:
- White gel pens or metallic markers for titles and borders.
- Stamps and ink pads to add compass roses, flourishes, or decorative corners.
- Printed labels or photos decoupaged on with Mod Podge for a scrapbook feel.
The contrast between the rustic background and crisp lettering instantly makes your project look like it came out of a design studio instead of a dollar-store craft aisle.
Lesson 4: Different sides of the board behave differently
If your poster board has one shiny side and one matte side, they won’t take stain the same way. The matte side usually absorbs faster and gives deeper, softer color. The glossy side can resist liquids and cause beads or streaks.
That doesn’t mean you can’t use the glossy side, but you might need thinner coats and more patience. Always test a small area on each side before you decide which one to commit to. You might be surprised which look you like better.
Lesson 5: Use “mist and blot” for a subtle aged look
If you don’t want strong color, try this very gentle approach:
- Pour cooled coffee or tea into a spray bottle.
- Lightly mist the poster board from 10–12 inches away.
- Immediately blot with a paper towel to lift any heavy droplets.
This creates a soft, cloud-like tint with small variations that feel natural and vintage, but still light enough to write over in pen or marker.
Lesson 6: Sealing is worth the extra 10 minutes
It’s tempting to skip the sealer, especially if you’re rushing to a deadline. But sealing protects your work from fingerprints, moisture in the air, and accidental smudges. A quick spray of clear acrylic or a thin coat of Mod Podge can be the difference between a project that looks great for an afternoon and one that looks great for a year.
If you’re worried about changing the finish, test your sealer on one of those practice pieces you made earlier. If you like how that looks, you’ll love it on the final board.
Conclusion: From Plain Board to Vintage Showpiece
Staining a poster board is one of those simple DIY projects that delivers way more impact than effort. With basic suppliescoffee or tea, a brush, maybe some diluted water-based stainyou can transform a cheap, flat sheet into something that looks like aged parchment, faux wood, or a custom art background.
By taking time to prep, working in thin layers, letting everything dry properly, and sealing the final piece, you can create posters, signs, and displays that look polished and intentional, not last-minute. Once you’ve done it once, you’ll start finding excuses to stain poster boards for just about everything.
So grab a board, brew some coffee, and start experimenting. Your next “wow, you made that?!” moment is just a few brushstrokes away.