Table of Contents >> Show >> Hide
- Why Long Sleeve Tie Dye Is So Good (and Slightly Tricky)
- Best Shirts for Tie Dye Long Sleeves
- Supplies You’ll Need
- How to Tie Dye Long Sleeve Shirts Step by Step
- Step 1: Set Up Your Workspace Like a Tiny Dye Lab
- Step 2: Wash and Dampen the Shirt
- Step 3: Plan the Pattern (Especially the Sleeves)
- Step 4: Fold and Bind the Shirt
- Step 5: Mix Dye and Choose Color Order
- Step 6: Apply Dye Slowlyand Get Both Sides
- Step 7: Let It Sit (Don’t Unwrap Too Early)
- Step 8: Rinse, Wash, and Dry the Right Way
- Best Tie-Dye Patterns for Long Sleeve Shirts
- Common Mistakes (and How to Avoid Them)
- Color Combo Ideas That Look Great on Long Sleeves
- Quick FAQ About Tie Dye Long Sleeve Shirts
- Real-Life Tie-Dye Experiences and Lessons Learned (Extra 500+ Words)
- Conclusion
If regular tie-dye shirts are fun, long sleeve tie-dye shirts are the deluxe edition. You get more fabric, more pattern space, more chances to be creativeand yes, more opportunities to accidentally dye your elbow neon purple. The good news? Long sleeves are not harder than short sleeves once you know how to plan the folds, control color placement, and avoid over-saturating the sleeves.
In this guide, you’ll learn exactly how to tie dye long sleeve shirts step by step, which materials work best, how to choose patterns that look great on extra fabric, and how to wash your shirt so the color stays bold. I’ll also share real-world tips and “wish I knew this sooner” lessons at the end, so your first project doesn’t look like a rainbow fought a washing machine and lost.
Why Long Sleeve Tie Dye Is So Good (and Slightly Tricky)
Long sleeve shirts are amazing for tie dye because they give you three design zones instead of one: the body, the sleeves, and the cuffs. That means you can create a coordinated look (matching sleeves and torso) or go full chaos mode (spiral chest, striped sleeves, dip-dyed cuffs).
The tricky part is fabric bulk. When sleeves bunch up inside the fold, some areas can stay too dry while others get flooded with dye. The secret is simple: plan your folds, secure tightly, and apply dye slowly enough that you can see where it’s going.
Best Shirts for Tie Dye Long Sleeves
Choose the Right Fabric First
For bright, lasting color, start with a shirt that is mostly natural fiberideally 100% cotton. Cotton absorbs dye more evenly and gives more vibrant results than many synthetic-heavy blends. If you only have a blend, a high-cotton blend can still work, but the colors may turn out softer or more muted.
Long sleeve shirts also vary in thickness. Lightweight cotton tees are easiest for beginners because they fold and bind more easily. Heavier jerseys or waffle knits can be tie dyed too, but they need more dye and a little more patience during rinsing.
Pre-Wash Every Shirt (Yes, Even “Brand New”)
Pre-washing removes sizing, finishes, oils, and residue that can block dye absorption. It also helps with shrinkage before you spend time making a gorgeous pattern that suddenly fits your dog after the first wash. Skip the fabric softeneryour dye does not want to compete with softener coating.
Start with White or Very Light Shirts
White is the easiest choice because it gives you the most predictable color results. Light gray or pastel shirts can work, but they will influence the final color. Dark shirts are better for reverse tie dye (bleach/discharge techniques), which is a separate technique and requires extra caution.
Supplies You’ll Need
- White or light-colored long sleeve shirt (preferably 100% cotton)
- Tie-dye kit (one-step kit for beginners) or fiber-reactive dye + bottles
- Rubber bands (lots of them)
- Plastic gloves
- Plastic table cover, trash bags, or drop cloth
- Zip-top bags or plastic wrap (to keep fabric damp while dye sets)
- Squeeze bottles (if not included in your kit)
- Wire rack and tray (optional, but super helpful for less muddy pooling)
- Soda ash fixative (optional or required depending on dye system)
- Paper towels
- Old clothes (unless you want “accidental abstract fashion”)
Pro tip: Beginner kits are great because they usually include the basicsdyes, gloves, bands, and surface protectionso you can start without a chemistry degree or a craft-store scavenger hunt.
How to Tie Dye Long Sleeve Shirts Step by Step
Step 1: Set Up Your Workspace Like a Tiny Dye Lab
Tie dye is fun. Tie dye stains on your kitchen table are less fun. Cover your work surface with plastic, wear old clothes, and keep paper towels nearby. If possible, work outside or in a garage. You’ll have more space to spread out the sleeves and fewer regrets.
Step 2: Wash and Dampen the Shirt
Wash your shirt first, then leave it slightly damp for folding. Damp fabric is easier to manipulate and often helps dye spread more smoothly than bone-dry fabric. If your dye brand recommends a soda ash soak, follow the package directions and wring out excess liquid before tying.
Step 3: Plan the Pattern (Especially the Sleeves)
This is the part most beginners rushand then wonder why one sleeve looks like art and the other looks like a traffic cone. Decide how you want the sleeves to behave before you fold:
- Matching sleeves: Lay sleeves parallel and fold them together so both take the same stripe or spiral sequence.
- Different sleeves: Fold and band each sleeve separately for an intentionally mismatched design.
- Body-first design: Keep sleeves tucked into a body spiral or crumple for a more blended, all-over look.
Step 4: Fold and Bind the Shirt
There are dozens of tie-dye patterns, but here are the best starter options for long sleeves:
- Spiral: Pinch the center of the shirt body and twist into a disk. Tuck or wrap sleeves neatly around the spiral, then secure with rubber bands crossing like pizza slices.
- Crumple: Scrunch the whole shirt (including sleeves) into a loose mound and band it. Great for organic, marbled patterns.
- Stripes: Accordion fold the shirt (or each sleeve) and place bands at intervals for clean bands of color.
- Bullseye: Pinch one point (center chest, side hem, or sleeve cuff) and band along the length for concentric circles.
Rubber bands should be snug enough to create resist lines but not so tight that you can barely get dye into the folds. Think “secure burrito,” not “industrial pipe clamp.”
Step 5: Mix Dye and Choose Color Order
If you’re using a one-step kit, fill bottles with water as directed and shake well. If you’re using separate dyes, mix according to product instructions. For long sleeve shirts, color planning matters because there’s more room for colors to drift and blend.
Color rule that saves beginners: apply lighter colors first (yellow, pink, light blue) before darker colors (red, purple, navy, black). Dark shades can easily overpower lighter tones. Also, avoid placing too many dark complementary colors directly next to each other unless you want muddy browns or grayish patches.
Step 6: Apply Dye Slowlyand Get Both Sides
This is where the magic happens. Apply dye to each section created by the rubber bands, then flip the shirt and repeat on the back. Long sleeves soak up more dye than you think, so check folds and cuffs for dry white pockets if you want full saturation.
Helpful technique for cleaner results: place the tied shirt on a wire rack over a tray while dyeing. This helps excess dye drip away instead of pooling underneath and turning everything into “mystery brown deluxe.”
Long sleeve tip: cuffs and underarm seams often hide undyed fabric. Gently open folds with gloved fingers and add a little dye where needed, especially near seams.
Step 7: Let It Sit (Don’t Unwrap Too Early)
Once dyed, wrap the shirt in plastic or place it in a sealed bag to keep it damp while the dye sets. Many beginner tie-dye methods work with a setting time of around 6–8 hours, while some creators prefer overnight or up to 24 hours for richer color. The key is keeping the fabric damp and following your dye brand’s instructions.
This is the hardest step emotionally. You made something cool and now you want to see it. Resist. Future-you will be rewarded with brighter color and sharper pattern lines.
Step 8: Rinse, Wash, and Dry the Right Way
Put gloves back on. Remove rubber bands, then rinse the shirt thoroughly. Many tie-dye tutorials recommend rinsing until the water runs mostly clear. Start with the temperature guidance from your dye brand; a common approach is rinsing and gradually cooling the water as excess dye releases.
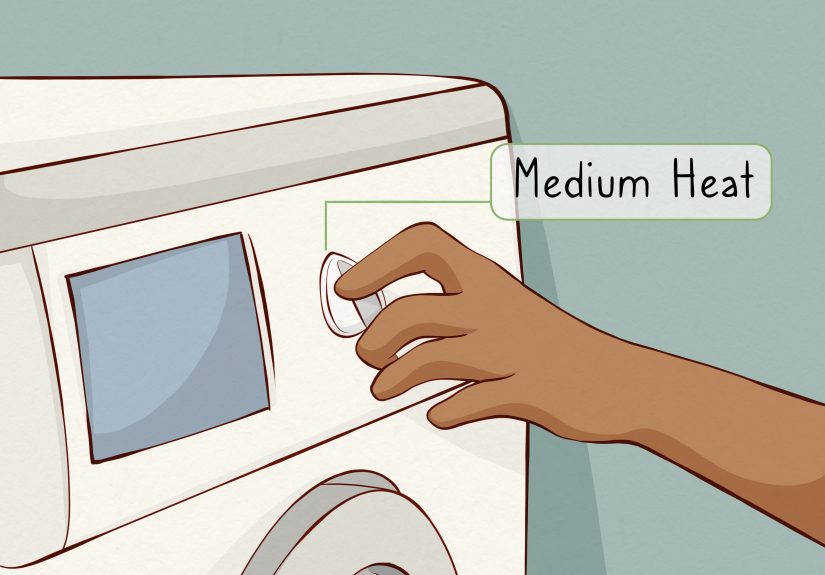
After rinsing, wash the shirt by itself (or with similarly colored tie-dye items) in cold water with mild detergent. Avoid fabric softener and bleach. For the next few washes, continue washing it separately to protect other clothes from any leftover dye bleed. Air dry or tumble dry on low/medium heat depending on your fabric and dye instructions.
Best Tie-Dye Patterns for Long Sleeve Shirts
1) Spiral Body + Solid/Gradient Sleeves
This gives you a statement chest pattern with calmer sleeves. Great if you want a wearable look rather than “festival wizard on laundry day.” Make a spiral on the torso, then dye the sleeves one or two coordinated colors.
2) Candy-Cane Sleeves (Striped Sleeves)
Accordion-fold each sleeve lengthwise and band at regular intervals. Alternate colors for a barbershop-pole effect. Keep the body simple (white, crumple, or single-color wash) so the sleeves get the spotlight.
3) Cuff Ombre Dip Effect
Perfect for beginners. Keep the shirt mostly one color or white, then apply deeper color near the cuffs and lighter saturation toward the elbows. It looks intentional, modern, and forgiving.
4) Full Crumple Long Sleeve
If you love unpredictable patterns, crumple is your friend. It uses the extra sleeve fabric beautifully and creates a textured, all-over look. This is also one of the easiest techniques when you’re making multiple shirts in one session.
5) Ice-Dye Inspired Long Sleeve
If you want more watercolor-like, softer transitions, ice dye is a fun variation. It typically uses powdered dye and ice over natural fabrics, and the melting ice creates organic movement across the shirt. It’s less controlled but often stunning.
Common Mistakes (and How to Avoid Them)
- Muddy colors: Too many dark colors touching each other, or too much dye pooling underneath. Use fewer colors and elevate the shirt on a rack if possible.
- Pale results: Synthetic-heavy fabric, skipping prewash, weak dye mix, or not enough set time.
- Large white gaps: Not enough dye in thick folds (common with long sleeves). Check seams and cuffs before bagging.
- Blurry pattern lines: Loose bands or over-saturation. Bind firmly and apply dye slowly.
- Color bleeding in laundry: Rinsing too lightly or washing with other clothes too soon. Wash separately for the first few cycles.
Color Combo Ideas That Look Great on Long Sleeves
- Sunset: Yellow + orange + magenta
- Ocean: Aqua + royal blue + purple
- Earthy: Rust + mustard + olive (on cream shirts especially)
- Galaxy: Blue + purple + fuchsia + black accents
- Minimalist: One-color indigo spiral or gray crumple
- Sporty sleeves: Black body + reverse tie-dye sleeves (advanced)
Quick FAQ About Tie Dye Long Sleeve Shirts
Can I tie dye a shirt that isn’t 100% cotton?
Yes, but results vary. High-cotton blends usually work better than 50/50 blends, which often produce lighter, less vibrant colors.
Do I need soda ash?
Sometimes. Some one-step kits are designed to be easy for beginners and may not require a separate soak. Fiber-reactive dye systems often use soda ash for stronger bonding and brighter color. Always follow the dye brand instructions.
How long should I let the dye sit?
A common range is 6–8 hours to overnight; some tutorials suggest up to 24 hours for richer color. The most important thing is keeping the fabric damp while it sets and following your dye manufacturer’s guidance.
Can I machine dry the shirt?
Usually yes, but low or medium heat is gentler on color. Air drying is also a great option, especially for the first dry.
Real-Life Tie-Dye Experiences and Lessons Learned (Extra 500+ Words)
The first time I tie dyed a long sleeve shirt, I treated it like a regular tee and wondered why one sleeve looked gorgeous while the other sleeve looked like it had been emotionally neglected. I had folded the body carefully, made a decent spiral, and then basically stuffed the sleeves into the bundle like I was packing a suitcase five minutes before checkout. Lesson learned: long sleeves are not “extra fabric.” They are design real estate.
On my second attempt, I planned the sleeves before touching the body. I laid the shirt flat, smoothed the seams, and decided I wanted striped sleeves with a crumple torso. It took maybe three extra minutes to fold each sleeve accordion-style and add rubber bands at even intervals. The result looked ten times more intentional. That was the moment I realized tie dye is not about being “good at art”; it’s about slowing down just enough to make a few smart choices.
Another big lesson came from color placement. Early on, I got ambitious and used six colors on one shirt because I believed more colors automatically meant more beauty. What I got instead was a muddy patch near the shoulder that looked like a weather radar image. Now I usually pick three dominant colors and one accent. Long sleeve shirts already have visual complexity because of the sleeve length, cuffs, and folds, so you don’t need every color in the box to make them pop.
I also learned to respect the cuffs. Cuffs love to hide dry fabric. If you’re aiming for full saturation and skip the cuffs, you’ll discover bright white rings after rinsing and say words not suitable for a crafting blog. These days I always check under the cuff folds and around seam intersections before bagging the shirt to set. A small squeeze of dye there can save the whole piece.
Batching time taught me patience too. Once, I opened a shirt after just a couple of hours because I was excited (and a little nosy). The pattern looked okay, but the colors were noticeably softer than another shirt from the same batch that sat overnight. It wasn’t ruined, but it taught me that tie dye rewards patience the way bread dough does: you can rush it, but the final result usually tells on you.
Washing was another learning curve. The first time I washed a finished shirt with other laundry “just this once,” I spent the next hour inspecting a pale towel that now had a faint lavender personality. Since then, I wash tie-dye pieces alone for the first few rounds without negotiation. It’s not dramatic; it’s just practical.
My favorite long sleeve project so far was an ocean-themed shirt with deep blue sleeves fading into aqua at the cuffs and a loose spiral torso in blue, purple, and a touch of pink. It wasn’t perfect. One sleeve had a stronger dye line than the other, and the spiral center was slightly off. But once it dried, it looked handmade in the best wayenergetic, unique, and impossible to confuse with anything from a store rack.
That’s probably the best thing about tie dye long sleeve shirts: the little variations are part of the charm. The shirt remembers the folds you chose, how tightly you wrapped it, where the dye wandered, and whether you were feeling bold or cautious that day. If you’re new to tie dye, don’t aim for flawless. Aim for intentional, wearable, and fun. The “wow” factor usually shows up right after you stop trying to control every drop.
Conclusion
Tie dyeing long sleeve shirts is one of the easiest ways to make a custom piece that actually feels fun to wear. Start with the right shirt, prewash it, plan your sleeve strategy, apply color with intention, and be patient during the setting and wash stages. Whether you choose a clean striped sleeve look or a wild all-over crumple, the best results come from simple prep and thoughtful color placementnot from complicated tricks. Put on gloves, embrace the mess, and make something uniquely yours.