Table of Contents >> Show >> Hide
- Before You Hit Send: Gather These Details (Future You Will Be Grateful)
- How to Transfer Money with Western Union: 11 Steps
- Step 1: Choose Your Transfer “Lane” (Online/App vs. In-Person vs. Start Online, Pay in Cash)
- Step 2: Create an Account (or Log In) and Build Your Sender Profile
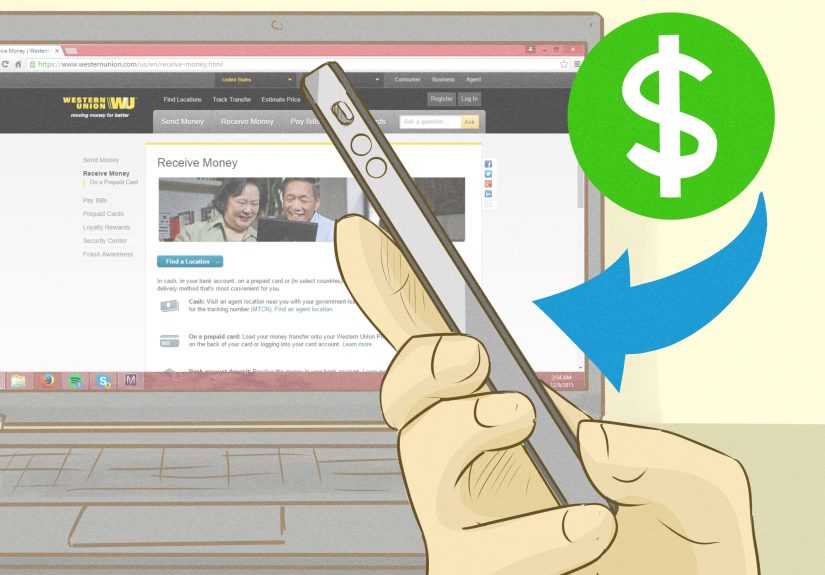
- Step 3: Start a New Transfer and Select the Destination
- Step 4: Choose How the Receiver Gets the Money
- Step 5: Enter the Receiver’s Details Carefully
- Step 6: Review Fees, Exchange Rate, Delivery Estimate, and Payout Amount
- Step 7: Choose Your Payment Method (and Complete Any Required Verification)
- Step 8: Confirm and Send (Then Save Your Receipt Like It’s a VIP Pass)
- Step 9: Get the MTCN and Share It Securely with the Receiver
- Step 10: Track the Transfer (So You’re Not Refreshing Your Messages Every 12 Seconds)
- Step 11: Know Your “Fix-It” Options: Corrections, Cancellation, and Refunds
- How the Receiver Gets the Money (Cash Pickup, Bank Deposit, or Wallet)
- Costs, Limits, and Timing: The Real-World Version
- Safety First: How to Avoid Scams When Using Money Transfers
- Common Problems (and How to Solve Them Without Losing Your Cool)
- Quick FAQs
- Real-World Experiences: What Sending Money Usually Feels Like (and What People Wish They’d Known)
- Conclusion
Sending money shouldn’t feel like defusing a movie bomb (“Cut the red wire! No, the other red wire!”). Western Union can be surprisingly straightforward once you
know what information you need, which delivery option fits your situation, and how to avoid the classic mistakeslike spelling your receiver’s name “almost”
the same as their ID (aka: the fastest way to turn a quick transfer into a snack-and-wait situation).
This guide walks you through 11 practical steps to transfer money with Western Union, whether you’re using the website, the app, or an in-person agent location.
Along the way, you’ll learn how fees and exchange rates typically work, what your receiver needs to pick up cash, how to track your transfer, and what to do if
something goes sideways.
Before You Hit Send: Gather These Details (Future You Will Be Grateful)
Money transfers are “measure twice, cut once.” If you collect the right info upfront, you’ll avoid delays, cancellations, and the dreaded “Why is this pending?”
spiral.
- Receiver’s legal name (exactly as shown on their government-issued ID)
- Destination (country, and sometimes city/state depending on delivery method)
- How the receiver will get the money (cash pickup, bank deposit, mobile walletavailability varies by location)
- Amount and currency you want to send
- Your payment method (bank account, debit/credit card, or cash at an agent locationoptions vary)
- Your ID (especially if sending in person or if identity verification is required online)
- Receiver’s bank details if doing a bank deposit (only if that option is selected and available)
How to Transfer Money with Western Union: 11 Steps
Step 1: Choose Your Transfer “Lane” (Online/App vs. In-Person vs. Start Online, Pay in Cash)
Western Union transfers usually fall into three common lanes:
- Online or app: Start and pay digitally (often fastest to initiate).
- In-person: Visit an agent location, pay there, and get a paper receipt.
- Start online, pay in cash: Begin the transfer on the app/website, then pay in-store within the allowed window (handy if you prefer cash).
Pick the lane based on what you have (card/bank/cash), how quickly you need the money delivered, and what’s easiest for your receiver to access.
Step 2: Create an Account (or Log In) and Build Your Sender Profile
If you’re sending online or in the app, you’ll create a profile with your basic information. This helps Western Union confirm you’re a real person (and not a
raccoon in a trench coat) and may also affect how much you’re allowed to send.
Tip: Use accurate personal details. If your profile info and your payment method don’t match up, verification can take longer or fail.
Step 3: Start a New Transfer and Select the Destination
Begin a transfer and choose the receiver’s country (and sometimes their city/region). Then enter the amount you want to send. Depending on the corridor and method,
you may see different delivery options.
Example: Sending money to a family member for rent? You might pick bank deposit if available. Sending emergency funds to someone traveling? Cash pickup can be more practical.
Step 4: Choose How the Receiver Gets the Money
This is where you decide the “finish line” for the funds. Common options (availability varies by location) include:
- Cash pickup: Receiver collects cash at an agent location.
- Bank deposit: Funds go to a bank account (details required).
- Mobile wallet: Funds are delivered to a supported wallet (where available).
Choose the option your receiver can actually use. (A bank deposit is great… unless your receiver doesn’t have a bank account. In that case, it’s mostly just “depositing” stress.)
Step 5: Enter the Receiver’s Details Carefully
This step is the MVP of “avoid delays.” For cash pickup, the receiver’s name must match their government-issued ID exactly. Nicknames can cause problems.
If you’re sending to a bank account or wallet, double-check the details you enter. A wrong digit can mean delays, rejection, or funds bouncing back.
Step 6: Review Fees, Exchange Rate, Delivery Estimate, and Payout Amount
Before you confirm, you’ll see the transfer summary: fees (if any), exchange rate (if currency conversion is involved), and what your receiver is expected to get.
This is the moment to pause and do the “does this make sense?” check.
Practical rule: If you’re sending internationally, look at both the fee and the exchange rate. The cheapest fee doesn’t always mean the best overall deal.
Step 7: Choose Your Payment Method (and Complete Any Required Verification)
Payment options vary by location and transfer type, but often include bank account, debit card, credit card, or cash at an agent location.
If you’re paying from a bank account online, you may need to link and verify that account first. If you’re sending a larger amount, you may be asked to verify your identity.
Verification can increase your sending limits and help protect against fraud.
Step 8: Confirm and Send (Then Save Your Receipt Like It’s a VIP Pass)
Once everything looks right, confirm the transfer. You’ll get a confirmation and a receipt (digital or paper). This receipt includes the key tracking info you’ll
need if you want to follow the transfer status or fix a problem.
Step 9: Get the MTCN and Share It Securely with the Receiver
Western Union typically provides a tracking number called the MTCN (Money Transfer Control Number). Your receiver may need itespecially for cash pickup.
Share it securely (direct message or callavoid posting it publicly). Think of it like a claim ticket: only the right person should have it.
Step 10: Track the Transfer (So You’re Not Refreshing Your Messages Every 12 Seconds)
If you want updates, use Western Union’s tracking feature. Transfer statuses can include steps like “sent,” “in progress,” “available for pickup,” or “completed.”
If it’s taking longer than expected, check for common causes:
- Name mismatch
- Verification needed
- Bank deposit details incorrect
- Local payout rules or business hours
Step 11: Know Your “Fix-It” Options: Corrections, Cancellation, and Refunds
Mistakes happenespecially when you’re sending money in a hurry. If you realize something is wrong, act fast.
- If you need to correct receiver details: Contact customer support as soon as possible. Some edits may be allowed depending on the transfer status.
- If you need to cancel: In many cases, you can request cancellation if the money hasn’t been paid out. Rules can vary by channel and transfer type.
- Know your rights: U.S. remittance transfer rules generally provide a short cancellation window (commonly 30 minutes) for certain transfers.
How the Receiver Gets the Money (Cash Pickup, Bank Deposit, or Wallet)
Cash Pickup Basics
For cash pickup at an agent location, receivers are commonly asked for:
- A valid government-issued photo ID
- The tracking number (MTCN)
- Sender’s full name
- Expected amount (and sometimes sender location details)
Small but important: If the receiver’s name on the transfer doesn’t match their ID, they may not be able to pick up the money until it’s corrected.
Bank Deposit Tips
If bank deposit is available and selected, make sure the receiver’s bank details are accurate. Bank deposits may take longer than cash pickup depending on banking
rails, local processing, and verification steps.
Mobile Wallet Delivery
Where available, wallet delivery can be convenientespecially in places where wallet adoption is high. Confirm the receiver uses a supported wallet and that you have the correct wallet details.
Costs, Limits, and Timing: The Real-World Version
Fees and Exchange Rates
Transfer costs usually come from a combination of service fees (which can vary) and exchange rates (for international transfers). Always review the final summary
before you hit confirm so you know the total cost and the receiver’s expected payout.
Sending Limits (and Why Verification Matters)
Limits can differ by destination, channel, and payment method. As a general pattern, unverified users may have lower limits, and verified users may qualify for higher limits.
If you’re planning to send a larger amountsay, helping with tuition or medical expensesbuild in time for identity verification.
Timing
Delivery time depends on where the money is going, how it’s delivered, and whether any verification or compliance checks are required. Cash pickup can be fast once
available, while bank deposits may depend on banking processing times.
Safety First: How to Avoid Scams When Using Money Transfers
Money transfers are popular with scammers for the same reason they’re popular with everyone else: they’re fast. The difference is that scammers are trying to
make your money fast in the opposite direction.
- Only send money to people you know and trust. If a stranger insists on a money transfer, treat that like a blinking red warning sign.
- Watch for impersonation tricks. Fake “bank,” “government,” or “tech support” emergencies are classic scam setups.
- If you suspect fraud, act immediately. Contact the transfer provider right away to see if the transfer can be stopped.
- Never share sensitive info (passwords, verification codes, full account details) with someone who contacted you unexpectedly.
Common Problems (and How to Solve Them Without Losing Your Cool)
Problem: “My receiver can’t pick it up.”
Most common causes: name mismatch, missing ID, missing MTCN, or the transfer isn’t available yet. Start by verifying the receiver’s name spelling and confirming the transfer status.
Problem: “It says pending.”
Pending can happen when verification is needed, when payments are processing, or when additional checks apply. Review your email/app notifications and look for any requests for documentation.
Problem: “I entered the wrong details.”
Contact customer support quickly. The sooner you act, the more options you may haveespecially if the money hasn’t been paid out.
Quick FAQs
Do I need the MTCN?
It’s extremely useful for tracking. For cash pickup, it’s often required or strongly recommended to speed up the pickup process.
Can I pay in cash if I start online?
In some cases, yesWestern Union offers options where you start the transfer digitally and then pay in cash at a participating agent location within the required time window.
Can I cancel a transfer?
Cancellation depends on the transfer status and channel. If the money hasn’t been paid out, cancellation may be possible. U.S. remittance transfer rules also generally provide a short cancellation right for certain transfersso if you made a mistake, don’t wait.
Real-World Experiences: What Sending Money Usually Feels Like (and What People Wish They’d Known)
People’s experiences with Western Union tend to follow a familiar story arc: confidence, speed, one tiny “oops,” and then either a victory lap or a short
customer-support side quest. Here are a few common real-world scenarios people often describeand what you can learn from them.
Experience #1: The “Name Spelling” Plot Twist.
Someone sends money to a relative for cash pickup and uses a nickname“Mike” instead of “Michael,” “Liz” instead of “Elizabeth.” Everything looks fine until
the receiver shows up with an ID that doesn’t match the transfer. The result: the receiver can’t pick it up, the sender gets a frantic message, and everybody’s
stress levels spike for no good reason. The fix is usually simple (correct the name), but it can take time. The lesson: treat the receiver’s name like it’s going
on a passportbecause it basically is.
Experience #2: The “Fees vs. Exchange Rate” Surprise.
Another common moment: the sender chooses the lowest fee option and feels clever… until they notice the exchange rate difference changes how much the receiver gets.
This is where people often say, “Wait, why is the payout lower than I expected?” Not every transfer is identicaldestination, payment method, and delivery option can
change the total cost. The lesson: when you review the final summary, look at the receiver payout and the total cost together, not just the fee line.
Experience #3: The “Verification Speed Bump.”
Some senders describe a smooth first transfer… and then a surprise request for identity verification when they try to send more next time. This can feel annoying,
but it’s also a safety feature and can increase sending limits. People who plan ahead say it’s painless; people who discover it at 11:58 p.m. when they’re trying
to help someone “right now” say it’s the worst invention since spoilers. The lesson: if you think you’ll ever need to send a larger amount, verify earlier when you’re not in a rush.
Experience #4: The “Where’s My MTCN?” Scavenger Hunt.
Receivers sometimes ask for the tracking number and the sender thinks, “Sure, I’ll find it,” then realizes they didn’t save the receipt, their inbox is a chaos museum,
and their app notifications are… not helping. The lesson: as soon as you send, save the confirmation and the MTCN somewhere obvious (notes app, screenshot, email folder).
Bonus: share the MTCN directly with the receiver so they’re not waiting on you to become an archaeologist.
Experience #5: The “Scam Alarm” Wake-Up Call.
A lot of people only learn about money-transfer scams after someone tries one on them: a fake “urgent” message, an impersonation call, a too-good-to-be-true offer.
The best outcomes happen when the sender pauses and verifies the story through a trusted channelcalling a known number, texting a family member directly, or checking
official guidance. The lesson: urgency is the scammer’s favorite tool. Your favorite tool is taking 60 seconds to confirm.
In other words: the best Western Union experience is usually the boring one. Boring means the name matches, the details are correct, the receiver has what they need,
and the transfer goes through without drama. And boringwhen it comes to sending moneyis a compliment.
Conclusion
Western Union transfers boil down to three things: choosing the right delivery method, entering receiver details perfectly, and reviewing the true cost (fees + exchange rate)
before you confirm. Do that, save your MTCN, and you’ll avoid most headaches. Add smart scam awareness, and you’ll avoid the truly expensive problems.