Table of Contents >> Show >> Hide
- Why Use a Paint Sprayer on Trim & Doors?
- Choosing the Right Paint Sprayer for Trim & Doors
- Prep: The Unsexy Secret to a Gorgeous Finish
- How to Use a Paint Sprayer on Trim
- How to Spray Interior Doors Like a Pro
- Avoiding Common Sprayer Mistakes
- Cleanup and Safety
- Real-Life Lessons from Spraying Trim & Doors
- Lesson 1: The Prep Feels Endless… Until You Start Spraying
- Lesson 2: You Don’t Need a Contractor-Grade Setup to Get Great Results
- Lesson 3: Masking Smart Beats Masking Everything
- Lesson 4: Don’t Rush the Cure Time
- Lesson 5: Spraying Can Be Weirdly Addictive
- Lesson 6: It’s Okay to Mix Spraying and Hand-Painting
If you’ve ever tried to brush miles of baseboard or wrestle with a six-panel door using a roller, you already know: there has to be a faster way. That’s exactly why so many DIYers (including the Young House Love crew back in the day) fall in love with the magic of a paint sprayer for trim and doors. Done right, you get buttery-smooth finishes, razor-sharp lines, and the very satisfying feeling of knocking out in hours what would’ve taken an entire weekend by hand.
In this guide, we’ll walk through how to use a paint sprayer on trim and doors in a real-life, “kids and pets live here” house from prep and masking to spraying, drying, and cleanup. We’ll mix pro-level advice with friendly, Young-House-Love-style practicality so you can get awesome results without turning your home into a cloudy crime scene of overspray.
Why Use a Paint Sprayer on Trim & Doors?
Trim and doors are where your paint job either looks like a professional finish or like your toddler helped. Sprayers shine here because they:
- Lay down ultra-smooth finishes with no brush or roller marks, which is especially noticeable on glossy trim and paneled doors.
- Speed up big projects like repainting all your upstairs door casings, baseboards, and doors in one go.
- Reach tricky profiles that are tedious to brush, like detailed molding or grooves in raised-panel doors.
Manufacturers like Graco and Wagner specifically recommend sprayers for interior trim, doors, and cabinets because these surfaces benefit most from thin, even coats and good atomization. When you combine that guidance with real-world DIY experiences like those shared on Young House Love, you get a practical, repeatable system that works beautifully in a typical home.
Choosing the Right Paint Sprayer for Trim & Doors
Before you channel your inner spray-painting superhero, you’ve got to pick the right gear. Most DIYers land on one of these options:
1. HVLP (High Volume Low Pressure) Sprayers
HVLP sprayers are favorites for doors, trim, and furniture because they:
- Deliver a fine, controllable spray pattern, ideal for detailed trim.
- Produce less overspray than many airless units, which is great indoors.
- Often plug right into the wall, with a small cup attached to the gun very similar to what Young House Love used.
The tradeoff is that they can be slower on huge surfaces, and you often need to thin thicker paints slightly (always follow both your paint and sprayer instructions).
2. Airless Sprayers
Airless sprayers pump paint directly from the can through a high-pressure hose. Pros love them for large projects because they’re fast and powerful, and when paired with a fine-finish tip they can produce a beautiful surface on trim and doors.
To make an airless sprayer trim- and door-friendly, you’ll want:
- A fine-finish spray tip (for example, a 210–310 FFLP-style tip that creates a narrow, controlled fan).
- Good pressure control, so you can dial it down for thin, even coats.
- Decent masking skills. Airless units can throw a lot of paint very quickly, so prep matters.
3. What About the Paint?
For trim and doors, look for:
- Enamel or “trim & door” paints (water-based alkyd or urethane-modified acrylics are common) for durability and a hard cure.
- Sheens like satin, semi-gloss, or gloss to resist scuffs and make cleaning easy.
- A compatible primer for bare wood, stained surfaces, or glossy old paint.
Most sprayer and paint manufacturers include charts that tell you whether thinning is needed, which tip size to use, and what pressure settings work best. Definitely read these they’re not just fine-print suggestions.
Prep: The Unsexy Secret to a Gorgeous Finish
If spraying is the glamorous main event, prep is the backstage chaos that makes it possible. Professional painters agree that careful prep is the number one difference between a “wow” finish and a “what happened here?” one.
Step 1: Clear and Protect the Space
- Move furniture out or to the center of the room and cover it with plastic or drop cloths.
- Protect floors with rosin paper or drop cloths, taping edges so overspray can’t sneak underneath.
- Mask walls and ceilings near the trim with painter’s tape and paper or plastic sheeting.
Sprayers don’t have to be messy, but overspray is real. Pros often describe spraying trim first, then masking it and rolling the walls later, which keeps lines crisp and saves time.
Step 2: Remove or Mask Hardware and Doors
- Take doors off their hinges and lay them flat on sturdy supports (sawhorses work great). This helps avoid drips and runs.
- Remove knobs, latches, and strike plates, or carefully mask them off if removal isn’t practical.
- Label each door and its hardware with painter’s tape so everything goes back exactly where it came from.
Step 3: Clean, Sand, and Repair
- Clean trim and doors to remove dust, fingerprints, grease, and hand grime using a degreaser or a mild cleaner.
- Lightly sand glossy surfaces with 220–320 grit sandpaper to improve adhesion.
- Fill nail holes and dents with wood filler or spackle; caulk gaps along trim edges and corners.
- Vacuum and tack-cloth the surfaces so you’re not spraying dust into your fresh paint.
Step 4: Prime When Needed
If you’re covering dark stain, old oil-based paint, or vivid colors (looking at you, bright blue trim), a quality bonding primer is your best friend. Prime with the sprayer or by brush/roller, depending on the scope of your project and manufacturer instructions.
Let the primer fully dry and lightly sand again for a super-smooth base.
How to Use a Paint Sprayer on Trim
Once prep is done, spraying the trim becomes almost… fun. Here’s a step-by-step roadmap.
Step 1: Adjust Your Sprayer
- Fit a fine-finish tip or detail nozzle suitable for trim work.
- Adjust the spray pattern – a narrow vertical fan works well for most baseboards and casings.
- Set the flow/pressure lower to start, then adjust up until you’re getting a smooth, even coat without spitting or fogging.
Always test on scrap trim or cardboard first. If the paint looks dry and dusty, you may be too far away or moving too fast. If it’s sagging or dripping, you’re too close, moving too slowly, or spraying too heavy a coat.
Step 2: Dial In Your Distance and Passes
Most manufacturers recommend holding the sprayer about 6–12 inches from the surface, depending on the model. Keep your wrist locked and move your arm so the tip stays parallel to the trim.
- Start spraying just off the surface, then sweep across and release the trigger after you pass the other end. This avoids heavy blobs at the start and stop.
- Overlap each pass by about 50 percent so the finish stays uniform without stripes.
Step 3: Work in Logical Sections
Spray trim in sections so you’re not racing the clock as the paint starts to set:
- Do baseboards around a room, one wall at a time.
- Spray window and door casings from top to bottom so any minor overspray falls where you’ve already painted.
- Check for drips or sags a minute or two later and gently tip off with a small brush if needed.
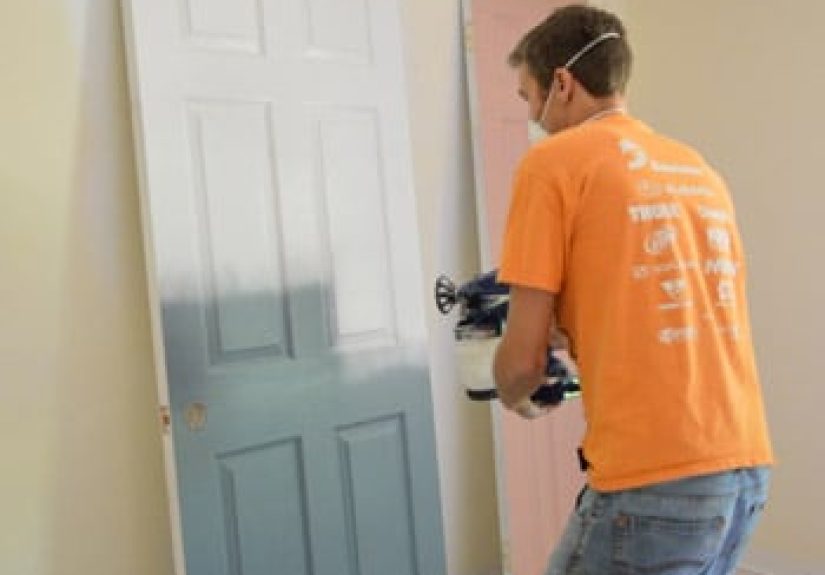
How to Spray Interior Doors Like a Pro
Sprayed doors are one of those high-impact upgrades that make your house feel brand new. The key is thin, consistent coats and smart positioning.
Step 1: Lay the Door Flat (If Possible)
Many pros and DIYers prefer to spray doors flat on sawhorses. It reduces the risk of runs and gives you better control over detailed panels.
- Start with the edges first, then move to the face.
- On paneled doors, spray the panels and recessed areas first, then finish with broad strokes over the stiles and rails.
Step 2: Thin Coats Are Your Friend
One of the biggest pro tips: apply paint in multiple thin coats instead of one thick one. This helps prevent sags, orange peel, and weird texture.
- Keep your passes moving at a steady pace.
- Watch the sheenyour goal is a wet, even look that isn’t pooling.
- Allow each coat to dry according to the paint label before flipping or recoating.
Step 3: Drying and Reinstallation
Once the final coat is on, give the doors time to cure. They may be dry to the touch in a few hours, but still delicate underneath.
- Wait at least overnight before flipping, stacking, or rehanging doors (longer if humidity is high).
- Use felt pads or cardboard spacers between doors if you must stack them to prevent sticking.
- Reinstall hardware carefully so you don’t gouge your pretty new finish.
Avoiding Common Sprayer Mistakes
Even careful DIYers run into a few bumps the first time they spray trim and doors. Here’s how to sidestep the big ones:
Problem: Overspray Everywhere
Fix it:
- Mask wider zones with paper or plastic, not just thin tape lines.
- Use a smaller fan tip for narrow trim and adjust pressure down.
- Work with windows open and fans to move mist away from freshly sprayed surfaces (while still following safety rules).
Problem: Drips and Sags
Fix it:
- Spray lighter coats and keep the sprayer moving at a consistent speed.
- Hold the sprayer at a consistent distance rather than arcing in and out.
- Catch fresh runs with a small angled brush; sand and touch up once dry if you miss them.
Problem: Rough or “Orange Peel” Texture
Fix it:
- Strain your paint before loading the sprayer to remove tiny debris.
- Adjust the pressure or flow; sometimes bumping it slightly up can help atomize the paint better.
- Lightly sand between coats with fine-grit sandpaper to smooth things out.
Cleanup and Safety
Paint sprayers make application faster, but they also demand proper cleanup and basic safety habits.
- Wear a respirator rated for paint fumes and particles, plus safety glasses.
- Use gloves and old clothes or coveralls mist has a way of finding you.
- Clean the sprayer immediately after use following the manufacturer’s steps. Thorough cleaning prevents clogs and extends the life of your equipment.
Yes, cleanup takes some time, but remember: you just painted every bit of trim and a stack of doors in a fraction of the time it would have taken with a brush. Totally worth it.
Real-Life Lessons from Spraying Trim & Doors
Reading the instructions is great. Seeing how things actually go down in real houses? Even better. Over the years, DIYers including the Young House Love team and countless forum regulars have shared some very relatable sprayer lessons. Here are some of the big takeaways that can save you time, stress, and maybe a few “what have I done?” moments.
Lesson 1: The Prep Feels Endless… Until You Start Spraying
Almost everyone says the same thing: the masking, taping, sanding, and cleaning feel like they’ll never end. But once you start spraying, the payoff is huge. In many projects, people report spraying all the trim and doors in an upstairs hallway or multiple bedrooms in a single session, something that would have taken whole weekends with a brush.
Think of prep as loading the slingshot. The more carefully you pull back (prep), the more satisfying the “snap” (actual spraying) is. The Young House Love crew, for example, spent serious time taping, priming, and protecting their wood floors before saying goodbye to their old blue trim, and it allowed them to spray confidently without panicking about overspray.
Lesson 2: You Don’t Need a Contractor-Grade Setup to Get Great Results
There’s a lot of online debate about HVLP vs. airless sprayers. Pros love airless rigs for their power and speed, but many DIYers get excellent results with consumer-grade electric sprayers when they follow the directions and use the right paint.
What matters more than the brand name is:
- Choosing a sprayer that’s actually designed for trim, doors, and cabinets (not just staining fences).
- Practicing your technique on scrap pieces before going near your real trim.
- Taking the time to dial in the flow and pattern for your specific paint.
In other words, you don’t need to remortgage your house to buy a professional rig. You just need a solid, well-reviewed DIY-level sprayer and some patience.
Lesson 3: Masking Smart Beats Masking Everything
Many first-time sprayers either massively over-mask or under-mask. The sweet spot is a strategic approach: protect the floors and walls where overspray is likely to land, but don’t shrink-wrap the entire room.
Pros often recommend this sequence: spray the trim first, then mask it and roll the walls afterward. That way, if a little overspray lands on the walls during trim spraying, it gets covered later anyway. It’s a mindset shift that can save hours of tape and frustration.
Lesson 4: Don’t Rush the Cure Time
The most heartbreaking stories are almost always about impatience: gorgeous freshly sprayed doors that get fingerprints, dings, or stick to the door stops because they were rehung too soon. Even quick-drying water-based enamels need time to fully cure.
Real-world experience says: if you can, give doors at least a full day lying flat before rehanging, and avoid hard contact for several more days while the finish hardens. It’s a little inconvenient, but it’s much better than having to sand out damage and respray.
Lesson 5: Spraying Can Be Weirdly Addictive
One funny pattern that comes up in DIY communities: once people get comfortable with sprayers for trim and doors, they start looking around their house thinking, “What else can I spray?” Cabinets, furniture, accent walls nothing is safe.
That’s not a bad thing, as long as you stay smart about prep and safety. The more you use your sprayer, the better your technique gets, and the faster you can transform big chunks of your home with a crisp, modern, professionally painted look.
Lesson 6: It’s Okay to Mix Spraying and Hand-Painting
Sprayers aren’t an all-or-nothing tool. A lot of DIYers happily spray doors and long runs of baseboard, then brush tight spaces, small touch-ups, or awkward corners. Some even roll the first coat and spray the final one for the smoothest possible top layer.
The goal isn’t to “win” at spraying it’s to get the best finish with the time, tools, and space you have. If that means using a sprayer for the big stuff and a trusty angled sash brush for details, you’re doing it right.
When you combine these real-world lessons with solid prep and good technique, you’ll see why so many people swear they’ll never go back to hand-painting doors and trim again.