Table of Contents >> Show >> Hide
- Why Nail Art Is Basically a Creature Factory
- DIY Manicure Basics (So Your Hands Stay Happy)
- The Workflow: From Manicure to Monster Sketch
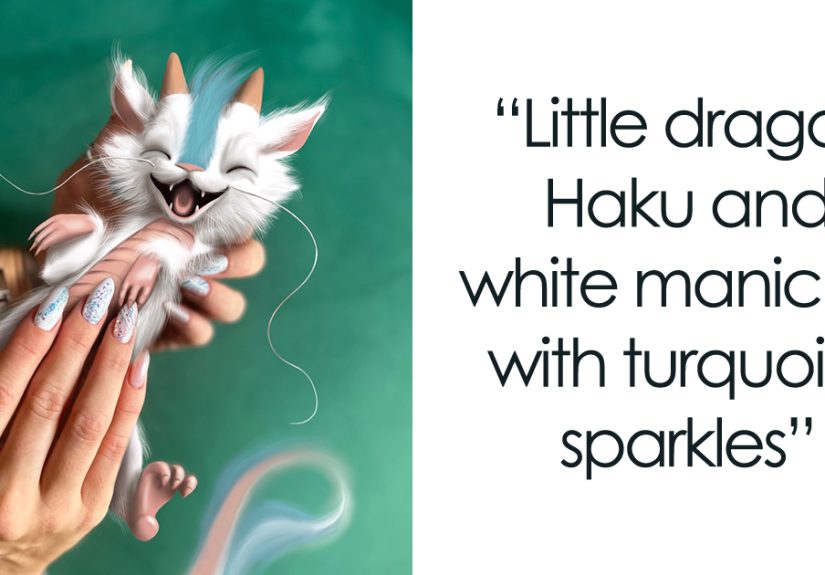
- 11 Nail-Art-to-Creature Pairings (11 “Pics” as Gallery Captions)
- Pic 1: “Midnight Jelly Galaxy” → The Nebulisk
- Pic 2: “Pearl Chrome French” → The Shellwing Swanwyrm
- Pic 3: “Sage Matte Botanical” → The Mossmuzzle
- Pic 4: “Hot Pink Flame Art” → The Sparkjaw Imp
- Pic 5: “Gold Foil Minimalist” → The Gilded Whisper Moth
- Pic 6: “Ocean Marble Swirl” → The Tideglass Manatee
- Pic 7: “Black + Silver Negative Space” → The Voidfin Skater
- Pic 8: “Pastel Confetti Specks” → The Sprinklehoof
- Pic 9: “Classic Red Gloss” → The Crimson Standard
- Pic 10: “Lavender Aura Gradient” → The Dreamwisp Eel
- Pic 11: “Citrus Micro-Art” → The Zestling Gecko
- Common DIY Nail Art Mistakes (And How to Fix Them Without Rage-Quitting)
- Health & Safety Checklist (Quick, Practical, Not Paranoid)
- of Experience-Based Tips from DIY Nail Artists and Illustrators
- Conclusion: Tiny Canvases, Big Worlds
Some people meditate. Some people jog. Some people alphabetize their spice racks for fun (no judgment, but also… wow).
And then there’s this particular brand of self-care: painting your own nails and then immediately inventing a whole
mythical ecosystem that looks like it crawled out of your cuticles.
If that sounds oddly specific, welcome. DIY nail art is already a tiny masterpiece you carry on your hands.
Pair it with illustration, and suddenly your manicure becomes a mood board, a color script, and a creature generator
all at once. The result? A mini “gallery” where each nail set gets a matching imaginary beastequal parts adorable,
dramatic, and “please don’t bite me, I spent 45 minutes topcoating you.”
Why Nail Art Is Basically a Creature Factory
Nail designs have three things illustrators love: palette, texture, and story.
A pearly chrome finish suggests scales or armor. A jelly polish looks like a translucent belly or a magical wing membrane.
A speckled “eggshell” topper practically begs for a hatchling character. Even the shape of your nails can influence
silhouettes: almond nails read elegant and predatory; short squoval nails feel friendly and roundlike a creature that
would apologize for bumping into you.
The best part is that nail art forces constraints. You’ve got limited space, a fixed set of colors, and a real-world
finish (glossy, matte, glitter). Constraints are rocket fuel for creativity. Your manicure isn’t just decoration
it’s the art director politely telling your imagination, “Work with what you’ve got.”
DIY Manicure Basics (So Your Hands Stay Happy)
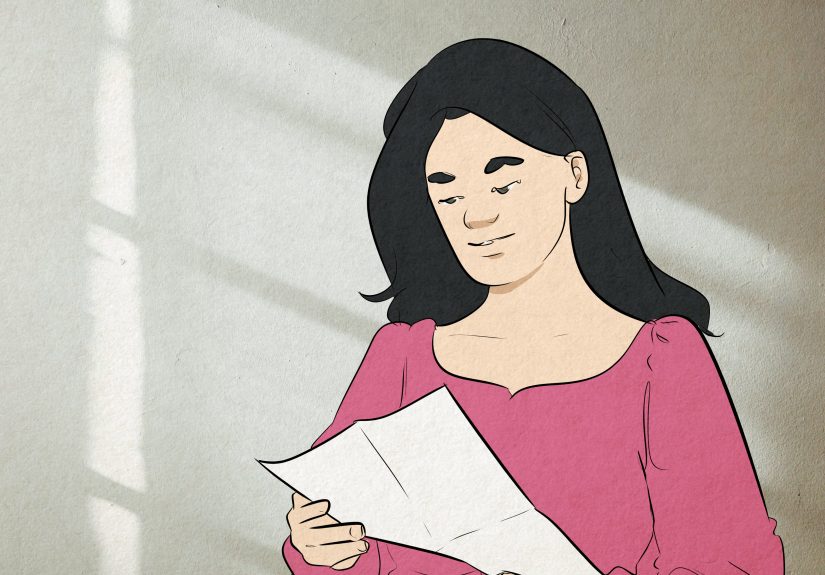
Before we unleash 11 imaginary creatures onto the planet, let’s talk about the practical side. A great DIY manicure
looks good, but a smart DIY manicure also respects your nails and skin. Think of this as creature care for humans:
gentle handling, clean tools, and no unnecessary chaos.
Prep Without Starting a Cuticle War
Cuticles exist for a reason: they help protect the area where the nail meets the skin. That’s why many dermatology
sources advise not cutting or removing them. Instead, soften with warm water (or after a shower),
then gently push back if you want a cleaner edge for polish. If you trim anything, keep it to
obvious hangnails that are already detacheddon’t “sculpt” living skin like it owes you rent.
For shaping, file with a light touch. One common tip from dermatologists is to file in a single direction instead
of sawing back and forth like you’re trying to start a campfire. Your nails will thank you by not peeling
in tiny, spiteful layers later.
Clean Hands, Clean Tools, Clean Vibes
If you’re doing your own manicure, you control the hygiene levelso you might as well choose “excellent.”
Wash hands first. Clean tools after use. If you’re sharing tools (roommates, siblings, best friends),
be extra strict: skin around nails can get small cuts, and that’s how bacteria can sneak in.
A simple approach: wash tools with soap and water to remove debris, then disinfect appropriately.
Many public health resources discuss disinfecting surfaces with solutions like alcohol at sufficient concentration.
For nail tools, follow product directions, and avoid shortcuts like “I waved it near a candle, so it’s basically sterile.”
(It is not.)
Choosing Polish Wisely (Marketing Words Are Not Magic Spells)
In the U.S., nail products are generally regulated as cosmetics, and most don’t require premarket approval.
That doesn’t mean they’re “bad,” but it does mean you should treat claims like “non-toxic” or “clean” as
starting points, not finishing lines. If you’re sensitive to fragrance, formaldehyde resins, or certain
solvents, read labels and patch-test when you can.
If fumes bother you, improve ventilation: open a window, use a fan, and don’t hover over wet polish like you’re
whispering encouragement to it. (It can’t hear you. It will still smudge.)
Gel and UV/LED Lamps: The Quick, Balanced Reality Check
Gel manicures can look amazing and last longer, but curing lamps emit ultraviolet (often UVA) radiation.
Research has shown these devices can damage DNA and cause mutations in cells under certain experimental conditions,
and many clinicians recommend simple precautions if you use them: apply broad-spectrum sunscreen to hands
(letting it absorb first), or wear UV-protective fingerless gloves during curing. If you do gel often, consider
spacing sessions out and giving nails a “recovery” period to reduce brittleness or thinning.
The Workflow: From Manicure to Monster Sketch
Step 1: Treat Your Nails Like Tiny Canvases
Start with a clear “design brief”:
two to three main colors, one texture (glitter, chrome, matte, jelly), and one motif (stars,
waves, leopard spots, botanical shapes). Too many ideas at once can turn into visual noise, and your creature
will come out confusedlike it forgot what species it is midway through evolving.
Step 2: Photograph Your Manicure Like It’s a Product Shoot
Good lighting matters. Natural light near a window works wonders. Take one close-up of each hand, plus a couple
“hero shots” showing both hands together. These photos become your reference for color, reflectivity, and texture
basically a palette sampler you can reuse in your illustration.
Step 3: Translate Nail Details Into Creature Traits
Pick 3–5 design elements and assign them to creature anatomy:
- Glitter → scales, pollen dust, bioluminescent freckles
- Chrome → armor plating, beetle shell, futuristic fins
- Marble swirl → smoky fur, cloud-like wings, storm patterns
- French tip → horns, beak edges, tail spikes
- Negative space → transparent skin, ghost fins, “glass” bones (tastefully, not creepy)
Step 4: Give It a Tiny Story
A creature becomes memorable when it has behavior. Is it shy? Does it hoard shiny things? Is it allergic to drama?
(Relatable.) Add one sentence of lore. You’ll be amazed how fast your sketch gains personality.
11 Nail-Art-to-Creature Pairings (11 “Pics” as Gallery Captions)
Below are eleven pairings you can treat like a mini exhibit: each “pic” includes a manicure style and a matching
imaginary creature concept. Use them as prompts, captions, or a blueprint for your own nail-to-narrative series.
Pic 1: “Midnight Jelly Galaxy” → The Nebulisk
Nails: translucent midnight-blue jelly polish with scattered silver micro-glitter.
Creature: A small lizard-like traveler whose skin looks like deep space. Glitter becomes star clusters,
and its tail leaves a faint comet trail when it’s excited (which is alwaysbecause snacks exist).
Pic 2: “Pearl Chrome French” → The Shellwing Swanwyrm
Nails: pearly chrome base with crisp white French tips.
Creature: A graceful serpent-bird hybrid with nacreous scales and wing edges as bright as French tips.
It nests near calm water and judges your posture silently but kindly.
Pic 3: “Sage Matte Botanical” → The Mossmuzzle
Nails: matte sage green with tiny leaf decals.
Creature: A round, fox-like forest spirit with velvety fur. Leaf motifs turn into ear fronds and
little sprigs along its shoulders. It smells like rain and good decisions.
Pic 4: “Hot Pink Flame Art” → The Sparkjaw Imp
Nails: neon pink with flame shapes in orange and red.
Creature: A mischievous, salamander-ish imp whose flame markings glow brighter when it laughs.
It can’t breathe fire, but it can dramatically roast your outfit with a single look.
Pic 5: “Gold Foil Minimalist” → The Gilded Whisper Moth
Nails: nude base with scattered gold foil fragments.
Creature: A soft moth creature with paper-thin wings flecked in gold. It appears near lamplight
and “whispers” by fluttering patterns that look like tiny handwritten notes.
Pic 6: “Ocean Marble Swirl” → The Tideglass Manatee
Nails: blue-and-white marble swirls with a glossy topcoat.
Creature: A gentle sea grazer with cloud-swirl patterns on its back like moving waves.
It collects smooth stones and arranges them into suspiciously aesthetic spirals.
Pic 7: “Black + Silver Negative Space” → The Voidfin Skater
Nails: black polish framing clear negative space with silver lines.
Creature: A sleek, skate-like creature that looks partially transparent, as if it’s a shadow
you can see through. Silver lines become “circuit veins” that glow when it changes direction.
Pic 8: “Pastel Confetti Specks” → The Sprinklehoof
Nails: milky pastel base with multicolor speckle topper.
Creature: A tiny hoofed creature with confetti freckles and a bouncy gait. It’s basically
a birthday party with legs, and it leaves a trail of good luck and mild chaos.
Pic 9: “Classic Red Gloss” → The Crimson Standard
Nails: glossy, timeless red.
Creature: A regal dragon-cat hybrid with lacquer-red scales so shiny it doubles as a mirror.
It is dramatic, confident, and absolutely the main character in every room.
Pic 10: “Lavender Aura Gradient” → The Dreamwisp Eel
Nails: lavender-to-clear aura gradient with a soft glow effect.
Creature: A floating eel-like wisp that moves like smoke in water. The aura gradient becomes
a luminous belly fade. It appears when you’re sleepy and “guides” you to the nearest blanket.
Pic 11: “Citrus Micro-Art” → The Zestling Gecko
Nails: bright citrus colors with tiny slice details.
Creature: A cheerful gecko with orange-and-lime spots and a tail shaped like a curled peel.
It’s energized by sunlight and compliments your life choices loudly.
Common DIY Nail Art Mistakes (And How to Fix Them Without Rage-Quitting)
“Why Is My Polish Bumpy?”
Usually: thick coats, not enough dry time, or painting over oils. Solution: thinner coats, let each layer set,
and wipe the nail plate gently (some people use alcohol-based wipes) before painting if your skin runs oily.
Also: glitter is bumpy by nature. That’s not a flawit’s a personality.
“My Nails Peel After I File”
Over-filing or sawing back-and-forth can rough up edges. File gently, one direction, and consider a smoothing base coat.
If peeling persists, take a break from polish and focus on hydration (hand cream, cuticle oil) and gentler removal.
“My Cuticles Look Angry”
If the skin around your nails is red, sore, or swollen, scale back. Avoid cutting. Moisturize.
And watch for signs of infectionpain, pus, increasing swellingespecially after any break in the skin.
Health & Safety Checklist (Quick, Practical, Not Paranoid)
- Don’t cut or aggressively remove cuticles; protect that nail-skin seal.
- Use clean tools; don’t share without proper cleaning/disinfection.
- Ventilate your space if you’re using strong removers or acrylic/gel products.
- If using UV/LED curing: consider sunscreen or UV-protective fingerless gloves.
- Know red flags: worsening pain, swelling, warmth, pus, fever, or red streaking warrants medical attention.
- If you have diabetes, circulation issues, or immune concerns, be extra cautious with nail problems.
of Experience-Based Tips from DIY Nail Artists and Illustrators
People who do their own manicures and draw alongside them tend to describe the process as a satisfying mix of
“tiny precision” and “creative chaos.” The manicure part is the slow-burn: prep, base, careful color placement,
waiting, topcoat, more waiting. The illustration part is where that patience pays offyou’ve already built a palette
and a texture library on your fingertips, so your sketch starts with a strong direction instead of a blank-page stare-down.
One common learning curve is painting the non-dominant hand. DIYers often say it feels like trying to sign your name
on a moving bus. The trick isn’t superhuman controlit’s strategy. Stabilize your elbows on a table, rest your painting
hand’s pinky on the other hand for balance, and choose designs that look intentional even if they’re slightly imperfect
(gradients, speckles, abstract swirls, negative-space lines). When you match the manicure to a creature illustration,
those “happy accidents” become design features: a wobbly line turns into lightning on a dragon’s back; a stray glitter
fleck becomes a glowing freckle pattern on a moth’s wing.
Another shared experience: the moment you realize drying time is a lifestyle, not a suggestion. Many DIYers build a
“post-paint ritual” to avoid smudgesanswer texts with knuckles, open doors with elbows, and develop a deep respect
for pump dispensers. Some even plan the illustration stage to happen after nails are fully dry, using that time
to write creature “lore” notes or thumbnail silhouettes. It keeps the creative momentum going while your topcoat finishes
becoming truly hard-wearing.
On the illustration side, artists often recommend translating nail textures into drawing textures right away.
If your nails are glossy chrome, you might add high-contrast highlights and sharp specular reflections to the creature’s
armor. If your nails are matte and soft, you might use grainy shading or muted colors to keep the creature plush and gentle.
That direct translation is what makes the pairing feel “matched” instead of loosely inspired.
Finally, DIYers frequently mention that this hobby feels surprisingly grounding. It’s hands-on, detail-driven, and gives
you a visible result you carry around all day. When you add a creature illustration, you turn “I painted my nails” into
“I created a tiny world.” And on a tough week, having a miniature nebula lizard (or a sprinkle-hoofed party animal)
riding shotgun on your fingertips is a weirdly effective reminder that creativity can be practical medicinejust without
pretending it replaces actual medical care.
Conclusion: Tiny Canvases, Big Worlds
A DIY manicure is already a small act of artistry. Pair it with illustration, and you’ve got a repeatable creative engine:
design nails, photograph them, translate shapes and textures into a creature, add one sentence of lore, and suddenly your
hands are hosting a whole imaginary wildlife documentary. Keep it clean, keep it gentle on your nails, and let the polish
lead the way. Your next creature might be hiding in your topcoat.