Table of Contents >> Show >> Hide
- Why Liquor Store Wine Boxes Are Secretly Organization Gold
- Before You Start: Pick Your Makeover Style
- Materials and Tools
- Step-by-Step: Liquor Store Cardboard Box Makeover
- Design Ideas That Don’t Look Like “Just a Box”
- Mistakes to Avoid (So Your Box Doesn’t Revolt)
- Safety Notes (Quick, But Worth It)
- 500+ Words of Real-World “Experience” from People Who Do This Project
- Conclusion
There are two kinds of people in the world: people who throw away cardboard boxes, and people who look at a cardboard box and whisper,
“You could be a closet organizer.” If you’ve ever lugged home a free liquor store wine box (the kind with built-in dividers), congratulations
you’ve basically adopted a low-budget, high-potential storage system.
A liquor store cardboard box makeover takes that sturdy, divider-filled box and turns it into something you actually
want to display: a chic craft-room sorter, a pantry organizer, a desk-side filing bin, or the world’s most obedient toy corral.
This article breaks down the “why it works,” the “how to do it,” and the little design upgrades that keep your box from screaming,
“I used to hold six bottles of Merlot.”
Why Liquor Store Wine Boxes Are Secretly Organization Gold
Not all cardboard is created equal. Liquor store wine boxes are often designed to handle weight and movement, which means thicker walls,
better corners, and built-in cardboard dividers (hello, instant compartments). That divider grid is the star of the show: it naturally sorts
supplies into neat little neighborhoodsno HOA required.
What they’re perfect for
- Craft rooms: paint bottles, glue sticks, vinyl rolls, markers, ribbon spools, washi tape, small tools
- Home office: mail, notebooks, chargers, cords (aka the “electronic spaghetti” drawer alternative)
- Pantry: snack bars, seasoning packets, baking items, tea, kid-friendly grab-and-go options
- Closets: socks, accessories, cleaning cloths, hair tools, extra toiletries
- Garage or utility: gloves, small parts, paint brushes, sandpaper, hand tools
The only real “problem” is the branding and the not-so-glam cardboard look. Luckily, a makeover is basically a fancy way of saying:
wrap it, seal it, and give it handles so it feels employed.
Before You Start: Pick Your Makeover Style
Your finish choice determines the whole vibe. Pick based on where the box will live and how hard it will work.
(A craft-room box gets handled a lot. A top-shelf closet box mostly just sits there like royalty.)
Option A: Fabric-Wrapped “Boutique Storage” Look
Fabric makes cardboard feel intentionallike you bought it at a home store and casually “forgot” to mention the price.
This is ideal for bedrooms, closets, offices, and living spaces.
Option B: Paper/Decoupage “Pattern Pop” Look
Scrapbook paper, wrapping paper, decorative napkins, or even pages from old maps can create a designer finish fast.
This is perfect for lighter-duty storage and for anyone who loves bold patterns.
Option C: Contact Paper “Fast + Wipeable” Look
Contact paper is the quickest route to a clean, wipeable surface. Great for pantries, kids’ supplies, and anywhere sticky fingers roam.
Option D: Painted “Minimal + Modern” Look
Paint gives a clean, uniform finish, especially if you’re matching a room’s color palette. It can also be a great base layer under decoupage.
(Bonus: paint is a very effective way to mute loud logos.)
Materials and Tools
Mix and match based on your chosen finish. You don’t need everythingjust a plan and a little patience.
Core supplies
- Liquor store wine box (with dividers) + optional extra cardboard for reinforcement
- Scissors and/or a craft knife (with a cutting mat or thick cardboard underneath)
- Measuring tape or ruler
- Pencil
- Clean cloth (for dust removal)
Finish supplies (choose your adventure)
- Fabric route: fabric, fabric glue or decoupage medium, foam brush, smoothing tool (old card or brayer)
- Paper/decoupage route: decorative paper/napkins, decoupage medium, foam brush
- Contact paper route: contact paper, squeegee/old card
- Paint route: primer (optional but helpful), acrylic/latex paint, paintbrush or small roller
Upgrade supplies (high impact)
- Clear sealer (spray or brush-on) for durability
- Label holder or printable labels
- Ribbon/rope/webbing for handles
- Hot glue (optional) for trim and quick fixes
- Corner protectors or washi tape for edges
- Felt pads for the bottom (helps sliding and prevents snagging)
Step-by-Step: Liquor Store Cardboard Box Makeover
Step 1: Inspect, clean, and reinforce
Start by checking the box for weak corners, torn edges, or dividers that wobble. Dust it off and remove any loose labels.
If the divider grid is removable, gently lift it out for easier wrapping and painting.
Quick reinforcement trick: Cut strips of spare cardboard and glue them along the inside top rim or corners.
This keeps the box from “bowing” when you pick it up loaded with supplies.
Step 2: Decide on handles now (not later)
Handles are easiest to install before you add decorative layersespecially if you’re cutting hand holes.
Mark where your hands naturally grab the box (typically centered on the short sides).
- Hand holes: trace a rounded rectangle and cut carefully; reinforce around the opening with glue and extra paper/fabric
- Strap handles: punch two holes and thread rope or webbing; knot inside and cover knots with an inner liner
Step 3: Cover the outside (pick your finish)
Fabric method (durable and “store-bought”)
- Measure each side panel and cut fabric with a 1–2 inch overhang for wrapping edges.
- Apply a thin, even layer of decoupage medium or fabric glue to one panel at a time.
- Lay fabric down and smooth from the center outward to prevent bubbles.
- Wrap excess fabric over the rim and slightly into the inside for a clean finish.
- Repeat for all sides. Let it dry thoroughly before trimming any extra.
Paper/decoupage method (fast, stylish, pattern-forward)
- If your paper is thin, consider painting the box first in a neutral color so logos don’t show through.
- Brush decoupage medium onto the box, place paper, and smooth it down.
- Brush a protective top coat over the paper once the base layer sets.
- Seal edges carefullyedges are where wear happens first.
Contact paper method (quick + wipeable)
- Cut contact paper slightly larger than each side.
- Peel backing slowly and smooth as you go (think: “apply like a screen protector,” not “wrap like a burrito”).
- Trim corners neatly and fold excess over edges for strength.
Paint method (clean, modern, customizable)
- If the box is glossy or printed heavily, a primer layer can help paint adhere more evenly.
- Use light coats to reduce warping and soggy cardboard.
- Let each coat dry fully; then add a clear sealer if the box will be handled often.
Step 4: Make the inside look finished
An upgraded outside is great, but the inside is where your eye goes when you open it or pull out supplies.
Lining the interior instantly levels the project up.
- Easy liner: kraft paper, leftover wallpaper samples, or plain cardstock
- Premium liner: matching fabric, peel-and-stick liner, or painted interior + sealer
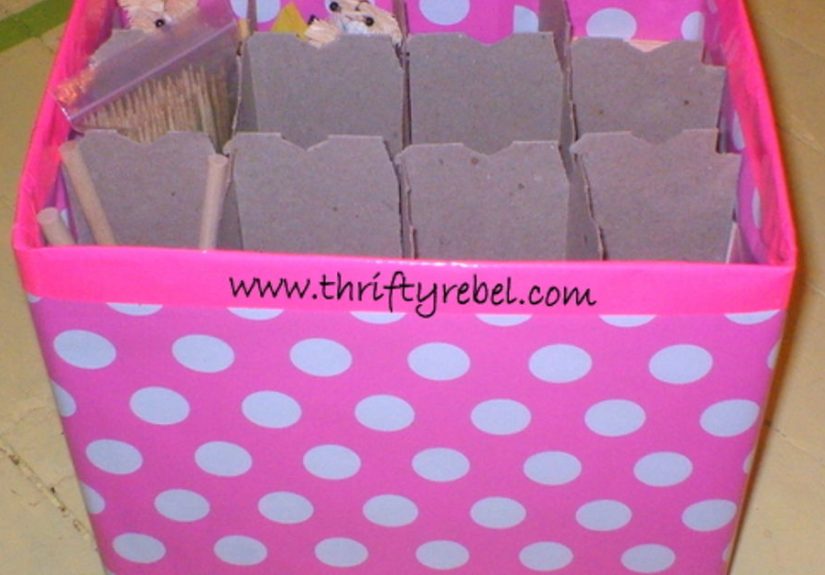
Step 5: Upgrade the dividers (the “wow” move)
The dividers are what make these liquor store boxes specialso treat them like the VIPs they are.
- Cover dividers with matching paper or paint them for a cohesive look.
- Reinforce divider tops with washi tape or thin strips of fabric to prevent fraying.
- If compartments are too small, remove every other divider strip to create larger bays.
Step 6: Seal for real life
If the box will be used daily, sealing matters. A clear top coat protects paper, reduces scuffs,
and makes surfaces easier to wipe clean. Let all layers dry thoroughly before sealing.
Design Ideas That Don’t Look Like “Just a Box”
1) “Craft Room Command Center”
Use a bold pattern outside and a light interior so you can see supplies quickly. Label each compartment:
“Brushes,” “Markers,” “Glue,” “Cutting,” “Tape,” “Vinyl Tools.” The dividers keep chaos from mixing into one mega-pile.
2) “Pantry Snack Caddy”
Line with wipeable contact paper. Reserve compartments for granola bars, fruit snacks, tea packets, and seasoning mixes.
Add sturdy rope handles so you can grab it like a basket and restock easily.
3) “Charging Station Tamer”
Use dividers to separate cables and adapters by device type. Add a label on each slot:
“Phone,” “Tablet,” “Laptop,” “Camera,” “Misc.” Bonus: fewer “Where is my charger?” speeches.
4) “Gift Wrap and Ribbon Wrangler”
Cover the outside with leftover wrapping paper (the irony is delicious). The dividers are perfect for ribbon spools,
bows, tags, and tape. Store it vertically in a closet for easy access.
Mistakes to Avoid (So Your Box Doesn’t Revolt)
Using too much wet glue or paint
Cardboard absorbs moisture. Heavy, soggy applications can warp panels. Thin coats and patience win.
Skipping edge protection
Edges take the most abuse. Reinforce with folded paper, fabric strips, washi tape, or an extra layer of sealer.
Not planning labels early
If you want label holders, add them before sealing so adhesives bond well.
Forgetting real-world use
A decorative finish is nice. A finish that survives being carried with 12 bottles of acrylic paint is nicer.
If the box will be lifted often, reinforce corners and handles like you mean it.
Safety Notes (Quick, But Worth It)
- Use a sharp blade for cleaner cuts (dull blades tear cardboard and increase slip risk).
- Ventilate well if using spray products or strong adhesives; protect surfaces from overspray.
- Let finishes cure fully before heavy use“dry to touch” is not always “ready for life.”
500+ Words of Real-World “Experience” from People Who Do This Project
Since liquor store cardboard box makeovers are a classic upcycling project, people tend to run into the same “aha!” moments
(and the same “oops” moments) across craft rooms, classrooms, and closets. Here are patterns that consistently come up,
framed as practical takeaways and specific scenarios you can copy.
Experience #1: The divider grid becomes the unexpected MVP
Many DIYers start this project thinking the goal is simply to make the outside pretty. Then the dividers do something magical:
they turn “dump storage” into “assigned seating.” One common example is a craft room where paints, markers, and glue used to live
in one oversized bin. The moment those items get separated into compartments, people report that cleanup takes minutes instead of
turning into a dramatic monologue about how organization is a myth.
A particularly effective use: dedicating each divider slot to a single category (like washi tape rolls or paint bottles),
then labeling the outside edge. The label is the habit cuewithout it, even the prettiest box slowly drifts back into
“random things I own” territory.
Experience #2: Fabric looks incredible, but contact paper wins in “busy household physics”
Fabric-wrapped boxes get rave reviews for looking boutique-level, especially when the fabric matches curtains, a rug,
or a craft-room color scheme. But in kitchens, kids’ areas, or garages, people often prefer contact paper because it’s wipeable.
The real-life test is this: someone will spill something. It might be coffee. It might be glitter glue. It might be a mystery substance
that appears when children are left alone for 45 seconds. Contact paper shrugs and moves on.
A common compromise: fabric outside (for style) and contact paper inside (for durability). That “best of both worlds” combo shows up
again and again in pantry and office makeovers.
Experience #3: Reinforcement is the difference between “cute” and “actually useful”
People who love the final result almost always do one extra step: strengthening the box at stress points.
The most repeated tip is reinforcing the top rim and handle area. Why? Because that’s where cardboard fails first when it’s lifted.
A simple strip of cardboard glued along the inside rim, plus a sealed edge, dramatically improves lifespan.
Another repeated “wish I’d done that sooner” upgrade is adding a bottom insert (a piece of foam board, chipboard, or extra cardboard)
under the interior liner. That creates a flatter base so the box slides in and out of shelves without catching.
Experience #4: The makeover sparks a chain reaction
This project tends to be contagious. Someone makes one box, sees how good it looks, then suddenly every cardboard box in the house
gets a suspiciously long stare. People often scale up into a matching setthree or four boxes with coordinated patterns,
each with a specific purpose. The result is less visual clutter, and more importantly, less mental clutter:
you know where things go because the storage looks intentional.
If you want that “set” look without buying materials for every box, a consistent elementlike the same label style,
the same handle type, or the same neutral paint on edgescreates cohesion even when patterns vary.
Conclusion
A liquor store cardboard box makeover is one of those rare DIY wins that checks every box (pun absolutely intended):
it’s cheap, fast, customizable, and genuinely useful. The built-in dividers make organizing easier, and the makeover makes it
attractive enough to live out in the open without shame.
Whether you go fabric-chic, decoupage-bold, contact-paper-practical, or paint-minimal, the secret is the same:
reinforce the stress points, protect the edges, and label like you mean it.
Your future selfstanding in front of a tidy shelf, finding exactly what they needwill be very impressed.