Table of Contents >> Show >> Hide
- Who Is Kirk Pearson, and Why Make: Put a Mic in Front of Him
- The Maker’s Mindset: Build the Instrument, Then Build the Song
- Electronic Music From Scratch: The Big Ideas You Can Steal Today
- Core Building Blocks of Electronic Sound (No Mysticism Required)
- DIY Electronics Basics: Tiny Parts, Big Vibes
- Modern Workflow: DAW + MIDI + Sampling (The “Actually Finish Tracks” Section)
- Sound Design Recipes (Kirk-ish, But You Do You)
- Mixing Without Tears: Gain, Headroom, and Reality Checks
- Beginner Setup Checklist: Enough Tools to Create, Not Enough to Stall
- Common Beginner Mistakes (And How to Laugh Your Way Past Them)
- Why Make: Matters for Music Makers
- Conclusion: Make the Instrument, Make the Music, Make It Yours
- Experiences That Match the Kirk Pearson Approach (Extra Notes for the Long Haul)
Electronic music has a reputation problem. People hear “synthesizer” and picture a billionaire’s spaceship dashboard,
or a producer hunched over a laptop doing math to feelings. Kirk Pearson’s takefeatured on Make:castis basically:
relax. Electronic music is just sound plus curiosity, and curiosity is (still) free.
In the Make: universe, building a musical instrument is not “extra.” It’s the point. Pearson’s approach is part
studio craft, part science-fair mischief, and part “wait, that worked?” joy. And yes, it’s beginner-friendlyunless
your main hobby is being intimidated. In that case, this article may be hazardous.
Who Is Kirk Pearson, and Why Make: Put a Mic in Front of Him
The Make:cast episode that turns “gear talk” into “let’s build stuff”
In the episode titled “Making Electronic Music With Kirk Pearson”, Make:cast host Dale Dougherty
talks with Pearsonauthor of Electronic Music from Scratchalong with editor Kevin Toyama. The conversation leans
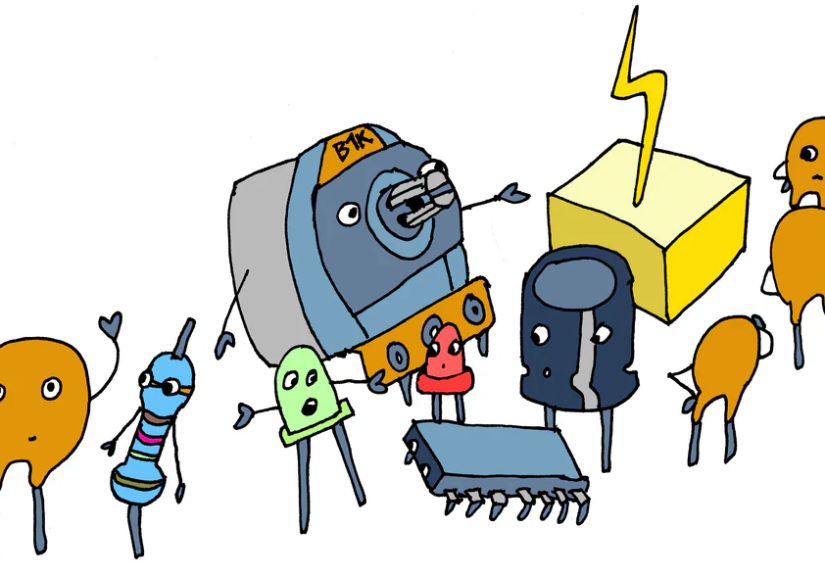
hard into experimentation: circuit bending, synthesizer design, and how humble parts like capacitors and potentiometers
can become musical decision-makers (which is a fancy way of saying: tiny components can help you make huge noises).
Pearson also gets real about the “translation problem”: how do you bottle the energy of a hands-on workshop and pour it
into a book without losing the magic? Along the way, they mention the collaborative work with illustrator Maisie Byerly,
plus other creative projectslike a new album and a show called Radio Pacific.
The Maker’s Mindset: Build the Instrument, Then Build the Song
A lot of electronic music advice starts with: “Pick a DAW.” Pearson’s angle is more like: “Pick a question.”
What happens if you turn a flickering candle into a melody generator? What happens if you give a cassette player a
keyboard? What happens if you create an instrument so weird it makes your friends laughand then makes them dance?
This “question-first” mindset matters because it changes how you learn. Instead of memorizing plugins, you start
understanding signal flow, modulation, and the art of making sound behave. You become less dependent on presets and more
confident with fundamentalswhich is great, because presets can be moody and judgmental.
Electronic Music From Scratch: The Big Ideas You Can Steal Today
A crash course in musical circuitry (with mischief baked in)
Electronic Music from Scratch is positioned as a beginner’s guide to “homegrown audio gizmos,” but don’t let the
cozy phrasing fool you: it’s a deep well. The book’s pitch is delightfully specificprojects like oscillators that
compose melodies based on candle flickers, cassette players with keyboard attachments, and even a talkbox designed for
scaring younger relatives (finally, a family-friendly use case).
On the Dogbotic Labs side, the book is described as 365 pages with 40+ projects, published
by MAKE Pressan important detail, because it signals a builder’s approach rather than a “here are 10 EDM secrets” approach.
Dogbotic frames the whole thing as creative inquiry: follow your curiosity, learn the craft, and don’t be afraid of
“oft-maligned creative topics.”
Dogbotic Labs: where “serious” and “silly” collaborate
Pearson describes Dogbotic as a laboratory for strange and interesting sounds, and the origin story is refreshingly
practical: it began as sound-for-hire, then expanded into workshopsespecially during the pandemic erawhere participants
received boxes of materials and learned DIY synthesizer concepts remotely. The result is a rare blend of studio thinking
and teaching thinking, which is why the Make: audience clicks with it so fast.
Core Building Blocks of Electronic Sound (No Mysticism Required)
Here’s the part where people typically start whispering words like “subtractive” and “wavefolding” as if they’re casting spells.
Good news: most of what you need is shockingly simple.
Oscillators: the sound source
An oscillator generates a waveformsine, triangle, saw, squareeach with its own harmonic personality. If you’ve ever
heard a saw wave and thought “that sound is trying to sell me a motorcycle,” congratulations: you can hear harmonics.
In DIY land, the oscillator is the “heart” of many synthesizers, whether analog (op-amp circuits) or digital (microcontrollers).
Filters: the tone sculptor
Filters shape brightness and character. Low-pass filters let lows through and tame highs; high-pass filters do the reverse;
band-pass filters focus on a slice of frequencies. This isn’t just “EQ with a cooler name”filters can become expressive,
especially when modulated.
VCAs: the volume gate that makes notes feel like notes
A VCA (voltage-controlled amplifier) controls amplitude. If you’ve ever made a synth patch and wondered why it sounds like
a continuous vacuum cleaner instead of a musical note, the missing ingredient is often amplitude control.
Envelopes (ADSR): the time-shape of a sound
Envelopes (often ADSR: attack, decay, sustain, release) shape how a note begins, evolves, holds, and ends. They can control
volume, filter cutoff, pitch, and other parametersbasically, they make static tones feel alive.
LFOs: slow movement that creates groove and motion
LFOs (low-frequency oscillators) create modulation below the audible rangewobble, pulse, drift, shimmer. Assign an LFO to
filter cutoff for classic movement, or to pitch for vibrato. Assign it to anything and you’ve invented a new way to be
slightly out of control (musically).
DIY Electronics Basics: Tiny Parts, Big Vibes
In the Make:cast conversation, Pearson gets into the everyday parts that make DIY instruments approachable: capacitors and
potentiometers. That’s not triviait’s a mindset shift. You don’t need a lab; you need a few components, a willingness to
experiment, and a healthy respect for “oops.”
Potentiometers: the human interface for “more/less”
Pots are the knobs you twist. They let you control resistance (and therefore voltage or signal level) smoothly, which is why
they show up everywhere: volume, cutoff, rate, depth, you name it.
Capacitors: timing, smoothing, and “why did it suddenly sound warm?”
Capacitors store and release energy, so they’re central to timing behaviorslike how envelopes rise and fall, or how a simple
oscillator cycles. Learn what a capacitor does, and a lot of “mystery behavior” starts making sense.
Analog vs. digital DIY: solder smoke or Python snacks
If you love analog, you’ll bump into voltage-controlled oscillator (VCO) designs and classic circuit approaches. If you love
digital, platforms like CircuitPython make it possible to explore synthesis concepts in codewaveforms, envelopes, modulation
without needing to source rare parts or argue with a breadboard at 2 a.m. (Unless you want to. Some people do.)
Modern Workflow: DAW + MIDI + Sampling (The “Actually Finish Tracks” Section)
Making electronic music today often means combining DIY sound sources with software tools. The trick is learning the
connectionsespecially MIDI and samplingso you can move from experiments to complete songs.
MIDI: the language that lets gear talk
MIDI is not audio. It’s performance datanotes, velocity, timing, control changessent between devices. Think of it like a
recipe, not a meal. This is why a single MIDI clip can trigger a hardware synth, a software instrument, or your friend’s
overconfident tambourine plugin.
Sampling: turning the world into an instrument
Sampling is where maker brains thrive: record a sound, map it across a keyboard, and suddenly your coffee grinder is a bass
synth. Tools like Logic Pro’s Quick Sampler are built for fast experimentationdrag in audio, shape pitch, filter, and amp
behavior, and start playing immediately. It’s the shortest path from “found sound” to “usable instrument.”
Sound Design Recipes (Kirk-ish, But You Do You)
These are not “rules.” They’re starting pointslike training wheels, except you’re allowed to do tricks and pretend it was intentional.
1) Candlelight melody generator (controlled chaos)
Use a light sensor (or simulated modulation) to generate a fluctuating control signal. Map it to pitch steps or filter cutoff
so the melody “breathes.” Record the best 20 seconds, loop it, and layer a steady drum pattern underneath. Suddenly your room
ambience is composing for youlike a ghost, but friendlier.
2) Cassette-wobble pad (nostalgia with teeth)
Record a sustained chord, then introduce pitch drift via slow modulation (LFO or automation). Add gentle saturation and a
low-pass filter sweep. The goal is “warm and alive,” not “my tape deck is actively dying,” though the line can be thin.
3) Talkbox-esque vocal effect (family-friendly horror)
Start with a simple synth lead (saw wave into a filter). Apply formant-style filtering or a vocoder-like effect, then automate
the filter and resonance for vowel movement. Use it sparinglylike hot sauce. The point is character, not dental surgery.
4) Circuit-bent percussion (glitch, but musical)
Take a basic drum pattern and introduce micro-variations: randomize velocity, shift hits slightly off-grid, and modulate a
bitcrusher or filter just enough to create motion. The “bent” feel comes from controlled instability, not total collapse.
5) One-oscillator bass that punches above its weight
Start with one oscillator and a low-pass filter. Use an envelope with a fast attack and short decay to add a percussive pluck
to the filter cutoff. Keep the low end clean, leave headroom, and let groove do the flexing.
Mixing Without Tears: Gain, Headroom, and Reality Checks
DIY instruments can be loud, noisy, and wildly dynamic. That’s not a bugit’s a personality. But you still need to manage
gain and headroom so your mix doesn’t sound like it’s being played inside a trash can (unless that’s your concept album).
Gain staging: keep signal healthy at every step
“Gain” isn’t just volume; it’s how hard you’re driving each stage of your audio chain. Set levels so you avoid clipping and
keep noise under control. A clean signal gives you options later; a clipped signal gives you regret now.
Leave headroom and use references
Practical mastering-minded mixing tips: leave headroom, compare to reference tracks, and don’t over-limit your mix bus. If you
plan to master later (or send it out), export a version with your limiter bypassed, and keep notes about your intent.
Beginner Setup Checklist: Enough Tools to Create, Not Enough to Stall
- A sound source: DIY oscillator, hardware synth, or a solid software instrument.
- A way to control it: MIDI keyboard/controller (or a DIY interface if you’re feeling spicy).
- A DAW: something you’ll actually use (Logic, Pro Tools, etc.).
- Sampling tool: quick sampler for found sounds and DIY recordings.
- Monitoring: headphones or speakers you trust, plus sane levels.
- One “fun” thing: a filter, delay, or weird modulation tool you’ll explore deeply.
If you’re choosing a beginner-friendly synth, focus on learning-friendly architecture: oscillator(s), filter, envelope,
LFOso you can practice fundamentals and understand how patches are built.
Common Beginner Mistakes (And How to Laugh Your Way Past Them)
1) Treating presets like destiny
Presets are postcards, not home addresses. Study them, steal the structure, then change one thing at a time and listen.
You’ll learn faster and keep your music personal.
2) Over-layering before you have a groove
A great 8-bar loop can beat a mediocre 300-track session. Build groove first: kick, snare/clap, hats, bass. Then earn your
layers like you’re leveling up in a video game.
3) Clipping early and “fixing it in mastering”
Mastering can polish, not resurrect. Keep levels sane, leave headroom, and your track will thank you by not sounding crunchy
for unintentional reasons.
Why Make: Matters for Music Makers
Make: doesn’t treat music tech as a shopping listit treats it as a creative practice. That’s why Pearson fits so well in
their ecosystem: he links history, electronics, and artistry without turning it into gatekeeping. The goal is to make you
feel brave enough to experiment, fail productively, and build a sound you can’t buy.
If you’re coming from a traditional music background, Pearson’s story offers a gentle permission slip: electronic music can
be a rebellion, a playground, and a craftall at once. If you’re coming from electronics, it’s the reverse permission slip:
you don’t need to be “a real musician” to make real music. You need ears, curiosity, and a willingness to iterate.
Conclusion: Make the Instrument, Make the Music, Make It Yours
“Making Electronic Music With Kirk Pearson – Make:” is ultimately about agency. Build a simple circuit. Patch an envelope to
a filter. Sample a weird sound. Connect it all with MIDI. Then arrange it into something that feels like you. The fun isn’t
only in the finished trackit’s in the moment your homemade gizmo makes a sound you’ve never heard before, and you realize:
oh no… I’m going to do this forever.
Experiences That Match the Kirk Pearson Approach (Extra Notes for the Long Haul)
People often think electronic music “clicks” because you finally buy the right synth or download the right plugin. In reality,
it clicks when your brain learns to predict cause and effect: if I change this voltage / parameter / envelope time,
the sound will behave like that. That predictive feeling is addictive. It turns noodling into intention.
One common experience: your first DIY sound will be… not pretty. It might buzz, drift out of tune, or sound like a refrigerator
learning to sing. That’s normal. DIY instruments don’t arrive polished; they arrive honest. The win is not “perfect tone.”
The win is understanding why the tone is imperfectand realizing you can steer it.
Another experience: the “one knob too far” lesson. You’ll discover a sweet spot where resonance feels exciting, then you’ll
turn it a millimeter more and your ears will file a complaint with HR. This is how you learn control ranges. Mark the sweet
spot (literally, with tape) and move on. Your future self will thank you.
There’s also a classic maker moment when you stop thinking in instruments and start thinking in systems. A drum loop
isn’t a loop; it’s timing + timbre + dynamics. A bass sound isn’t “a bass preset”; it’s a waveform + filter slope + envelope
curve + how it sits against the kick. Once you see systems, you can build them with circuits, software, or bothand you’re
no longer dependent on any single tool.
Expect a phase where you become obsessed with modulation. LFOs feel like magic because they add motion without you having to
manually perform every change. The danger is over-modulationeverything wobbling like it’s on a boat. The cure is choosing
one element to animate per section. Let the bass be steady while the pad breathes; later swap roles. Movement feels bigger
when it’s contrasted with stillness.
Sampling brings its own emotional arc. The first time you record a mundane soundkeys jingling, a chair squeak, a microwave
beepand map it to a keyboard, it’s hilarious. Then, weirdly, it becomes meaningful. You start hearing the world as potential
instruments. You take walks and think, “That gate has a nice transient.” This is not a problem. This is the hobby.
If you mix DIY sound sources, you’ll experience “noise reality.” Breadboards hiss. Cheap preamps hum. Interesting circuits
pick up interference like they’re auditioning for an AM radio drama. You learn the difference between charming noise
(texture) and destructive noise (masking). Practical habits emerge: keep cables short, watch gain staging, record clean when
you can, and add dirt later when you mean it.
Finishing tracks becomes easier when you treat your DIY experiments like a sample library. Instead of trying to write a
whole song while debugging a circuit, you record short “best-of” moments: 10 seconds of a great wobble, a clean one-shot,
a strange drone. Later, you arrange those captures like building blocks. This workflow protects your creativity from your
troubleshootingand it’s surprisingly Pearson-coded: build, explore, capture, then compose.
Finally, there’s a social experience that matters: sharing weird instruments makes people curious. Even non-musicians will
ask to try the knob that “sounds like a robot sneezing.” That’s an invitation to collaboration. Electronic music doesn’t
have to be solitary or screen-bound. It can be tactile, funny, communaland occasionally loud enough to remind you to take
breaks.