Table of Contents >> Show >> Hide
- Why Toothbrush Water Damages Medicine Cabinets in the First Place
- First, Figure Out Whether You Need to Repair or Replace
- Step-by-Step: How to Repair Toothbrush Water Damage in a Medicine Cabinet
- How to Replace a Damaged Cabinet Bottom or Shelf
- Medicine Cabinet Materials: What Holds Up Best in Humid Bathrooms?
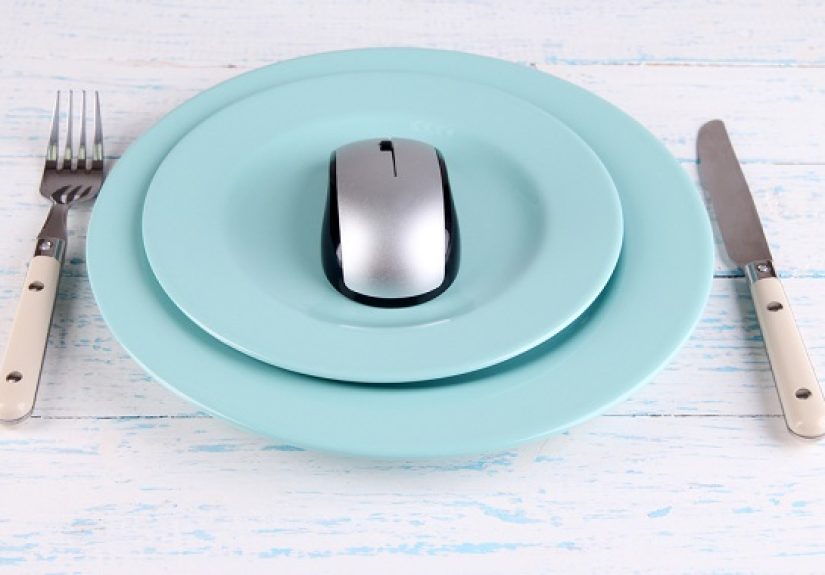
- What About the Toothbrush Itself?
- How to Prevent Future Cabinet Water Damage
- When to Call a Professional
- Final Thoughts
- Extended Experiences: What Homeowners Commonly Learn From Toothbrush Water Damage
Bathrooms are tiny steam rooms with a sink. Add a wet toothbrush, a dripping electric brush head, a crowded cup, and a cabinet that never fully dries, and you have the perfect recipe for swollen shelves, peeling laminate, funky odors, and that suspicious soft spot that says, “Please don’t press me again.” If you have noticed bubbling veneer, warped particleboard, stained wood, or mildew inside your medicine cabinet, the good news is that not all damage means total replacement. In many cases, you can repair toothbrush water damage, stop it from coming back, and make your cabinet look respectable again without launching a full bathroom renovation.
This guide explains what actually causes cabinet damage around toothbrush storage, how to tell the difference between cosmetic wear and structural failure, how to repair medicine cabinets and nearby vanity storage, and how to prevent future moisture problems. In other words, it is part home repair, part bathroom sanity plan.
Why Toothbrush Water Damages Medicine Cabinets in the First Place
Toothbrushes are small, but the moisture they bring into a cabinet adds up fast. A brush that gets rinsed twice a day, then dropped into a cup or tucked into a shelf while still wet, can leave repeated droplets on cabinet floors, shelf liners, and corners. Over time, that moisture seeps into painted wood, MDF, or particleboard. The result is classic bathroom cabinet water damage: swelling, surface bubbling, musty smells, and occasionally mold.
The trouble usually is not the toothbrush alone. It is the toothbrush plus poor airflow, steam from hot showers, sink splash, and a cabinet material that hates humidity with the passion of a cat facing a bath. Composite materials such as particleboard and MDF are especially vulnerable. When their surface coating fails, even slightly, water can get in and cause the fibers to expand. Solid wood can also stain or warp, but it usually tolerates minor moisture better than low-cost engineered board.
Common signs of toothbrush water damage
- Raised or bubbling laminate inside the cabinet
- Soft or crumbly shelf edges
- Dark rings under a toothbrush holder or charging base
- Peeling paint near the sink side of the cabinet
- A stale, moldy smell that returns after cleaning
- Cabinet bottoms that sag or feel swollen
First, Figure Out Whether You Need to Repair or Replace
Before grabbing sandpaper and optimism, inspect the cabinet carefully. A cosmetic repair works only when the damage is limited. If the cabinet structure is failing, patching the surface is just makeup on a waterlogged problem.
Damage that is usually repairable
- Minor surface stains
- Light swelling on painted or laminated particleboard
- Peeling veneer in a small area
- Small chips, dents, or rough edges
- Mild mildew that has not eaten into the material
Damage that usually means replacement
- Particleboard that has turned soft, mushy, or crumbly
- Large sections of cabinet floor that sag
- Mold that keeps returning after thorough drying and cleaning
- Warped shelves that no longer sit flat
- Delamination over wide areas
- Visible damage caused by an ongoing plumbing leak
A good rule: if the board has only swollen a little, you may be able to sand, seal, and refinish it. If it has lost strength, replace the affected panel. Trying to “save” rotten particleboard is often a great way to spend an afternoon achieving absolutely nothing.
Step-by-Step: How to Repair Toothbrush Water Damage in a Medicine Cabinet
1. Eliminate the moisture source
Do not repair the cabinet until you know why it got wet. Is the toothbrush cup dripping onto the shelf? Is an electric toothbrush charger trapping water underneath? Is the sink splashing the cabinet face? Is steam collecting because the bathroom fan never runs long enough? Fix that first. Otherwise, your cabinet will be back on the injured list in no time.
2. Empty the cabinet completely
Take everything out: medicine, floss, skincare, contact lens solution, mystery travel bottles from 2019, all of it. This gives you a clear view of the damage and helps the space dry faster. If any cardboard packaging is damp or moldy, toss it.
3. Dry the cabinet thoroughly
Wipe away visible moisture, then let the cabinet air out. Use a fan, open the bathroom door, and run the exhaust fan. If the room is chronically humid, a dehumidifier can help. Drying matters because moisture trapped beneath paint or veneer leads to repeat swelling and mildew.
4. Clean and disinfect the damaged area
For grime and toothpaste residue, use a mild cleaner and a damp cloth, then dry the area immediately. If you see light mildew, clean it carefully and let the surface dry fully before repairing. Avoid soaking the cabinet during cleaning. The goal is to remove contamination, not baptize the shelf a second time.
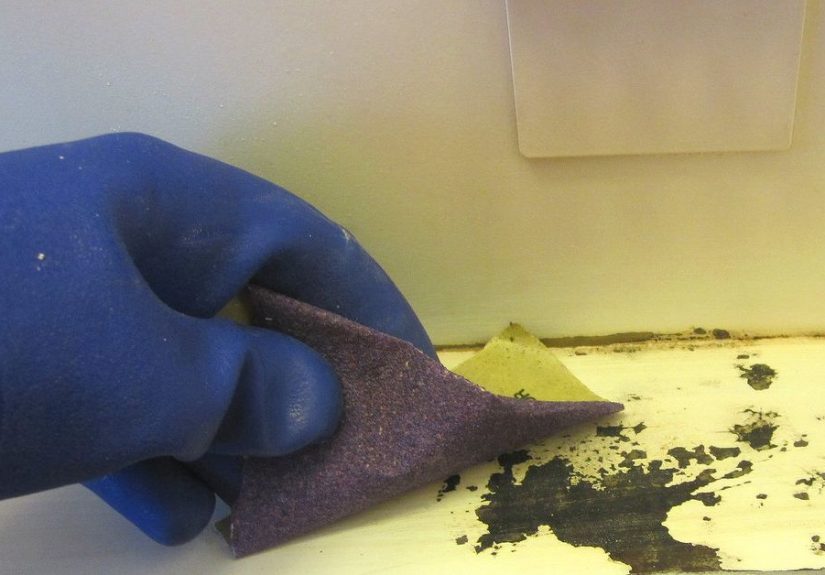
5. Sand minor swelling
If the shelf or cabinet floor is only slightly raised, sand the area gently until it feels even. This works best on minor particleboard swelling or lifted finish edges. Wipe away dust afterward. If sanding exposes fuzzy, weak fibers or the board keeps flaking apart, stop and move to replacement instead.
6. Reattach loose laminate or veneer
Peeling laminate can sometimes be glued back down if the substrate underneath is still firm. Apply adhesive carefully, press the veneer flat, and clamp or weight it until cured according to product instructions. If the material underneath is swollen and distorted, gluing the top layer down may improve the look temporarily, but it will not fix the root problem.
7. Fill chips, pits, or shallow damage
Use wood filler or a repair compound for small holes, chipped corners, or sanded-down low spots. Once dry, sand smooth. This step is especially useful when the damage is localized around a toothbrush cup, charging base, or shelf edge.
8. Prime and refinish
After repairs are smooth and dry, apply a suitable primer and topcoat for bathroom conditions. A moisture-resistant finish helps protect the surface from future drips and humidity. Match the cabinet finish as closely as possible, or repaint the entire interior shelf if you want it to look intentional instead of “patched by candlelight.”
How to Replace a Damaged Cabinet Bottom or Shelf
If the water damage is beyond cosmetic repair, replacement is usually smarter than endless patching. This is especially true for swollen particleboard bottoms inside vanity cabinets or lower storage near the sink.
When replacement makes more sense
- The shelf bows under light pressure
- The edges have expanded and split
- The laminate is separating across a large area
- The board smells musty even after drying
- The damage keeps spreading
In many cases, you can cut out the damaged bottom panel and install a new one rather than replacing the entire cabinet. Plywood generally performs better than particleboard in damp areas, and moisture-resistant panel products are usually a wiser upgrade for bathroom storage. If the cabinet frame itself is compromised, though, full replacement may be the better long-term fix.
Medicine Cabinet Materials: What Holds Up Best in Humid Bathrooms?
If you are repairing with the future in mind, material matters. Not all bathroom cabinets respond the same way to wet toothbrushes, steam, and sink splash.
Particleboard
Affordable, common, and dramatic. When particleboard gets wet, it swells quickly and often loses strength. Minor damage can sometimes be sanded and sealed, but major swelling usually means replacement.
MDF
Smoother than particleboard and popular for painted cabinets, but still vulnerable to prolonged moisture. It can work well in bathrooms if sealed properly and kept dry, but repeated water exposure is bad news.
Plywood
A stronger option for bathroom cabinets and replacement panels. It handles moisture better than particleboard and is often worth the extra cost when repairing lower cabinet sections.
Solid wood
Durable and repairable, but not invincible. It can stain, warp, or crack if repeatedly exposed to water, though it tends to recover better than cheaper composites when damage is caught early.
What About the Toothbrush Itself?
If you store a toothbrush inside a medicine cabinet, your storage habits matter almost as much as the repair itself. A toothbrush should be rinsed, stored upright, and allowed to air-dry between uses. Wet brushes stuffed into closed containers stay damp longer, which encourages microbial growth and keeps surrounding surfaces wetter too. Replace manual toothbrushes and electric brush heads every three to four months, or sooner if the bristles are frayed.
That advice is not just about oral hygiene. It is also practical cabinet care. A brush that dries properly leaves less standing moisture on shelves, cups, and charging trays. The cabinet wins, and so do your molars. Everyone gets a trophy.
How to Prevent Future Cabinet Water Damage
Improve ventilation
Run the bathroom exhaust fan during showers and for a while afterward. Open the door or window when possible. Bathrooms with persistent humidity are much more likely to develop mold and cabinet damage.
Stop storing dripping items on bare shelves
Place toothbrushes in a holder that allows drainage and airflow. Do not let the brush head sit in a puddle at the bottom of a cup. If you use an electric toothbrush, dry the base area regularly.
Use a tray or washable liner
A small waterproof tray under toothbrushes, mouthwash, or skincare bottles can save the cabinet surface from drips. Make sure the tray itself is cleaned and dried often.
Wipe down shelves weekly
Quick maintenance beats major repair. A 30-second wipe-up removes water spots, toothpaste splatter, and the slow creep of bathroom gunk.
Check caulk and sink splash zones
Water often reaches cabinets from the countertop edge or backsplash, not just from what is stored inside. Recaulk gaps and fix any leak or splash pattern that directs water toward the cabinet.
Do not ignore “small” leaks
Minor plumbing drips under or near the sink are notorious for turning cabinet bottoms into swollen sponge cake. If you spot staining, shut off the water if needed and deal with the leak before repairing finishes.
When to Call a Professional
You can handle many cabinet touch-ups as a DIY project, but some situations call for a pro. Bring in help if the cabinet has widespread mold, structural damage, hidden water intrusion behind the wall, or if you suspect the medicine cabinet mounting area has softened. A contractor or cabinet repair specialist can tell whether the problem is isolated shelf damage or part of a bigger moisture issue in the bathroom.
Final Thoughts
Repairing toothbrush water damage in medicine cabinets is really about managing a small moisture problem before it turns into a cabinet funeral. If the damage is light, you can often clean, dry, sand, fill, and refinish the surface. If the material has swollen badly or lost strength, replace the damaged panel and upgrade to something more moisture-resistant. Then change the habits that caused the damage in the first place: better airflow, better drying, and smarter toothbrush storage.
The best medicine cabinet repair is the one you only have to do once. So yes, save the shelf, repaint the cabinet, upgrade the liner, and let your toothbrush dry like the civilized bathroom tool it was meant to be.
Extended Experiences: What Homeowners Commonly Learn From Toothbrush Water Damage
The most useful lessons often come from lived experience, especially in bathrooms where people are busy, rushed, and not thinking, “I wonder how this drip pattern will affect my cabinet substrate over the next eight months.” In real homes, toothbrush water damage rarely announces itself in a dramatic way. It usually starts as a tiny ring under a toothbrush holder, a little bubbling near the back corner of a shelf, or a patch of paint that suddenly looks tired. People ignore it because the damage seems cosmetic. Then one day they lift the toothbrush cup and discover the shelf feels soft, the liner sticks, or the laminate has lifted like a potato chip.
A common experience is the family bathroom problem. Two adults, two kids, six oral-care products, one crowded medicine cabinet. Everyone rinses brushes and drops them back inside while still wet. The cabinet door stays closed, the bathroom fan barely works, and the room gets steamy twice a day. After several months, the shelf under the toothbrushes develops dark stains and the front edge starts to puff up. In these cases, homeowners often discover that the cabinet itself is not “bad quality” so much as constantly exposed to trapped moisture. Once they repair the shelf, switch to an open, ventilated holder, and run the fan longer, the problem usually stops repeating.
Another common story involves electric toothbrushes. People love the convenience, but the charging base can become a sneaky source of standing water. A little rinse water runs down the handle, collects under the base, and sits there day after day. Homeowners often say they never noticed how much moisture was trapped until they lifted the charger and found a permanent ring or raised finish underneath. The fix is usually simple but eye-opening: dry the base daily, use a tray, and avoid storing the charger on vulnerable wood or particleboard surfaces.
There is also the renter experience, which tends to involve older medicine cabinets with painted interiors and years of layered humidity. Renters often spot bubbling paint and assume it is just age. Sometimes it is. But just as often, the cabinet has been absorbing moisture for years from wet toiletries, sink splash, and inadequate ventilation. A light repair can make it look better, but the real improvement comes from changing daily habits: leave the cabinet open briefly after brushing, wipe shelves dry, and avoid crowding damp items together.
Then there are homeowners who discover the damage is not from the toothbrush at all, at least not directly. They start by trying to repair a shelf and end up finding a slow plumbing leak, failed caulk, or condensation collecting on an exterior wall behind the cabinet. That experience teaches the most important repair lesson of all: visible damage is a symptom, not always the cause. Smart repairs begin with detective work.
Across these experiences, the pattern is consistent. People who catch the problem early usually save the cabinet with modest work. People who wait until the board turns soft often end up replacing shelves or entire lower cabinets. The silver lining is that once homeowners understand how quickly repeated moisture damages engineered wood, they become much better at prevention. A drier toothbrush, a better fan routine, and a five-second shelf wipe can do more for a medicine cabinet than the fanciest repair kit in the hardware aisle.