Table of Contents >> Show >> Hide
- Why an Oil Drum Is an Upcycling Gold Mine
- Start With the Right Drum (This Choice Makes or Breaks the Project)
- Safety First: The Rules That Keep Upcycling Fun
- Tools You’ll Actually Use (No Need for a NASA Budget)
- 12 Oil Drum Upcycle Ideas That Are Actually Worth Building
- 1) Ugly Drum Smoker (UDS): the legendary set-it-and-forget-it BBQ build
- 2) No-weld barrel smoker (horizontal): classic backyard engineering
- 3) Smokeless fire pit using a double-wall drum setup
- 4) Simple fire pit bowl (half-drum build)
- 5) Wicking bed planter: a self-watering garden hack in a steel drum
- 6) Raised garden bed “rings” (cut-down drum sections)
- 7) Compost tumbler (drum roller composter)
- 8) Rain barrel (often plastic, but the drum lessons still apply)
- 9) Outdoor storage bin (with or without a hinged lid)
- 10) Patio side table or coffee table with hidden storage
- 11) Drum stools or a 3-piece bistro set
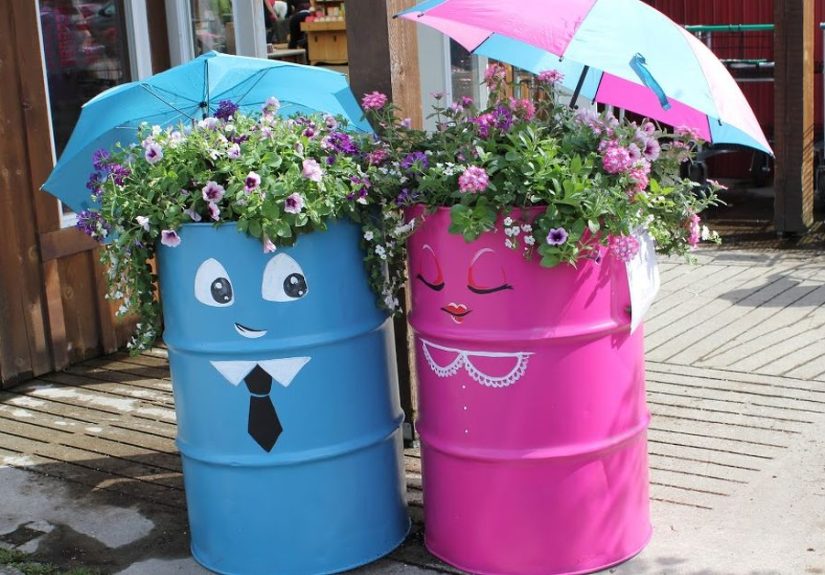
- 12) Yard art, signage, and statement pieces
- Finishing Like a Pro (So It Doesn’t Rust Out or Look Like a Science Fair)
- Common Mistakes (So You Don’t Learn Them the Hard Way)
- Mini Case Examples: Matching Projects to Real Life
- Conclusion: Upcycle Smart, Build Once, Enjoy for Years
- Experiences: What DIYers Usually Learn While Upcycling Oil Drums (and Why It’s Weirdly Addictive)
There’s something wildly satisfying about turning an industrial oil drum into something you actually want in your yard.
It’s like adopting a grumpy metal trash panda and teaching it mannerssuddenly it’s a smoker, a fire pit, a planter,
or the world’s most unbothered patio table.
But here’s the deal: “oil drum upcycling” is one of those DIY rabbit holes where the finished projects look easy,
while the middle part involves sharp edges, mystery residues, and a strong desire to buy bandages in bulk.
This guide walks you through the smart, safe, genuinely practical way to upcycle 55-gallon drumsso your project
ends with compliments, not cautionary tales.
Why an Oil Drum Is an Upcycling Gold Mine
A standard 55-gallon drum (steel or plastic) is basically a ready-made building block: tough, weather-resistant,
and big enough to become functional furniture or equipment without complicated joinery. Upcycling one can also:
- Cut costs compared with buying new outdoor gear, planters, or compost systems.
- Reduce waste by extending the life of durable materials that might otherwise be scrapped.
- Add personality to your spacesteel drums look industrial-cool even when they’re pretending to be “rustic.”
Start With the Right Drum (This Choice Makes or Breaks the Project)
Not all drums are created equal. Some are “perfect weekend project,” and others are “please don’t turn this into a
backyard science experiment.”
Steel vs. plastic drums
- Steel drums are ideal for heat-based builds (smokers, grills, fire pits) and for rugged outdoor furniture.
They’re also paint-friendly and can look great with minimal finishing. - Plastic (food-grade) drums are common for rain barrels and compost tumblers because they’re easy to drill,
don’t rust, and are lighter to move around.
Open-head vs. closed-head
- Open-head drums have a removable lid (often held by a locking ring). These are easier for smokers,
storage bins, and anything that needs wide access. - Closed-head drums have two bung holes. They can still be used, but you’ll be cutting a larger opening
if your project needs itmeaning more safety steps and more finishing work.
Food-grade and “what was in this?” matters
If you’re building anything that touches food (smoker, grill) or water used around edible plants (rain barrel),
source a drum with a known, safe history. Many DIYers specifically look for drums that previously held food products
(like juice concentrate) rather than chemicals with names that look like Wi-Fi passwords.
Safety First: The Rules That Keep Upcycling Fun
Upcycling drums is not inherently dangerousguessing what’s inside them is. Drums that held flammable liquids,
solvents, fuels, or unknown chemicals can retain residues and vapors long after they “look empty.” Heat, sparks, or
cutting tools can ignite those vapors.
Non-negotiable safety checklist
- Do not cut, weld, or grind any drum unless you can verify its previous contents.
- Avoid drums that held flammables (fuel, solvents, oil-based products) or anything labeled hazardous.
- Work outdoors in a well-ventilated area, away from structures and anything combustible.
- Use PPE: eye protection, heavy gloves, hearing protection, long sleeves, and a respirator when sanding paint or coatings.
- Deburr everything. Sharp edges are the #1 “surprise tax” of drum projects.
- When in doubt, choose a new drum or have a professional drum reconditioner handle cleaning/purging.
Cleaning and prep: the boring part that saves your project
Even a “safe” drum needs cleaning. For food or garden-related projects, the goal is to remove residues, oils, and loose
coatings so your paint sticks and your finished project doesn’t smell like an auto shop.
- Start with a degreasing wash (hot water + detergent/degreaser), scrubbing all interior surfaces you can reach.
- Rinse thoroughlymore than once.
- Remove loose paint/rust with a wire brush, sanding, or a flap disc (wear a respirator).
- Let it dry completely before priming or painting to prevent trapped moisture and rust blooms.
Tools You’ll Actually Use (No Need for a NASA Budget)
The exact tool list depends on your build, but most drum upcycles use a similar starter kit:
- Drill + metal bits (and a step bit for cleaner holes)
- Angle grinder with cut-off wheel and flap disc (for cutting and smoothing)
- Jigsaw with metal blades (a slower but controllable cutting option)
- Measuring tape, marker/chalk line, clamps
- File or deburring tool (your fingers will thank you)
- Primer + paint matched to the job (exterior enamel or high-heat paint)
12 Oil Drum Upcycle Ideas That Are Actually Worth Building
Let’s get to the fun part: projects that look cool, work well, and don’t require you to “just wing it” with fire.
Pick one that matches your space, tools, and tolerance for sanding.
1) Ugly Drum Smoker (UDS): the legendary set-it-and-forget-it BBQ build
A drum smoker is one of the most popular drum upcycles for a reason: it’s efficient, holds steady temperatures, and
can produce serious barbecue without a premium price tag. The basic concept is simple: controlled airflow feeds a
charcoal basket at the bottom while food cooks on grates above.
- Best drum: new, unlined steel drum or a verified food-grade drum.
- Key parts: air intakes near the bottom, exhaust at the top, charcoal basket, cooking grates, thermometer.
- Pro move: “season” the interior with a hot burn and a light oil coating to help protect against rust.
2) No-weld barrel smoker (horizontal): classic backyard engineering
If you like the look of a traditional offset-style smoker but want to keep the build approachable, many designs rely on
bolts, plumbing fittings, and careful cutting rather than welding. You’ll spend more time measuring, but less time learning
to weld while questioning your life choices.
3) Smokeless fire pit using a double-wall drum setup
Smokeless fire pits use double-wall construction to preheat air and re-burn smoke for a cleaner burn. A steel drum can be
cut and nested to create that double-wall effect. The end result: less smoke in your eyes and fewer guests doing the “campfire shuffle.”
- Best for: patios, hangout areas, and anyone tired of smelling like a bonfire the next day.
- Don’t skip: evenly spaced ventilation holes and solid base support.
4) Simple fire pit bowl (half-drum build)
The straightforward version: cut a steel drum in half, add drainage/air holes, and mount it on legs or set it on a non-combustible base.
It’s quick, rugged, and surprisingly good-looking once the edges are cleaned up and you add handles.
Important: Use only clean, known-history drums. And remember: burning trash is not “fire pit energy”it’s a fast track to bad fumes and angry neighbors.
5) Wicking bed planter: a self-watering garden hack in a steel drum
A steel drum can become a deep, productive planterespecially when turned into a wicking bed. Wicking beds hold a water reservoir
beneath the soil so plants can draw moisture as needed, which is great for hot summers and busy schedules.
- Best for: herbs, greens, peppers, compact tomatoes, flowers.
- Smart add-on: line the interior with sturdy plastic if you’re concerned about residues or you’re using older steel.
6) Raised garden bed “rings” (cut-down drum sections)
Cut a drum into shorter rings and you’ve got modular raised beds that are tough, tidy, and easy to place. Add a protective edge trim
along the top so it’s garden-friendly, not garden-hostile.
7) Compost tumbler (drum roller composter)
Extension services often describe barrel composters as an accessible way to speed composting and make turning easier: drill ventilation holes,
load it partially, then roll it to mix. You can build a simple frame that holds a rod through the drum so it spins like a rotisserieexcept,
you know, it’s banana peels and leaves.
- Best drum: plastic or a verified non-toxic drum.
- Airflow tip: multiple rows of evenly spaced holes help oxygen reach the pile.
- Practical reality: don’t overfillabout three-quarters full leaves room for mixing.
8) Rain barrel (often plastic, but the drum lessons still apply)
Many DIY rain barrels use food-grade plastic drums because they’re easy to drill for a spigot and won’t rust. Whether you DIY it or buy a finished
rain barrel, the same principles matter: secure screening to prevent mosquitoes, a stable base, and clear labeling that the water is not for drinking.
Alsomath time: one gallon of water weighs about 8.34 pounds. A full 55-gallon barrel can weigh well over 450 pounds, not counting the barrel itself.
That’s “please don’t put this on a wobbly stack of scrap wood” territory.
9) Outdoor storage bin (with or without a hinged lid)
An open-head drum is basically a ready-made weather-resistant storage container. Clean it, paint it, add a soft edge trim,
and you’ve got storage for firewood kindling, garden tools, dog toys, or the mysterious collection of extension cords every house accumulates.
10) Patio side table or coffee table with hidden storage
A drum table is a crowd-pleaser: it looks custom, it’s sturdy, and it can store cushions or outdoor games inside.
Top it with a round wood surface or a sealed plywood circle and you’ve got a functional piece that doesn’t mind weather.
11) Drum stools or a 3-piece bistro set
With careful cutting and reinforcement, drum halves can become stools or chairs. Add plywood seating, foam, and durable upholstery,
plus rubber edging anywhere legs or hands might touch. The look lands somewhere between “industrial loft” and “my neighbor is weirdly talented.”
12) Yard art, signage, and statement pieces
If you want maximum style with minimal engineering, drums are perfect for bold paint jobs, stenciled numbers, house signs, or sculptural planters.
This is also the ideal category if you enjoy DIY but prefer your projects to involve less fire and more creativity.
Finishing Like a Pro (So It Doesn’t Rust Out or Look Like a Science Fair)
Edge control: make it touch-safe
After cutting, sand or grind edges smooth and add edge trim where people might grab or brush against it. This is the step that turns
“cool project” into “safe to have friends over.”
Paint and coatings
- Fire projects: use high-heat paint where appropriate, and keep paint away from direct flame zones.
- Outdoor furniture/planters: exterior metal primer + durable topcoat improves longevity.
- Food-contact caution: don’t assume random paints or coatings are food-safe. For smokers, many builders prefer to burn out coatings and season the interior instead of painting it.
Drainage and airflow (two tiny details that prevent big headaches)
- Planters: add drainage holes so water doesn’t turn your soil into soup.
- Compost tumblers: add ventilation holes for oxygen and a few drainage points for excess moisture.
- Fire pits: airflow holes support cleaner burning and reduce smoldering.
Common Mistakes (So You Don’t Learn Them the Hard Way)
“It looks empty” is not a safety standard
Drums can retain residues and vapors. If you can’t confirm what was inside, don’t cut it. Full stop.
When a drum’s history is unknown, the safest upcycle is a non-cutting one (like decorative use) or choosing a new/verified drum instead.
Underestimating weight
A 55-gallon rain barrel can be hundreds of pounds when full. Set barrels on a level, stable base, and plan for overflow direction
so you don’t accidentally create a mud moat next to your foundation.
Skipping rust protection
Bare steel outdoors will eventually rust. Sometimes that’s a vibe; sometimes it’s a structural problem. Prime and paint when longevity matters,
especially for furniture and planters that sit on damp ground.
Mini Case Examples: Matching Projects to Real Life
If you want weekend results
- Storage drum with lid + paint
- Drum table with wood top
- Simple half-drum fire pit (only with a known-safe drum)
If you want “I built this” bragging rights
- Ugly Drum Smoker with adjustable airflow
- Smokeless fire pit double-wall build
- Compost tumbler with frame and rod
If you want garden upgrades that pay you back
- Wicking bed drum planter
- Raised bed rings
- Rain barrel setup with screen + stable stand
Conclusion: Upcycle Smart, Build Once, Enjoy for Years
“Oil drum upcycling” is the rare DIY category where you can spend very little and end up with something genuinely usefuland surprisingly stylish.
The secret isn’t fancy tools or perfect paint. It’s picking the right drum, treating safety like part of the design, and finishing edges and coatings
like you plan to keep the thing around for a while (because you will).
Start with one project that matches your spacemaybe a drum table, a planter, or a compost tumblerand let your confidence grow from there.
Before you know it, you’ll be the person friends call when they find a drum and think, “This could be… something.”
Experiences: What DIYers Usually Learn While Upcycling Oil Drums (and Why It’s Weirdly Addictive)
People rarely get into oil drum upcycling because they woke up craving “industrial container aesthetics.” Usually it starts with a bargain:
a neighbor has a drum, a salvage yard has a stack, or someone posts “free barrel” online and your brain goes, That’s basically a smoker-shaped opportunity.
The first experience most DIYers report is the surprise weight of the material itselfsteel drums feel light until you try to steady one while it rolls
like a mischievous robot across the driveway.
Then comes the “prep reality check.” The dream is cutting, building, and posting the final photo by Sunday night. The reality is that cleaning takes longer than expected,
because residue hides in seams, and paint that looked “fine” suddenly flakes when you touch it with a wire brush. There’s a particular momentusually about 20 minutes
into scrubbingwhen you understand why professional drum reconditioners exist. It’s humbling. It’s also strangely motivating, because once you’ve done the dirty work,
the drum starts to feel like your project, not just a random container you dragged home.
Cutting is often the most intense learning curve. DIYers quickly discover that the goal is not “cut faster,” it’s “cut cleaner.” Slow, controlled cuts reduce sharp burrs,
help your lid fit better, and make finishing dramatically easier. And everyone learns the same lesson about edges: you can either smooth them now, or you can donate a knuckle
later. Most people choose “smooth them now” after the first close call. Add a rubber edge trim and suddenly your project goes from “cool but dangerous” to “actually usable.”
If the project involves airflowsmokers, fire pits, compost tumblersDIYers tend to get a mini education in physics without realizing it. A drum smoker that runs too hot can teach
you more about oxygen and draft than a high school worksheet ever did. The experience is part frustration, part fascination: you adjust an intake a tiny bit, wait, and the temperature
responds like the drum is having feelings. After a few attempts, the “mystery machine” becomes predictable. That first steady cook or clean burn feels like winning a small trophy.
Garden-related builds have their own set of aha moments. Raised beds made from drum rings feel nearly indestructible, but they also heat up in the sunso positioning matters.
Wicking beds feel like cheating once you see how long moisture lasts, but you also learn quickly that drainage height is everything: too high and plants dry out, too low and you’ve built
a swamp. Rain barrel experiences are especially memorable because a full barrel is seriously heavy. DIYers often describe the moment they realize the stand must be sturdy
(and level) as a turning point in their relationship with gravity.
The most common “unexpected win” is how social these projects become. Friends stop by to see what you’re building. Neighbors offer parts. Somebody has a spare grate. Somebody else has
leftover high-heat paint. And once you’ve completed one drum project, you start seeing drums everywhere like they’re potential furniture waiting for adoption. Upcycling becomes a habit:
not because you need five drum tables, but because you’ve learned how satisfying it is to take something industrial and make it useful, safe, and personal.
In the end, the experience that keeps people coming back is the blend of practicality and personality. Oil drum upcycling is hands-on, a little gritty, and deeply rewarding.
You finish with something you can point to and say, “I made that,” and it’s not just decorit’s a smoker that feeds people, a planter that grows food, or a composter that turns scraps into soil.
That’s the kind of DIY that sticks.