Table of Contents >> Show >> Hide
- Before You Buy: The 7-Minute “Worth It?” Checklist
- Clean, Prep, and Keep It Safe (Without Nuking the Finish)
- The Flea Market Flip Toolkit (Small, Mighty, Actually Useful)
- 48 Amazing Projects, Hacks, and Revamps
- Make It Look Intentional: 5 Design Rules That Never Fail
- Common Painting & Refinishing Mistakes (So You Don’t Cry in the Garage)
- Extra: Real-Life Flea Market “Experience” (The Parts Nobody Posts)
- Conclusion
Flea markets are where perfectly good stuff goes to wait for someone with vision (and, ideally, a trunk that actually closes). One booth’s “old junk” is your future statement piecebecause vintage has something new furniture can’t fake: character, craftsmanship, and the kind of quirks that make guests ask, “Where did you get that?”
This guide is your practical, slightly cheeky roadmap to turning flea market finds into real-deal upgrades: furniture makeovers, clever hacks, and budget-friendly revamps that look intentionalnot “I found this on the curb behind a taco truck.” You’ll also get smart shopping tips, safety notes, and a finish-first mindset so your projects last longer than your motivation.
Before You Buy: The 7-Minute “Worth It?” Checklist
1) Do the wobble test (aka: “Is this secretly a maraca?”)
Grab the piece at two corners and gently twist. A little movement is normal in older furniture; a full-body shimmy is a red flag. Check legs, stretchers, and joints. Tightening screws is easy. Rebuilding snapped joints on a dining set of six… less romantic.
2) Look for solid bones, not perfect paint
Scratches, ugly stain, and dated hardware are cosmeticgreat leverage for negotiating. Focus on structure: cracked frames, missing support slats, termite damage, water-swollen particleboard, or delaminated veneer can turn “bargain” into “why me.”
3) Sniff like a detective (because your house will)
Musty odors can often be fixed, but strong mildew, heavy smoke, or mystery-sticky “what is that?” may take serious work. Smell inside drawers and under cushionsthose hidden zones hold the truth.
4) Check drawers and doors for smooth function
Pull drawers out, inspect bottoms, and look for sagging. Open doors and check hinges. If it operates well now, refinishing won’t ruin it. If it fights you now, paint won’t suddenly make it cooperative.
5) Know what you can fix fast
Quick wins: replacing knobs, adding bumpers, tightening screws, swapping upholstery, cleaning and sealing wood, spray painting metal. Slower wins: veneer repair, major structural work, full refinishes, rewiring lamps, or deep odor remediation.
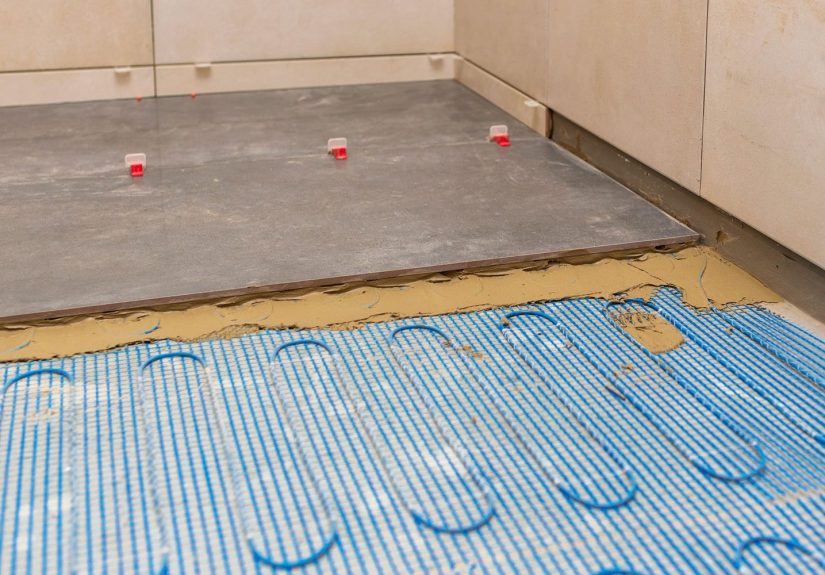
Clean, Prep, and Keep It Safe (Without Nuking the Finish)
The best flea market makeover starts with boring steps that make everything easier later: cleaning, degreasing, and drying thoroughly. Skip this and your paint may peel like a sunburn.
Wood & painted furniture
- Dust first with a dry cloth or vacuum brush.
- Wash gently using a small amount of mild dish soap in warm water; wring cloth well to avoid soaking wood.
- Degrease if the piece is grimy (especially chair backs, kitchen pieces, or anything that lived near hands and snacks).
- Dry completely before sanding, priming, or waxing.
Upholstery & fabric
- Vacuum deeply (crevices, under cushions, everything).
- Deodorize with baking soda, let sit (even overnight), then vacuum again.
- Spot clean with appropriate fabric-safe cleaners; consider a portable upholstery cleaner for larger stains.
Glass, dishes, and vintage kitchenware
Wash sturdy items thoroughly. Be cautious with older dishware used for food or drinksome vintage ceramics and glass may contain lead. When in doubt, use it as decor (your spice jars can be charming without becoming your dinnerware).
Lead paint reality check (quick, not scary)
If you’re refinishing older painted piecesespecially anything that might be from before 1978assume lead paint is possible. Use lead-safe practices: minimize dust, contain your work area, and clean thoroughly. If you’re planning major sanding or stripping, consider professional guidance or certified services. Safety is the least aesthetic part of DIY, but it’s also the part you can’t “fix later.”
The Flea Market Flip Toolkit (Small, Mighty, Actually Useful)
- Cleaning: microfiber cloths, soft brush, mild dish soap, degreaser, bucket, gloves
- Prep: sanding blocks, assorted grit sandpaper, tack cloth, wood filler, putty knife
- Painting: bonding primer, quality brush + small roller, painter’s tape
- Hardware: screwdriver set, drill/driver, new knobs/pulls, felt pads
- Upholstery basics: staple gun, staples, pliers, scissors, fabric
- Safety: eye protection, mask/respirator (especially for sanding), drop cloth/plastic sheeting
48 Amazing Projects, Hacks, and Revamps
The magic of flea market finds is that one item can become ten different things depending on your style. Pick 1–2 projects to start, then build momentum. (Momentum is basically the only renewable energy source in DIY.)
Furniture Makeovers (1–16)
- Two-tone dresser refresh: Paint the body a neutral, stain the top, and swap hardware for an instant “designer” look.
- Nightstand to bar cart base: Add casters and a towel bar; use the drawer for bottle openers and napkins.
- Dining chair seat reupholster: Replace outdated fabric with a modern printhigh impact, low commitment.
- Wobbly chair rescue: Tighten fasteners and re-glue joints; add felt pads so it stops “tap dancing” on hardwood.
- Record cabinet to coffee station: Add a power strip inside, hooks for mugs, and a tray for syrups.
- Old headboard bench: Use a twin headboard as the back, add a simple frame, and upholster the seat.
- Small table to entry drop zone: Paint, add a lower basket shelf, and style it with a bowl for keys.
- Bookcase glow-up: Paint the exterior, wallpaper the back panel, and suddenly you have “custom built-ins” energy.
- Veneer-friendly makeover: Skip aggressive sanding; scuff, prime, and paint for a smooth, durable finish.
- Desk makeover for WFH: Add cable grommets, paint the legs, and line drawers with peel-and-stick paper.
- Sideboard to media console: Cut ventilation holes in the back panel and add hidden cord management.
- Old trunk as coffee table: Add a wood top tray and felt pads; bonus storage for blankets and board games.
- Plant stand from a stool: Paint a thrifted stool and top it with a waterproof tray for indoor greenery.
- Wardrobe to pantry cabinet: Add shelves, baskets, and labelsyour snacks deserve real estate.
- Drop-leaf table revival: Fix hinges, refinish the top, and use it as a compact dining/work surface.
- “New” vintage vanity: Convert a small desk with a mirror and add organizers for a glam getting-ready station.
Storage & Organization (17–26)
- Wicker basket to side table: Flip it, add a sturdy top (wood board or tray), and you’ve got hidden storage.
- Suitcase stack storage: Use vintage suitcases as decor that also hides cords, games, or off-season items.
- Drawer as wall shelf: Mount an old drawer horizontally; paint inside and use it for books or plants.
- Toolbox bathroom caddy: Clean and line it; store hair tools, toiletries, or cleaning supplies.
- Crate rolling storage: Add casters to a wooden crate for kids’ toys or craft supplies.
- Magazine rack mail station: Hang it near the entry to corral mail, menus, and the mystery coupons you’ll never use.
- Cabinet door command center: Attach hooks and clips; mount inside a closet or pantry for bags and notes.
- Vintage ladder storage: Lean a ladder for blankets, towels, or plantsinstant vertical organization.
- Small cabinet to charging station: Drill discreet holes, add a power strip, and hide the cable jungle.
- Glass jar pantry set: Repurpose matching jars for dry goods; label for that “I have my life together” look.
Lighting & Hardware (27–34)
- Lamp base makeover: Keep the base, ditch the shade, repaint or rewrap, then add a fresh shade.
- Chandelier remix: Combine parts from mismatched fixtures for a custom light (rewire safely or get help).
- Swap knobs for instant upgrade: One bag of new hardware can make a tired piece look brand new.
- Backplate “jewelry”: Use decorative washers or plates behind knobs to give basic hardware a luxe look.
- Vintage sconce modern twist: Refinish metal and pair with a minimalist bulb for an old-meets-new vibe.
- Spray-painted brass revival: Clean well, then use a metal-friendly paint for a fresh, consistent finish.
- Reclaimed pulls as wall hooks: Mount drawer pulls on a board for a quirky coat rack.
- Door knob towel hook: Mount old knobs in a bathroom or mudroom for charming, sturdy hooks.
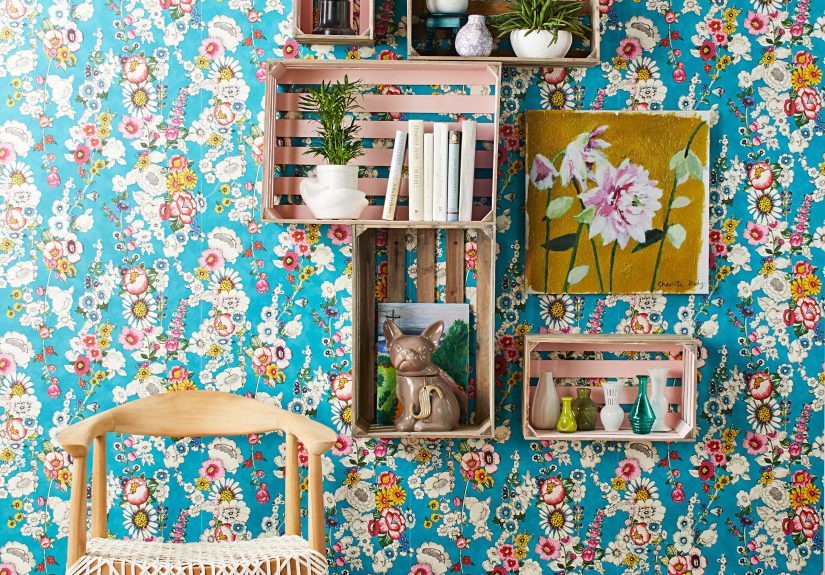
Decor & Wall Art (35–44)
- Frame gallery wall: Thrift frames, spray paint for cohesion, and insert art prints or your own photos.
- Mirror makeover: Refresh the frame and hang it where it bounces lightcheap “room expansion.”
- Old window frame display: Turn it into a photo grid, memo board, or seasonal wreath backdrop.
- Vintage books as decor: Stack by color or theme; use as risers for candles and plants (and yes, it’s allowed).
- Map or sheet music wall art: Frame vintage paper for instant texture and history.
- Serving tray ottoman top: Make a stable surface for drinks while keeping the cozy footrest energy.
- Plate wall moment: Use thrifted plates in a curated clustermix patterns with one repeating color.
- Basket wall: Hang woven baskets as art; it’s warm, dimensional, and surprisingly polished.
- Shadow box from a drawer: Mount small collectibles, postcards, or trinkets in a painted drawer turned display.
- Salvaged signs as typography: Use one bold vintage sign as an anchor piece, not a clutter parade.
Outdoor & Seasonal (45–48)
- Metal chair garden refresh: Wire-brush rust, prime, and repaint for a patio-ready upgrade.
- Planter from enamelware: Drill drainage holes and use vintage pots for herbs or flowers.
- Outdoor lantern glow-up: Clean glass, repaint the frame, and add battery candles for low-fuss ambiance.
- Seasonal porch vignette: Use thrifted crates, baskets, and a small table as a rotating decor “stage.”
Make It Look Intentional: 5 Design Rules That Never Fail
- Repeat a finish: Choose one metal tone (black, brass, chrome) and repeat it 2–3 times in a room.
- Mix old + new: Pair vintage with modern so your space feels curated, not like a time capsule.
- Limit your “statement pieces”: One star, a few supporting actors. Not 12 divas competing for attention.
- Mind scale: Oversized pieces can overwhelm; tiny pieces can look lost. Measure before you buy.
- Use texture to cheat depth: Wicker, wood grain, aged metal, and linen add richness even in neutral palettes.
Common Painting & Refinishing Mistakes (So You Don’t Cry in the Garage)
Skipping degreasing
Paint hates invisible grime. Grease, hand oils, and old polish are basically anti-paint force fields. Clean and degrease first, then scuff-sand, then prime.
Painting over sanding dust
Dust under paint creates weak spots and rough texture. Wipe down thoroughly before primer and between coats.
Choosing the wrong primer
Stains, tannins, and old finishes can bleed through. When in doubt, use a quality bonding primer designed for furniture. Your future self will thank you every time you look at that not-yellowed white dresser.
Extra: Real-Life Flea Market “Experience” (The Parts Nobody Posts)
Flea market DIY looks glamorous online: quick before-and-afters, perfect lighting, a triumphant “I only paid $12!” caption. Real life is a little differentand honestly, that’s part of the fun. Here’s what the experience usually feels like, plus how to win anyway.
First, there’s the hunt. You arrive with a plan (“I’m only looking for a narrow console table”), and five minutes later you’re holding a brass swan planter you don’t remember picking up. This is normal. Flea markets are basically impulse control boot camps. The trick is to keep your plan flexible but your standards firm: solid structure, fixable flaws, and a price that leaves room for supplies. If a seller says, “It just needs a little love,” mentally translate that into: “You will spend a Saturday cleaning it and a Sunday debating paint colors.”
Then comes negotiationthe polite dance where you try to look casually interested while your brain screams, “I LOVE IT.” A friendly approach works best: ask about the piece, point out obvious issues (missing knob, wobble, chipped veneer), and make a fair offer. Many sellers expect some haggling, especially later in the day when they’re tired and ready to load up. If it’s a big item, ask about delivery or help loading. “Can you hold it while I grab my car?” is one of the most valuable sentences in the language.
Next: transportation roulette. That “small” chair looks manageable until you remember your back is not, in fact, a forklift. Bring moving blankets, straps, and a tape measure. Measure your trunk opening, not just your trunk. (Yes, this is a lesson people learn the hard way.) Once home, you’ll do the reveal: pulling drawers out, flipping it over, and discovering either excellent craftsmanship or a surprise repair that looks like it was done during a moving vehicle chase scene.
Cleaning is where romance goes to be replaced by realityand reality is sticky. The first wipe-down can turn a “cute patina” into “oh wow, it was beige.” This step is also when you figure out whether the smell is surface-level or deep-set. Airing out, baking soda deodorizing, and careful cleaning usually solve most thrift-store funk, but some pieces need patience: a few rounds of gentle cleaning, time in fresh air, and sealing surfaces before they finally feel like your furniture.
Finally, the makeover stage: this is where you’re tempted to rush. Resist. Prep is the difference between a finish that lasts for years and a finish that chips the first time someone sets down a mug like they’re playing Jenga. Do the boring steps: degrease, scuff, wipe, prime, thin coats, cure time. When you’re done, the best feeling isn’t just “it looks good” it’s that your home now has a piece with a story, and you created the next chapter yourself.
Conclusion
Flea market finds are more than bargainsthey’re opportunities. With smart shopping, good cleaning habits, and a few reliable DIY techniques, you can turn castoffs into furniture and decor that feel personal, elevated, and built to last. Start with one small project, learn what you love (paint? hardware? upholstery?), and keep going. Your home will look more collected over timeand your wallet will breathe easier.