Table of Contents >> Show >> Hide
- Why Make Small-Batch Jam (and Why Skip Pectin)?
- Ingredients
- Tools You’ll Want
- Step-by-Step: Small Batch Strawberry Jam (No Added Pectin)
- How to Know When Jam Is Done: 3 Foolproof Gel Tests
- Storage Options: Refrigerator, Freezer, or Shelf-Stable Canning
- Flavor Variations (Because Strawberries Love Friends)
- Troubleshooting: Fixing Common No-Pectin Jam Problems
- Ways to Use Homemade Strawberry Jam (Beyond Toast)
- FAQ: Small Batch Strawberry Jam Without Pectin
- Conclusion
- Jam-Maker Diaries: Real-World Experiences & Lessons From the Stove
You know what’s magical? Turning a mountain of strawberries into a jewel-toned jar of jam that tastes like summer
decided to move in and pay rent. You know what’s even more magical? Doing it without a box of pectin, without a
giant sticky mess, and without needing to “make jam” like it’s a weekend-long historical reenactment.
This small batch strawberry jam (no added pectin) is the cozy, practical version: a modest amount of
fruit, a simple ingredient list, and a method that teaches you how jam actually sets. You’ll end up with a
spread that’s bright, spoonable, and jammy (yes, that’s a technical term in my kitchen).
Why Make Small-Batch Jam (and Why Skip Pectin)?
Small-batch jam is basically the “test drive” of preserving. You get big flavor with less commitment. One pound
of strawberries becomes a couple of jarsperfect if you’re working with peak-season berries, a farmers’ market
haul, or a clamshell that’s getting a little too fragrant in the fridge.
And skipping pectin? That’s not just a “look at me, I’m old-fashioned” flex. It’s a way to keep the strawberry
flavor front and center. When you make jam without added pectin, the set comes from a trio:
natural fruit pectin, sugar, and acid (hello, lemon).
Heat does the rest by evaporating water and concentrating everything into that glossy, spreadable texture.
But… Strawberries Are Low in Pectin. Will This Actually Set?
Yesjust expect a softer, more luxurious set than a bouncy “store-bought” gel. Strawberries are naturally lower
in pectin than some fruits, so the jam relies on cooking to the right stage and using smart techniques (like
lemon juice and good testing). The upside is a jam that tastes like strawberries, not strawberry-flavored candy.
Ingredients
This is a true no pectin strawberry jam recipe: three essentials, plus a few optional upgrades.
The measurements below make about 2 cups (roughly 1 pint), depending on how long you cook it.
- 1 pound strawberries (fresh or frozen), hulled and sliced (about 3 to 3 1/2 cups sliced)
- 3/4 cup granulated sugar (adjust to taste; see notes)
- 1 1/2 to 2 tablespoons lemon juice (fresh or bottled)
- Pinch of salt (optional, but it makes the strawberry flavor pop)
- Optional flavor extras: 1/2 teaspoon vanilla extract, 1/2 teaspoon lemon zest, or a tiny pinch of black pepper
Ingredient Notes That Make a Difference
- Use a mix of ripeness if you can. Fully ripe strawberries bring sweetness and aroma; slightly under-ripe berries
bring more natural pectin and acidity, which helps the jam set. - Frozen strawberries work. They often release more liquid, so your cook time may be a bit longerbut the flavor can be excellent.
- Sugar isn’t only for sweetness. It helps reduce water activity, supports the gel network, and improves shelf life.
You can reduce sugar a little, but the jam may be looser and won’t keep as long. - Lemon juice helps texture and brightness. Acid supports gel formation and keeps the flavor from tasting flat.
Tools You’ll Want
- Wide, heavy-bottomed saucepan or deep skillet (wider = faster evaporation)
- Wooden spoon or silicone spatula
- Potato masher (optional, for controlling texture)
- Instant-read thermometer or candy thermometer (helpful, not mandatory)
- Small plate in the freezer (for the “wrinkle test”)
- Clean jars with lids for storing (refrigerator/freezer) or proper canning jars if you’re processing
Step-by-Step: Small Batch Strawberry Jam (No Added Pectin)
Step 1: Macerate the berries (aka “let sugar do some work”)
Put the sliced strawberries in your saucepan and sprinkle the sugar over the top. Stir, then let the mixture sit
for 15 to 30 minutes. The sugar pulls juice from the fruit, which helps the berries soften and
cook evenly. (Also, it smells like strawberry perfume, and nobody is mad about that.)
Step 2: Start cooking and add lemon
Set the pan over medium heat and stir until the sugar dissolves and the berries release lots of liquid.
Add the lemon juice (and a pinch of salt, if using). Bring to a gentle boil, then reduce to a steady simmer.
Step 3: Simmer, stir, and control the texture
Cook uncovered, stirring frequently (more often as it thickens). Use a potato masher to break up berries for a
smoother jam, or keep it chunky for a more “strawberry preserves” vibe.
As it cooks, foam may appear on top. You can skim it off for a clearer jam, or stir it back in for a slightly
lighter texture. Either way, you’re winning.
Step 4: Test for set (this is where jam becomes jam)
Depending on water content and pan width, the jam usually takes 18 to 35 minutes to reach a set.
Don’t obsess over the clockuse the tests below.
Step 5: Jar it up
Once it’s set, remove from heat and let it cool for 5 minutes (it thickens slightly as it cools). Ladle into
clean jars. Cool to room temperature, then refrigerate or freeze.
How to Know When Jam Is Done: 3 Foolproof Gel Tests
1) Temperature Test (fast and accurate)
For many traditional jams and jellies, the gel stage is around 220°F at sea level. If you’re at a
higher elevation, the gel point drops. If you’re using a thermometer, start paying close attention once you’re
above 215°Fjam can go from “not ready” to “oops, strawberry taffy” faster than you’d think.
2) Freezer Plate “Wrinkle Test” (my favorite because it feels like a magic trick)
- Put a small plate in the freezer before you start cooking.
- When you think the jam is close, spoon a small dollop onto the cold plate.
- Return the plate to the freezer for 1 minute.
- Push the jam with your finger: if it wrinkles and holds its shape, it’s set. If it runs like syrup, keep cooking and test again.
3) Spoon/Sheet Test (classic and simple)
Dip a spoon in the jam and lift it. If the jam drips off in thin streams, it likely needs more time. If it falls
in thicker “sheets” and clings to the spoon, you’re close to set.
Storage Options: Refrigerator, Freezer, or Shelf-Stable Canning
Refrigerator jam (easiest)
Store in a sealed jar in the fridge and enjoy within about 2 to 3 weeks. Always use a clean
spoon to avoid introducing crumbs (crumbs are tiny chaos agents).
Freezer jam (still easy)
Cool completely, leave a little headspace for expansion, and freeze for up to 6 months for best
quality. Thaw overnight in the fridge.
Water-bath canning (for shelf stability)
If you want pantry-safe jam, it’s important to follow a tested canning recipe and processing time
from a reliable source (think extension services or USDA-style guidance). In general, jams are hot-packed into
properly prepared jars with about 1/4-inch headspace, sealed with two-piece lids, and processed
in a boiling-water canner with altitude adjustments. Also: old-school wax/paraffin seals aren’t recommended for
sweet spreads because of mold risks.
Translation: refrigerator jam is perfect for small batches. If you want shelf-stable jam, use the small-batch
method for flavor, then follow a verified canning process for safety. Both can be true. Your kitchen can contain
multitudes.
Flavor Variations (Because Strawberries Love Friends)
- Vanilla Strawberry: Stir in 1/2 teaspoon vanilla extract after cooking.
- Balsamic Strawberry: Add 1 teaspoon balsamic vinegar near the end for a “fancy cheese board” vibe.
- Strawberry Basil: Add 2 tablespoons finely sliced basil off heat, let steep 5 minutes, then jar.
- Strawberry Lemonade: Add extra lemon zest and bump lemon juice to 2 1/2 tablespoons.
- Strawberry Pepper: One tiny pinch of black pepper makes strawberry taste even more like strawberry (weird, but true).
Troubleshooting: Fixing Common No-Pectin Jam Problems
“My jam is runny.”
- Most likely: It just needs more cooking time. Keep simmering and re-test with the freezer plate.
- Fruit was very ripe or watery: That’s finejust cook longer in a wide pan for better evaporation.
- You cut the sugar too much: Less sugar can mean a looser set. Next time, reduce only slightly or expect “strawberry sauce” (still delicious).
- It will thicken as it cools: Hot jam is always looser than chilled jam. Let it fully cool before declaring defeat.
“My jam is too thick or sticky.”
- It cooked too long or too hot. Stir constantly near the end and pull it earlier next time.
- Easy rescue: Warm the jam gently and stir in a splash of water (start with 1 tablespoon per cup) until spreadable.
“My jam tastes a little flat.”
- Add a small squeeze of lemon juice or a pinch of salt after cooking. Acid and salt sharpen fruit flavor without making it taste “lemony.”
“It foamed up like a strawberry volcano.”
- Use a larger pot than you think you need and keep the boil steady, not explosive. Foam is normaljust stir and skim as needed.
Ways to Use Homemade Strawberry Jam (Beyond Toast)
- Swirl into Greek yogurt or oatmeal
- Spoon over vanilla ice cream or cheesecake
- Glaze roasted chicken or pork (yes, reallymix with a little vinegar)
- Layer in a peanut butter sandwich like it’s your job
- Whisk into a quick vinaigrette with olive oil and balsamic
FAQ: Small Batch Strawberry Jam Without Pectin
Do I have to use lemon juice?
For the best flavor and a more reliable set, yes, it’s strongly recommended. Lemon juice adds acid, which helps
jam gel and keeps the strawberry taste bright.
Can I use less sugar?
You can reduce it a bit, but expect a softer set and shorter shelf life. Sugar supports gel formation and helps
preserve the jam. If you want very low sugar, consider a low-sugar pectin recipe instead of forcing a no-pectin
jam to do a job it didn’t apply for.
Can I double this recipe?
You can, but small-batch jam is happiest when it stays small. Larger volumes take longer to reach gel stage and
can cook unevenly. If you want more, make two batches back-to-back for better results.
Conclusion
Making small batch strawberry jam with no added pectin is part recipe, part science experiment,
and part edible victory lap. Once you learn the gel tests, you’re no longer “following directions”you’re making
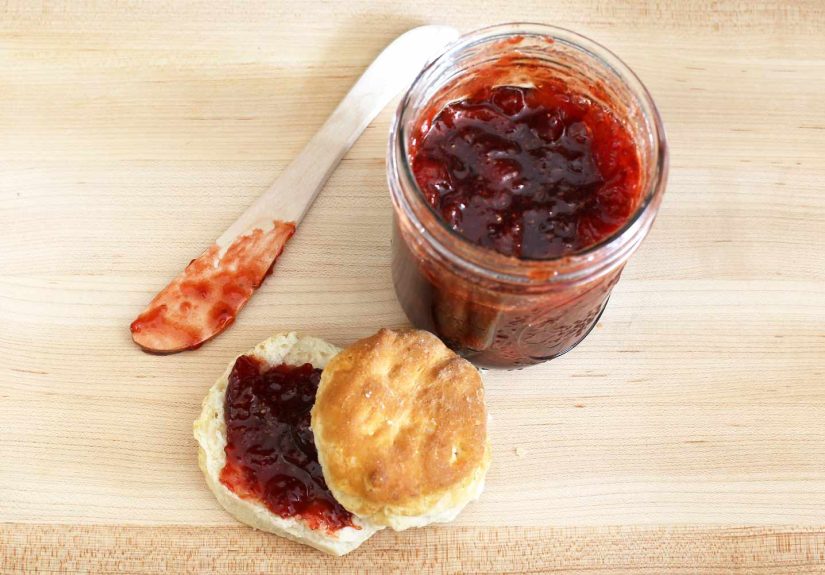
jam on purpose. And that’s a powerful feeling, especially when it’s spread on a warm biscuit.
Jam-Maker Diaries: Real-World Experiences & Lessons From the Stove
If you’ve never made jam without added pectin, your first batch can feel like a reality show challenge:
“You have 30 minutes, one saucepan, and strawberries that seem determined to become soup. Good luck.” The good
news is that no-pectin jam is forgivingmostly because it teaches you to rely on what you see instead of what a
timer says.
One common experience: the early simmer looks like nothing is happening. You stir, you watch bubbles pop, and the
mixture seems stubbornly thin. This is the “trust the process” stage. Strawberries hold a lot of water, and that
water must evaporate before the jam can thicken. A wider pan helps, but the real secret is patience. Home cooks
often notice that the jam suddenly changes personality near the endbubbles get larger, the mixture looks glossy,
and the spoon leaves a brief trail when you drag it through the pan. That’s your cue to start testing more often.
Another very normal moment: the foam panic. The jam rises, looks fluffy, and threatens to climb
out of the pot like it has places to be. Usually this happens when the boil is too vigorous or the pot is too
small. If it happens to you, reduce the heat slightly and keep stirring. Skimming foam at the end is optional,
but lots of jam-makers prefer to skim so the finished jam looks clear and jewel-like in the jar. (If you don’t
skim, the jam still tastes great; it just looks a little more “rustic.” Call it artisanal and move on.)
Texture is another thing people learn by doing. Some folks love a smooth jam and mash the berries early; others
want chunks that feel like strawberry candy in spread form. A useful middle path is to mash about half the fruit
after 10 minutes of simmering. That gives you enough broken-down berries to thicken the base, while still leaving
some pieces for a preserves-style bite.
And then there’s the classic: “My jam didn’t set.” First, take a breath. Warm jam is always looser than cold jam.
Many batches that look runny at the stove thicken beautifully after cooling overnight in the fridge. Second, even
if it truly is loose, you didn’t failyou made strawberry syrup. Pour it on pancakes, swirl it into
lemonade, drizzle it over shortcake, or mix it into a quick glaze for roasted meat. Jam that’s slightly soft is
still wildly useful. (Honestly, the kitchen doesn’t need more shame. It needs more pancakes.)
Over time, most home jam-makers develop “their” rhythm: they learn the sound of the simmer, the look of the
thickening bubbles, and how often to stir so nothing scorches. They also learn that the freezer plate test is
like having a tiny jam lie detector in your freezer. When the jam wrinkles, you get a little thrilllike you
unlocked a secret level in the strawberry game. That’s the real joy of small-batch preserving: not just the jar
at the end, but the confidence you build batch after batch.